DIY Home Water Filtration: Your Complete Guide to Purer, Tastier Water
Building your own home water filtration system is one of the most empowering projects you can take on. It puts you in the driver's seat, giving you total control over the quality of your water. You get to build a solution that's a perfect match for your home's unique needs—often for a lot less than hiring a pro—and you get complete peace of mind about what's coming out of your tap.
Why Build Your Own Home Water Filter?

Ever notice that faint swimming pool smell from your tap? Or wonder why your morning coffee just tastes a bit… off? While municipal water is treated to be safe, it often leaves behind things like chlorine, sediment, and minerals that can mess with the taste, smell, and even the lifespan of your appliances.
Taking on a DIY home water filtration project lets you tackle these issues head-on. This isn't just about saving money; it’s about becoming more self-reliant. You'll gain a real understanding of your home's water—from the source right to your glass—and build something that fixes your specific problems.
Addressing Real-World Water Woes
Imagine a family on well water who's constantly dealing with that awful "rotten egg" smell from hydrogen sulfide. A professionally installed system could run them thousands, but a well-designed DIY setup with the right carbon filter can knock out that odor for a fraction of the cost.
Or think about the city apartment dweller who's sick of chlorine ruining their tea. A simple under-sink activated carbon filter—a project you can easily knock out in an afternoon—solves the problem instantly. It's this direct, hands-on approach that connects your concerns with a real, working solution.
The real magic of the DIY approach is customization. You aren't just buying a generic box off the shelf. You're engineering a solution perfectly matched to your water quality report, whether you're targeting lead, sediment, or excessive hardness.
This drive for tailored solutions is a big reason why the home water filtration market, valued at a massive USD 20.26 billion in 2024, is projected to hit USD 50.89 billion by 2033. For people like us, simple point-of-use filters are a huge part of this trend. Going the DIY route can slash installation costs by up to 70% compared to hiring a professional.
DIY vs. Professional Installation: Cost and Benefit Snapshot
Deciding between a DIY project and hiring a pro often comes down to balancing cost, time, and complexity. This table gives you a quick look at what to expect from each path for common filtration setups.
| Factor | DIY Home Water Filtration | Professional Installation |
|---|---|---|
| Upfront Cost | Low. Mainly parts and basic tools. | High. Includes parts, labor, and company overhead. |
| Time Commitment | Moderate. From a few hours to a full weekend. | Low. Usually completed in a few hours. |
| Skills Required | Basic plumbing and handyman skills. | None. The expert handles everything. |
| Customization | High. You choose every component. | Limited to the pro's available systems. |
| Key Benefit | Cost savings and deep system knowledge. | Convenience and warranty-backed work. |
While hiring a professional guarantees a quick and polished result, the satisfaction and savings from doing it yourself can't be beaten, especially for simpler systems.
The Power of Knowing Your System
When you build your own filter, you know exactly what's inside it, how every part works, and when it needs a tune-up. That knowledge is incredibly empowering.
- Complete Control: You hand-pick the filtration media, whether it's a sediment filter to catch rust or a carbon block to absorb chemicals.
- Cost Savings: Sourcing your own parts and putting in the elbow grease dramatically cuts the final price tag, making top-tier filtration more affordable.
- Skill Building: You’ll pick up basic plumbing skills and get more confident with home maintenance—a huge win for any homeowner.
There's a special kind of satisfaction that comes from turning on your faucet and knowing you're the one responsible for that pure, great-tasting water. If you enjoy the self-sufficiency that comes from creating your own home solutions, you might also be interested in exploring other DIY home wellness projects. It's about more than just a project; it's about making your daily life better, one drop at a time.
Understanding Your Water Before You Build
Before you even think about buying parts for a DIY home water filtration system, you need to play detective.
Building a filter without knowing what’s in your water is like trying to fix a car without looking under the hood—you might get lucky, but you're probably wasting time and money. The goal is to build a system that solves your specific water problems, not someone else's.
The very first step is to figure out exactly what you're up against. Are you dealing with the lingering taste of chlorine from city treatment, or is your well water leaving rust-colored stains from high iron content? Each contaminant requires a different filtration strategy.
Decoding Your City Water Report
If you get your water from a municipal source, you have a powerful tool at your disposal: the Consumer Confidence Report (CCR). Your local water utility is required by law to provide this report to its customers annually. It's a detailed breakdown of what's in your water, including detected contaminant levels and how they compare to legal safety limits.
You can usually find your CCR on your water company's website. Keep an eye out for terms like:
- Chlorine/Chloramine: These are common disinfectants. While effective, they can leave a chemical taste and odor. High levels are a clear signal that an activated carbon filter should be a core component of your build.
- Hardness: Measured in grains per gallon (GPG), high hardness is caused by calcium and magnesium. It's not a health risk, but it causes scale buildup that can destroy appliances.
- Lead and Copper: These often leach from old plumbing pipes. If your report shows levels close to the action limit, a specialized filter certified for lead reduction is essential.
Understanding this report turns a guessing game into a targeted plan. For more detailed advice on interpreting these results and choosing the right filter, you can find a wealth of information in guides for homeowners. For an in-depth look, you might be interested in exploring the expert advice at Water Filter Advisor to make a more informed decision.
When to Test Your Well Water
For those on private well water, the responsibility for testing falls squarely on you. Unlike city water, well water isn't treated or monitored by a utility, meaning its quality can change with the seasons or due to environmental factors. A professional lab test is a non-negotiable first step.
A comprehensive well water test will screen for a different set of potential troublemakers. You'll want to check for things like iron, manganese, sulfur (that "rotten egg" smell), nitrates, and bacteria like E. coli. High sediment, for instance, points to the need for a robust pre-filter to protect the more sensitive components of your system downstream.
A water test isn't an expense; it's an investment in your project's success. It provides the exact blueprint you need to build a DIY filtration system that actually works, ensuring every dollar you spend is on a component that targets a real problem.
Before deciding on a filtration method, it's also crucial to understand the quality of water entering your home, and for many, this includes ensuring a clean water supply starts at the source with proper water tank cleaning. Contaminants can build up in storage tanks, undermining even the best filtration system.
Once you have your test results in hand, you can confidently move forward. High iron? An oxidizing filter is your answer. Bacteria present? A UV purification stage becomes a priority. This data-driven approach is the foundation of every successful DIY home water filtration project, ensuring you get safe, clean, and great-tasting water from day one.
Choosing Your Filtration Superheroes
Alright, you’ve got your water test results in hand and you know what you’re up against. Now for the fun part: choosing your filtration method. This isn't a one-size-fits-all situation. The best DIY home water filtration setup depends entirely on what you're trying to remove.
Think of it like building a custom toolkit. You need to pick the right components for the job, balancing performance, cost, and how much time you want to spend on the project. Let's dig into the most common technologies you can put together yourself.
The Foundation: Sediment Filters
A sediment filter is the first line of defense for any serious water filtration system. Its job is simple but crucial: it catches all the big stuff. We’re talking about the sand, silt, rust particles from aging pipes, and any other gunk that makes your water look murky.
This is almost always the first stage in any DIY build, and for good reason. It acts as a bodyguard for the more delicate (and expensive) filters down the line. Without it, a high-end carbon filter or a reverse osmosis membrane would get clogged and destroyed in no time.
You'll run into a few main types:
- String-Wound: These look just like they sound—a big spool of string. They’re fantastic for well water where you might have particles of all different sizes.
- Pleated: With a huge surface area, these filters allow for great water flow without a big drop in pressure. They're usually the go-to for city water.
- Spun-Polypropylene: These are a solid, budget-friendly choice for basic sediment removal.
If you're in an apartment on city water, a simple pleated filter is probably all you need to snag any debris from the pipes. But if you're on a well, you'll likely want a lower-micron string-wound filter to handle the heavier load.
The Workhorse: Activated Carbon Filters
Hate that "public pool" smell and taste? Activated carbon is your answer. These filters are masters at pulling chlorine out of water. They work through a process called adsorption, where chemical contaminants literally stick to the carbon's massive internal surface area.
Beyond just chlorine, activated carbon is a champ at removing volatile organic compounds (VOCs), pesticides, and a whole host of other chemicals that mess with your water's taste and odor.
For most DIY projects, you'll be looking at an activated carbon block filter. These solid blocks can filter particles down to an incredibly fine 0.5 microns. That means they don't just improve taste—they can also trap nasty cysts like Giardia and Cryptosporidium, making them a seriously versatile part of your system.
A simple two-stage setup with a sediment pre-filter and a carbon block filter is probably the most popular DIY project out there. It’s a weekend warrior’s dream, solving the most common city water problems—cloudiness and chlorine—in just a couple of hours.
This combo is perfect for renters or anyone who wants a massive upgrade in water quality without touching their home's main plumbing.
The Heavy-Hitter: Reverse Osmosis (RO)
When you need water that's as pure as you can possibly get it, you bring in the big guns: Reverse Osmosis (RO). This is serious filtration. An RO system uses high pressure to force water through a special membrane that strips out almost everything else. We’re talking lead, arsenic, fluoride, nitrates, salts—you name it.
Putting together a DIY RO system is a more involved project, but it's totally achievable. A typical setup has a few key parts:
- Pre-filters: You'll always have a sediment filter and at least one carbon filter to protect the RO membrane.
- RO Membrane: This is the heart of the system, where the real magic happens.
- Storage Tank: RO makes water slowly, so a small tank keeps a supply of purified water ready to go.
- Post-filter: This is usually a final carbon filter to give the water a final "polish" for taste before it hits your glass.
The market shows just how effective these systems are. RO units command over 60% of the market share, but other technologies are making moves. For example, UV purifiers are seeing a projected 10.6% growth rate, largely because they offer a chemical-free way to kill bacteria, which is a great option for renters. As a reader of Water Filter Advisor, you know the golden rule: test your water first, then build your system with NSF-certified media. You can read the full analysis of the home water filtration market to see where the industry is heading.
Building an RO system is a commitment, but if your water report shows heavy metals or other nasty contaminants, it's the single most effective DIY path to getting water that’s purer than most bottled brands, right from your own tap.
Choosing the right filter media is the most critical decision in your DIY build. This table breaks down what each type is good at, so you can mix and match components to target the specific contaminants in your water.
Filtration Media Performance Against Common Contaminants
| Filtration Media | Removes Chlorine | Removes Sediment | Removes Lead/Metals | Removes Bacteria/Viruses |
|---|---|---|---|---|
| Sediment Filter | No | Excellent | No | No |
| Activated Carbon | Excellent | Good (some) | Good (some) | Poor (cysts only) |
| Reverse Osmosis | Excellent | Excellent | Excellent | Good |
| UV Purifier | No | No | No | Excellent |
As you can see, no single filter does it all. That's why multi-stage systems are so popular and effective. A sediment filter protects a carbon filter, which in turn protects an RO membrane, giving you layers of purification that cover all your bases.
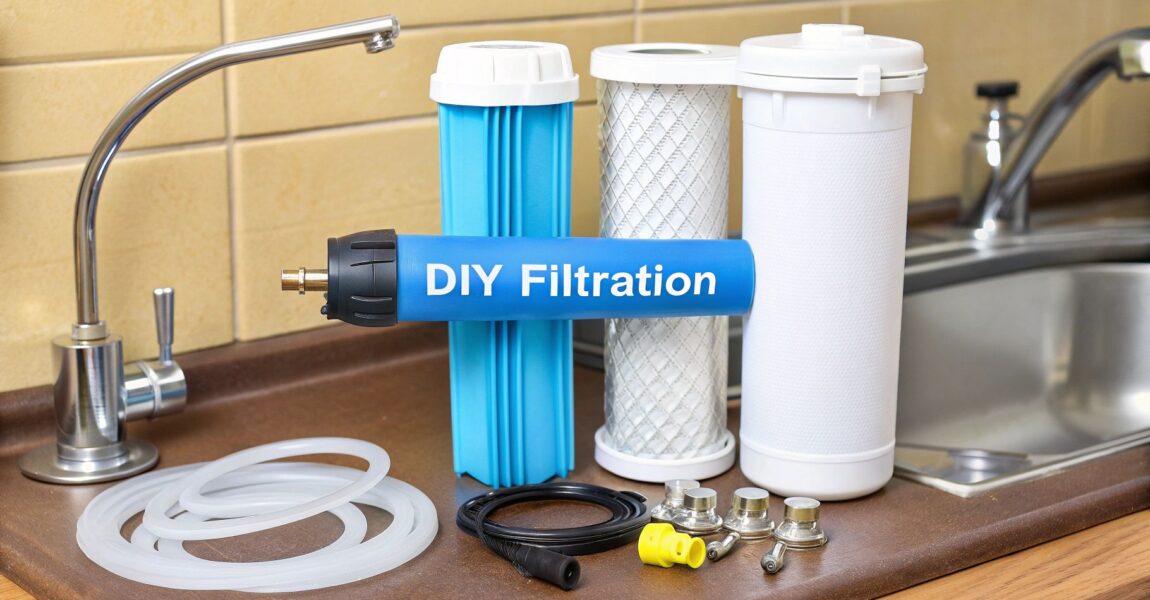
Building a Basic Under-Sink Water Filter
Alright, time to roll up your sleeves. We're going to walk through one of the most practical and rewarding DIY home water filtration projects you can tackle: a two-stage under-sink filter. This setup is a fantastic starting point for dealing with both sediment and common chemical culprits like chlorine.
We’ll go from gathering the parts to doing that final, all-important leak check. Even if you're new to this kind of work, don't sweat it. The process is pretty straightforward when you take it one step at a time. With a bit of patience, you can have a custom filter up and running in a single afternoon.
Gathering Your Tools and Materials
A successful project starts with having everything you need laid out and ready to go. Trust me, there’s nothing worse than having to make a frantic trip to the hardware store with your water shut off.
Here’s what you'll need for a standard two-stage system:
- Two 10-inch Filter Housings: These are the main bodies that hold your filter cartridges. Make sure the kit includes a mounting bracket and a housing wrench—you'll need it.
- A Sediment Filter Cartridge (5-micron): This is your first line of defense, designed to catch the bigger stuff like rust, sand, and silt.
- An Activated Carbon Block Cartridge (0.5 to 5-micron): Stage two. This one is for tackling chlorine, weird tastes and smells, and VOCs.
- PEX Tubing or Braided Steel Lines: You'll need a couple of sections to plumb the water from your cold line, through the filters, and back to the faucet.
- Shut-off Valve (Angle Stop Adapter): This little piece is a game-changer. It lets you isolate the filter system so you don't have to shut off water to the whole sink just to change a cartridge.
- Fittings: You'll need the right connectors (push-to-connect and compression are common and easy to use) for your tubing, filter housings, and water line.
- Plumber's Tape: An absolute must-have for creating a watertight seal on any threaded connection.
For tools, grab a pipe cutter, an adjustable wrench, a drill for the mounting bracket, and definitely a bucket and some old towels. No plumbing job is ever completely dry.
The diagram below shows a typical filtration sequence. It starts with a sediment filter, then carbon for chemicals, and often reverse osmosis for the highest level of purification.
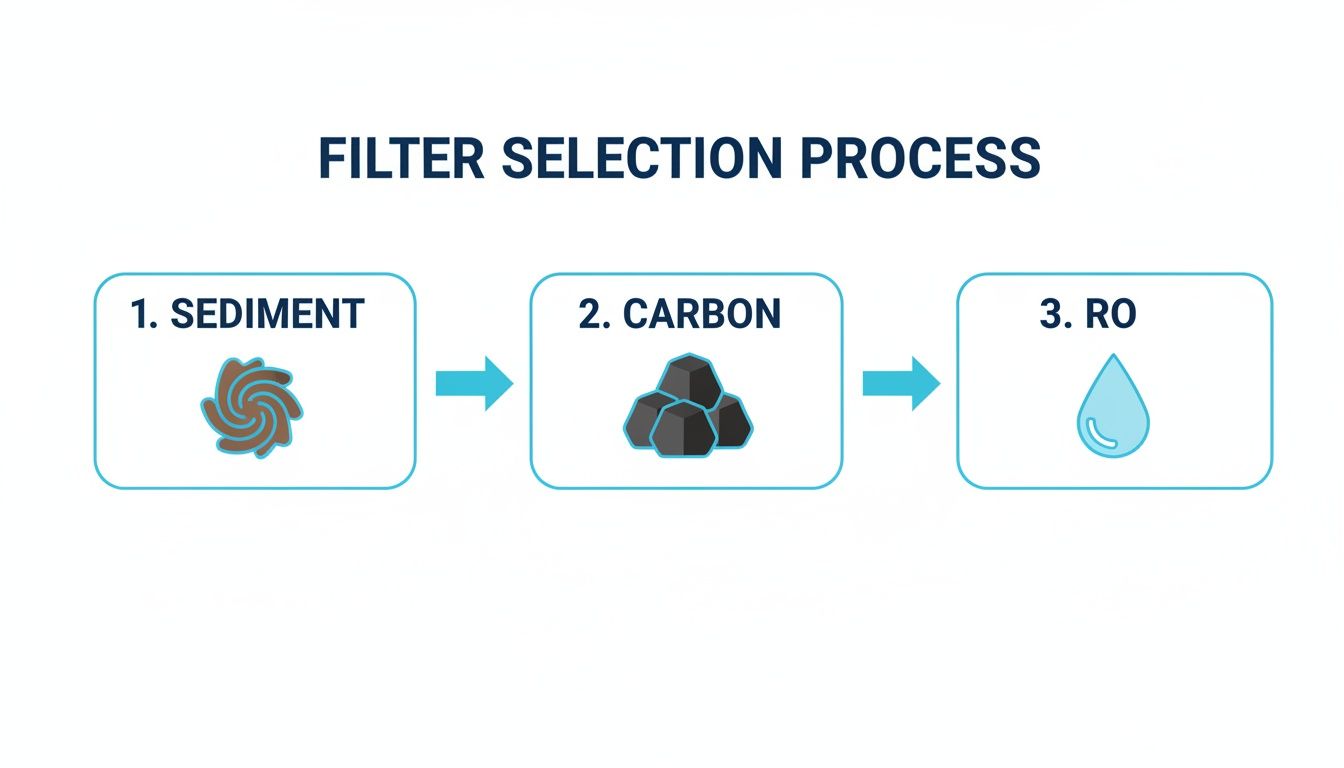
This multi-stage approach is so effective because each filter does a specific job and protects the next one down the line, making the whole system more efficient and longer-lasting.
Assembling and Mounting the Filter Unit
With all your parts in front of you, the first real step is putting the filter unit together. Go ahead and attach the two filter housings to the mounting bracket. Next, you'll install the inlet and outlet fittings into the housing caps. Before you do, wrap the threads with plumber's tape—give it three to four wraps in a clockwise direction—then tighten them down.
Pro Tip: Get your fittings hand-tight first, then give them just a gentle quarter-to-half turn more with a wrench. Over-tightening is the #1 reason people end up with cracked housings and annoying leaks. The tape is what creates the seal, not brute force.
Once it's all assembled, find a good spot for it under your sink. You need to leave enough clearance below the housings—at least a couple of inches—to have room to unscrew them when it's time to swap cartridges. Use your drill to mount the bracket securely to the cabinet wall.
Tapping Into Your Cold Water Line
This is the part that seems intimidating, but it's really not that bad. First thing's first: shut off the main water supply to your house. Then, open your kitchen faucet to let the line drain completely.
Put your bucket under the cold water line to catch the last few drips. Now, use your pipe cutter to make a single, clean cut in the line that runs between the wall shut-off and the faucet. This is where you'll install your new angle stop adapter. This adapter is key because it gives you an extra port to feed water to your new filter system.
From there, it's just a matter of connecting the dots. Run a piece of PEX tubing from the adapter's outlet port to the "IN" port of your first housing (the sediment filter). Then, connect another piece of tubing from the "OUT" port of your second housing (the carbon block) and run it back to connect with the faucet's cold water line.
The Moment of Truth: Testing for Leaks
Okay, deep breath. Before turning the water back on, give every connection one last check to make sure it's snug. A great trick is to place a dry paper towel under each fitting; they'll show you even the tiniest drop of water instantly.
Now, head to your main valve and very slowly turn the water back on just a crack. Go back to the sink and listen for any hissing and watch every single connection point for drips. If everything looks good and stays dry, you can open the main valve the rest of the way.
Let the water run through the new filters and out the faucet for about five minutes. This flushes out any loose carbon fines from the new cartridge.
And that's it! You just built and installed your own under-sink water filter. This simple but powerful DIY home water filtration system will give you much cleaner, better-tasting water right from your kitchen tap.
Maintaining Your DIY Filtration System
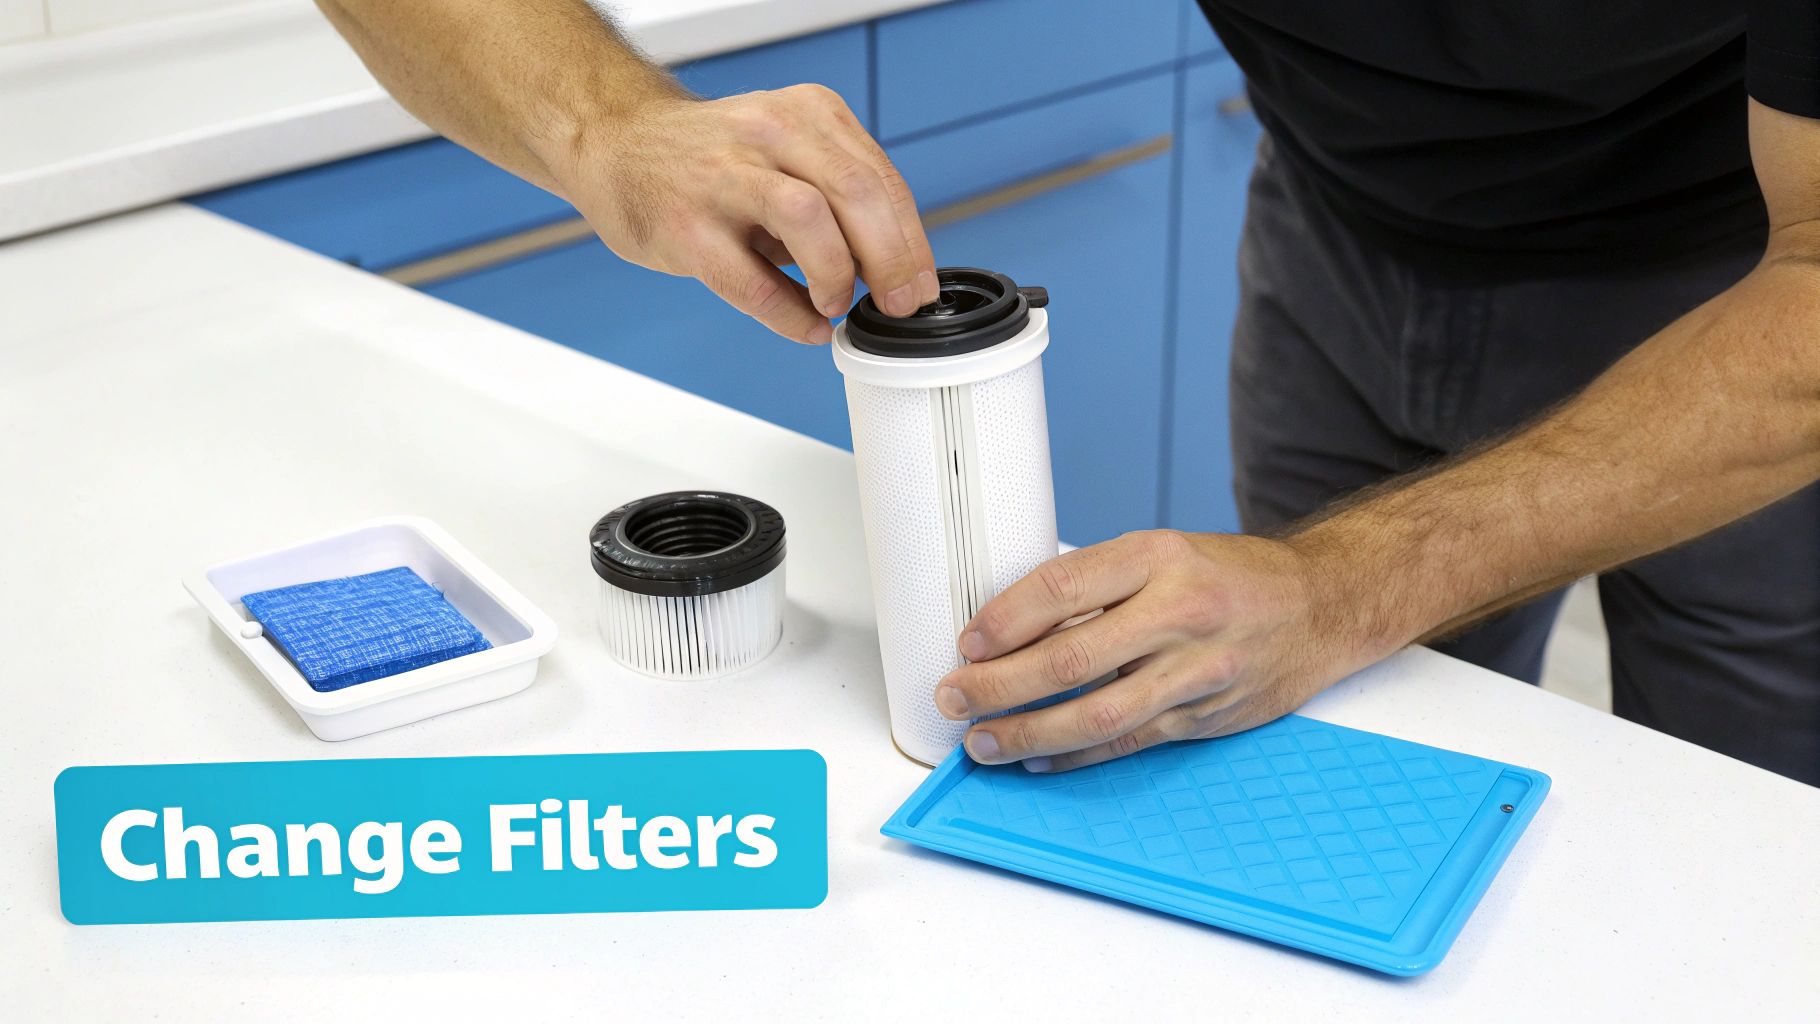
So, you’ve built and installed your DIY home water filter. Fantastic work. But getting it up and running is just the first step. To keep that clean, pure water flowing, you've got to think about long-term care.
Proper maintenance is what keeps your system working like it should. If you neglect it, filters get clogged, water pressure plummets, and worst of all, it stops trapping contaminants. A filter that's completely saturated can actually start leaking the gunk it's already captured right back into your water.
The easiest way to avoid this is to set up a simple maintenance schedule you can stick to.
Creating a Practical Filter Replacement Schedule
Knowing when to swap out your filters is the heart of the maintenance plan. There's no single magic number here—lifespan depends on the filter type and just how much work it has to do with your specific water source. Someone on well water with lots of sediment will be changing pre-filters way more often than a person on city water.
As a rule of thumb, here are some good starting points for common filters:
- Sediment Filters: These are your workhorses, catching all the initial grit and grime. Expect to change them every 3 to 6 months.
- Activated Carbon Block Filters: Great for taste, odor, and chemicals, these typically last 6 to 12 months before they're "full."
- Reverse Osmosis (RO) Membranes: The RO membrane itself is surprisingly resilient. If you're good about changing your pre-filters, it can last 2 to 3 years.
Of course, these are just guidelines. The real trick is learning to recognize the signs that your system is telling you it's time for a change.
Visual Cues and Performance Indicators
Your filter will give you some pretty clear hints when it's time for a swap. Instead of just marking a date on the calendar, learn to spot the physical signs of a filter that's done its job.
One of the first things you'll almost always notice is a drop in water pressure. If your faucet flow has slowed to a sad trickle, it’s a dead giveaway your sediment filter is clogged and fighting a losing battle.
Another clue is when old problems reappear. That chlorine taste you got rid of suddenly comes back? Your carbon filter is saturated. For sediment filters, you don't even have to guess—just look at it. If a once-white filter cartridge is now a nasty shade of brown or orange, it's long overdue for a change.
The Importance of Post-Installation Testing
How can you be sure your filter is still working? You test the water. Regular testing is the only way to get real proof that your system is performing up to snuff.
You don't need to be a chemist or send samples off to a lab every week. There are plenty of simple, affordable home water testing kits that give you quick answers on things like chlorine levels, pH, and water hardness.
Testing your water every few months is a smart move. Let's say a test shows chlorine is slipping past your filter. That tells you it's time for a new carbon cartridge, even if you haven't hit the six-month mark yet. This kind of data-driven approach takes all the guesswork out of maintenance and makes sure your water is always as clean as you intended.
Got Questions About DIY Water Filtration?
Building your own home water filtration system is a great project, but it's totally normal to have a few questions before you start twisting wrenches. Getting the right answers can be the difference between a smooth installation and a frustrating Saturday afternoon. We've pulled together some of the most common questions we hear to help you get started.
What Size Filter Do I Need?
Picking the right filter size is all about balancing how much filtration you need with your home's water flow.
For most projects tucked under a sink or sitting on a countertop, the standard 10-inch filter housing is your best bet. It’s small enough to fit into tight spaces but big enough to hold a huge variety of effective filter cartridges.
But if you're building a system for your whole house, you need to think bigger. We're talking about the 20-inch "Big Blue" style housings. These brutes can handle a much higher volume of water without choking your home's water pressure. Just match the filter size to the demand you’re putting on it.
Will a DIY Filter Kill My Water Pressure?
Yes, any filter will reduce water pressure a little bit, but it shouldn't feel like you've gone back to a low-flow showerhead from the 90s. If you notice a major drop, your system probably isn't designed right.
The usual suspects for pressure loss are:
- A Clogged Sediment Filter: This is the #1 reason. As that first filter catches all the gunk, it gets harder for water to pass through. You have to change these regularly.
- An Undersized System: Trying to force all your home’s water through a little 10-inch filter is a recipe for a weak flow.
- A Super-Fine Filter: A filter with a tiny micron rating (like a 0.5-micron carbon block) will naturally slow things down more than a standard 5-micron filter.
To keep your pressure up, always use the right size filter for the job and don't slack on your replacement schedule.
A properly built DIY system might cause a pressure drop so small you'll barely notice. If your shower suddenly feels weak right after an install, your first move should be to check for a clogged or undersized filter.
Can I Actually Filter My Own Well Water?
Absolutely. In fact, this is where DIY systems really shine. You can build a custom, multi-stage setup to knock out the specific problems common in well water, like iron, sulfur, and heavy sediment—issues you rarely see with city water. A typical DIY well setup might go from a heavy-duty sediment filter to an iron filter, then finish with a carbon filter to fix any taste and odor issues.
The most important first step, though, is getting a comprehensive lab test on your well water. This test is your roadmap; it tells you exactly what you're fighting so you can pick the right tools for the job. If you skip the test, you're just guessing.
How Often Do I Really Need to Change My Filters?
The "change every six months" on the box is a good starting point, but the real answer comes down to your water quality and how much you use. If your water is loaded with sediment, you might be changing that first-stage filter every three months, while the carbon filter after it could easily last the full year.
Let the system tell you what it needs.
- Look: Is that white sediment filter looking more like mud? It's time.
- Taste: Can you taste the chlorine coming through again? Your carbon filter is done.
- Flow: Has your water pressure taken a nosedive? Your pre-filter is probably clogged solid.
It helps to jot down when you change each filter. Soon you'll have a realistic schedule dialed in for your specific home and water. Consistent maintenance is what makes a DIY home water filtration system work, giving you clean, safe water for years.
Ready to stop wondering and start building? The team at Water Filter Advisor has spent years reviewing and testing every type of filter imaginable. Our in-depth guides and unbiased reviews will help you choose the perfect components for your project, ensuring you get it right the first time. Visit us today to make confident, cost-effective decisions for your home's water.
Find your perfect filter at https://www.waterfilteradvisor.com.