Your Ultimate Guide to Testing for Heavy Metals and Choosing the Right Home Water Filter

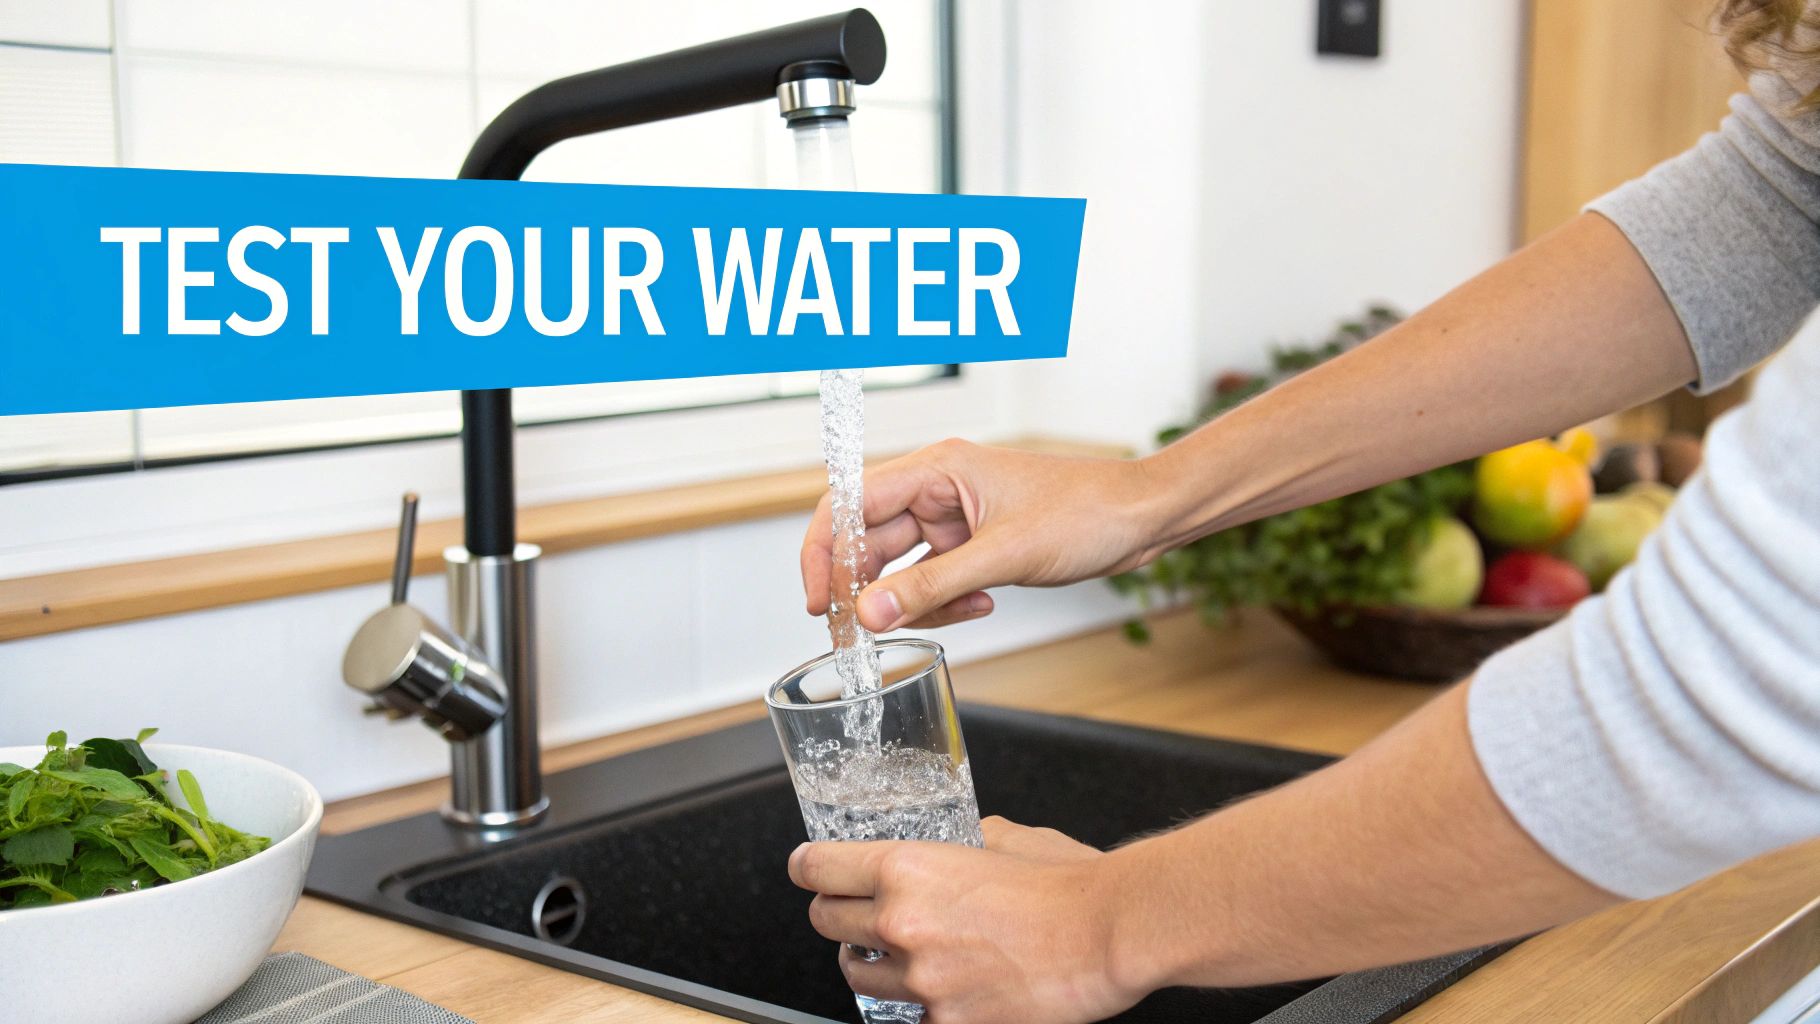
You can’t always trust your eyes. That crystal-clear water flowing from your kitchen tap might be hiding some nasty secrets. The only real way to know what you’re drinking is to test water heavy metals—we’re talking about invisible villains like lead and arsenic that pose serious health risks. Getting proactive about testing is the single best way to make sure the water in your home is safe and to find the perfect filtration system for your family.

The Hidden Journey of Your Drinking Water

A glass of clear water being poured from a modern kitchen faucet, with sunlight glinting off the surface.

It’s easy to get a false sense of security, especially if your local water report comes back with a clean bill of health. But here’s the thing: those reports only tell part of the story. They test the water at the treatment plant, not at the end of its journey—your faucet. This is where a home filtration strategy becomes your best line of defense.

The real problem often crops up in the miles of pipes the water travels through to get to you. Much of this infrastructure is decades old, and that’s where heavy metal contamination can really take hold.

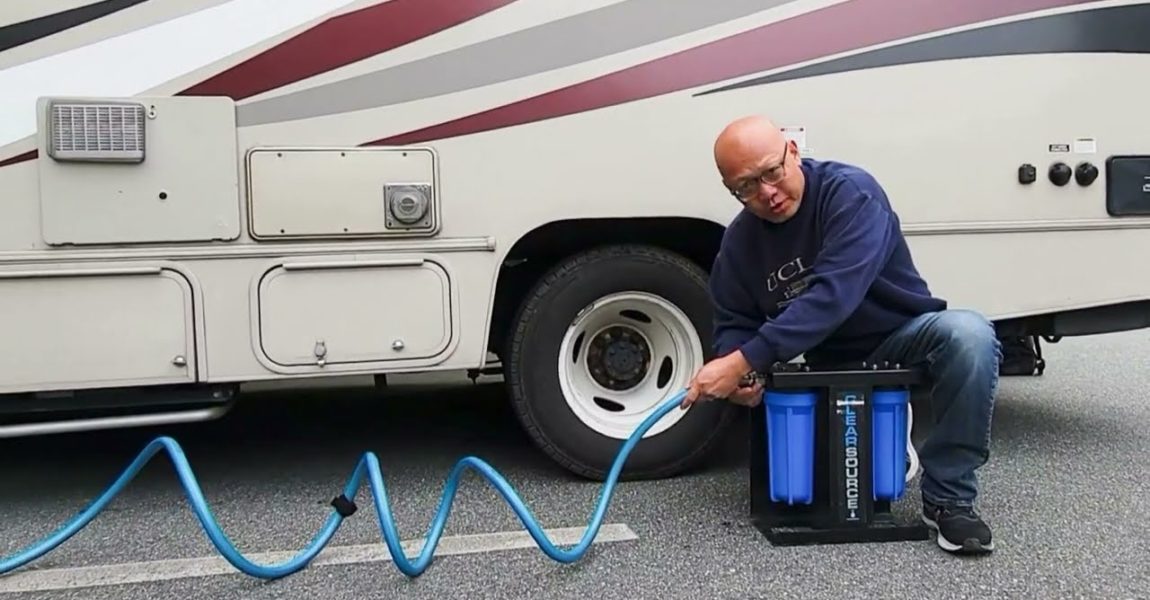
For instance, many older homes and communities still have plumbing made with lead or copper. Over time, these pipes corrode, and tiny, microscopic particles flake off into the water passing through. This means that water that was perfectly safe when it left the plant can pick up a load of contaminants just a few feet before it fills your glass—a problem only a point-of-use or whole-house filter can solve.

Sources Beyond Your Pipes

It isn’t just about the pipes leading to your house, either. The water source itself, whether it’s a city supply or a private well, is exposed to all sorts of environmental factors that can introduce heavy metals long before it ever gets treated.

A few common culprits include:

  • Industrial Runoff: Factories and manufacturing plants can dump wastewater loaded with harmful metals. This is a massive global problem. In India, for example, an estimated 260 million liters of industrial wastewater, thick with metals like chromium and lead, flow into the Ganga River every day. That's a staggering amount, and you can read the full research to see the true scale of the issue.
  • Agricultural Contamination: The pesticides and fertilizers used on farms often contain heavy metals like arsenic and cadmium. When it rains, these chemicals wash right out of the soil and into rivers, lakes, and the groundwater we rely on.
  • Natural Deposits: Sometimes, the problem is right under our feet. Certain heavy metals, like arsenic, occur naturally in the earth's crust and can dissolve into groundwater, especially in areas with certain geological makeups.

The unsettling truth is that even if your water looks, smells, and tastes perfectly fine, it could still have elevated levels of these harmful elements. Because they are colorless and odorless, the only way to be certain is to perform a test.

At the end of the day, your city’s report gives you a general snapshot, but a home test gives you the real picture of what your family is actually drinking. It’s the essential first step to choosing a water filtration system that truly protects your household.

DIY Kits vs. Lab Analysis: Which Water Test Is Right for You?

So, you're ready to find out what's really lurking in your tap water. Great! Your first mission, should you choose to accept it, is deciding how you're going to test it.

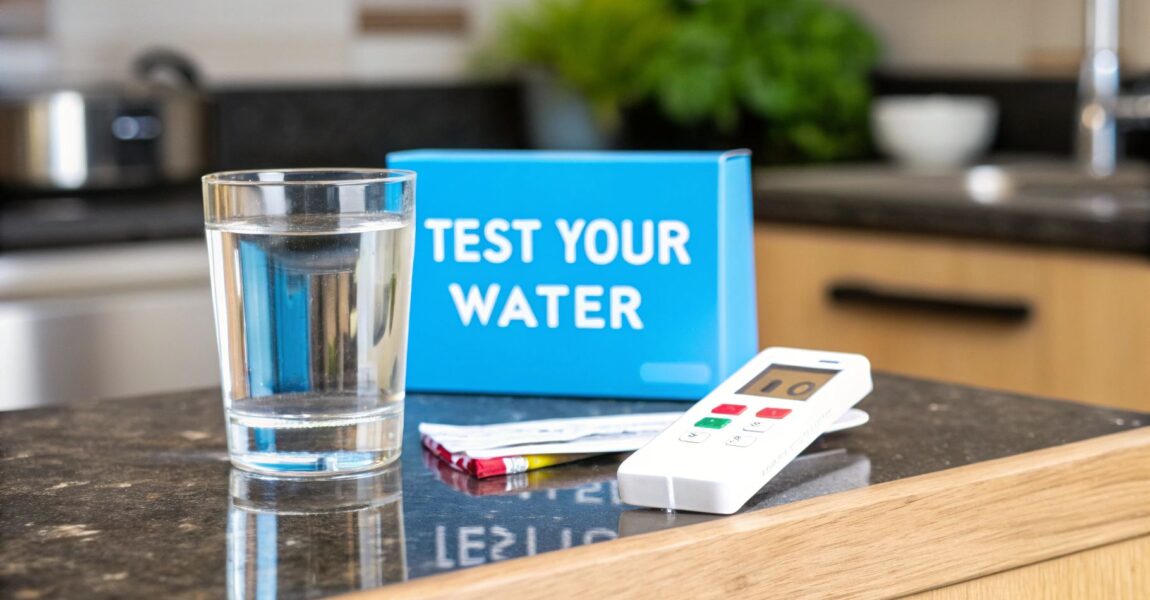
When you're looking to test water for heavy metals, you've got two main routes: the quick-and-easy DIY test kit or the comprehensive professional lab analysis. Think of it like this: a DIY kit is like taking your temperature at home, while a lab test is like getting a full diagnostic workup from a specialist. Both are useful, but they serve very different purposes in your quest for clean water.

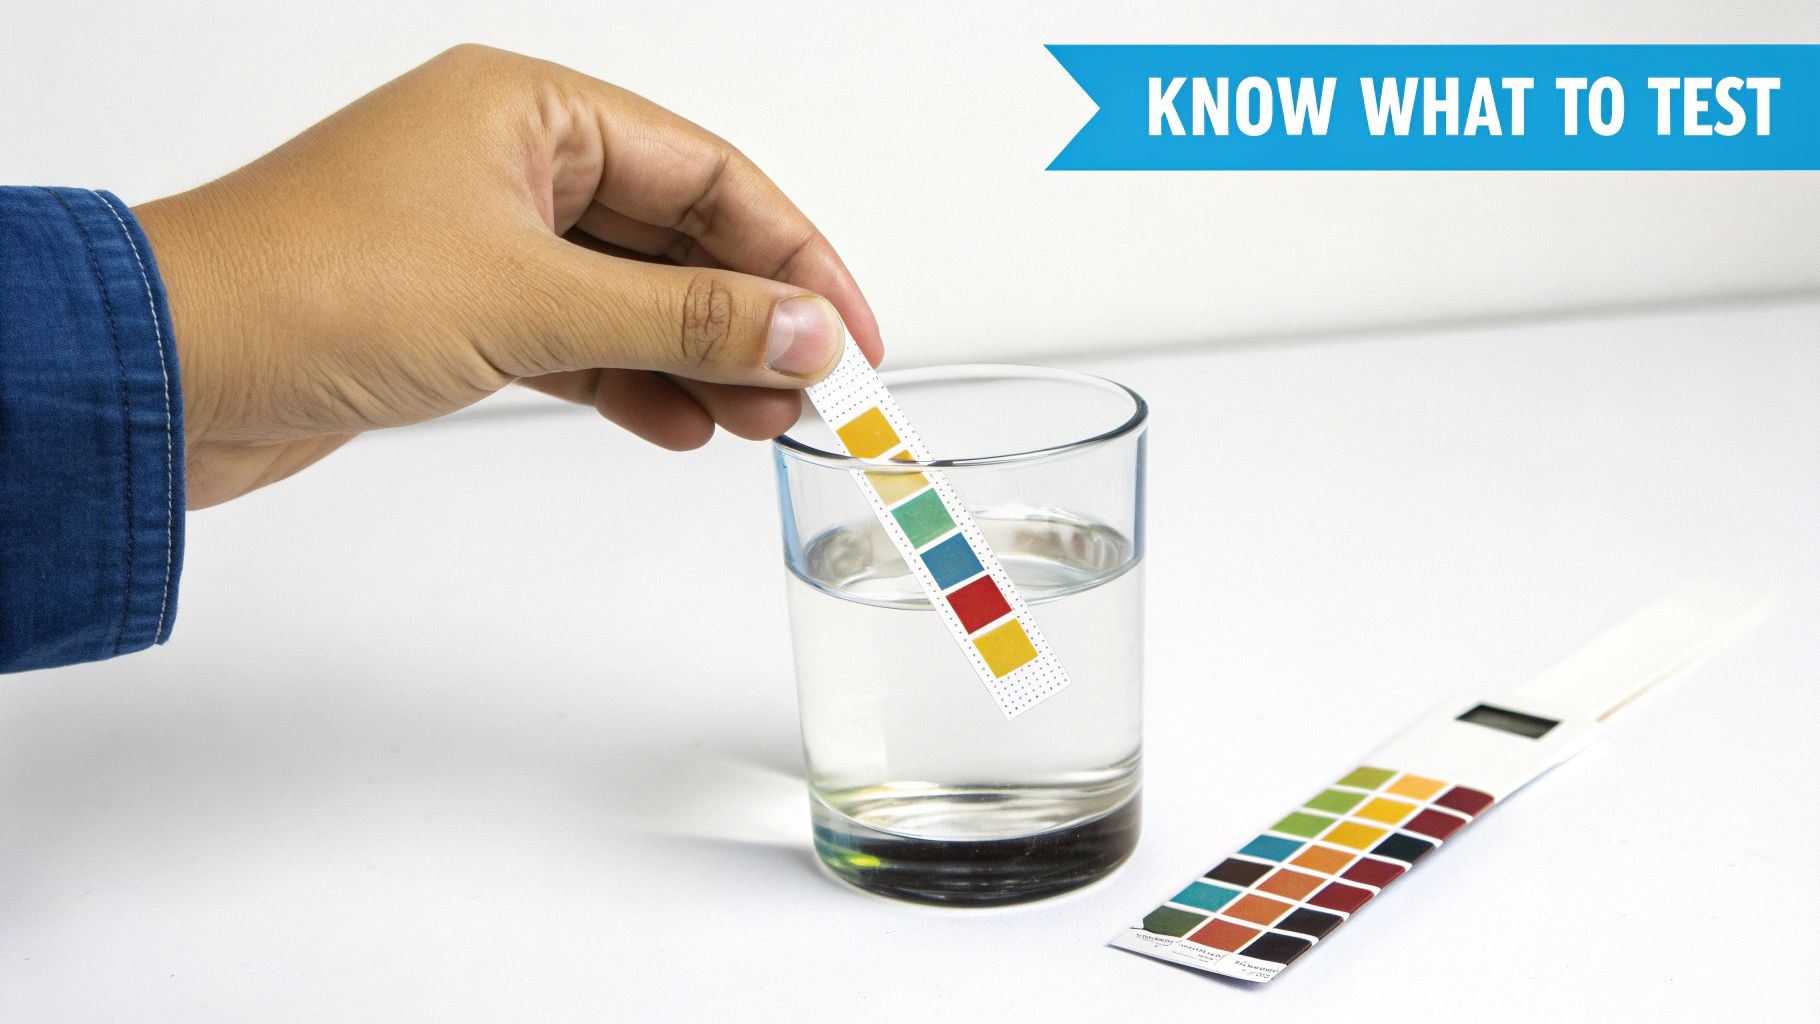
DIY kits are all about instant gratification. They’re cheap, you can find them almost anywhere, and you get results in minutes. Most work by dipping a test strip into a water sample and matching the color it turns to a chart. It’s a fantastic way to get a quick, general overview and find out if you need to investigate further.

Just keep in mind that these kits are mostly qualitative. They’ll tell you if a contaminant is present, but usually not how much. You'll get a simple "yes" or "no," which might be all you need to decide it’s time to upgrade from a basic pitcher filter. For anyone who enjoys a hands-on approach, using a DIY kit fits right in with other DIY home upkeep strategies.

When Precision Is Paramount

On the flip side, you have professional lab analysis. This is the gold standard for accuracy, no contest. It costs more and you'll have to wait a bit—usually a week or two for the report. But the level of detail you get in return is your secret weapon for choosing the perfect home filtration system.

You'll receive a report with precise, quantitative data showing the exact concentration of various heavy metals, often measured down to the parts per billion (ppb).

This kind of detail is absolutely essential in a few common situations:

  • You Have Specific Health Concerns: If someone in your family has a compromised immune system, or if you have infants and young children, knowing the exact levels of contaminants like lead is non-negotiable.
  • You're Buying a Filtration System: Before you drop hundreds or even thousands on a whole-house filter, you need to know exactly what you’re trying to remove. A lab report is the blueprint for your filtration strategy.
  • You Have a Private Well: Well owners are 100% responsible for their water quality. Regular lab testing is the only real way to make sure your water source is safe from things like agricultural runoff or naturally occurring metals.

Choosing a method isn't just about cost; it's about confidence. A DIY kit gives you a clue, but a lab test gives you the definitive blueprint for building your home's water defense system.

To help you weigh your options, I've put together a simple table that breaks down the key differences between the two methods.

Comparing DIY Test Kits and Professional Lab Analysis

This side-by-side comparison should make it easier to decide which water testing method fits your needs, budget, and how much accuracy you're looking for.

Feature DIY Test Kits Professional Lab Analysis
Accuracy Good for presence/absence Highly accurate quantitative results
Cost Generally $20 – $50 Typically $100 – $300+
Speed Instant or within minutes 1-2 weeks for results
Scope Tests for a limited range of metals Can test for a wide array of contaminants
Best For Quick screenings, routine checks Health concerns, filtration planning, well water

So, what's the verdict? A DIY kit is a fantastic first step. If it flags anything concerning, follow up with a professional lab analysis. That hard data is exactly what you need to pick the perfect filtration solution and declare victory over contaminants.

Getting Your Water Sample Right: The Key to Accurate Results

When you set out to test your water for heavy metals, the accuracy of your results boils down to one simple thing: how well you collect the sample. It's a bit like a crime scene investigation—if you accidentally contaminate the evidence, the lab's findings are useless. A small mistake here can lead you to buy the wrong filter or, worse, miss a real problem entirely.

Luckily, getting a clean sample is easy once you know what to do. The whole process starts with a single question: what are you actually trying to measure? Are you checking the water coming from the city's main line, or are you trying to figure out if your own pipes are leaching lead? Each goal needs a slightly different approach.

First Draw vs. Flushed: The Two Types of Samples

You'll need to understand the difference between a "first draw" and a "flushed" sample. They each tell a unique story about your water and can help you pinpoint where to install a filter.

  • First Draw Sample: This is literally the first water out of your tap in the morning. You collect it before you run any faucets, showers, or flush any toilets. This water has been sitting still in your pipes all night, giving it plenty of time to pick up any contaminants like lead or copper. This is the most important test for sniffing out problems inside your own home's plumbing.

  • Flushed Sample: To get this sample, you'll let the cold water run for a solid 3-5 minutes before filling the bottle. This pushes all the stagnant water out of your home's pipes and pulls in fresh water from the main supply or your well. This sample tells you what the water quality is like before it even gets to your plumbing.

Taking both samples gives you the full picture. If your first-draw results show high lead but the flushed sample is clean, you’ve just pinpointed the problem to your home's pipes or fixtures. Now you know an under-sink filter might be a better solution than a whole-house system.

This simple three-step process—from grabbing a sample to understanding the results—is the foundation of taking control of your water quality.

Infographic showing the water testing process: Get Sample, Choose Method, Get Results.

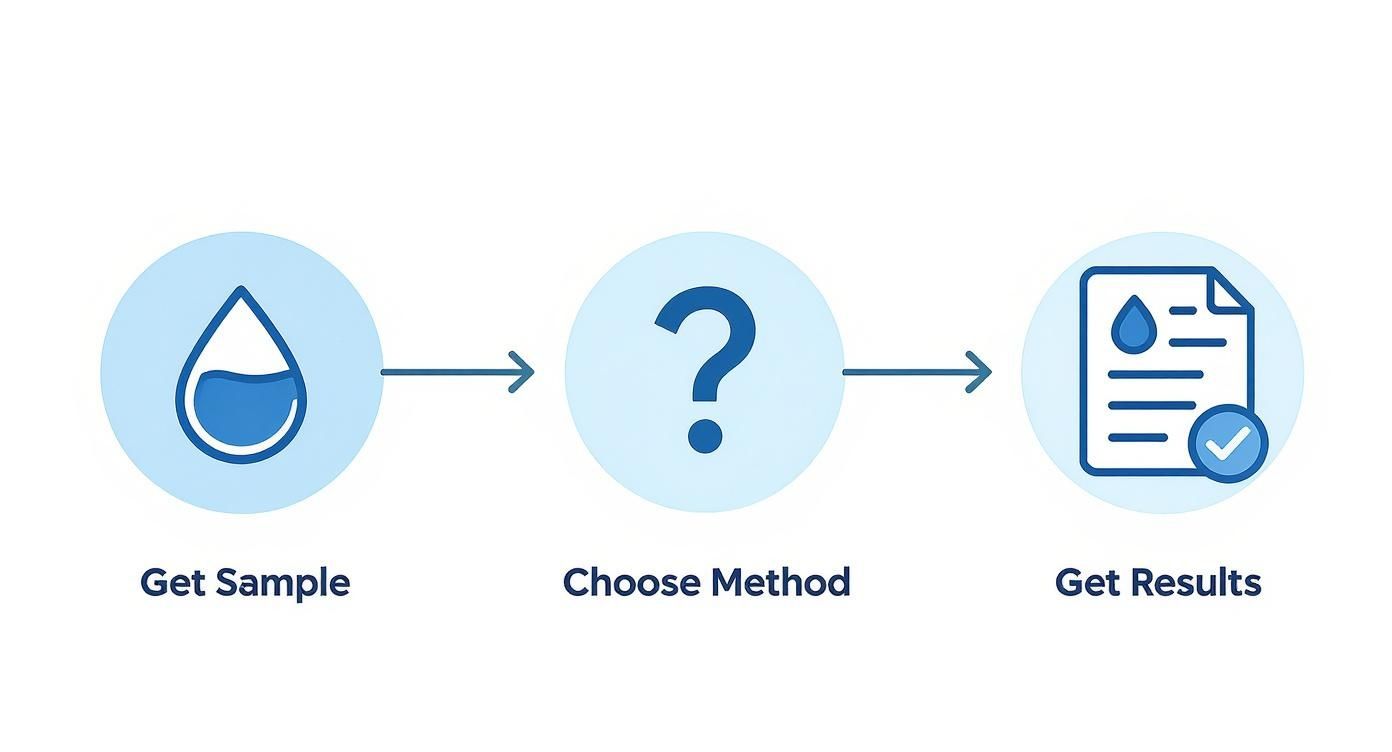
As you can see, it all starts with that first step. A good sample leads to good data and, ultimately, the right filtration choice.

Pro Tips for a Perfect Sample

To make sure nothing skews your results, here are a few critical but easy-to-follow guidelines I always recommend.

  1. Stick to the Cold Water Tap: Never use hot water for a sample. Your hot water heater often has metal parts that can break down and leach into the water. Hot water also dissolves contaminants from pipes more easily. Using the cold tap gives you a true baseline.
  2. Take Off the Aerator: See that little screen on the end of your faucet? That's an aerator. It can trap tiny bits of sediment and metal particles, which might fall into your sample and give you a false positive. Just unscrew it before you start.
  3. Follow the Kit's Instructions to the Letter: Whether you're using a home test kit or a mail-in lab vial, read the directions first. Some labs have very specific rules for how to fill the bottle or require you to ship it back quickly to keep the sample stable.

Following these steps is the best way to ensure that when you test water for heavy metals, you’re getting a real-world snapshot of what’s coming out of your tap. From there, you can confidently find the right filter to fix it.

Decoding Your Water Test Results

Getting that lab report back can feel a little intimidating. It often looks like a foreign language—just a wall of numbers, chemical symbols, and acronyms that don't mean much at first glance.

But don’t sweat it. This report is your treasure map, and it's about to lead you straight to the perfect water filter. Once you get the hang of a few key terms, you’ll be able to read it like a pro.

You’ll probably notice measurements like mg/L (milligrams per liter) or ppb (parts per billion). To put that into perspective, one part per billion is like a single drop of water in an Olympic-sized swimming pool. It sounds microscopic, but for potent heavy metals like lead and arsenic, even those tiny amounts are a big deal.

Your report will list out the metals and their concentrations. Your job is to play detective and compare these numbers against the safety benchmarks set by the Environmental Protection Agency (EPA).

Making Sense of the Numbers

The EPA sets a Maximum Contaminant Level (MCL) for many substances found in public drinking water. This is the absolute highest level of a contaminant that’s legally allowed. For some of the most dangerous metals, though, the goal is much, much stricter.

Let's break down a few common heavy metals and what the EPA guidelines say:

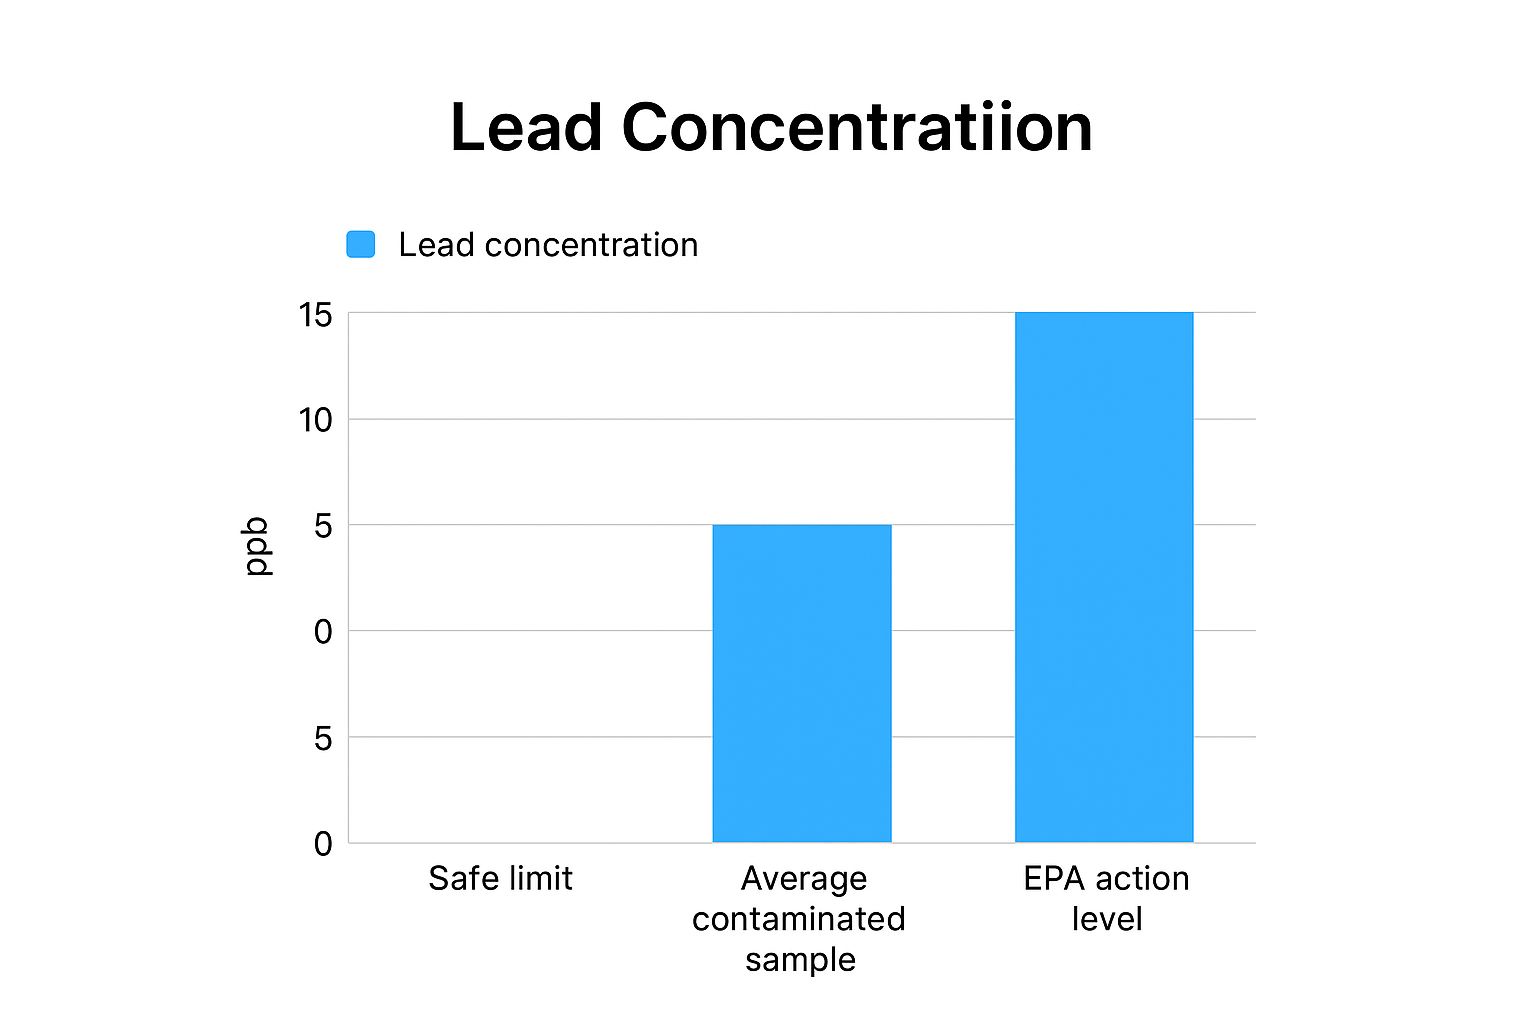
  • Lead (Pb): The EPA has set the Maximum Contaminant Level Goal for lead in drinking water at zero. That’s because there is no known safe level of lead exposure, period. The official "Action Level" is 15 ppb—if your water tests above this, you need a filter certified for lead removal.
  • Arsenic (As): Arsenic occurs naturally in the environment, but it's highly toxic. The EPA's MCL for arsenic is 10 ppb. Anything higher than this is considered unsafe for long-term consumption and requires a specialized filter.
  • Copper (Cu): While less toxic than lead, copper can still cause problems like gastrointestinal distress. Its Action Level is 1.3 ppm (parts per million), which is the same as 1,300 ppb.

The big takeaway here is that just because a metal is detected doesn't automatically mean your water is dangerous. It's all about comparing the concentration found in your test to these established safety limits to determine your filtration needs.

A Real-World Scenario

Let’s say you get your results back and see 22 ppb of lead and 5 ppb of arsenic.

The arsenic level (5 ppb) is under the EPA’s 10 ppb limit, so that’s good news. But the lead level at 22 ppb is a different story—it's significantly over the 15 ppb Action Level. This result is a clear red flag that you have a lead contamination issue that needs to be addressed with a targeted filtration system.

And this isn't just an issue in old cities. Heavy metal contamination is a massive global problem. A 2025 global soil study revealed that up to 17% of the world’s arable land is contaminated with toxic heavy metals, which can seep into water sources. You can discover more about these heavy metal findings to get a sense of the scale of the problem.

Understanding your report is what moves you from just having data to taking decisive action. When you test water heavy metals and decode the results, you gain the clarity needed to choose the perfect filtration solution, ensuring every drop from your tap is safe.

Matching Your Results to the Right Water Filtration System

Okay, you’ve got your test results. The worrying part is over, and now you know exactly what you’re dealing with. This is the moment you can take real action and choose a defense for your home.

It’s all about connecting the dots—linking the data from your water report to a specific filtration technology that will actually solve the problem.

Let's be clear: a basic pitcher filter is great for making water taste better. But when you’re up against serious contaminants like lead or arsenic, you need to bring in the heavy artillery.

For Broad-Spectrum Metal Removal

If your report lit up like a Christmas tree showing several different heavy metals—even at low levels—a reverse osmosis (RO) system is usually your best bet. Think of an RO system as an elite bodyguard for your water supply. It forces water through an incredibly fine membrane with microscopic pores.

This membrane is so effective that it blocks a huge range of contaminants, typically knocking out over 95% of heavy metals like lead, arsenic, mercury, and copper. It’s a true workhorse for getting exceptionally pure drinking and cooking water right at your kitchen sink.

Consider an RO system if:

  • Your report shows a cocktail of different heavy metals.
  • You’ve got high levels of arsenic, which can be tough for other filters to handle.
  • You simply want the highest possible purity for your drinking water.

Investing in the right filter is a direct response to your water quality report. It’s not about guessing; it's about using your data to make a confident, targeted decision that protects your family’s health for years to come.

For Targeted Contaminant Issues

Sometimes your report might pinpoint just one or two specific culprits, like lead leaching from old pipes or unusually high copper levels. In a situation like that, a more specialized filter might be a smarter and more cost-effective choice than a full RO setup.

Kinetic Degradation Fluxion (KDF) filters are a perfect example. These systems use a high-purity copper-zinc alloy that starts an electrochemical reaction, essentially neutralizing contaminants like lead, mercury, and chlorine and turning them into harmless substances. You'll often find KDF media inside whole-house systems or high-end shower filters.

While industrial pollution is a significant source of heavy metals, it's worth noting that strong regulations work. In Europe, for example, industrial releases of metals like lead and mercury into waterways have plummeted over the last few decades. You can discover more about these environmental improvements to see how focused efforts can create cleaner water for everyone.

When you test water heavy metals, you’re creating a roadmap. Your results point you directly to the filtration technology that will turn your tap water from a source of concern into a source of pure, safe hydration.

Common Questions About Home Water Testing and Filtration

Once you’ve decided to test your water, you’re bound to have a few more questions. That’s totally normal. People often wonder about the costs involved, how often they really need to re-test, and whether their filters are actually doing the job they’re supposed to.

Let’s clear up some of that confusion so you can feel confident you're on the right track.

The first thing on everyone's mind is usually the cost. A DIY kit is your most budget-friendly option, typically running under $50. It’s a great starting point. If you go for a certified lab analysis, expect to spend between $100 and $300. I always tell people to think of it as an investment—that detailed lab report is your roadmap to a solid filtration strategy.

How Often Should I Test My Water?

This is a big one, and it really comes down to where your water comes from and what your first test results look like.

  • For city water: If your initial tests are clean and you’ve got a reliable whole-house filter, re-testing every 2-3 years is a pretty safe bet. This just confirms your system is still working well and alerts you to any new issues from the municipal supply.
  • For well water: You are the water manager, so an annual test should be your standard. Wells can be affected by everything from farm runoff to seasonal weather changes, so staying on top of it is key to catching problems early.

Here’s a pro tip: If you discover high levels of a specific heavy metal, you’ll want to re-test about 1-3 months after you install a new filter. This is the only way to be certain the system is working and has knocked those contaminant levels down to a safe range.

Will My Filter Get Rid Of Everything?

It's a common misconception that any filter will remove all contaminants. The truth is, a filter's effectiveness is all about its specific technology. That basic carbon pitcher filter does a fine job with chlorine, but it won’t touch things like lead or arsenic. This is exactly why you need to match your filter to your test results.

A reverse osmosis (RO) system, for instance, is a powerhouse against heavy metals and can remove over 95% of most contaminants. But even then, no single system gets rid of 100% of everything. When you test water heavy metals, you get the exact data you need to choose the right line of defense.

You can find more helpful information in our extensive library of water filtration advice to guide your decision-making process.


At Water Filter Advisor, we're committed to helping you find the perfect, most effective solution for your home's specific needs. Explore our reviews and guides to make a confident choice for your family's health and safety.

https://www.waterfilteradvisor.com

How to Check for Chlorine in Your Water (and Actually Enjoy It)

Ever wonder how to check for chlorine in your water? Good news: you don't need a chemistry degree. The easiest ways involve using test strips, liquid reagent kits, or digital meters. You can grab these just about anywhere, and they’re designed for regular folks, not mad scientists. In just a few minutes, you'll know exactly what's flowing from your faucet and be one step closer to delicious, clean water.

Why Your Tap Water Smells Like a Pool Party

A glass of tap water being filled from a modern kitchen faucet.

That bleach-like, "clean" smell wafting from your kitchen sink isn't just your imagination—it's chlorine, the unsung hero and occasional villain of your tap water. City water treatment plants add it to the public water supply for one glorious reason: to obliterate harmful bacteria, viruses, and other microscopic baddies. It's a fantastic disinfectant that keeps our water safe on its long, winding journey to your house.

Think of it as a bodyguard for your H₂O. It does a knockout job preventing waterborne illnesses, but its ghost tends to stick around long after the mission is complete. This leftover disinfectant is called residual chlorine, and it’s the culprit behind that familiar swimming pool perfume in your drinking glass.

The Chlorine Conundrum

While chlorine is a public health champion, this residual amount isn't always the most pleasant houseguest. The impact goes beyond just a funky taste in your morning coffee or that pot of pasta. Its presence can be a real buzzkill in other ways around the house.

  • Skin and Hair: Chlorine is a master at stripping natural oils. This can leave you with dry, itchy skin and brittle, lackluster hair right after a shower—not exactly the spa-like experience you were hoping for.
  • Household Appliances: Over time, chlorinated water can wage a silent war on the rubber seals and gaskets in your dishwasher and washing machine, potentially sending them to an early retirement.
  • Taste and Odor: This is the most obvious party foul. The chemical taste and smell can make you shun the tap, and it can ruin the delicate flavors of everything from gourmet tea to homemade soup.

When you learn how to check chlorine levels in your water, you take back control. Testing is the first, non-negotiable step. It tells you what you're dealing with so you can choose a home water filtration system that brings back your water's clean, natural taste.

Understanding Safe Chlorine Levels

So, what's a "normal" amount of chlorine? The levels in your municipal water can actually fluctuate wildly depending on the season, recent weather (like a massive rainstorm), and even how far your house is from the treatment plant.

Global health organizations have set guidelines for what's considered safe. The World Health Organization (WHO), for example, suggests that residual chlorine should ideally stay between 0.2 and 0.5 milligrams per liter (mg/L). This is the sweet spot for effective disinfection without going overboard. You can learn more about the WHO's drinking-water guidelines to see how your tap water stacks up.

Knowing the specific chlorine level in your water is the only way to connect the dots. A quick test will tell you if your levels are low, moderate, or hitting the high notes, giving you the intel you need to choose the perfect water filter for your family.

Choosing Your Chlorine Testing Method

Before you can even dream about picking a water filter, you have to know what you're up against. Finding out how to check the chlorine in your water is a simple but super important first step. You've got three main ways to do this, and each one offers a different blend of convenience, accuracy, and cost.

Think of these as your personal water-testing toolkit. You don’t need to be a scientist to use them—just a few minutes and a glass of water from your tap. Let's break them down so you can find your perfect match.

Test Strips: The Quick and Easy Check

Want an answer in less time than it takes to microwave popcorn? Chlorine test strips are your go-to. They couldn't be easier: just dip a strip into your water sample, give it a little swish, and match the color on the strip to the chart on the bottle. It’s a lightning-fast and cheap way to get a general vibe of your chlorine levels.

Test strips are perfect for a quick spot-check. Maybe you just moved into a new place, or you’ve suddenly noticed your water smells a bit "off." A test strip gives you a ballpark reading right away, satisfying your curiosity in seconds. The trade-off for all that speed, though, is precision. They’re great for sniffing out a problem, but not so great for measuring exactly how big that problem is.

Liquid Test Kits: The Reliable Middle Ground

For a more accurate reading that won't make your wallet cry, liquid test kits (sometimes called "dropper kits") are an excellent choice. This is where you'll usually find the DPD method, which is a trusted standard in the water testing world.

With these kits, you add a few drops of a liquid reagent into a small vial of your tap water. The water changes color based on the chlorine content, and you match that color to a printed comparator. This method gives you a much clearer and more detailed result than a test strip, letting you feel a bit like a home scientist.

One of the most common methods is the colorimetric DPD (N,N-diethyl-p-phenylenediamine) approach, which uses a color change to quantify chlorine. Research shows that while test strips are fast, DPD-based photometric equipment is generally preferred for precise chlorine control. You can learn more from these detailed reports on water quality testing methods.

Digital Meters: For Pinpoint Accuracy

When you need the most precise measurement you can get—no ifs, ands, or buts—a digital meter or colorimeter is the tool for the job. These slick handheld electronic devices eliminate all the guesswork of matching colors by eye.

You just pop a water sample into the meter, and it gives you a direct digital reading of the chlorine concentration, often down to two decimal places.

Digital meters are perfect for homeowners who want to geek out on their water quality, especially before and after installing a whole-house filter. They cost more upfront, but for people serious about their water, their accuracy and ease of use are unbeatable.

Comparing Home Chlorine Test Methods

To make it simple, here’s a quick showdown of how the three main methods compare.

Method Best For Accuracy Speed Typical Cost
Test Strips Quick, initial checks and identifying a potential issue. Low to Moderate Very Fast (1 minute) $10 – $20
Liquid Test Kits Balancing accuracy and affordability for regular use. Moderate to High Fast (2-5 minutes) $15 – $30
Digital Meters Getting precise, data-driven results for tracking. Very High Fast (1-3 minutes) $50 – $150+

So, what's the right call? It really depends on your mission. Are you just casually curious, or are you on a quest to solve a specific issue like dry skin or coffee that tastes like it was brewed in a swimming pool? Any of these methods will arm you with the crucial info you need to take the next step: picking a filtration solution that’s a perfect fit for your home.

How to Get Accurate Test Results

Alright, let's get to the main event—actually testing your water. Don't worry, you won't need a lab coat for this. The goal is simple: get a true snapshot of the water quality coming out of your tap. Getting a reliable number you can act on is easier than you think; a few pro tips are all it takes.

We'll walk through the best practices for each testing method, but first, a couple of golden rules apply no matter which kit you have. These simple tricks ensure you're testing what’s flowing through your pipes, not what's been sitting around getting stale.

This visual guide breaks down your three main options for checking chlorine, from simple strips to precise digital readers.

Infographic about how to check chlorine in water

As the infographic shows, there's a clear trade-off between speed and accuracy. Test strips are the fastest, but digital meters give you the most exact reading. It's all about matching the right tool to your needs.

Universal Best Practices for Water Sampling

Before you even crack open your test kit, a couple of quick steps will set you up for success. They seem small, but they make a huge difference in accuracy.

First, let your tap run for about 30-60 seconds before you collect any water. Water that sits in your pipes overnight can have a different chlorine level than the fresh supply from the main line. Running the tap for a minute clears out that old, stagnant water.

Second, always grab a clean container. Any leftover soap, food, or even old water residue can mess with your results. If you’re using a vial that came with your kit, just give it a good rinse with the same tap water you’re about to test.

Mastering the Test Strip Technique

Test strips are all about speed, but there's a right way and a wrong way to use them. Rushing the process is the number one mistake people make, and it can give you a completely bogus reading.

Here's how to nail it:

  • Dip, Don't Soak: Submerge the strip in the water for a second or two, just like the instructions say. Leaving it in longer can make the colors on the reagent pads bleed.
  • A Gentle Swirl: Give the strip a gentle swirl while it's underwater to make sure the pads get fully saturated. No need to create a whirlpool.
  • Hold it Horizontally: Once you pull the strip out, hold it level. This is key—it stops the colors from running into each other and muddying the result.
  • Time it Right: This is critical. The instructions will specify a wait time—usually 15 to 30 seconds—before reading. Don't eyeball it. Use a timer on your phone. Reading too early or too late gives you a false result as the chemical reaction is still developing.

When it's time to read, match the color pads to the chart in good, natural light. It's surprisingly hard to tell the difference between subtle shades of pink in a dimly lit room.

Getting a Clear Result with Liquid Kits

Liquid dropper kits, often using DPD reagent, are a big step up in accuracy. Success here is all about the details. The reagent turns the water a pinkish-purple color when chlorine is present—the deeper the color, the higher the chlorine.

The single best tip for this method is to read the results against a white background. Just hold a plain piece of paper behind the vial when you compare its color to the chart. It makes the color pop and helps you find a much more exact match.

Also, be precise:

  • Fill the test vial exactly to the line. Too much or too little water will dilute or concentrate the reagent, skewing the reading.
  • Hold the reagent bottle perfectly vertical when adding drops. This ensures every drop is the same size.

You might wonder why this matters. Well, city water with chlorine is great for preventing bacteria, but it's a problem for some hobbies. People who ferment foods or keep fish aquariums have to dechlorinate their water first, often by letting it sit out for 24 hours or boiling it for 15 minutes to let the chlorine gas dissipate. For the rest of us, a good filter is a much faster solution.

Calibrating and Using a Digital Meter

If you've opted for a digital meter, you're on your way to the most precise results possible at home. But even these high-tech tools need a little TLC to stay accurate. The most important step is calibration.

Think of it like tuning a guitar. You have to give the meter a reference point so it knows what "zero" looks like. Most meters are calibrated with chlorine-free water, like distilled water. You just put the "blank" sample in the meter and hit the "zero" or "calibrate" button.

Do this regularly, especially if you haven't used the meter in a while or if the readings seem off. Once it's calibrated, the rest is a breeze. You add your tap water, drop in the DPD reagent (it often comes in a little powder packet), and the meter gives you a specific number in parts-per-million (ppm) or milligrams-per-liter (mg/L). No more guesswork.

By following these simple steps, you can trust the number you see. That reliable data is the foundation for figuring out what it all means and choosing the right water filter to reclaim your tap.

Making Sense of Your Chlorine Levels

You’ve done the test, matched the colors, and now you have a number. So what does a reading of 0.8 ppm or 1.5 mg/L actually mean for the water you drink and shower in every day? This is where we turn that number into a story about your daily life.

Understanding your results is less about complex chemistry and more about context. That number on your test strip or digital meter is the concentration of chlorine in your water, measured in parts per million (ppm), which is the same as milligrams per liter (mg/L). It tells you how your water is treated and what you're likely experiencing at home.

The chlorine in your tap water isn't just one thing. It’s a mix of different compounds, and your test kit can help you figure out what’s what. Grasping these two key terms is the first step to truly decoding your results.

Free Chlorine vs. Total Chlorine

When you test your water, you’ll often see options to measure both free chlorine and total chlorine. They sound similar, but the difference between them is crucial for understanding your water quality and choosing the right filter.

  • Free Chlorine: Think of this as the "active-duty" chlorine. It’s the potent disinfectant that’s ready and available to zap bacteria and other pathogens. This is the portion of chlorine that hasn't reacted with anything yet, and it’s what you typically taste and smell.

  • Total Chlorine: This is the sum of free chlorine plus combined chlorine (better known as chloramines). Combined chlorine forms when free chlorine gets tangled up with organic stuff in the water. It’s a less effective disinfectant but hangs around in the system much longer.

If your total chlorine level is way higher than your free chlorine, it means a lot of the disinfectant has already been "used up," creating chloramines. This often creates that potent, unpleasant chemical smell that's even worse than chlorine alone. For home filtration, knowing both numbers helps you choose a filter that can tackle the entire problem.

Key Takeaway: Think of free chlorine as the 'available' soldier ready for battle, and total chlorine as the entire army, including those who have already engaged with contaminants. Both contribute to the overall taste, smell, and feel of your water.

What Is a Normal Chlorine Level?

So, what should your chlorine reading actually be? According to the EPA, the maximum safe level is 4.0 ppm (mg/L). Most city water systems aim to keep it between 0.5 and 2.0 ppm by the time it reaches your faucet.

But "safe" and "pleasant" are two very different things.

Some people have super-senses and can taste or smell chlorine at levels as low as 0.5 ppm. Others might not notice it until it gets closer to 1.5 ppm or higher. This is often the point where you start to feel its effects, like dry, itchy skin after a shower or that distinct bleach-like taste in your drinking water.

It's also important to know that these levels aren't static. Chlorine concentration can swing up or down based on how far your home is from the treatment plant, seasonal changes, or even a recent heavy rainstorm that forces the city to use more disinfectant. This is exactly why you can't just rely on the city's annual water quality report; you need the real-time data from your own tap.

By understanding what a typical reading is and connecting it to your own experience—that dry skin, the flat-tasting coffee—you can decide what to do next. A consistently low reading might mean a simple faucet filter is all you need, while higher readings point toward a more robust whole-house system to protect every tap in your home.

Matching Your Results to the Right Filter

A person smiling as they install an under-sink water filter.

Alright, you've done the testing and you're holding the results. This is the moment where that data transforms into an action plan for getting amazing water in your home. The right filter all comes down to what your tests revealed. Are we talking about a minor taste issue, or are you dealing with a chlorine level that makes your shower feel like a dip in the public pool?

Think of your chlorine reading as a signpost. It points you straight to the most effective and budget-friendly solution for your water. There's no single "best" filter for everyone—the best one is the one that solves the specific problem you just uncovered. Let's turn that PPM number into a home upgrade.

Low to Moderate Chlorine Levels (0.2 to 1.0 ppm)

If your test came back in this range, you're in good company. This is the most common scenario, where the complaints are usually about taste and smell. Maybe your coffee tastes a little funky, your drinking water isn't as crisp as you'd like, or you catch a faint swimming pool scent now and then.

Good news: you don't need a massive, complicated system. The fix here is simple and targeted.

  • Water Pitcher Filters: This is the easiest entry point. A good pitcher with an activated carbon filter will make a huge difference in the taste and odor of your drinking water.
  • Faucet-Mounted Filters: These clip right onto your kitchen tap for instant gratification. They're a nice step up from a pitcher if you want filtered water on demand for cooking and drinking.

Both of these use activated carbon, a ridiculously porous material that acts like a chlorine magnet. As water flows through, chlorine gets trapped on the carbon's massive surface area. It's an incredibly effective and affordable way to get that pure water taste back.

Moderate to High Chlorine Levels (1.0 to 2.5+ ppm)

Once your readings consistently climb over 1.0 ppm, you’re in territory where the effects are more than just a nuisance. This is when you start feeling that tight, dry-skin feeling after a shower or begin to worry about the long-term impact of chlorine and its byproducts.

A simple pitcher just isn't going to cut it for the whole house. It's time to level up with a more comprehensive solution.

  • Under-Sink Filters: Tucked away under the kitchen or bathroom sink, these systems have much higher capacity and power than pitchers. They hook directly into your cold water line and give you purified water from a separate, dedicated faucet.
  • Countertop Filters: These units sit next to your sink and connect to the faucet, delivering serious filtration power without any plumbing work. They're a fantastic option for renters.

Your test results are your guide. A reading of 1.5 ppm or higher, combined with noticeable skin irritation or a strong chemical smell, is a clear signal that a point-of-use or whole-house system is a smart investment in your family's comfort and health.

Very High Chlorine or Whole-Home Concerns

If your chlorine levels are consistently high, or you just want every single tap, shower, and appliance in your house protected, a whole-house water filter is the ultimate solution. These are installed right where the main water line enters your home, meaning every drop of water that flows through your pipes gets treated.

A whole-house system is your best defense against not only chlorine but also its disinfection byproducts, like trihalomethanes (THMs). When you're dealing with really stubborn chlorine issues, you might even look at what the pros use. High-purity facilities often rely on specialized equipment like lab water purifiers for distilled water to get absolute purity.

For your home, a robust whole-house carbon filter delivers that same kind of peace of mind. You're not just improving your drinking water—you're protecting your appliances from wear and your skin and hair from dryness. It's a total home transformation, one filtered drop at a time.

By matching your specific chlorine reading to one of these strategies, you can stop guessing and make a smart choice. You've already done the detective work; now you can pick the right tool for the job with total confidence.

Common Questions About Water Testing

Even with the right gear, a few questions always pop up when you're learning how to check chlorine levels in your water. We’ve rounded up quick answers to the most common queries to clear up any confusion and help you move forward with your filtration plan.

How Often Should I Test My Water?

As a general rule, testing your home’s water every 3 to 6 months is a smart move. Chlorine levels from your city can change with the seasons or after heavy rain, so regular checks keep you informed.

A pro tip: always test right before and after you install a new water filter. This gives you concrete, undeniable proof of how well your new system is working and lets you see (and taste) the difference right away.

Can I Use Pool Test Strips?

It’s tempting, but please don't. Stick to kits made specifically for drinking water. Pool test strips are designed for much higher chlorine concentrations and a completely different water chemistry.

Using pool strips on your tap water will almost certainly give you a wildly inaccurate reading, making it completely useless for choosing a filter. For results you can actually trust, always grab a dedicated drinking water test kit.

If you're looking for more guidance on selecting the right tools and understanding different water contaminants, you can find a wealth of information in our comprehensive water filtration advice section.

My Test Shows Zero Chlorine. Is That Bad?

Not necessarily. If you're on city water, a zero reading might just mean you live far from the treatment plant. The chlorine has simply done its job and faded away by the time the water reaches you.

While that’s great for the taste, it also means the water no longer has that final layer of disinfectant protection. If you're concerned about microbial safety, adding a UV purification system after your main filter is a fantastic, chemical-free way to ensure total peace of mind.

Will a Water Softener Remove Chlorine?

This is a super common mix-up. A standard water softener will not touch chlorine. Softeners are designed for one job: removing hardness minerals like calcium and magnesium through a process called ion exchange. They're all about preventing scale buildup, not improving taste.

To actually get rid of chlorine, you need a filter that uses activated carbon. Many homeowners create the ultimate water dream team by pairing a water softener with a whole-house carbon filter to tackle both hard water and chlorine at the same time.

Your Guide to Home Water Testing and Finding the Perfect Filter

That glass of water from your tap might look perfectly clear, but let's be honest, looks can be deceiving. What you can't see could be a real problem for your home, your appliances, and your health. Before you assume that clear equals clean, it's time to play detective. Testing your water is the only way to know for sure what you're dealing with before you even think about buying a water filter.

Why You Should Test Your Home's Water Quality

A person holding a glass of clear tap water up to the light in a modern kitchen.

It’s easy to put your trust in the water flowing from your faucet, especially if you're on a city supply. And while that water is treated, contamination can absolutely happen as it travels through miles and miles of pipes to get to you.

Older plumbing in your neighborhood—or even lurking inside your own walls—can leach things like lead and copper straight into your drinking water.

On top of that, the very chemicals used to make the water safe, like chlorine, can create byproducts (known as DBPs) that have been linked to health concerns. This doesn’t automatically mean your water is dangerous, but it does show how much its quality can change on its journey to your glass.

Common Signs You Need a Water Test

You don’t have to wait for an official alert to start questioning your water. Sometimes, your house gives you clues. These are some of the most common red flags I see that point to a hidden issue:

  • You notice a weird taste. If your water has a metallic tang, that could signal iron, copper, or even lead. If it tastes more like a swimming pool, you've probably got high levels of chlorine.
  • Your appliances have white, chalky buildup. This is the classic calling card of hard water, caused by high levels of calcium and magnesium. That scale doesn't just look bad; it can kill the efficiency and shorten the lifespan of your dishwasher, coffee maker, and water heater.
  • You get your water from a private well. Unlike city water, private wells aren't regulated by the EPA. That means you are 100% responsible for making sure it's free from bacteria, nitrates, and other contaminants that can seep in from the ground.

Get the Data Before You Buy a Filter

Here’s the thing: testing your water isn't just about finding problems. It's about finding the right solution. Buying a water filter without knowing what's in your water is like throwing darts in the dark—you might get lucky, but you'll probably miss the bullseye.

Testing first gives you the power to pick a filtration system that actually targets the specific contaminants in your supply. This keeps you from wasting money on a complex system you don’t need, or worse, buying a cheap filter that doesn't fix your real problem.

At the end of the day, testing your water is about gaining peace of mind and taking back control over what’s flowing into your home.

What to Look For When Testing Your Water

A scientist holding a water sample test tube with clear liquid against a blurred lab background.

Before you can pick the right water filter, you first have to know what you’re up against. Think of it as playing detective—the clues are right there in your water. Learning how to test your water quality at home means knowing exactly which culprits to look for.

Most contaminants fall into a few key categories. This helps you figure out what matters most, whether you're dealing with city water and its treatment chemicals or you're a well owner worried about what's seeping into your groundwater.

Health Concerns

This is the big one. This group includes contaminants that pose a direct risk to your family's health. They’re often invisible, odorless, and tasteless, which makes testing the only way you’ll ever know they’re there.

  • Lead: A serious neurotoxin that often leaches from older plumbing. There is no safe level of lead exposure, period. It's a top priority for testing, especially if your home was built before 1986.
  • Bacteria and Viruses: If you're on a private well, microorganisms like E. coli are a major concern. They can get into your water from failing septic systems or farm runoff and make you sick fast.
  • Nitrates: Another common problem for well water, nitrates come from fertilizers and animal waste. They're especially dangerous for infants because they can interfere with the blood's ability to carry oxygen.

Nuisance Issues

These guys aren't usually as dangerous as the first group, but they can still wreak havoc on your home and make life unpleasant. These are the problems you can often see, taste, or feel.

The most frustrating part of nuisance issues is the slow, silent damage they do. You might not notice the scale buildup inside your water heater until it fails, or the dingy look of your laundry until it's too late.

A perfect example is water hardness, which is caused by too much calcium and magnesium. It's the culprit behind that chalky white scale on your faucets and the soap scum ring in your shower. Another classic is iron, which leaves those ugly reddish-brown stains in your sinks and toilets and can give your water a metallic tang.

General Quality Indicators

Finally, there are the general indicators that give you a bigger picture of your water’s overall condition. They don’t point to one specific contaminant but offer clues that something might be off.

Total Dissolved Solids (TDS) is a measure of everything dissolved in your water, both organic and inorganic. A high TDS reading isn't necessarily a health risk (it can include harmless minerals), but a sudden spike can be a red flag that something new has gotten into your water supply.

Similarly, the pH level tells you how acidic or alkaline your water is. Water that’s too acidic can actually corrode your pipes, which might leach metals like copper and lead right into your drinking water.

This kind of household-level testing is becoming a big deal globally. Since 2012, large-scale surveys in 29 countries have started using home water tests to get a better handle on drinking water safety. This is especially important for rural and lower-income families who often face higher risks. The data shows where city monitoring falls short and proves just how critical it is to check your water right at the tap. You can learn more about how household surveys identify water safety gaps and help inform public health.

Choosing Your Testing Method: DIY Kits vs. Lab Analysis

Alright, so you know what you might be looking for in your water. Now comes the big question: how do you find it? This is where you decide on your approach.

You’ve got two main paths to choose from when it comes to testing your water quality at home: doing it yourself with a DIY kit or sending a sample off for a professional lab analysis.

Each one has its place, and the right choice really boils down to your specific situation, how much you want to spend, and what will give you peace of mind. I like to think of it like a quick health check—sometimes, taking your own temperature at home tells you all you need to know, but other times, you need to see a doctor for the full workup to get the real story.

The Fast and Easy Route: DIY Test Kits

For a quick, on-the-spot snapshot of your water, you can't beat a DIY kit. These are the test strips, color disk kits, and handheld digital meters you can find online or at your local hardware store. They're built for speed, convenience, and affordability.

Most of these kits are designed to flag general quality indicators and common nuisance problems. They’re fantastic for getting a baseline reading on things like:

  • Chlorine: A must-have for anyone on city water who's curious about how much disinfectant is coming through their tap.
  • Water Hardness: Essential if you’re seeing that chalky scale building up on faucets and want to know just how hard your water is.
  • pH Levels: A good general indicator of acidity or alkalinity, which can impact your plumbing over the long haul.

You get results in minutes, which makes these kits a brilliant starting point. They empower you to quickly spot basic issues that a simple pitcher or faucet filter might be able to handle.

Choose a DIY kit when: You want a quick, general screening of your city water, you're curious about nuisance issues like hardness or chlorine, or you just need an affordable way to get an initial feel for your water's condition.

Digital Testers: A Step Up in DIY

A really popular type of DIY option these days are digital water testers. I've seen these handheld gadgets become a favorite for homeowners who want to keep a constant eye on their water. They usually measure things like Total Dissolved Solids (TDS), pH, and temperature, giving you an instant number on a screen.

Now, they won't tell you if you have lead or arsenic, but they're an excellent screening tool. For example, a TDS reading below 300 ppm is generally considered pretty good. But if you see a number over 500 ppm, that’s a clear sign it's time to dig a little deeper.

These digital testers, which usually run between $20 to $100, are also incredibly handy for checking if your filtration system, like a reverse osmosis unit, is still doing its job.

When You Need a Definitive Answer: Professional Lab Analysis

DIY kits are great for a quick look, but they have their limits. They simply can’t see everything.

When you're dealing with serious health concerns or complex water issues, nothing beats the accuracy and detail you get from a professional, state-certified laboratory test. This is the gold standard for filtration prep.

It’s the most thorough way to find out exactly what’s in your water. The process is straightforward: the lab sends you a special collection kit, you fill it up with your water, and you mail it back. In about a week or two, you’ll get a detailed report breaking down dozens of potential contaminants with scientific precision.

Once you have those results, figuring out the next steps can feel overwhelming. For more in-depth guidance on choosing the right filtration systems, you might find our full library of water filtration advice helpful.

Opt for a lab test when: You're on private well water, you have a reason to suspect dangerous contaminants like lead or arsenic, you have infants or immunocompromised folks at home, or you simply want the most accurate, complete picture before investing in a whole-house filter.


DIY Test Kits vs. Professional Lab Testing

Still on the fence? This head-to-head comparison should help you decide which water testing method is the right fit for your needs and your filtration goals.

Feature DIY Test Kits (Strips & Digital Meters) Professional Lab Analysis
Accuracy Good for general estimates, but not precise. Highly accurate and scientifically precise.
Contaminants Detected Limited to common parameters like chlorine, pH, hardness. Can detect hundreds of contaminants, including heavy metals, VOCs, bacteria, and pesticides.
Speed Instantaneous results (usually within minutes). Slower turnaround, typically 1-2 weeks.
Cost Very affordable, often $15 – $100. More expensive, ranging from $100 to $500+ depending on the tests.
Best For Quick screenings, identifying nuisance issues, monitoring city water, and checking filter performance. Well water owners, confirming specific health-related contaminants, and getting a comprehensive water profile.

Ultimately, the best method is the one that answers your specific questions and gives you confidence to choose the right water filter for the job.

Matching Test Results to the Right Water Filter

Okay, you've done the detective work and your water test results are in. This is where all that effort pays off, because you can finally turn that raw data into a real solution.

Instead of just guessing which filter to buy, you now have a clear roadmap. You know exactly what problem you need to solve.

Think of it like getting a prescription from a doctor. You wouldn't just grab any medicine off the shelf; you get the one prescribed for your specific issue. It’s the same exact principle with water filters. Matching the filter to your results saves you money and, more importantly, actually fixes the problem.

This infographic is a handy little decision tree to help you visualize whether a quick test strip check-up is enough or if you need to call in the big guns with a lab analysis.

Infographic about how to test water quality at home

As you can see, the right testing method really depends on your initial concerns. This helps point you in the right direction from the get-go.

Solutions for Common Water Problems

Let's connect the dots between what your report says and the hardware that can fix it. Most water quality headaches fall into a few common buckets, and luckily, there are specialized filters for each one.

  • Problem: Chlorine Taste and Odor
    Does your tap water taste and smell like a public pool? Your test results probably showed high chlorine levels. Good news: this is an easy fix. Activated carbon filters are your best friend here. They basically act like a magnet for chlorine, yanking it out of the water and making it taste and smell great. You'll find these in affordable options like water filter pitchers, faucet-mounted filters, and even most refrigerator filters.

  • Problem: Hard Water and Scale Buildup
    If your results flagged high levels of calcium and magnesium, you've got hard water. That's the stuff causing that chalky white scale on your faucets and making it impossible to get a good lather with soap. The only real fix for this is a water softener. These systems use a process called ion exchange to physically remove those hardness minerals, which will save your pipes and appliances from costly scale damage down the road.

  • Problem: Heavy Metals Like Lead
    A positive test for lead demands an immediate and serious response. Reverse osmosis (RO) systems are one of the most effective tools for removing lead and a whole bunch of other nasty contaminants. These are usually multi-stage filters installed right under your sink. They work by forcing water through a special membrane that blocks things like lead, arsenic, and nitrates.

Tackling Serious Contaminants

Some test results call for a much stronger defense. If you're on a private well or your lab report came back with microbiological threats, you need a system that offers true purification.

A UV purification system is a fantastic, chemical-free way to deal with bacteria and viruses. It uses powerful ultraviolet light to zap the DNA of nasty microorganisms like E. coli, which stops them from reproducing and making you sick. For well water, it's often paired with a sediment pre-filter to make sure the UV light can get a clear shot at any pathogens.

When you have real data from a water test, you're no longer just a consumer—you're an empowered homeowner. You stop buying generic products and start investing in a specific solution that’s perfectly matched to your home’s unique water profile.

This proactive mindset is catching on. Field studies have shown that the simple act of home water testing has a real impact on people's behavior. One study found that giving households access to water testing led to a 5.3 percentage point increase in the use of safer commercial water supplies over time.

It’s simple: when people know what’s in their water, they are far more likely to do something about it. You can read the full research on how testing changes water habits and see the data for yourself.

Maintaining Your Filter for Long-Term Purity

So you've installed a new water filter. That initial sense of relief is great, but the job isn't quite over. Keeping your water pure is an ongoing commitment, not a one-and-done deal.

Think of your filter like any other hard-working appliance in your home—it needs regular attention to keep doing its job right. This means you'll need to retest your water every so often to make sure your system is still working effectively.

Things can change with your water supply, sometimes without any warning. A big storm, a nearby construction project, or even small shifts in how your city treats its water can throw off the chemistry.

Create a Retesting Schedule

The best way to stay ahead of potential issues is to have a simple schedule based on where your water comes from and anything you notice that seems off.

  • For well water owners: Getting an annual professional lab test is non-negotiable. Your water source isn't regulated by the city, which means you're the first and only line of defense against contaminants like bacteria and nitrates that can pop up over time.
  • For city water users: Retest your water if you notice any sudden changes in taste, color, or smell. It’s also smart to test again after a "boil water" advisory is lifted, just to confirm everything is back to normal.

The Critical Role of Filter Cartridge Replacement

Beyond retesting, the single most important piece of maintenance is swapping out your filter cartridges on schedule. It’s so easy to let this slide, but putting it off can cause real problems.

An old, clogged filter doesn't just stop working; it can become a source of contamination itself.

Over time, all the junk your filter has been catching builds up. A saturated filter can turn into a breeding ground for bacteria, potentially making your so-called "filtered" water even worse than what's coming straight from the tap.

Sticking to the manufacturer’s replacement schedule—whether it’s every three months or once a year—is absolutely essential for protecting your investment and your family’s health.

And if you're thinking beyond just filtering what comes out of the tap, storing drinking water is another important step. You can find a comprehensive guide to potable water storage tanks that covers everything from materials and sizing to the crucial maintenance needed to ensure that water stays pure. Regular upkeep is the key to consistently safe water.

Answering Your Top Home Water Testing Questions

Even after you've got a plan, a few questions always seem to pop up. It's totally normal. Let's dig into some of the most common things people ask when they're figuring out how to test their water at home. This should clear up any last bits of confusion.

How Often Should I Be Testing My Water?

This is a big one, and the answer really hinges on where your water comes from. There's no single schedule that fits everyone.

If you have a private well, you're the one in charge of your water quality. Think of yourself as your own water utility manager. Because of that responsibility, an annual lab test is a must. Wells can be affected by all sorts of things—seasonal rain runoff, a neighbor's septic system, you name it. Consistent testing is the only way to stay on top of it and ensure your water is safe.

Now, if you get your water from the city, it's a bit different. That water is treated and tested before it even leaves the plant. The problem is, it can pick up contaminants on its long journey to your faucet. For city water, a good rule of thumb is to test every three to five years. The exception? Test immediately if you notice any weird taste or smell, or if the city issues a water advisory.

Can I Trust Those Free Tests from Water Filter Companies?

Ah, the "free" test. It's a tempting offer, but you have to be careful with this one. These tests usually come with a major catch.

More often than not, the person doing the test isn't a neutral water quality expert—they're a salesperson. Their entire job is to sell you a water filtration system. The "test" is really just a sales demonstration, designed to show you problems that their specific products can fix. It might reveal you have hard water or some chlorine, but it’s almost never a comprehensive, scientifically sound analysis of serious health concerns.

A free test might give you a small clue about your water, but it's usually just a high-pressure sales tactic in disguise. If you want a truly unbiased and accurate report on what's in your water, an independent lab test is the only way to go.

My Water Looks and Tastes Fine, So Why Bother Testing?

This is probably the most dangerous assumption you can make about your drinking water. So many of the worst contaminants are completely invisible to our senses. You simply cannot see, taste, or smell major threats like:

  • Lead: A powerful neurotoxin that can seep into water from old pipes and plumbing.
  • Arsenic: A known carcinogen that can be naturally present in groundwater, especially in certain regions.
  • Bacteria and Viruses: Microscopic pathogens that can lead to serious gastrointestinal illnesses.
  • Nitrates: A common contaminant in well water from agricultural runoff, which is especially dangerous for infants.

Let me say it again: clear water does not mean clean water. Testing is the only way to get the proof you need to know for sure that your water is free from these hidden dangers. It’s what lets you protect your family's health and make a smart, informed choice about whether you need a filter.


Ready to take the next step and find a filtration system that perfectly matches your water's needs? At Water Filter Advisor, we provide in-depth reviews, buying guides, and expert advice to help you make a confident, cost-effective choice. Explore our guides and find the right filter for your home today!

How to Remove Lead from Water: A Home Filtration Guide

So, you're wondering how to remove lead from water. It’s a smart question, but before you can zap it, you have to know if that invisible heavy metal is crashing your party in the first place. Since you can't see, smell, or taste lead, the only way to know for sure is to test your water.

Step 1: Confirming Lead is in Your Water

The idea of testing might sound like a science project, but it's really just a simple choice: a quick DIY kit from the hardware store, or sending a sample to the pros at a certified lab. Let's break down which one is worth your time.

DIY Test Kits vs. Professional Lab Analysis

Those do-it-yourself test strips are tempting. They’re cheap, and you get an answer in minutes. Just dip the strip in some water, and it changes color if lead is present. It's like a magic trick for your tap water.

The problem? Most of them aren't very good magicians. They often miss low levels of lead that are still a health risk, and they won't tell you how much lead you have. They’re a simple yes/no tool, but to pick the right filter, you need to know the specific number in parts per billion (ppb).

That's where professional lab testing steals the show. It's the gold standard for a reason. You'll get a collection kit from a state-certified lab with crystal-clear instructions. A lab report gives you the exact concentration of lead, leaving no room for doubt.

The Importance of the First-Draw Sample

How you collect your water sample is just as important as where you send it. For the most accurate reading, you need to capture a "first-draw" sample.

This just means collecting water from your kitchen tap first thing in the morning, before anyone uses any water in the house—no showers, no flushing toilets, no running the dishwasher. This water has been sitting in your pipes all night, giving it the maximum amount of time to absorb any lead from old plumbing.

A first-draw sample shows you the worst-case scenario for your daily lead exposure. If that sample comes back with high lead levels, you know you have a problem to solve.

Getting the sample is easy, but you have to do it right:

  • Don't run any water at all before collecting. Go straight to the kitchen sink.
  • Always use cold water. Hot water can pull more lead from pipes, but cold water is the standard for testing what you'll be drinking.
  • Fill the bottle immediately. Just turn on the tap and fill the collection bottle from the lab right away.

Understanding Your Test Results

Your lab report will give you a number in parts per billion (ppb). The EPA has an "action level" of 15 ppb, but don't get too hung up on that number.

That 15 ppb figure isn't a health-based safety standard; it's a trigger that requires public water systems to take action. The reality, according to the U.S. Centers for Disease control and Prevention (CDC) and other health experts, is that no level of lead exposure is safe, particularly for children. If your test shows any detectable lead, it's time to get serious about filtration.

Step 2: Choosing the Right Water Filter for Lead Removal

Okay, your test results are in, and they show lead. The good news is you can absolutely do something about it. The right water filter is your most powerful weapon in the fight for safer water.

But when you start looking, it's easy to get overwhelmed. The market is flooded with options, and every company promises perfectly pure, safe water. The real trick is to cut through the marketing fluff and find a filter that actually works on a heavy metal like lead.

Image

This chart puts things into perspective. The Environmental Protection Agency (EPA) goal for lead is zero. Any amount is a real concern, which is why effective filtration is so important.

The Gold Standard: NSF/ANSI 53 Certification

Before you even think about pitchers versus under-sink systems, there's one thing you absolutely must look for: NSF/ANSI 53 certification.

Think of this as an independent, third-party guarantee. It’s proof that a filter has been rigorously tested and can actually reduce lead and other health-related contaminants, just like it says on the box. If a filter doesn't have this specific certification for lead reduction, you have no real assurance that it’s protecting your family.

Never buy a filter for lead removal unless you can confirm it's certified to NSF/ANSI 53 standards. This seal is the single most reliable sign of a filter that does what it claims.

A Breakdown of Common Filter Types

With that critical certification in mind, let's walk through the most common types of home water filters. Each has its own set of pros and cons, so the right choice for you will depend on your budget, your living situation, and how much water you need to treat.

Comparing Home Water Filters for Lead Removal

Choosing the right filter is all about balancing effectiveness, convenience, and cost. This table breaks down the key differences to help you decide which system is the best fit for your home.

Filtration Type Lead Removal Effectiveness Installation Average Annual Cost Best For
Water Pitcher Moderate (if NSF 53 certified) None $60 – $120 Single users, renters, and budget-conscious households.
Faucet-Mounted Good (if NSF 53 certified) DIY, very easy $50 – $100 Kitchen use in rental properties or small apartments.
Under-Sink Excellent DIY or Professional $150 – $500 Homeowners wanting dedicated, high-quality drinking water at one tap.
Whole-House Excellent Professional Required $500 – $2000+ Homes with known lead service lines or widespread contamination issues.

As you can see, the options range from simple, portable solutions to comprehensive, whole-home systems.

Water Pitcher and Faucet-Mounted Filters

These are the entry-level options for a reason—they're affordable and incredibly easy to use. A pitcher can live in your fridge, while a faucet-mounted unit screws onto your kitchen tap in minutes.

  • How They Work: Most use a block of activated carbon. As water flows through, the carbon's huge, porous surface area adsorbs contaminants like lead.
  • Best For: Renters, people in small apartments, or anyone looking for a simple, budget-friendly starting point.
  • The Catch: Their filter capacity is pretty small. You’ll be changing cartridges every 40 to 100 gallons, and the flow rate can be slow. Plus, they only treat water at a single point.

Under-Sink Filtration Systems

If you're looking for something more permanent and powerful for your kitchen sink, an under-sink system is a fantastic upgrade. These are installed out of sight and connect directly to your cold water line, usually feeding a separate, dedicated faucet for pure, filtered water.

They also tend to use more advanced technology. Some rely on high-grade activated carbon, but many use reverse osmosis (RO), which is one of the most effective methods out there. You can learn more about RO system water purifiers to get a better handle on the tech, but basically, they use a special membrane to block nearly everything—lead, arsenic, nitrates, you name it.

Whole-House Filtration Systems

What if your test results show high lead levels throughout your home, or you know you have a lead service line? That’s when you should consider a whole-house, or "point-of-entry," system.

This is the most comprehensive solution. It’s installed where your main water line enters your home, meaning every single tap—from the kitchen sink to the bathroom shower—delivers clean, filtered water. While it provides total peace of mind, it's also the biggest investment and almost always requires a professional plumber to install correctly.

Step 3: Installing and Maintaining Your Water Filter

Image

So you’ve done your homework and picked out a solid, certified filter to remove lead. Fantastic. But the job isn't quite done. A high-quality filter is only as good as its installation and maintenance. Getting the setup right and being disciplined about upkeep is what truly protects your family.

Think of it this way: your filter is a gatekeeper for your water. If it’s not installed correctly or you let it get old and clogged, that gatekeeper can’t do its job.

Getting the Installation Right

The setup really depends on what kind of filter you bought. Simple systems, like the ones that mount directly on your faucet, are usually a piece of cake. You can often get them on in just a few minutes with no tools, just make sure you get a tight, leak-free seal.

Under-sink systems, however, are a bit more involved. While plenty are designed for a confident DIYer, you absolutely have to follow the manufacturer's instructions to the letter. No skipping steps.

A Quick Checklist for Under-Sink Filters:

  • Kill the Water Supply: First thing's first. Find the cold water shutoff valve under your sink and turn it off completely.
  • Secure Your Connections: Use the fittings and hoses that came in the box. Take a moment to double-check that every connection is snug. A slow, hidden drip can cause a world of water damage down the road.
  • Flush the New Filter: Before you even think about drinking the water, you have to flush the system. This means running cold water through it for a few minutes. It clears out any loose carbon dust (which is harmless but can make the water look cloudy) and gets the filter media activated and ready to work.

The most common mistake people make is skipping that initial flush. It’s not optional. This one step ensures your filter works like it’s supposed to from the very first glass.

Why Filter Replacement is Non-Negotiable

Let me be blunt: an old, expired filter is worse than no filter at all. As a filter cartridge does its job, it fills up with the contaminants it has captured. Once it reaches capacity, it can’t remove any more lead. Simple as that.

What’s worse is a phenomenon called "dumping," where a totally saturated filter can actually release a concentrated burst of the very junk it was supposed to be catching. This is precisely why changing your filter on schedule is the single most important part of this whole process. This focus on filtration is part of a much larger public health story, and you can learn more about the global fight for safe water from the World Health Organization.

Creating a Foolproof Maintenance Schedule

When a filter is tucked away under a sink, it’s easy to forget about it. "Out of sight, out of mind" can be a real problem here, so you need a system that doesn't rely on memory alone.

  • Calendar It: The moment you install a new cartridge, put the replacement date on your kitchen calendar or, better yet, set a recurring event on your phone.
  • Use the Sticker: Most filters come with a little sticker for a reason. Write down the date you installed it and the date it needs to be replaced. Stick it right on the filter housing or inside the cabinet door where you’ll see it.
  • Heed the Light: Many pitchers, refrigerators, and faucet filters now have an indicator light. These are great, but think of them as a backup reminder. Your calendar is your primary system.

Spotting the Signs of an Expired Filter

Beyond your schedule, the filter itself will often give you clues that it’s on its last legs.

The most obvious sign is a significant drop in water pressure. If the flow from your dedicated filter faucet has slowed to a trickle, that’s a dead giveaway. The filter is clogged with sediment and everything else it has captured, making it hard for water to get through. This is its way of telling you its ability to remove lead is compromised. Time for a change—immediately.

Bonus Tip: Simple Habits to Further Reduce Lead Exposure

Image

While your certified water filter is doing the heavy lifting, a few smart daily habits can add another powerful layer of protection. Think of these as the supporting players, working alongside your filtration system to keep your family’s contact with lead to an absolute minimum.

These simple, no-cost practices are all about turning your kitchen into a safer space.

Master the Morning Flush

When water sits in your pipes overnight or while you're at work, it has more time to pick up lead from old plumbing. The fix is surprisingly simple: flush your pipes. Before you use any water for drinking or cooking, just let the cold tap run for a minute or two.

You'll know you've flushed the line when the water turns noticeably colder. This quick step pushes out the stagnant water and pulls in fresh, cleaner water from the main before it even hits your filter.

The Golden Rule: Never Use Hot Tap Water for Cooking

It’s tempting to grab hot water from the tap to get a head start on boiling pasta, but this is one kitchen shortcut you need to skip. Hot water is far more corrosive than cold water and dissolves lead from pipes and old solder much more efficiently.

Always start with cold water for cooking and drinking. Heat it on the stove or in a kettle instead. This one change is a critical part of any home strategy for how to remove lead from water.

By following this rule, you’re ensuring you start with the lowest possible lead concentration before you even begin to cook.

Common Questions About Removing Lead From Water

Even after you've picked a filter and tested your water, a few questions might still be nagging you. That's completely normal. Let's tackle some of the most common things people ask about getting lead out of their water.

Will Boiling Water Remove Lead?

This is probably the biggest and most dangerous myth out there, and the answer is a firm no. Boiling is fantastic for getting rid of things like bacteria and viruses, but it does absolutely nothing for lead.

In fact, it can make things worse. When water boils, some of it turns to steam and escapes, but the lead stays behind. This means the lead concentration in the water left in the pot actually goes up. Always, always stick to a certified filter to handle lead.

How Do I Know My Filter Is Certified for Lead?

Time to become a label detective. You have to look for one very specific code on the product packaging or its official documentation: NSF/ANSI 53. This isn't just marketing fluff; it’s a certification from an independent organization that has put the filter through rigorous testing to verify it reduces lead to safe levels.

Don't just take a company's word for it. If a filter doesn't clearly state it's certified to NSF/ANSI 53 for lead reduction, you simply can't trust it to protect your family. It's the only real guarantee you have.

Vague promises like "cleaner water" don't cut it. For lead, this specific certification is non-negotiable.

Is It Safe to Shower in Water with Lead?

Finally, a bit of good news. The health risk from showering or taking a bath in water that contains lead is extremely low. Your skin doesn't absorb lead, so the real danger comes from drinking it.

The main thing to watch out for, especially with little kids, is making sure they don't swallow a bunch of bathwater. But for the most part, you don't need a massive whole-house filter just to make bathing safe. This allows you to focus your efforts and budget on point-of-use filters for the water you drink and cook with.

My City Water Report Is Clean. Should I Still Test My Tap?

Yes, without a doubt. This is a critical point that trips a lot of people up. Your city's water report shows the quality of the water as it leaves the treatment plant, which could be miles away.

Lead contamination is a "last-mile" problem. It almost always happens somewhere between the city main and your faucet. The usual suspects are an old lead service line running to your house or even your own plumbing—things like old pipes, lead-based solder, or certain brass fixtures. The only way to know what's actually coming out of your kitchen tap is to test it right there. Your city's report can't see inside your walls.

Article created using Outrank

Which water filter is the best? Brita vs PUR vs ZeroWater water filter review comparison

Which water filter is the best? Brita vs PUR vs ZeroWater water filter review comparison


Don’t just rely on bottled water! It may not always be convenient or cheap to buy bottled water. We searched for the best home water filter as we compared capacity, price, filtration speed, TDS levels, and taste test. Guess which water filter tastes the best?

Products mentioned with some alternates in case they are unavailable:
– ZeroWater 20 Cup Dispenser, Blue ( (
– ZeroWater 6 Cup Water Filter Pitcher with Water Quality Meter (
– PUR with Lead Reduction Filter (
– PUR with Faster Basic Filter (
– Brita Ultra Max with 1 Longlast Filter (
– Brita Ultra Max Water Dispenser Gray (

These are Amazon affiliate links, which means I may earn a small commission from Amazon, at no cost to you.

Original Video Source

Lifesaver Liberty Water Purifier  Bottle- A SHTF Must Have!!!

Lifesaver Liberty Water Purifier Bottle- A SHTF Must Have!!!


Lifesaver Liberty Water Purifier Bottle:

REMOVES VIRUSES, BACTERIA & CYSTS – The LifeSaver Liberty is the world’s 1st water purifier bottle with an integrated inline pump. This water filter bottle removes a minimum of 99.99% of viruses, bacteria and cysts and is the perfect additional for your survival gear and for camping and hiking.
NO CHEMICALS OR ELECTRICITY REQUIRED – The LifeSaver Liberty uses mechanical filtration to turn any questionable water source into drinkable water instantly. No more having to rely on water purification tablets that leave a disgusting after taste! Simply fill, pump and drink.
TESTED IN THE HARSHEST CONDITIONS – Independently tested to exceed full NSF/ANSI P231 and WHO2011 drinking water standards, the LifeSaver Liberty offers military-grade water purification. FailSafe technology is integrated into every filter so that you will never ingest unsafe water.
LONG LASTING PROTECTION – Every LifeSaver Liberty water filter bottle includes a filter cartridge that will purify up to 2,000 liters of water before having to be replaced. We’ve also included 1 activated carbon filter to improve the taste of water as well as a 5ft scavenger hose for easy access to hard to reach water sources.
VERSATILE WATER PURIFIER – The LifeSaver Liberty is more than just a water purifier bottle for outdoor enthusiasts. It’s lightweight and portable enough for your camping gear, but also robust and reliable enough for your emergency kit when disaster strikes.

Original Video Source

FILTER OR FAIL! Coffee Reverse Osmosis Water Filtration Challenge

FILTER OR FAIL! Coffee Reverse Osmosis Water Filtration Challenge


This week on Filter or Fail we put the US Aqua Platinum series to the test with your favorite Coffee drinks. As always we test the quality of our filtered specimen with a PPM meter and a taste test. Will it Filter? or Will it Fail? Watch and find out. Don’t forget to like, subscribe and leave a comment with any ideas you have for us to filter.

For more information on the US Aqua Platinum Series Reverse Osmosis System click here:

To find this system on Amazon click here:

Original Video Source