How to Remove Calcium from Your Water: A Practical Home Guide

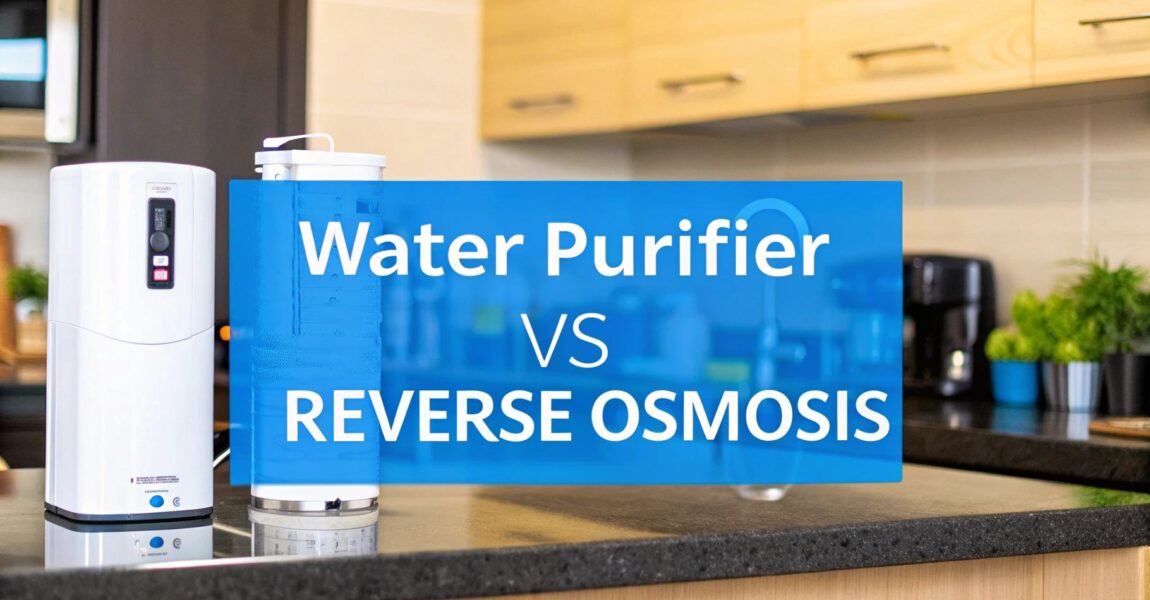
So, you're ready to declare war on the calcium in your water? Excellent. Your two superstar players in this fight are the classic salt-based water softener and the high-tech reverse osmosis system. Think of a water softener as a clever diplomat, swapping out hard calcium for soft sodium. Reverse osmosis, on the other hand, is pure brute force—it shoves water through a microscopic bouncer that physically blocks the minerals from getting in.

The Sneaky Cost of Hard Water in Your Home

A close-up shows a shower head and door suffering from severe hard water damage and mineral buildup.

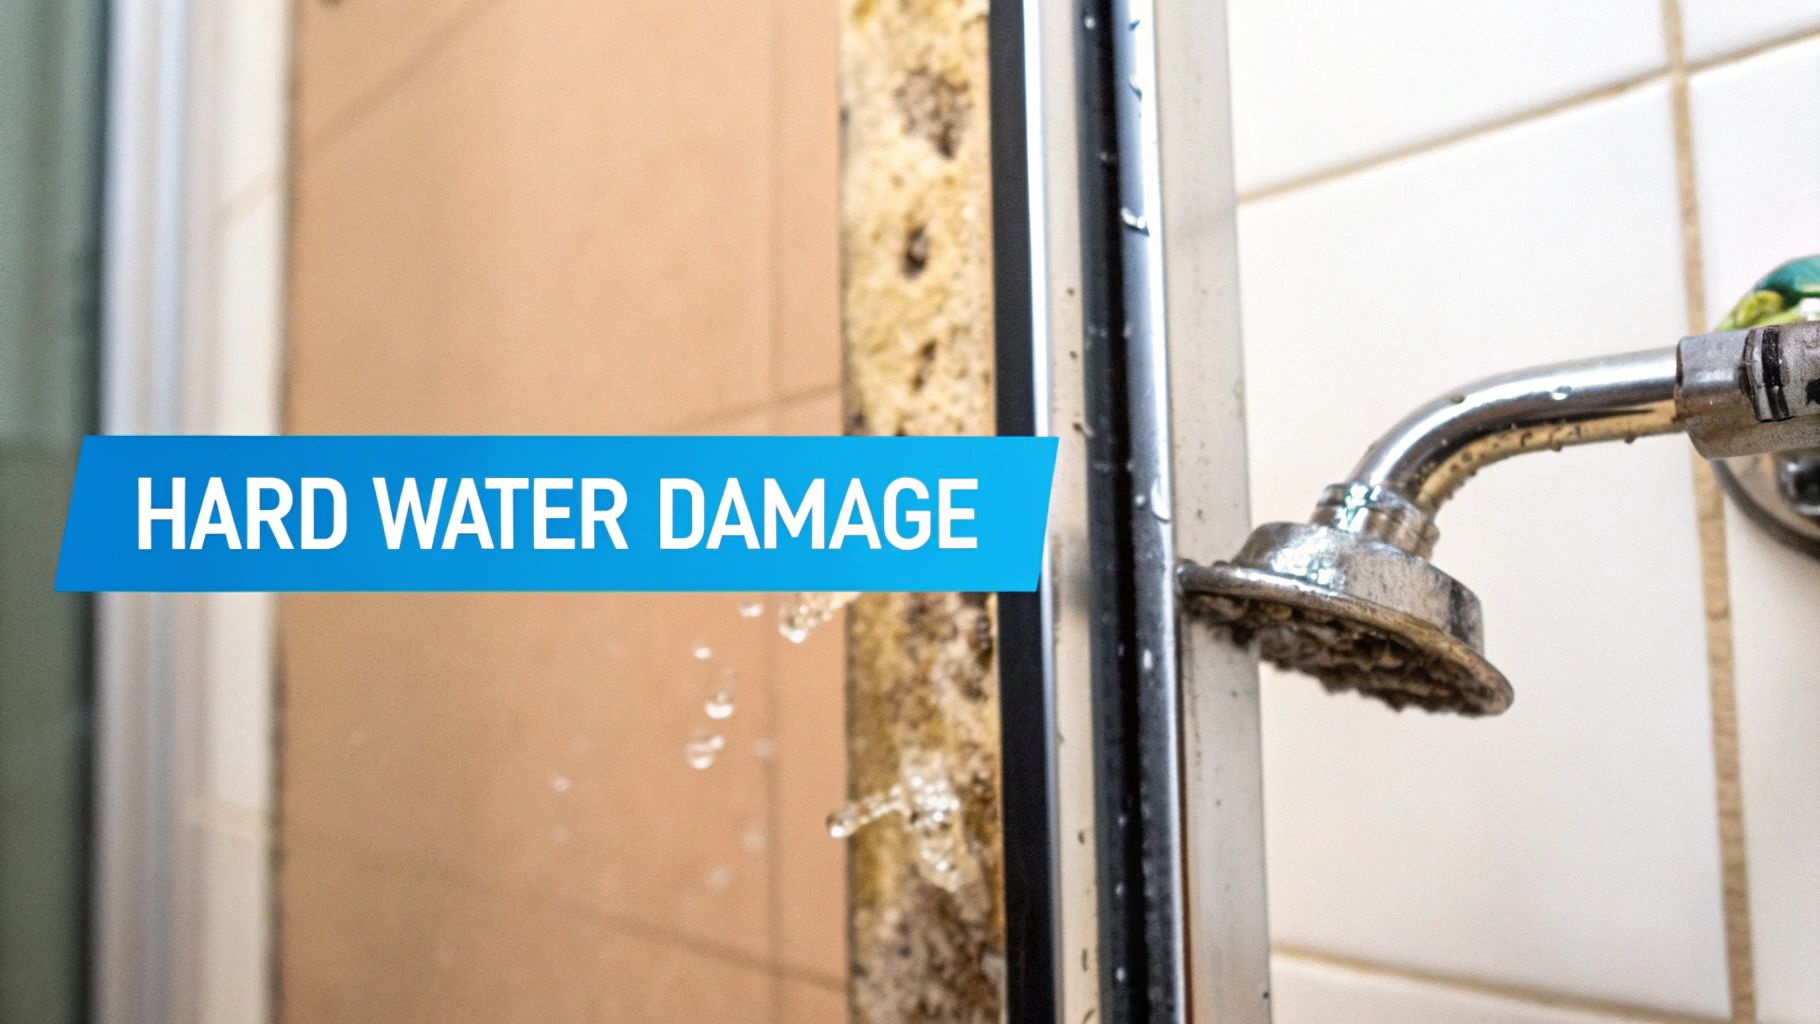
If you've ever waged a Saturday morning battle scrubbing that ghostly white film off your shower door, you've met hard water. If you've ever pulled your favorite t-shirt from the dryer only to find it feels like cardboard, you're a victim of hard water. This isn't just a minor inconvenience; it’s the daily grind for millions, all thanks to invisible calcium and magnesium particles crashing the party in your water supply.

These mineral freeloaders are the reason your soap throws a tantrum and refuses to lather, and why your wine glasses come out of the dishwasher looking like they’ve been frosted. You're trapped in an endless, and often losing, fight against soap scum on faucets, sinks, and tubs. But as annoying as these visible clues are, they’re just the opening act. The real damage is happening behind the scenes.

The Hidden Damage Calcium Causes

Beyond the daily cleaning headaches, hard water is silently waging a secret war on your home's plumbing and appliances. That same calcium that leaves spots on your glassware is building a rock-hard fortress inside your pipes called limescale. Over time, this mineral buildup chokes your plumbing, strangling water flow and putting a serious strain on your entire system.

Your water-using appliances are taking the biggest beating. Limescale loves to cozy up to the heating element in your water heater, wrapping it in a mineral blanket. This forces the unit to work overtime, burning more energy just to heat the same amount of water.

Hard water is a problem for a staggering 85% of American households. That relentless scale buildup can slash the lifespan of water heaters by up to 30% and crank up your energy bills by 20-30%.

Let that sink in. It means you could be forking over cash for a new water heater every 8-12 years instead of getting the full 20, all while paying more on your utility bills every single month. The same costly assault is happening to your dishwasher, washing machine, and even your beloved coffee maker. One of the most obvious signs is the never-ending task of removing hard water stains from windows and shower doors—it’s a crystal-clear sign of how much mineral gunk is being left behind.

The good news? You don't have to surrender. By understanding how to remove calcium from your water with the right filtration system, you can protect your home, save money, and finally win the war against limescale for good.

Diagnosing Your Hard Water Problem

A person's hand holds a water test strip above a glass of water, with 'TEST YOUR WATER' text overlay.

Before you can vanquish the calcium in your water, you have to play detective. You need to know exactly how hard your water is. This isn't just a fun fact for a cocktail party; it's the crucial first step that determines which filtration weapon is actually going to work for your home.

You've probably already spotted the evidence. Those stubborn, milky-white spots on your windows and shower doors? Those are the classic calling cards of hard water, which are primarily calcium and magnesium deposits. While these clues tell you there's a problem, you need a real number to make a smart decision.

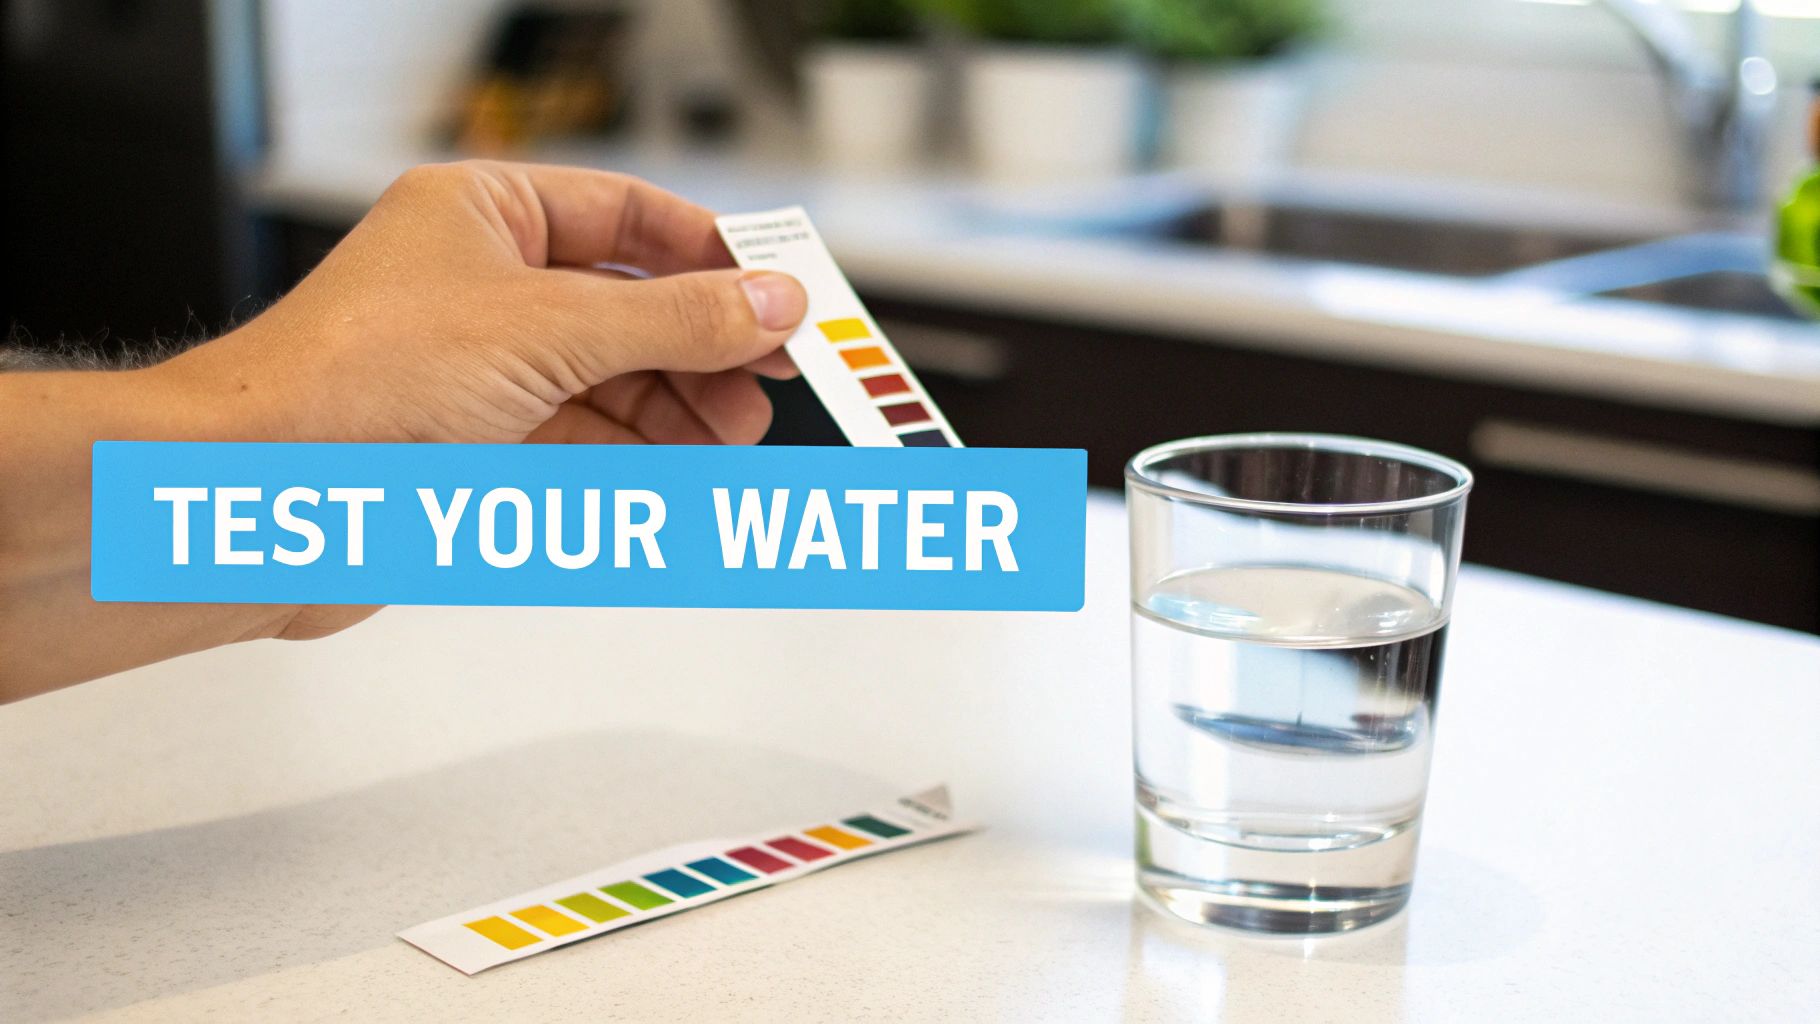
Luckily, you don't need a lab coat and a Ph.D. to figure this out. There are several ways to test your water, from simple DIY tricks to highly accurate lab tests.

Quick and Easy At-Home Tests

If you just want a quick confirmation that you're dealing with hard water, you can start with a couple of methods that cost next to nothing. They won't give you a precise number, but they'll tell you if you're on the right track.

  • The Soap Suds Test: This is the old-school way. Grab a clean, clear bottle, fill it about a third of the way with tap water, and add a few drops of pure liquid soap (Castile soap is perfect). Now, shake it like a Polaroid picture. If you get a big, fluffy layer of bubbles, your water is probably soft. If you just get a sad, cloudy film and barely any suds, congratulations, you’ve got hard water.
  • Water Hardness Test Strips: These are cheap, easy, and you can find them at any home improvement store. Just dip a strip into a glass of your water, and watch the color change. Match that color to the chart in the kit, and voilà, you'll have a good estimate of your water's hardness level.

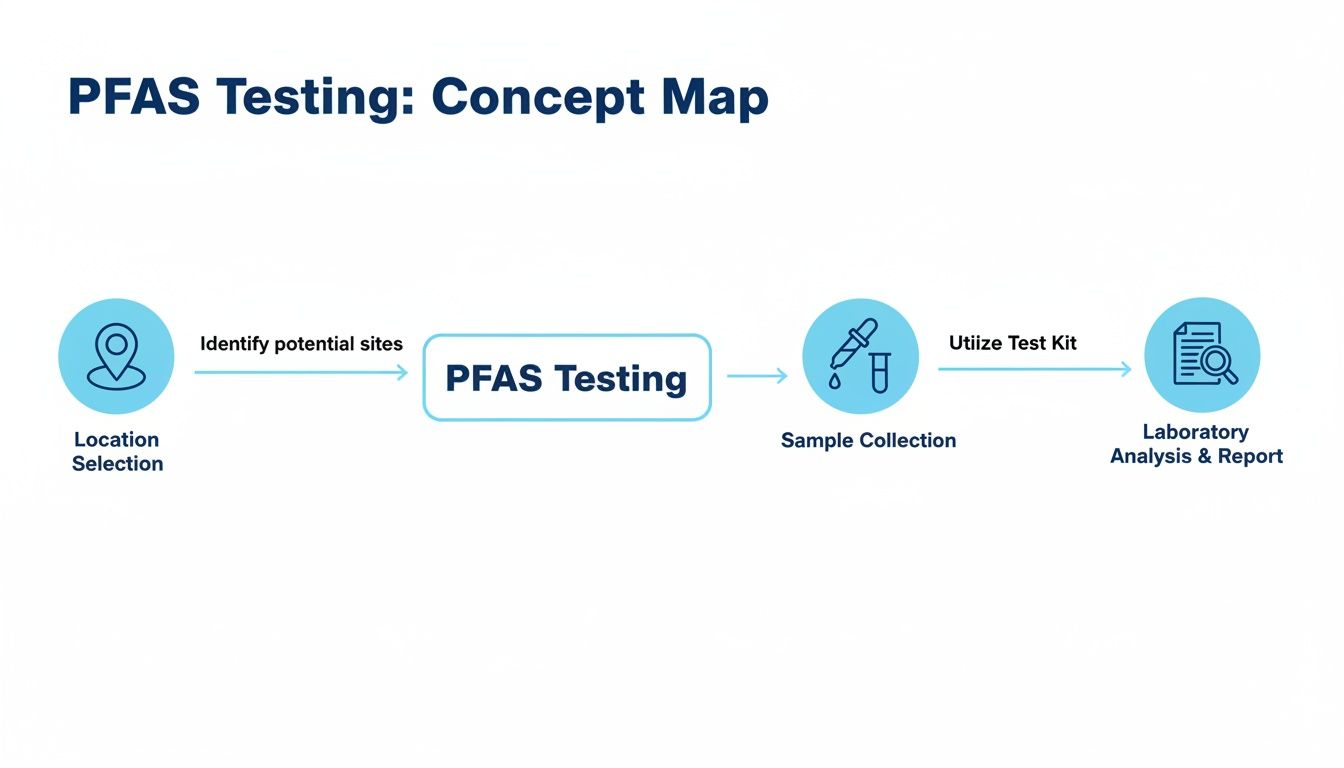
Getting a Precise Measurement

The DIY tests are a great start, but if you're planning to invest in a real water filtration system, you need a more accurate number. This is especially true if you're on a private well, where mineral levels can be all over the map and other sneaky contaminants might be lurking.

Knowing your exact water hardness number is essential. A water softener needs to be programmed with this value to work efficiently. Get it wrong, and you’ll either waste a mountain of salt and water, or worse, the system won't soften your water at all.

For a reliable result, you have a couple of better options. I’ve put together a quick comparison to help you choose the best method for your needs.

Water Hardness Testing Methods Compared

Different testing methods offer varying levels of detail and accuracy. Here’s a breakdown of the most common options to help you decide which is right for your situation.

Testing Method How It Works Accuracy Level Typical Cost Best For
Soap Suds Test Shaking soap in a water-filled bottle to observe suds formation. Low (Qualitative) Free Quick confirmation of a suspected hard water problem.
Test Strips A strip is dipped in water and changes color, which is then matched to a chart. Low to Moderate $10 – $20 A fast, inexpensive estimate of hardness in Grains per Gallon (GPG).
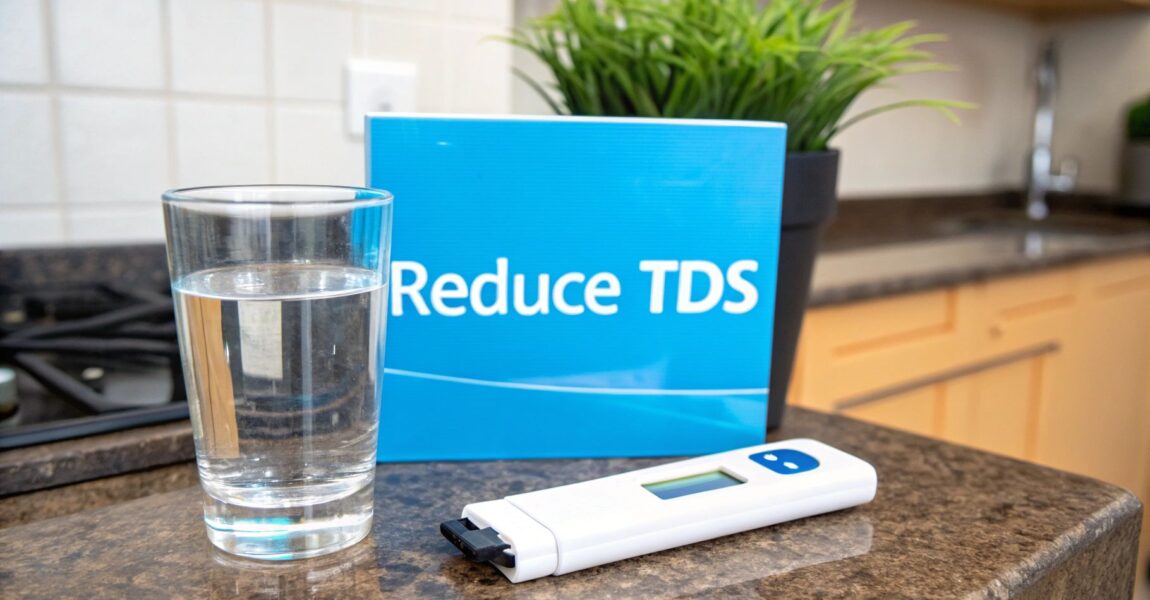
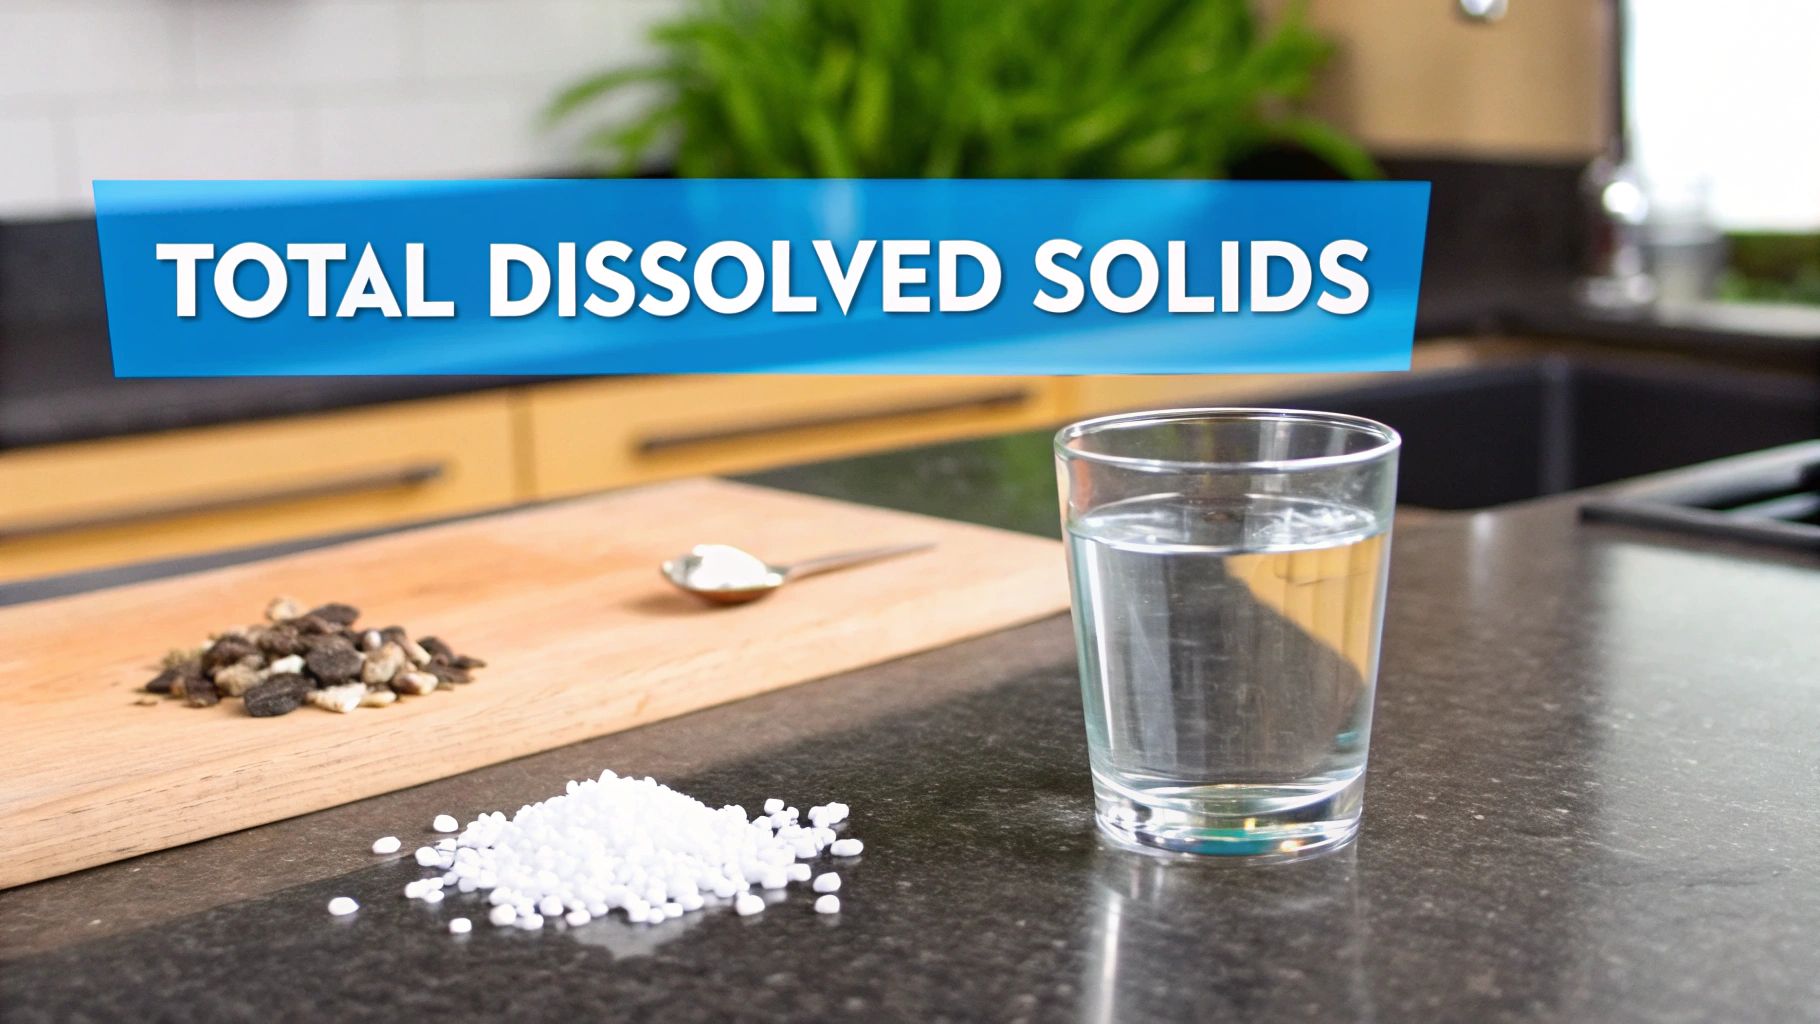
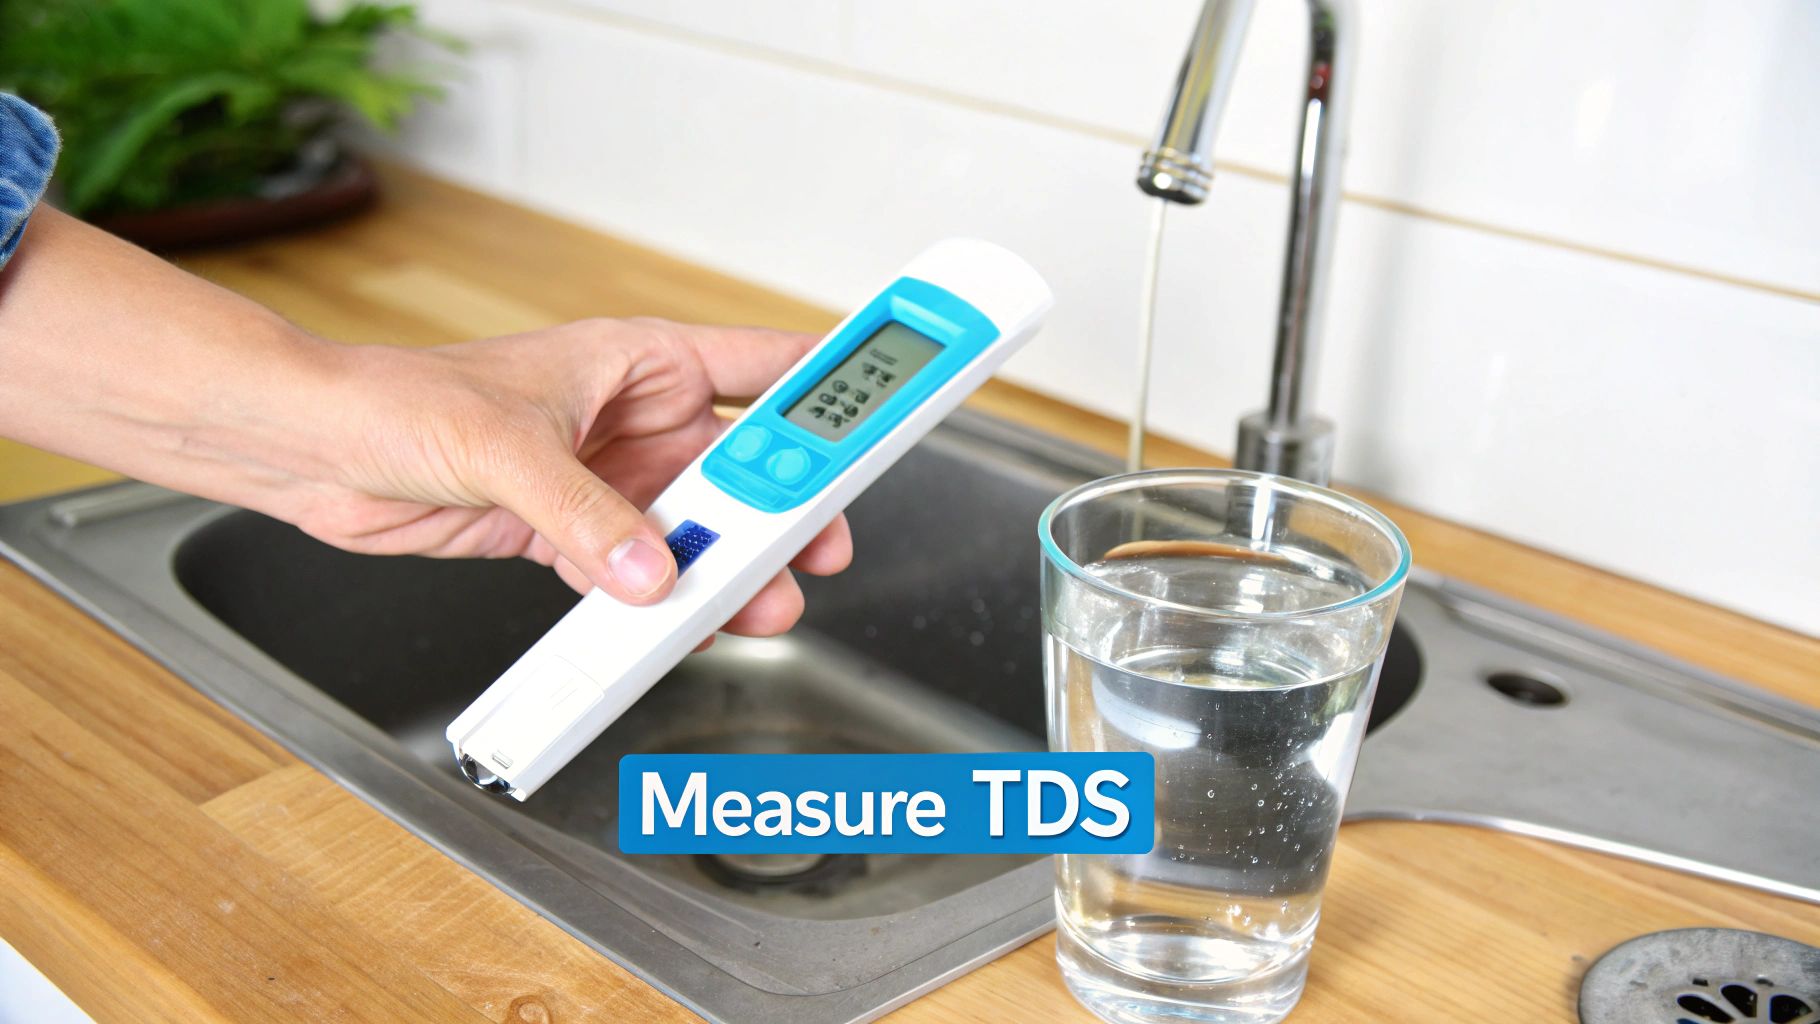
Digital Testers An electronic meter measures Total Dissolved Solids (TDS) in the water. Moderate to High $15 – $50 Getting an instant, precise TDS reading, which is a strong indicator of hardness.
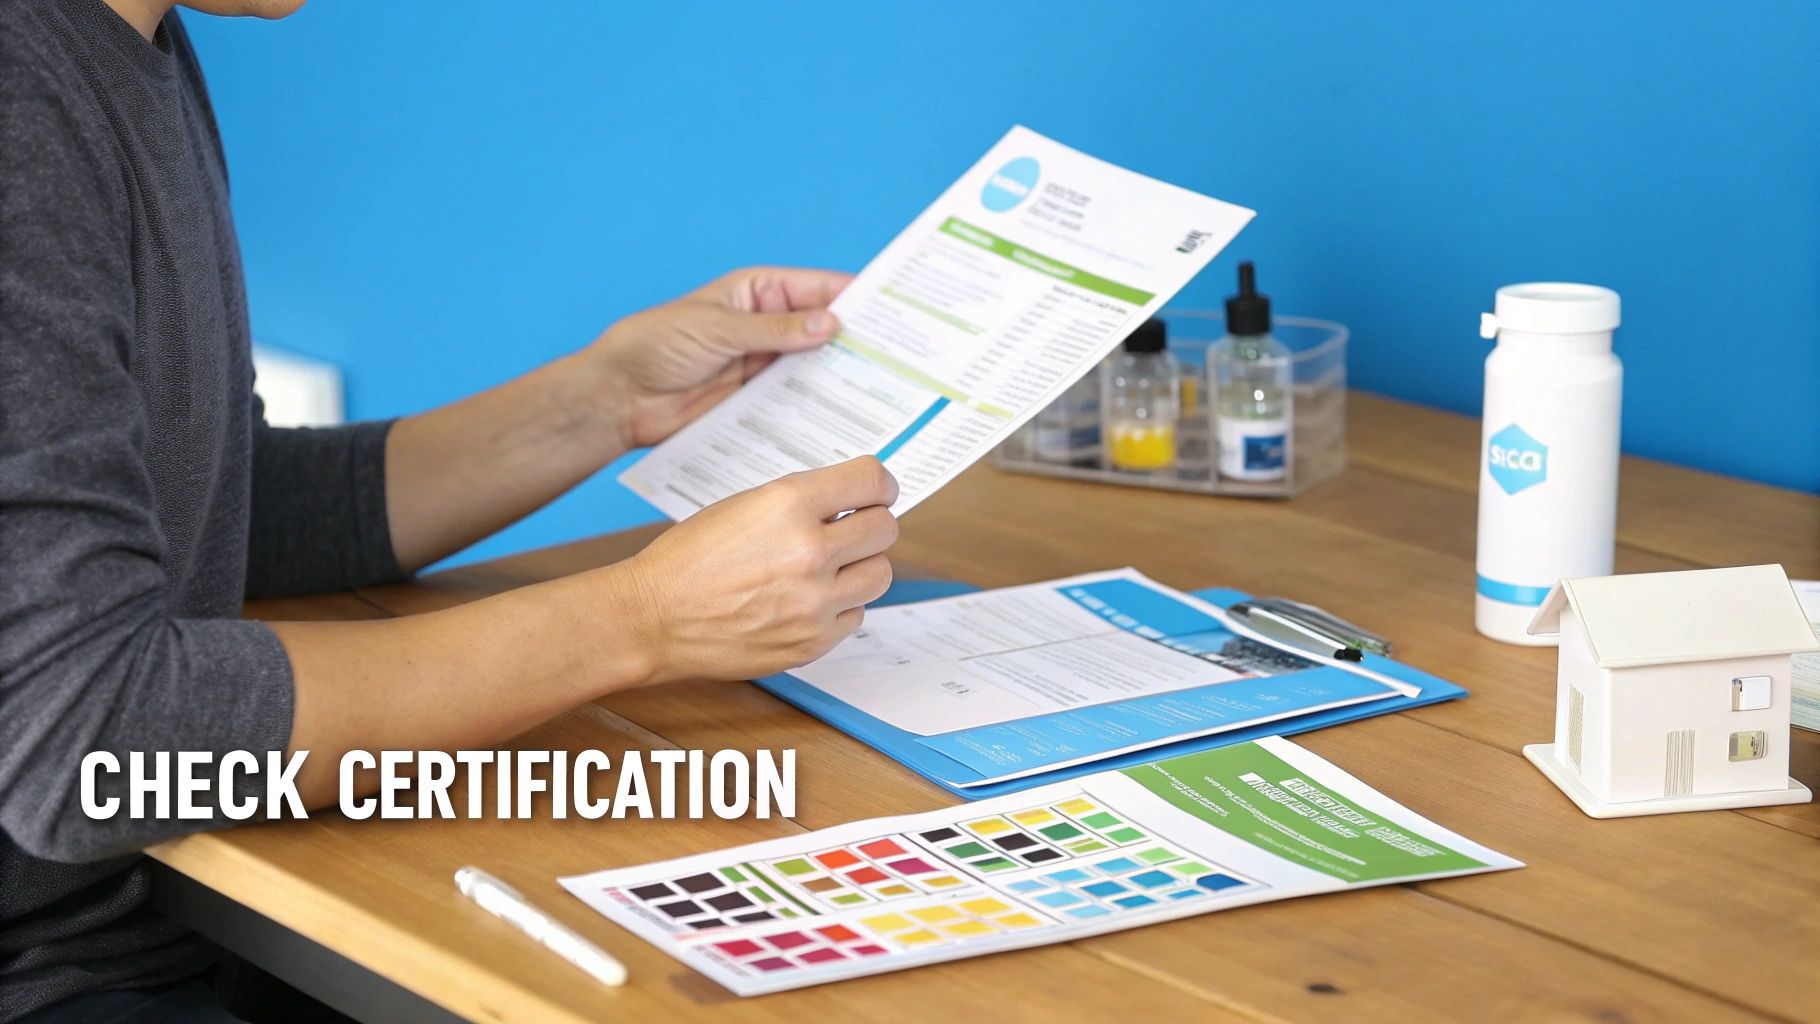
Lab Testing A water sample is mailed to a certified lab for a detailed chemical analysis. Very High $50 – $200+ Homeowners on well water or anyone needing a comprehensive water quality report.

Ultimately, choosing a more precise method like a digital tester or a professional lab test is a smart move. Once you have that specific number, you’ll be armed with the exact data you need to pick the right system, size it correctly, and get it programmed to work perfectly for years to come.

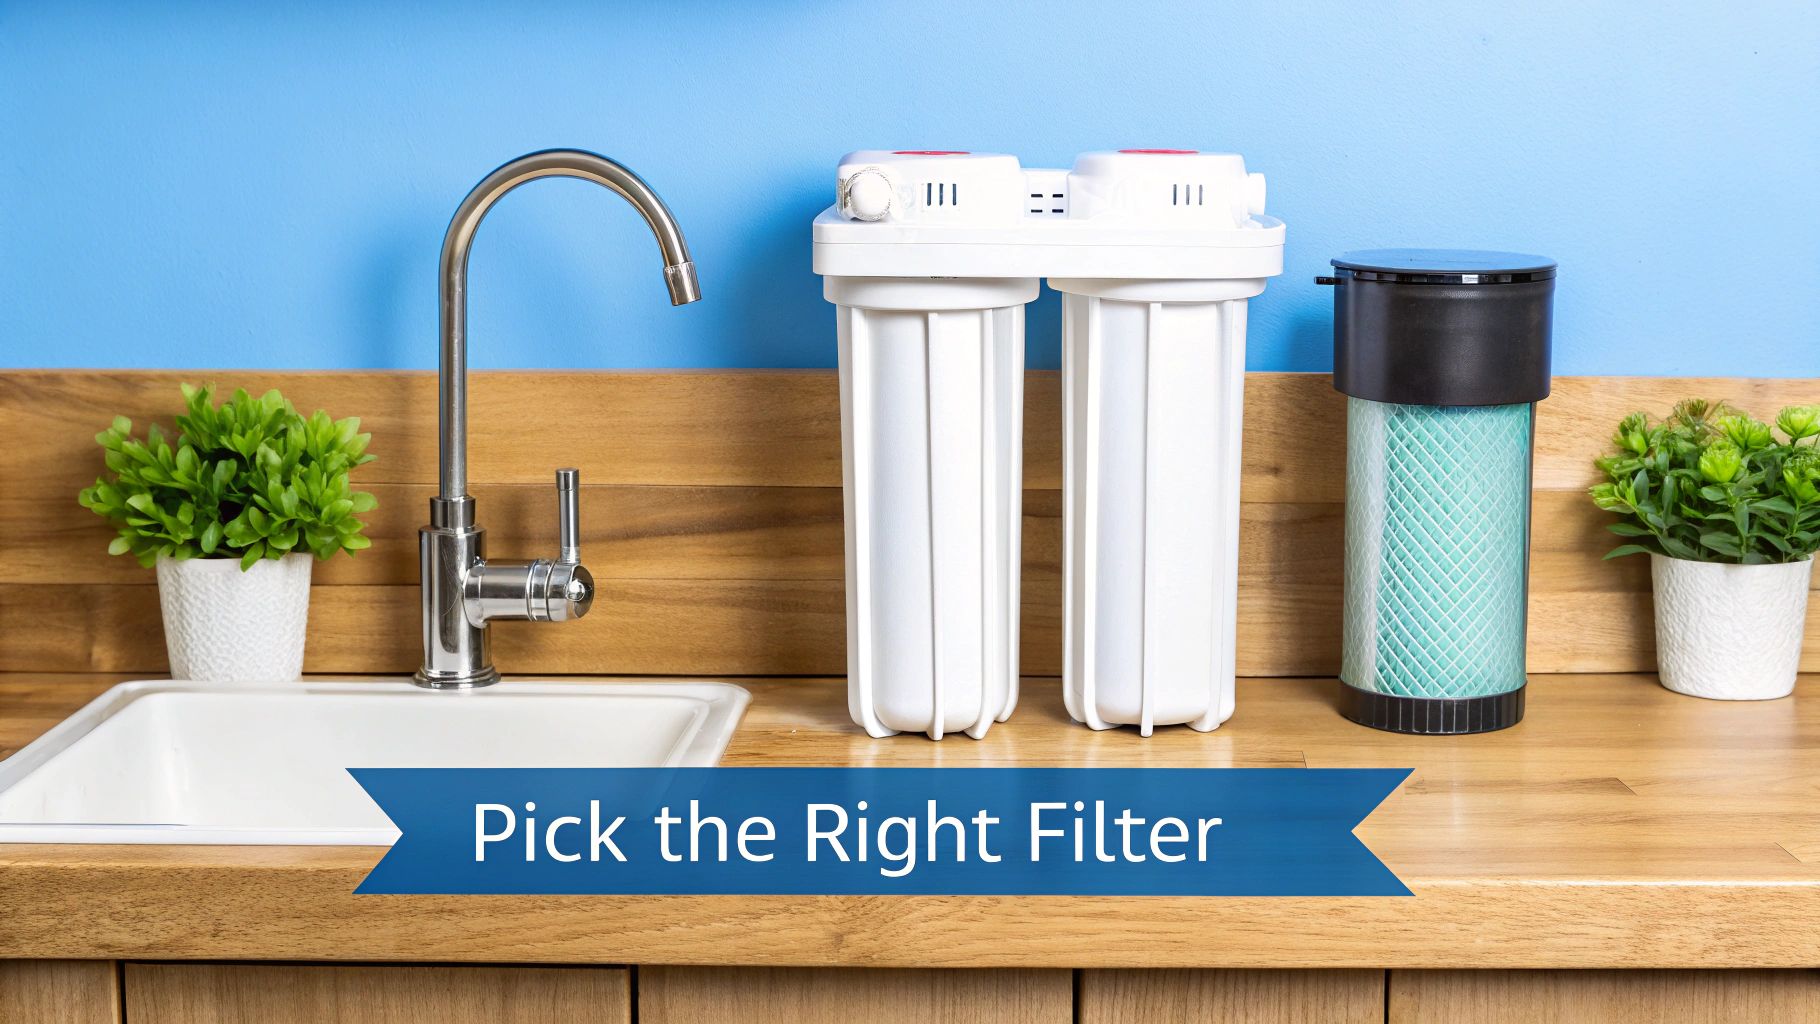
Effective Calcium Removal Methods for Your Home

Alright, you've done your homework and confirmed that hard water is the villain. Now for the fun part: picking your hero. Getting rid of calcium isn't a one-size-fits-all game. It’s about choosing the right tool for the job, whether you need to protect every pipe in your house or just want a perfect, scale-free cup of coffee.

Let's dive into the most common and effective ways to tackle hard water at home. We'll break down how each method works, from classic water softeners that physically rip the calcium out to newer systems that just change its bad behavior. This will give you a clear picture of what's happening to your water and why it matters.

The Gold Standard: Ion Exchange Water Softeners

When you want to remove calcium from your entire home's water supply, the traditional salt-based water softener is still the king of the castle. These systems are the absolute workhorses of the water filtration world, designed specifically to hunt down and eliminate the minerals that make water hard.

Think of it as a microscopic nightclub bouncer. Inside the main tank is a bed of tiny resin beads covered in sodium ions. As your hard water flows through, the rowdy calcium and magnesium ions, which have a stronger electrical charge, get grabbed and pulled onto the resin beads. In the process, they kick the weaker sodium ions off and into the water.

That's the "ion exchange" in a nutshell. The hard minerals get trapped, and a tiny, usually unnoticeable amount of sodium takes their place. The result? Truly soft water flowing to every faucet, showerhead, and appliance you own.

Of course, those resin beads can only hold so many troublemakers before they're full. That's when the system needs to clean itself, a process called regeneration.

  • First, the system backwashes the resin tank to flush out any gunk.
  • Next, it sucks a concentrated saltwater solution (brine) from a separate tank to wash the resin beads.
  • The massive wave of sodium in the brine overpowers the trapped calcium and magnesium, kicking them off the resin and sending them down the drain.
  • Finally, the system gives the resin a good rinse to get rid of any leftover brine, leaving it recharged with sodium and ready to get back to work.

The best part is this all happens automatically, usually in the middle of the night, so you never run out of glorious soft water.

Surgical Precision with Reverse Osmosis

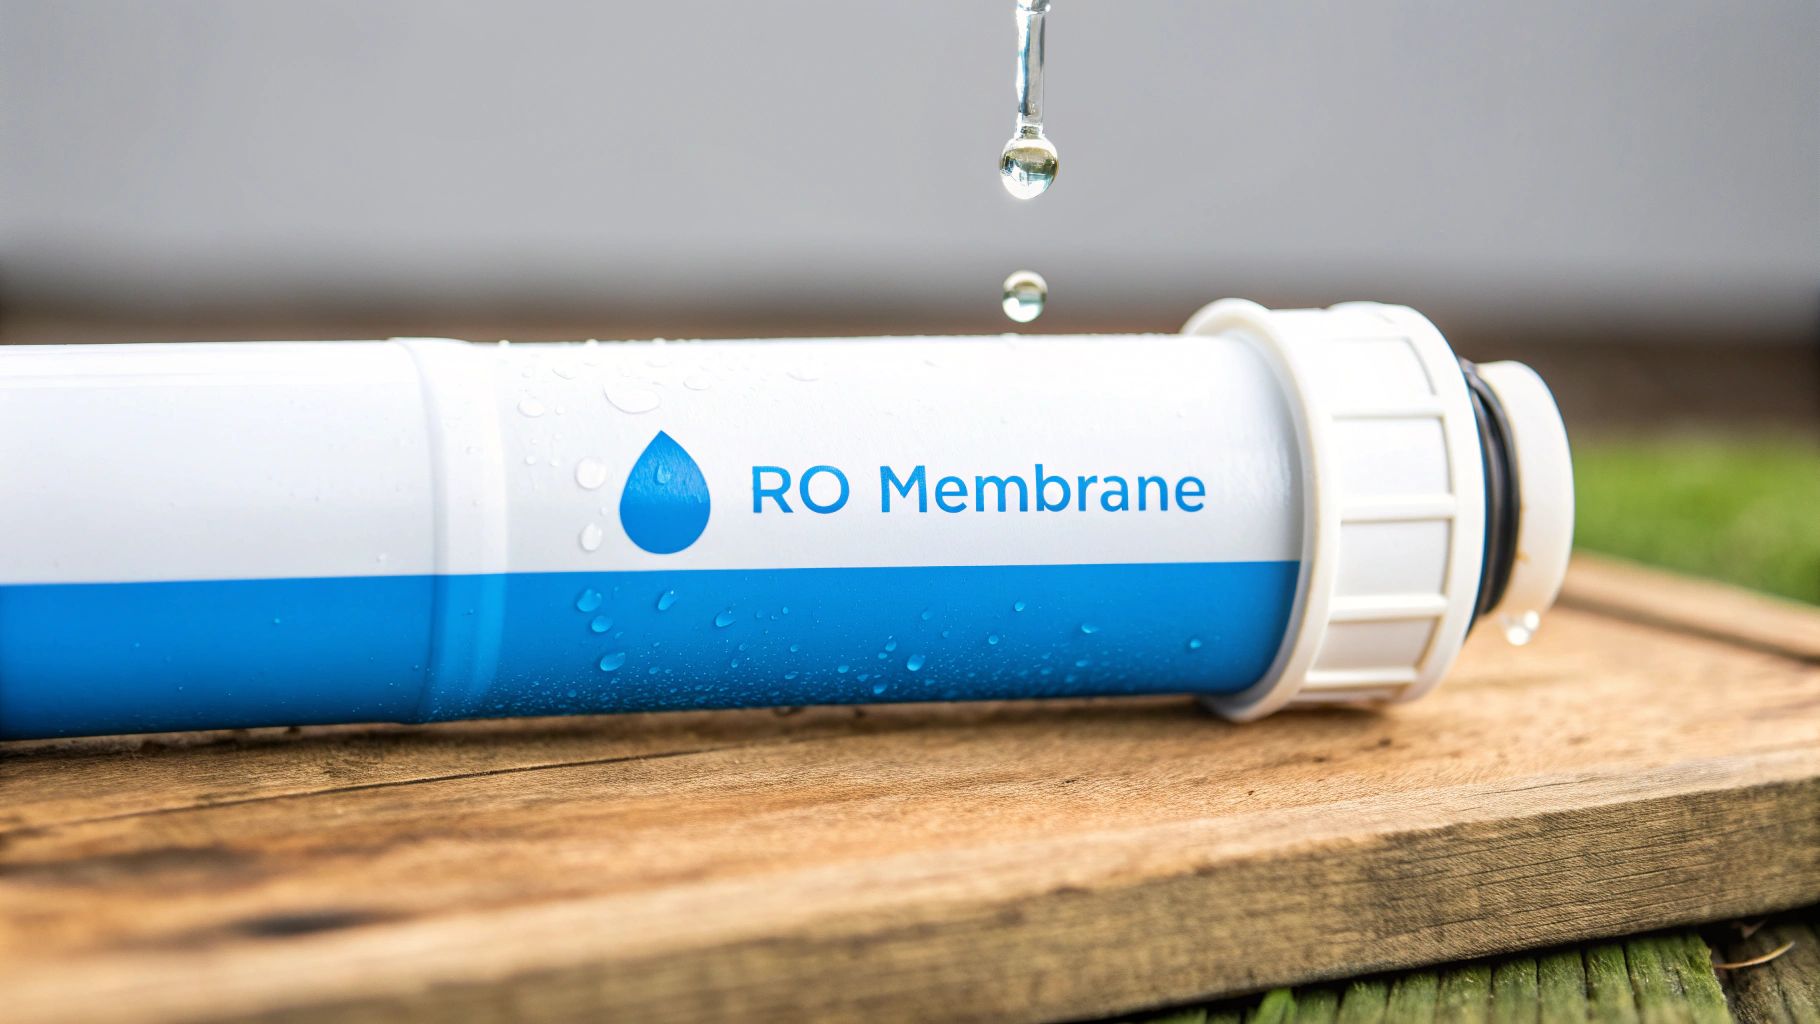
While a water softener is the perfect whole-house guardian, sometimes you need an even higher level of purity—especially for the water you drink and cook with. This is where a Reverse Osmosis (RO) system truly shines. An RO system doesn't just swap minerals; it acts like a microscopic fortress.

Think of it like a top-secret security checkpoint for water molecules. An RO system uses pressure to force water through a special semipermeable membrane—basically a filter with pores so tiny they make a human hair look like a tunnel.

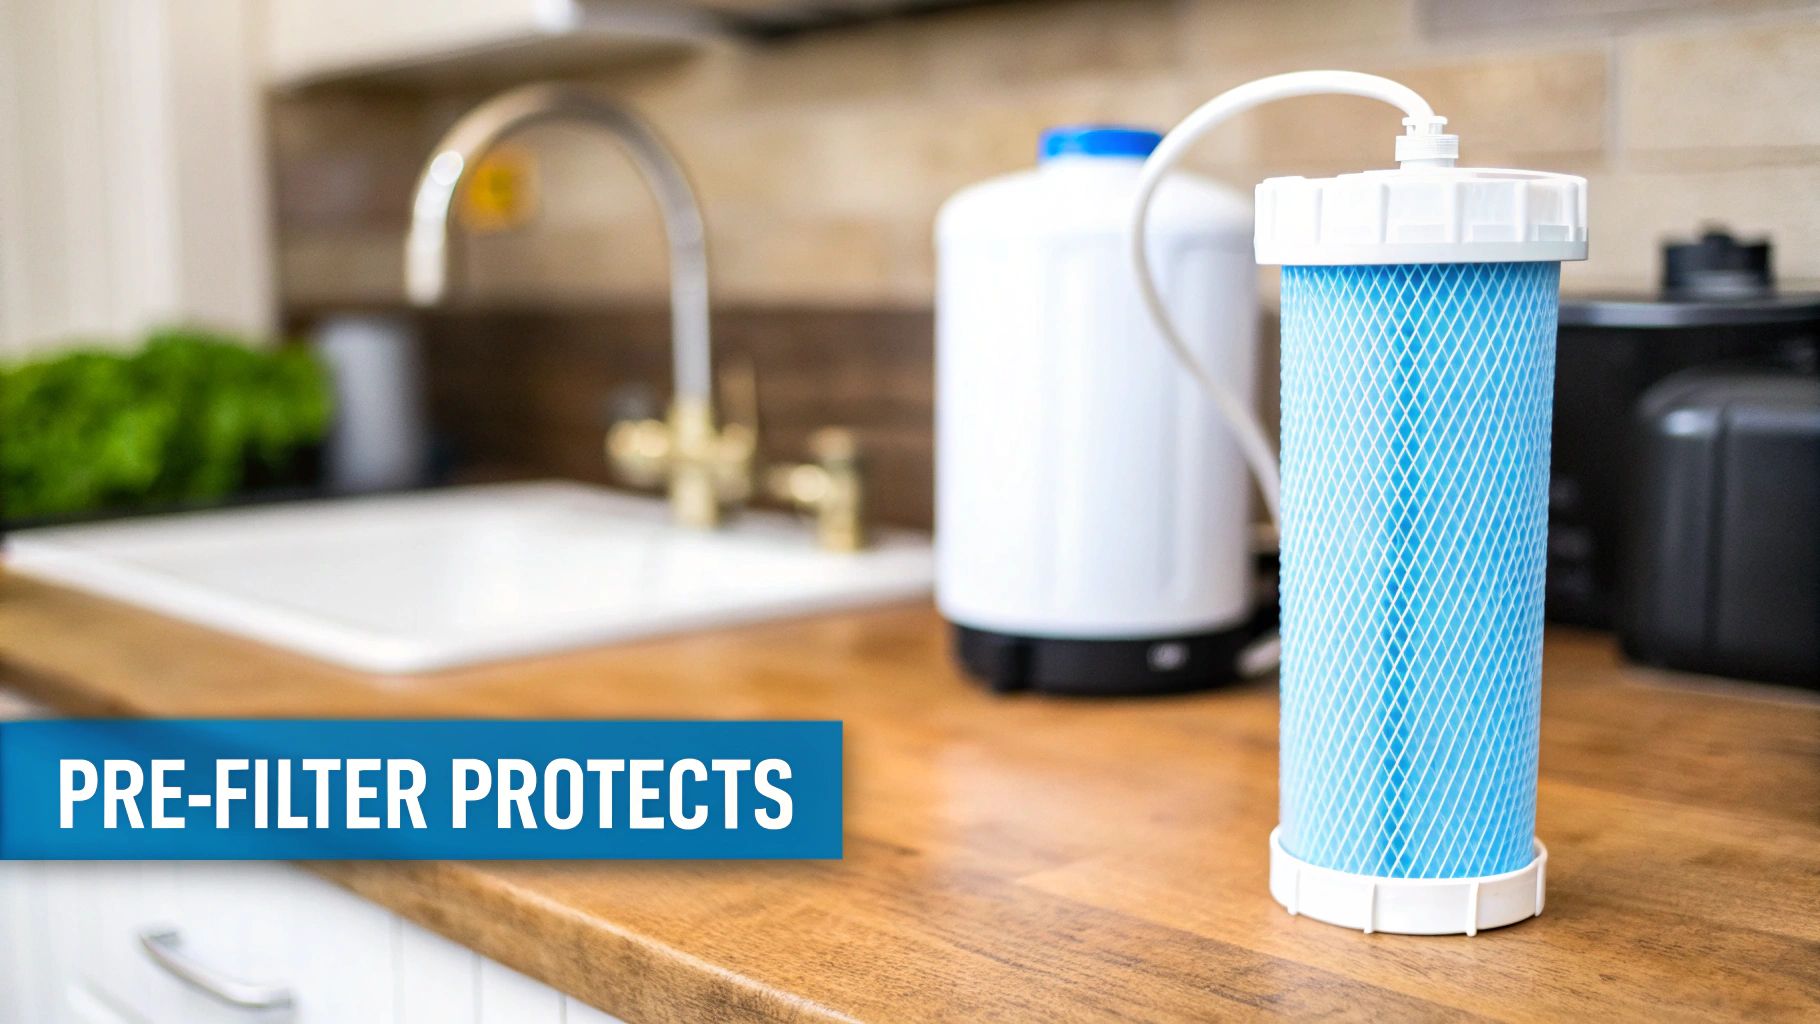
These pores are so incredibly small that only pure water molecules can squeeze through. Calcium, magnesium, and a whole army of other contaminants (like lead, chlorine, and salts) are just too big to pass. They get rejected by the membrane and are unceremoniously washed away down a separate drain line. The purified water is then stored in a small tank under your sink, ready to be dispensed from its own dedicated faucet.

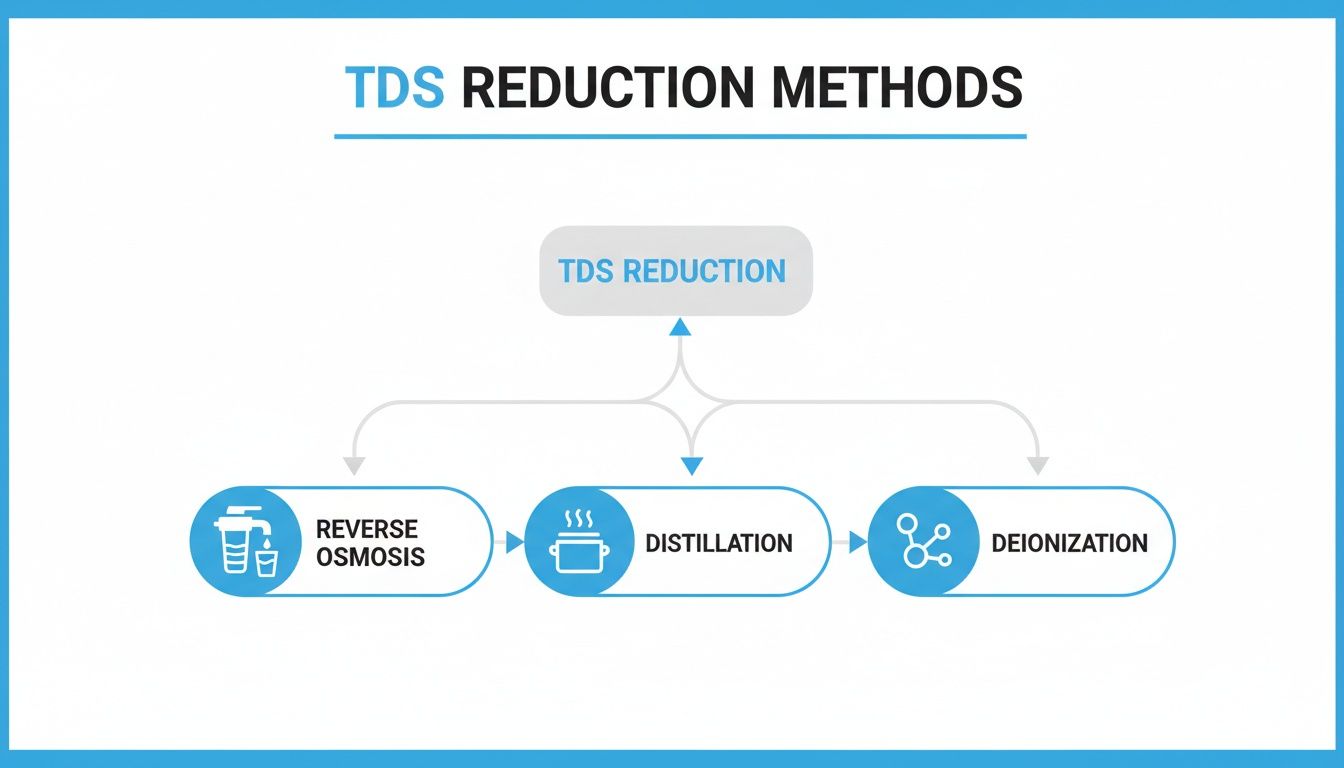
An RO system can strip out up to 99% of all total dissolved solids (TDS), including calcium. This makes it the go-to choice for getting perfectly pure, spot-free water for drinking, making crystal-clear ice, or brewing the best-tasting coffee you've ever had.

Because the process is slow and creates some wastewater, RO is almost always used as a "point-of-use" system at a single tap, not for the whole house. It's the perfect sidekick for a water softener: the softener protects the delicate RO membrane from getting clogged with scale, and the RO system gives you bottled-water quality right from the tap.

A Different Approach: Salt-Free Water Conditioners

For those who want to stop scale damage without adding salt or changing their water's chemistry, there's another popular option: a salt-free water conditioner. Now, it's critical to understand that these systems do not actually remove calcium from the water. Instead, they're like a behavioral therapist, altering calcium's structure so it can't stick to surfaces.

The leading technology here is called Template Assisted Crystallization (TAC). A TAC system uses a special media that acts as a seed for mineral crystals to form. As hard water flows past, the calcium and magnesium ions are grabbed and forced to clump together into tiny, stable micro-crystals.

These crystals are then released back into the water, but because they're now in a hardened, crystalline form, they can't cling to your pipes, faucets, or water heater elements. They just flow right through your plumbing and down the drain, minding their own business.

The big advantages of a TAC system are:

  • No Salt: You never have to buy or lug around those heavy bags of salt.
  • No Wastewater: They don't have a regeneration cycle that flushes water and brine down the drain.
  • Low Maintenance: The media inside can last for several years before it needs to be replaced.

The trade-off is that you don't get the other perks of truly soft water. Soap and shampoo won't lather up any better, you'll still see some water spots (though they should be easier to wipe away), and you won't get that classic silky-smooth feel of soft water on your skin. Think of it strictly as a scale-prevention device.

Calcium Removal Methods At-A-Glance

Trying to decide which system is your champion? It really comes down to your primary goals, budget, and how much maintenance you're willing to do.

This table gives you a quick side-by-side comparison of the top ways to deal with calcium in your home's water.

Filtration Method How It Works Calcium Removal Avg. Initial Cost Ongoing Maintenance
Ion Exchange Softener Swaps calcium ions for sodium ions. Yes, fully removes $800 – $2,500 Adding salt regularly; potential resin replacement every 10-15 years.
Reverse Osmosis (RO) Pushes water through a fine membrane. Yes, filters out $150 – $600 Replacing pre-filters (6-12 months) and RO membrane (2-4 years).
Salt-Free Conditioner (TAC) Crystallizes minerals to prevent scale. No, neutralizes $500 – $1,800 Replacing TAC media every 3-6 years; no salt or electricity needed.

Use this as a starting point. If you want the full benefits of soft water everywhere, a softener is your best bet. If you only care about pristine drinking water, an RO system is perfect. And if you just want to protect your pipes without the salt, a TAC conditioner is a great modern alternative.

Selecting the Right System for Your Household

Choosing a system to remove calcium from your water can feel a little overwhelming. With so many options, sizes, and technical terms floating around, it's easy to get lost. The key is to simplify. You just need to match the right technology to your home, your family, and your water.

Getting this right isn't just about picking a box off a shelf; it's about finding a real-world solution. What works for a couple in a small condo with moderately hard water is going to be totally different from what a family of five on a private well needs.

Sizing Your System Correctly

One of the biggest blunders homeowners make is buying a system that's too small or way too big. An undersized water softener, for example, will constantly be playing catch-up. It'll regenerate too often, which just burns through salt and water. Go too big, and you've just spent more money than you needed to upfront.

To get the sizing just right, you need two key pieces of info:

  • Your household water consumption: The average person uses around 80-100 gallons of water a day. Just multiply that by the number of people in your home to get a daily total. For a family of four, that's roughly 320-400 gallons per day.
  • Your water hardness level: This is the number you got from your water test, measured in grains per gallon (GPG). This tells you exactly how much of a workout the system has to do for every single gallon that flows through it.

With those two numbers, you can figure out the "grains of hardness" your system has to remove each day. Simply multiply your daily water usage by your GPG. For our family of four using 320 gallons with 15 GPG water, that’s 4,800 grains of hardness daily. This number becomes your guidepost for choosing a softener with the right capacity.

A correctly sized system means you'll have a steady supply of soft water without the system constantly regenerating. That saves you money on salt and water over the long haul. It's really the difference between a "set-it-and-forget-it" solution and a constant headache.

Understanding Water Flow Rate

Beyond just capacity, the other critical factor is the flow rate, which is measured in gallons per minute (GPM). This number tells you how much softened water the system can actually deliver at one time. If the flow rate is too low for your family's peak demand, you're going to notice a frustrating drop in water pressure.

Picture this: someone's in the shower, the dishwasher is running, and you flush a toilet. A system with a low GPM just can't keep up with that demand, and the person in the shower suddenly feels the water pressure drop to a trickle. For a typical family home, a system with a flow rate of at least 10-12 GPM is a safe bet to keep everyone happy and the pressure strong.

Whole-House vs. Point-of-Use Solutions

Next up, you have to decide where you want to treat your water. This really boils down to two main approaches: treating all the water that enters your home or just zeroing in on a specific faucet.

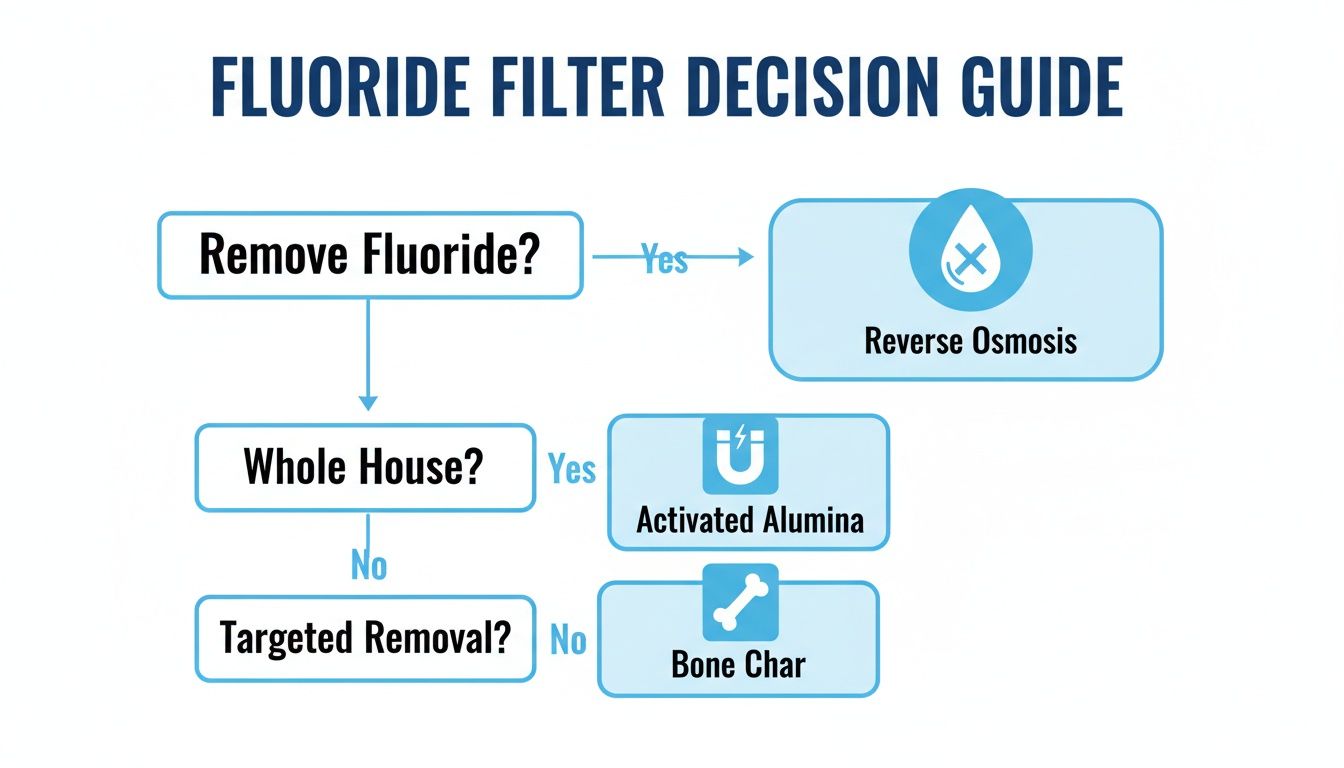
This quick decision tree can help you visualize which path makes the most sense for what you're trying to fix.

Flowchart for calcium removal from water, addressing problems like scale buildup or drinking water concerns.

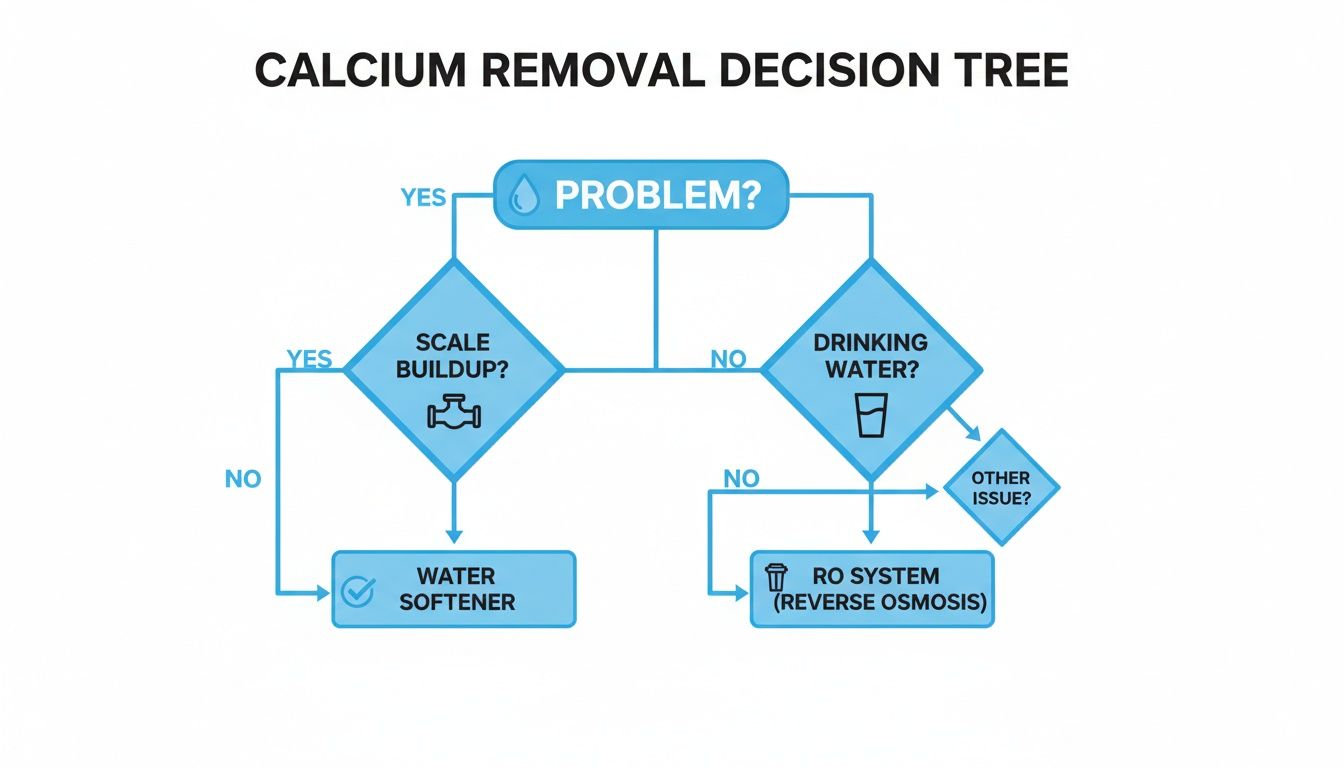
As the chart lays out, if your main headache is scale buildup wrecking your entire home, a whole-house system is the clear winner.

Whole-House (Point-of-Entry) Systems
These are the heavy hitters, like ion exchange water softeners or salt-free conditioners. They get installed right where your main water line enters the house, treating every drop before it can reach your pipes, appliances, and faucets.

  • Best for: Protecting your entire plumbing system, your water heater, dishwasher, and washing machine from scale. You also get the benefit of soft water for showering, which can be great for your skin and hair.
  • Real-World Scenario: A large family in a rural area with extremely hard well water (25+ GPG). For them, a whole-house softener isn't a luxury—it's essential to prevent constant appliance repairs and keep their plumbing from clogging up.

Point-of-Use (POU) Systems
These systems are specialists. They're designed to deliver highly purified water to a single spot, which is usually the kitchen sink. The most common example is an under-sink reverse osmosis (RO) filter.

  • Best for: Getting the highest purity for your drinking and cooking water. An RO system is the gold standard for removing not just calcium but a whole host of other contaminants, giving you bottled-water quality right from a dedicated faucet. For more helpful insights, you can explore additional water filtration advice from Water Filter Advisor.
  • Real-World Scenario: A couple living in a city apartment with moderately hard water. They aren't too worried about their pipes but really want to get rid of calcium and chlorine for better-tasting coffee and crystal-clear ice. A simple under-sink RO system is the perfect, budget-friendly fit for their needs.

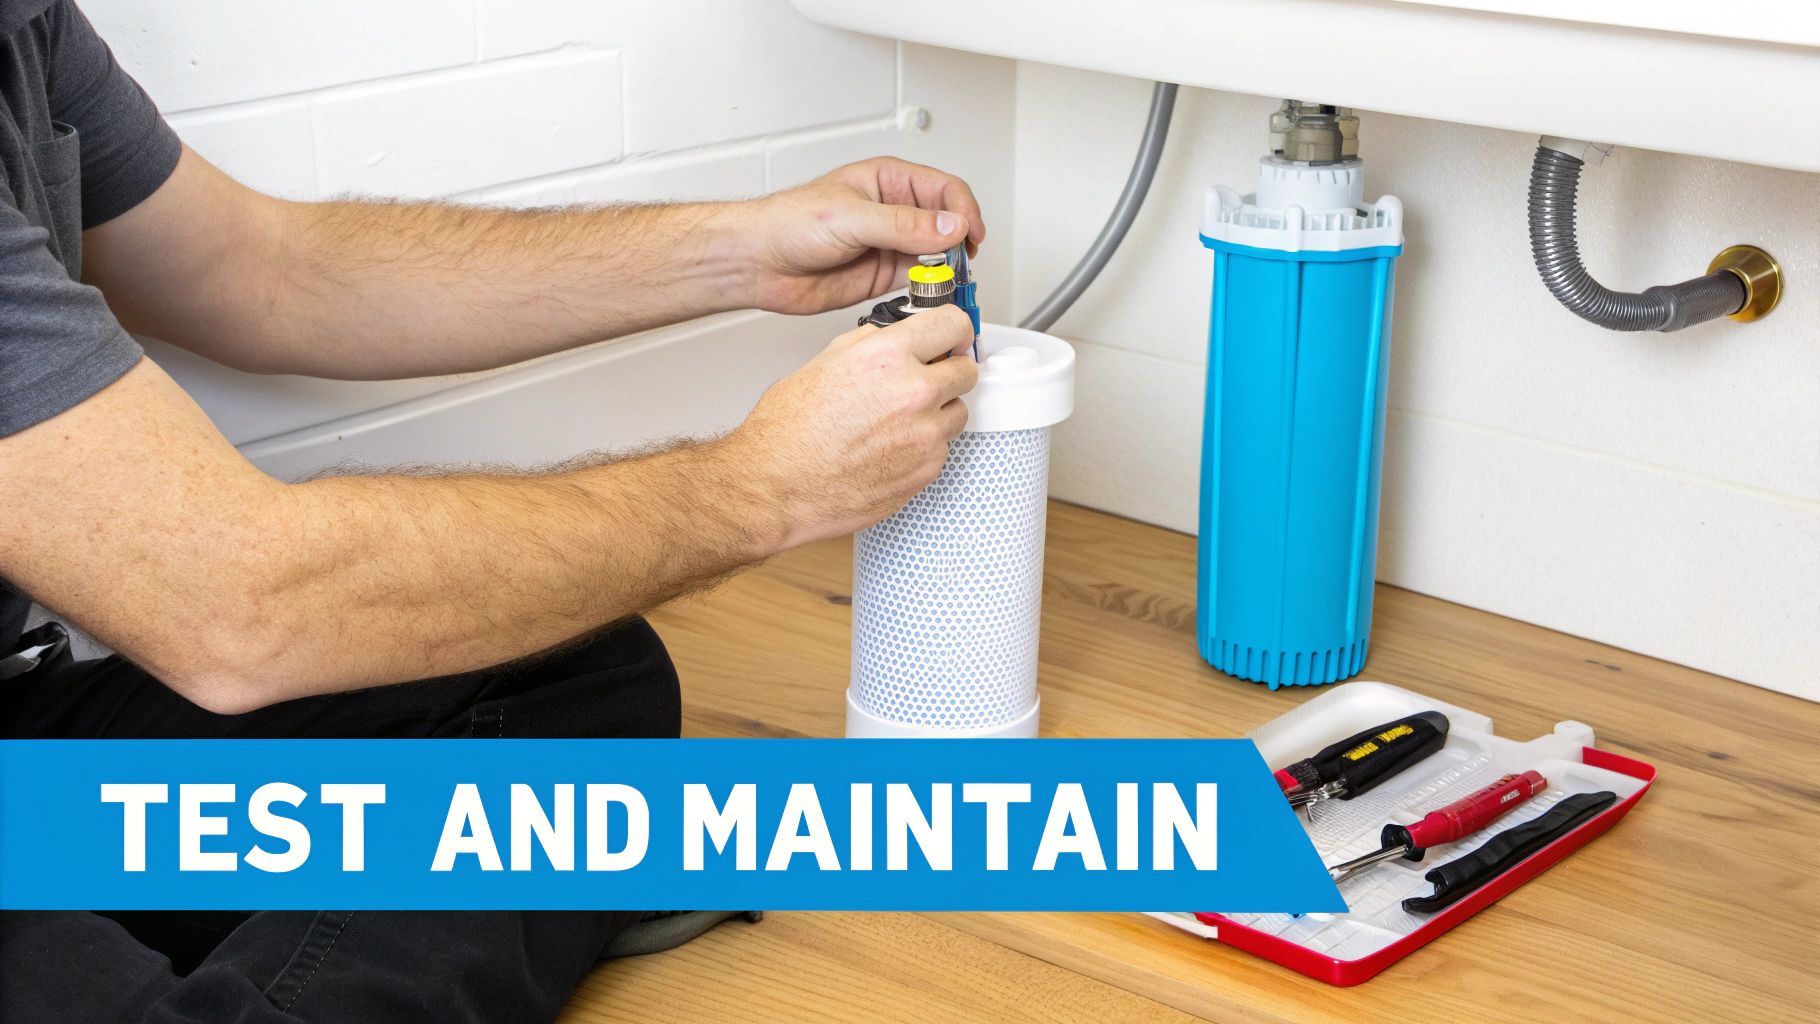
Installation and Long-Term System Care

A man in a blue shirt crouches, performing system maintenance on a white water filter in a cabinet.

Choosing the right system is the hard part; getting it running and keeping it that way shouldn't feel like a chore. The final hurdle is installation, followed by a simple care routine that will keep your system performing flawlessly for years. Nailing this ensures you get every penny's worth out of your investment and enjoy consistently great water.

Some systems are perfect for a weekend DIY project, while others really need a pro's touch. It all comes down to the system type and how comfortable you are with plumbing.

Point-of-use units, like an under-sink RO filter, are usually pretty straightforward. The kits are designed for homeowners, with clear instructions and push-to-connect fittings that take the guesswork out of it. If you can read a manual and operate a drill, you can probably have it done in an afternoon.

Whole-house systems are a completely different animal. Installing a water softener or a salt-free conditioner means cutting into your main water line. This is not the time for trial and error. It demands precision, the right tools, and a real understanding of local plumbing codes. A small mistake here can quickly turn into a massive leak and some seriously expensive water damage.

Pro Tip: Unless you've got serious plumbing experience, just hire a licensed plumber for a whole-house system. It's a smart move that guarantees the job is done right, meets code, and keeps your manufacturer's warranty intact.

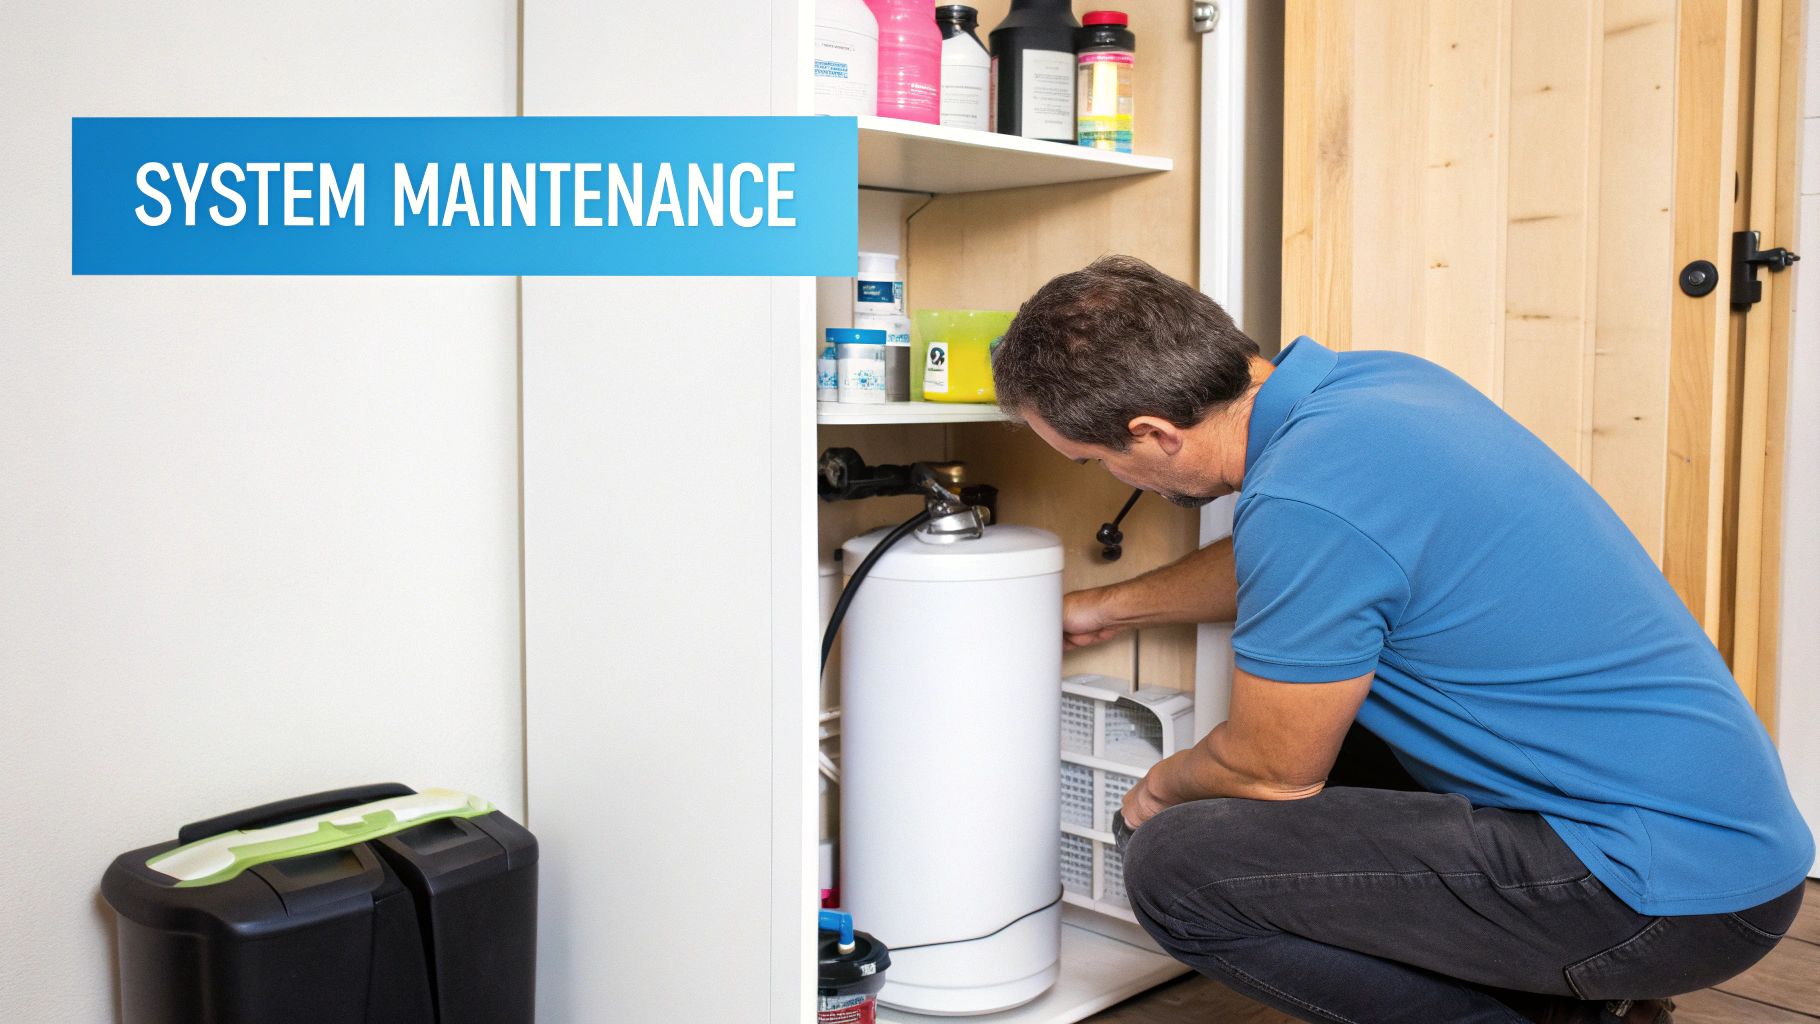
Creating a Simple Maintenance Routine

Once everything is up and running, a little TLC is all you need. The best part is that modern water filtration systems are built to be incredibly low-maintenance. Your to-do list will just depend on the tech you picked.

Here's what the typical upkeep looks like for the most popular systems:

  • Ion Exchange Water Softeners: This is about as easy as it gets. Your main job is just keeping the brine tank filled with salt. Glance at the salt level once a month and top it off. Most tanks hold enough to last a few months anyway. Stick with high-quality salt to avoid "salt bridging," a hard crust that can form and stop the system from working.
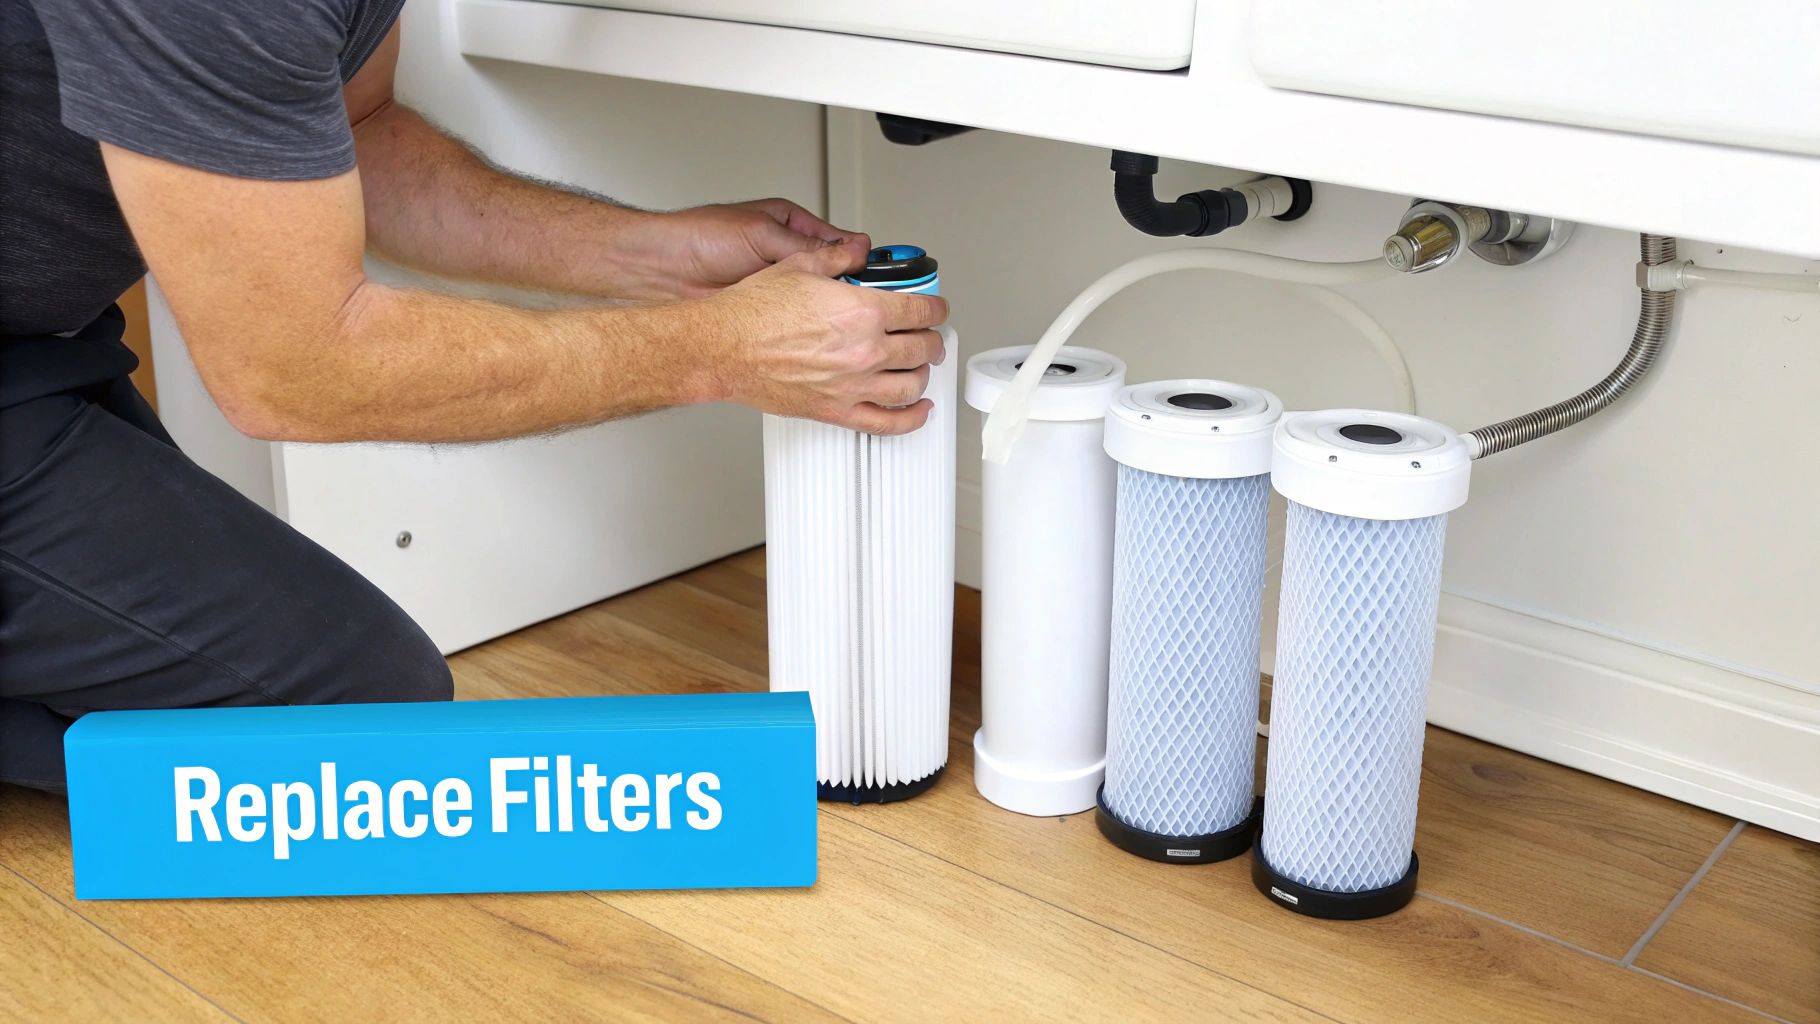
  • Reverse Osmosis (RO) Systems: These systems rely on filter changes to keep the water pure. The sediment and carbon pre-filters generally need to be swapped out every 6 to 12 months. The main RO membrane is much more durable, lasting anywhere from 2 to 4 years. Your system's manual will have a schedule—just pop a reminder in your phone's calendar.
  • Salt-Free Water Conditioners (TAC): If you want "set it and forget it," this is it. The special TAC media that neutralizes the calcium usually lasts 3 to 6 years before you need to think about replacing it. There's no salt to buy, no electricity, and no drain line to monitor.

Troubleshooting Common Hiccups

Even the most reliable system can have an off day. If you notice your water quality has changed, don't panic. Most problems are surprisingly simple to diagnose and fix.

A sudden drop in water pressure is a classic sign. The first thing to check is any pre-filter on your system. A clogged sediment filter is the usual suspect, and it's a cheap and easy fix. On an RO system, low pressure could also signal that it's time to change the filters or that the storage tank's air bladder needs a top-up.

What if your water starts feeling hard again? With a water softener, the fix is almost always simple. First, check if you're out of salt or if a salt bridge has formed. If the salt looks fine, make sure the system's settings—especially the water hardness level you programmed in—are correct and that the unit has power. These few checks will solve the issue over 90% of the time, getting you back to soft, scale-free water.

Frequently Asked Questions About Calcium Removal

Even after digging into the best ways to get rid of calcium, some questions always seem to pop up. Let's clear the air and tackle some of the most common worries homeowners have about taming their hard water for good.

Will a Water Softener Make My Water Taste Salty?

This is easily the biggest myth out there, and the short answer is no. A properly working water softener adds a tiny, almost always undetectable amount of sodium to your water. The exact amount is tied directly to how hard your water is to begin with.

For instance, if your water is moderately hard at 15 GPG, the process adds about 280 mg of sodium per gallon. For a little real-world context, a single slice of white bread has around 170 mg of sodium. Most people never notice the taste.

That said, if you're on a strict sodium-restricted diet or just don't want any added minerals in your drinking water, pairing a whole-house softener with a point-of-use reverse osmosis system at your kitchen sink is the perfect combo.

Can I Use a Water Filter Pitcher to Remove Calcium?

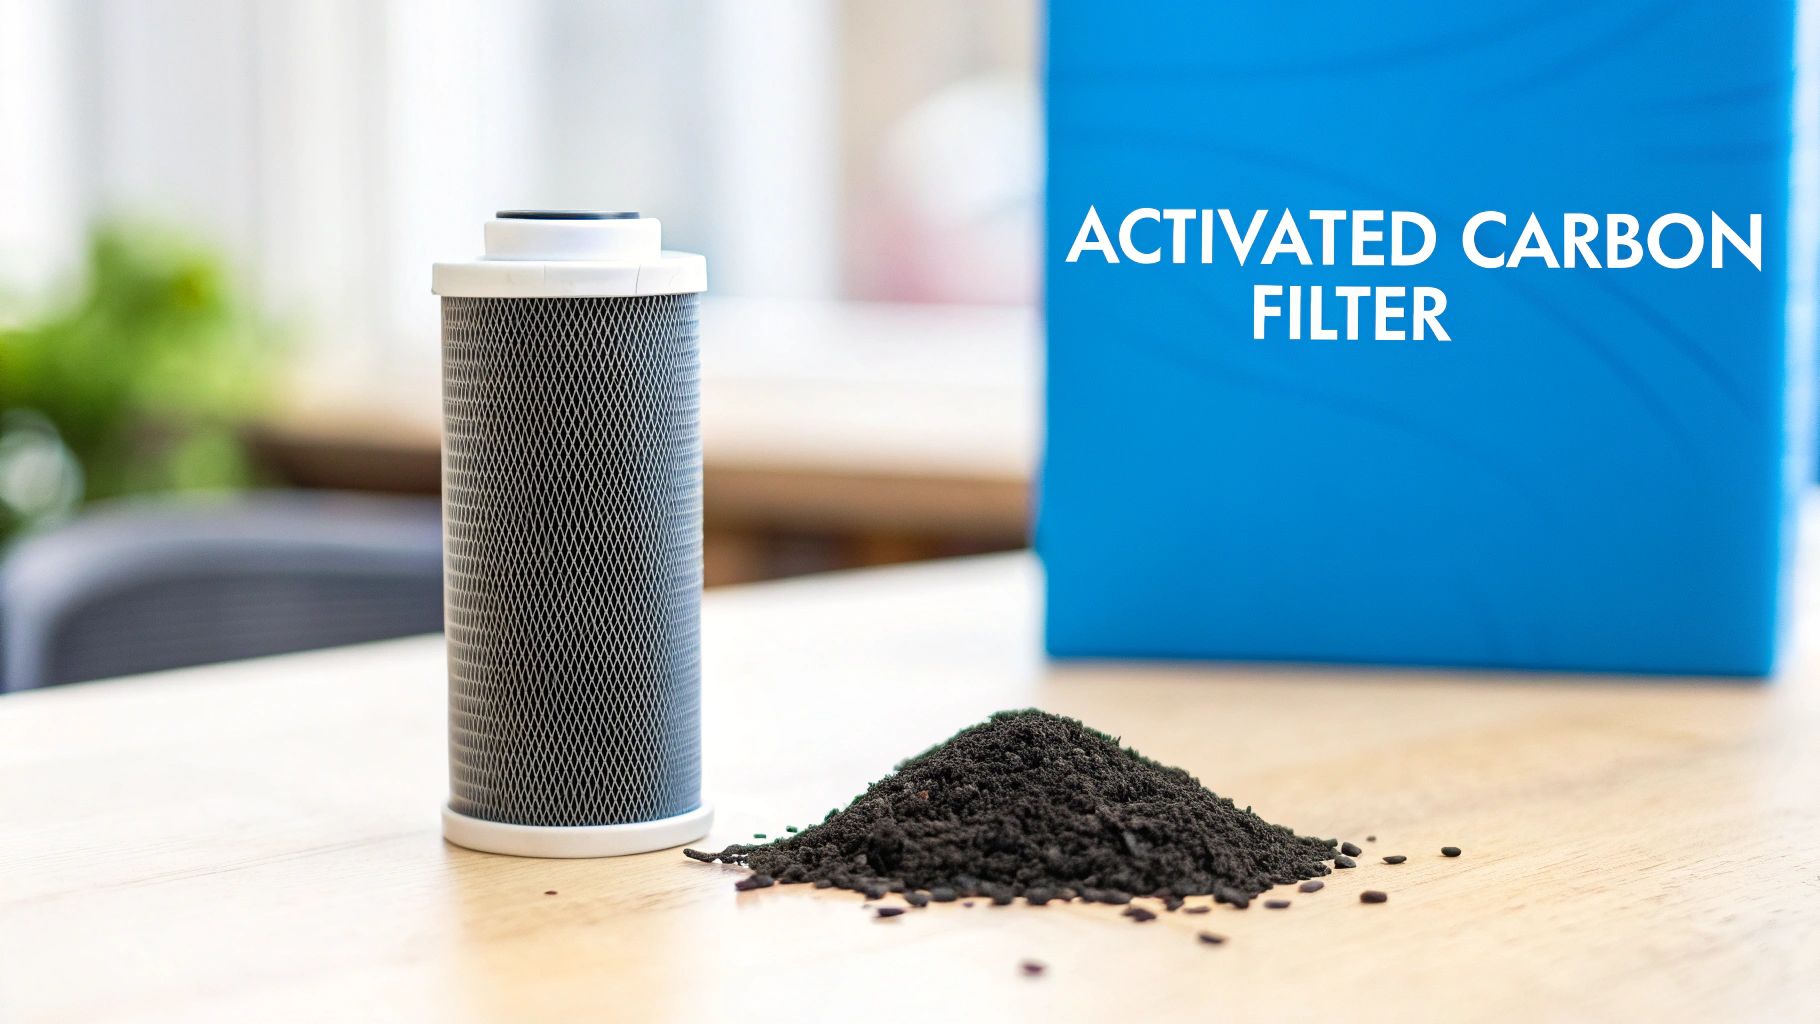
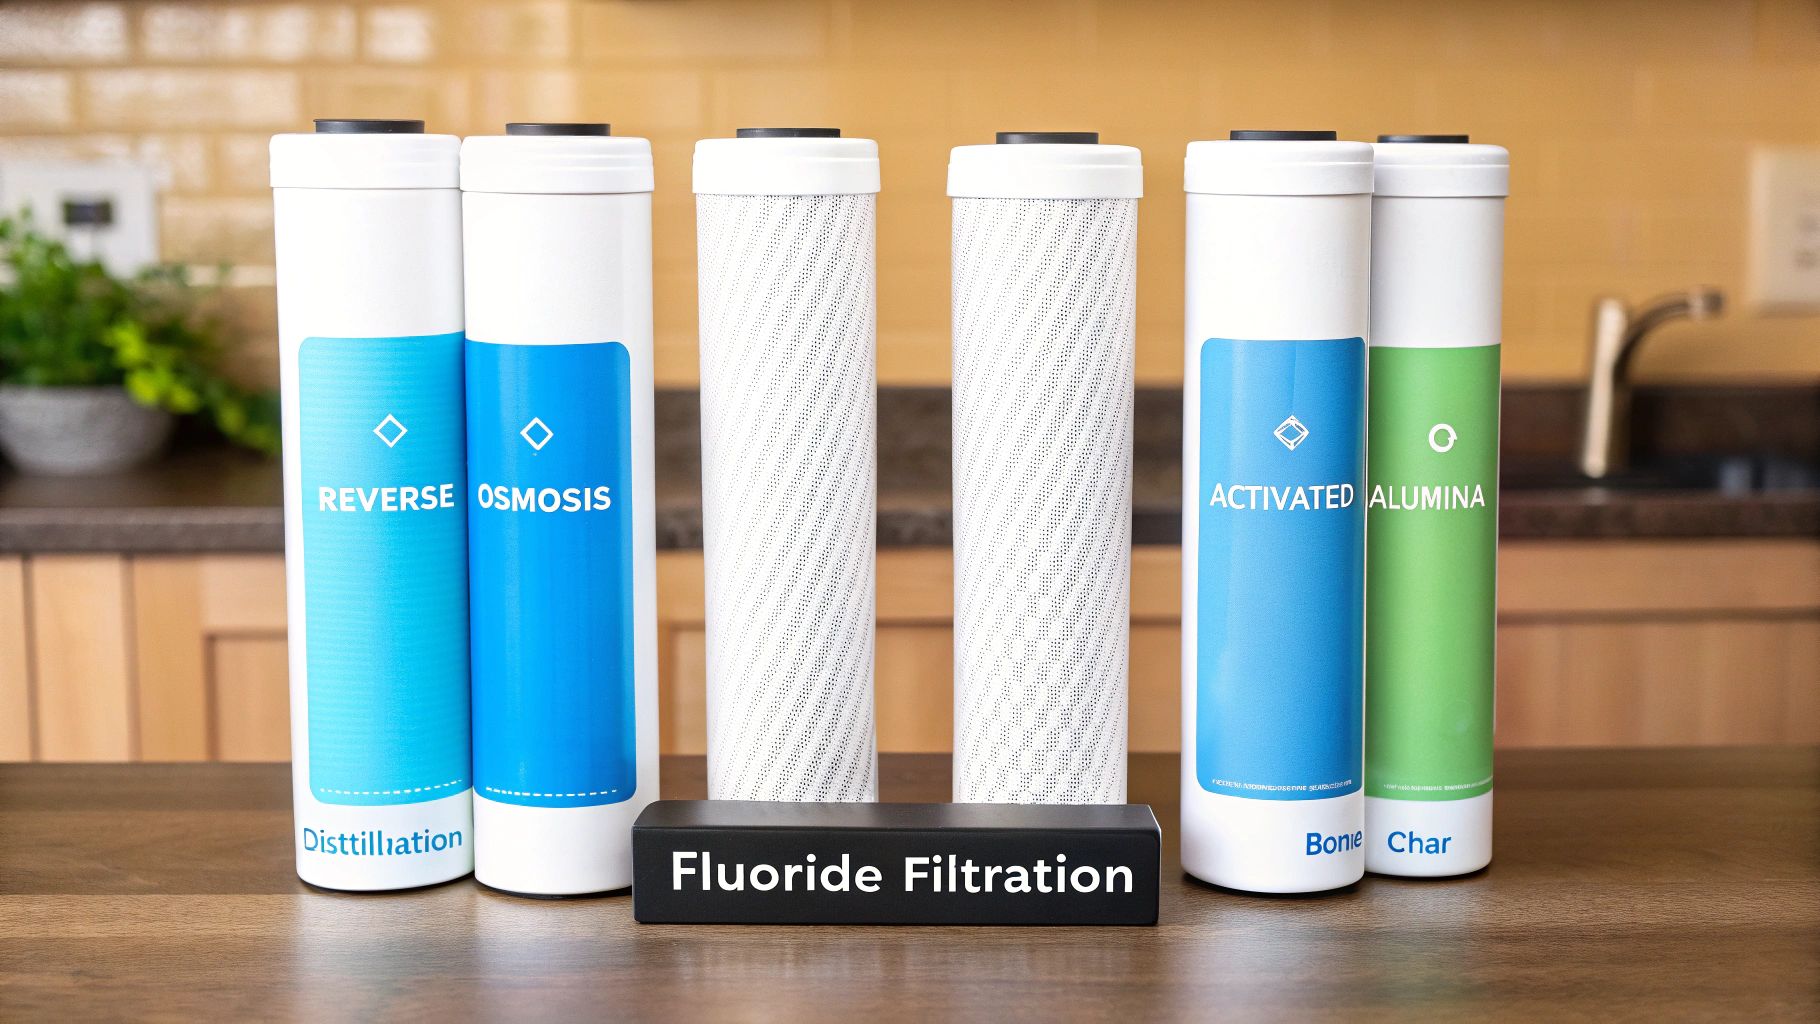
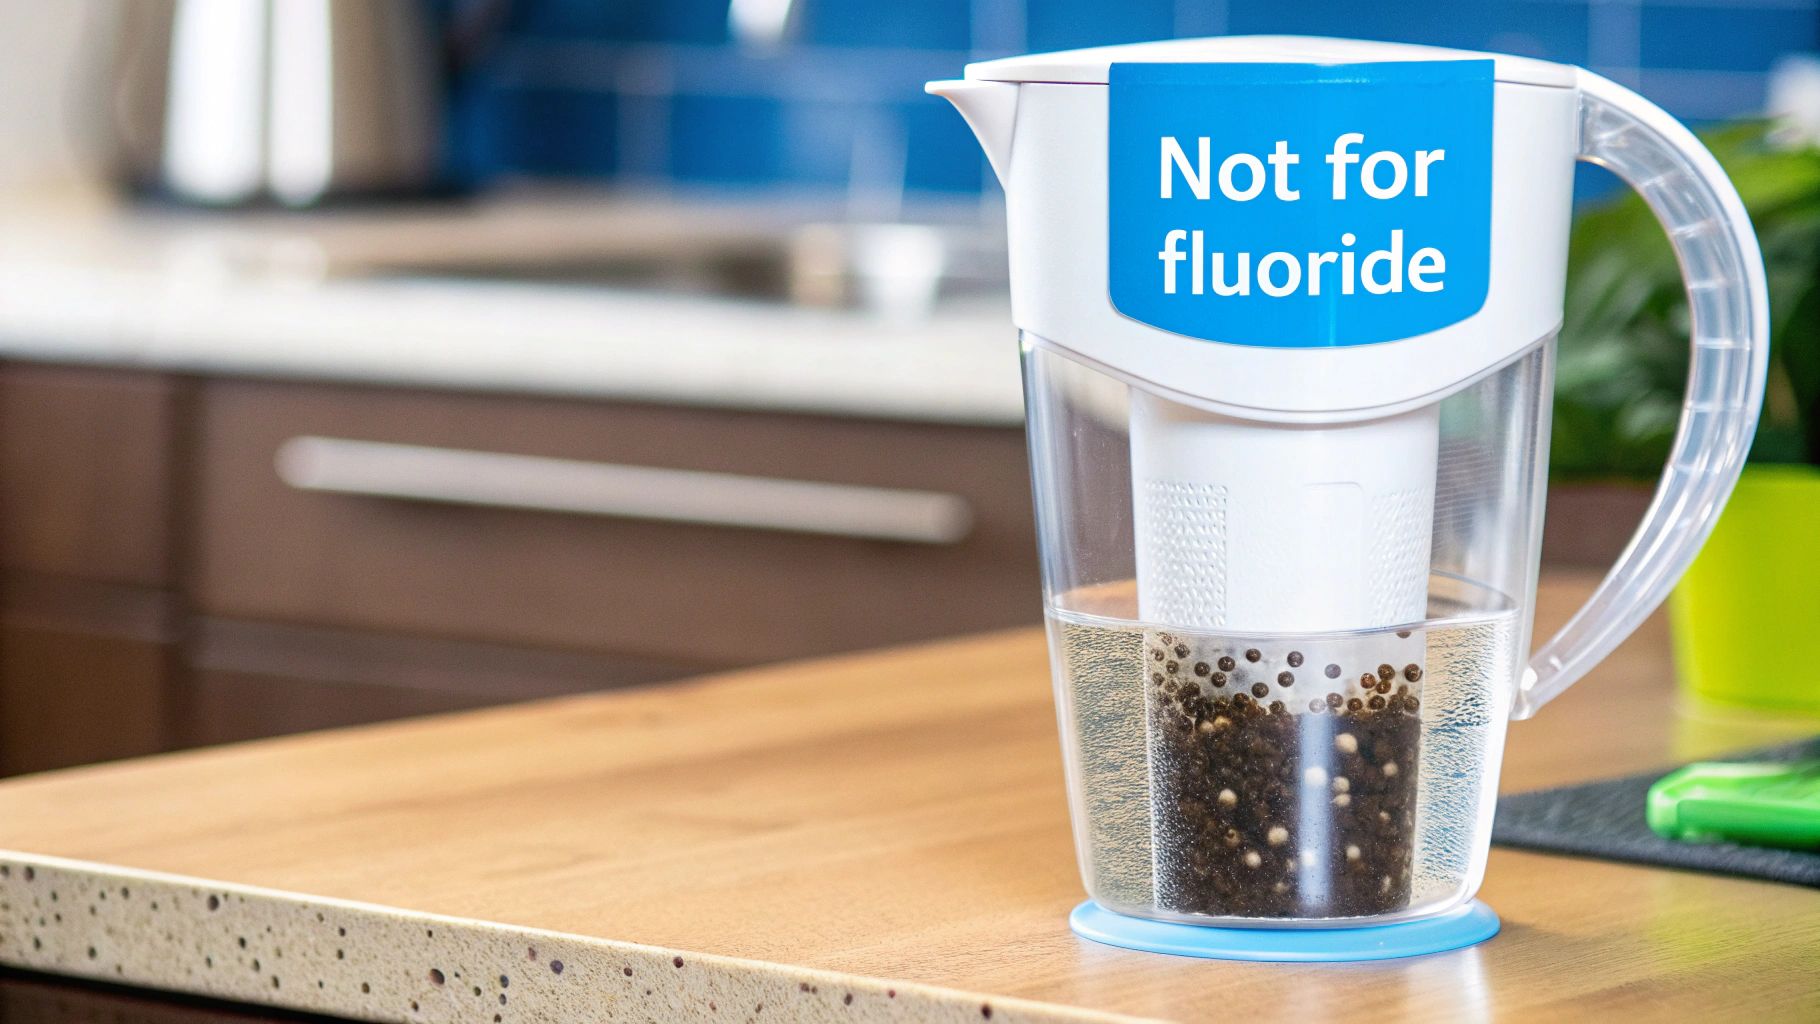
Those standard filter pitchers you keep in the fridge are really only good for one thing: making your water taste and smell better. They use activated carbon to trap things like chlorine, which definitely makes for a more pleasant glass of water.

But when it comes to dissolved minerals like calcium and magnesium, they don't do a thing. Getting rid of hardness requires a specific technology like ion exchange or reverse osmosis. You might see some niche pitchers claim a minor hardness reduction, but they just can’t handle the job in a way that will make a real difference for your appliances or even stop scale from forming in your kettle.

What Is the Difference Between a Water Softener and a Salt-Free Water Conditioner?

This is a really important distinction, and it all comes down to how they deal with calcium.

  • A water softener physically removes the calcium and magnesium minerals from the water using ion exchange. The result is genuinely soft water.
  • A salt-free water conditioner (which uses Template Assisted Crystallization, or TAC) doesn't remove the minerals at all. Instead, it changes their structure, crystallizing them so they can’t stick to pipes and form scale.

So, your choice really depends on what you're trying to achieve. If you're after that silky-smooth feeling in the shower and better lather from your soap, a traditional softener is the only way to go. If your main goal is simply to protect your home’s plumbing from scale buildup without the hassle of salt, a conditioner is a fantastic modern alternative.

How Often Do I Need to Replace the Resin in My Water Softener?

The resin bed is the heart of your softener, and it's surprisingly tough. With a little care and typical city water (that isn't loaded with iron or chlorine), a high-quality resin bed can last anywhere from 10 to 20 years.

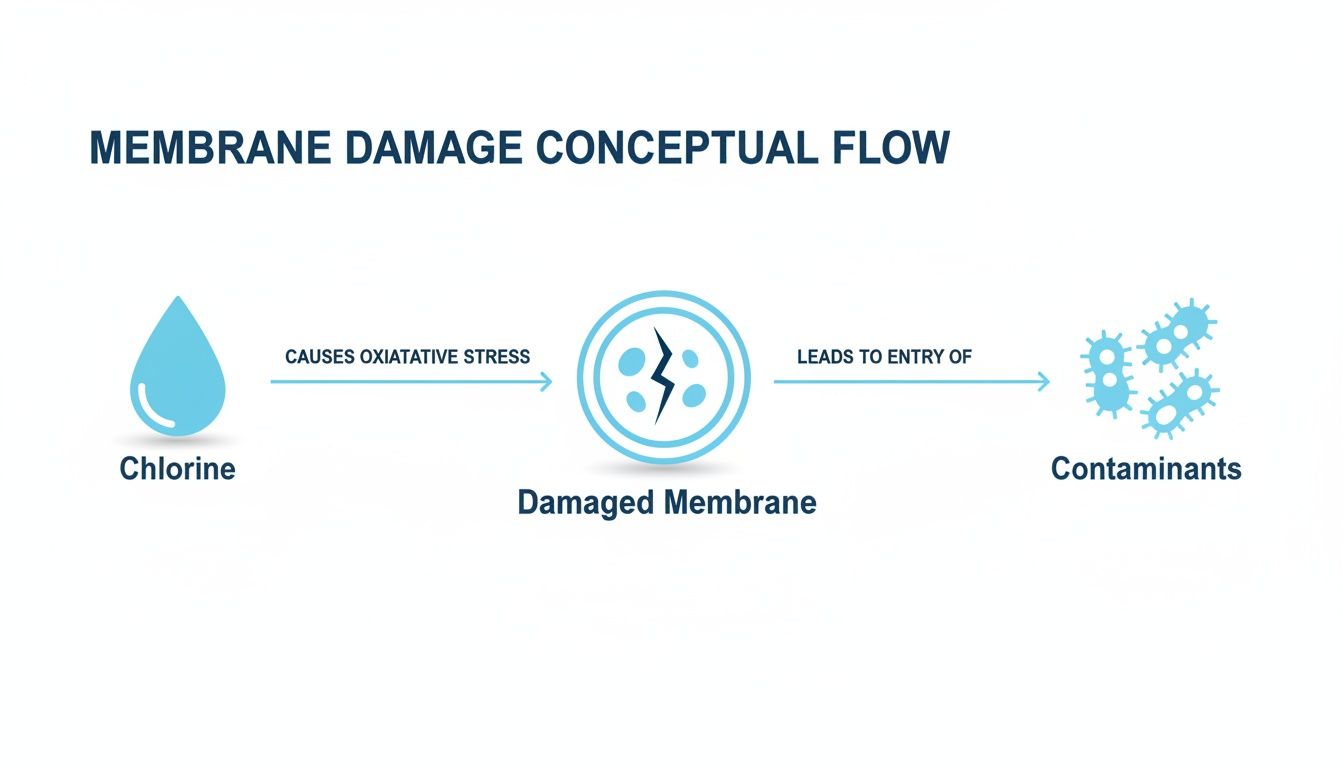
The things that really shorten its lifespan are high levels of chlorine or iron, which can break down the tiny resin beads over time. You’ll know it might be time for a change if your system seems to be regenerating correctly but your water still feels hard. Another tell-tale sign is a big drop in water pressure, which can happen if old, broken-down resin particles start clogging up the system. Using a resin cleaner once a year can really help you get the most life out of it.


Ready to find the perfect solution for your home's hard water problems? At Water Filter Advisor, we provide in-depth reviews, buying guides, and practical advice to help you make a confident choice. Explore our resources and find the right filter for your family at https://www.waterfilteradvisor.com.

Will Reverse Osmosis Remove Chlorine From Your Water?

Yes, a reverse osmosis (RO) system is brilliant at removing chlorine from your tap water. But if you think it's the fancy, high-tech membrane doing all the work, you're in for a surprise. The real story is a classic tale of teamwork.

It’s not actually the famous RO membrane doing the heavy lifting here.

Chlorine Removal in RO Systems Is a Team Effort

You’d be forgiven for thinking the sophisticated RO membrane is the star player for every contaminant, but when it comes to chlorine, another component steals the show. The unsung hero is the activated carbon pre-filter, which acts as a dedicated bodyguard for the entire system.

Its main job is to grab onto and neutralize chlorine before it ever gets a chance to reach the delicate RO membrane.

This pre-filtration step is absolutely critical for two main reasons:

  • Protection: Chlorine is a powerful oxidant that can eat away at the thin-film material of an RO membrane. Without a pre-filter, the membrane would get damaged and fail way too early, which is an expensive fix.
  • Taste and Odor: The carbon filter is what finally gets rid of that unpleasant "swimming pool" taste and smell that comes from chlorinated tap water, giving you crisp, clean-tasting water.

Modern home RO systems are remarkably good at this, with quality models often achieving chlorine removal rates over 99%. This incredible efficiency is all thanks to the activated carbon pre-filter adsorbing the chlorine molecules long before the water hits the main event: the membrane.

This diagram shows you exactly how water flows through these initial stages to get the job done.

As you can see, the carbon filter is the essential first line of defense, neutralizing chlorine to protect the RO membrane downstream.

To give you a clearer picture, here’s a quick breakdown of which part does what.

Chlorine Removal At A Glance

System Component Role in Chlorine Removal Typical Effectiveness
Carbon Pre-Filter The primary workhorse; removes chlorine through adsorption. Highly effective, often removing >99% of chlorine.
RO Membrane Secondary role; primarily removes salts and dissolved solids. Limited effectiveness; can be damaged by direct exposure.
Carbon Post-Filter "Polishes" the water, removing any lingering tastes or odors. Very effective for final taste and odor improvement.

So, while the RO system as a whole gets the job done, it's really the carbon filters doing the specific work of chlorine removal.

This all ties into the broader impact of water quality and filtration on things you might not even think about, like how your morning coffee tastes. Getting that first stage right is what makes the entire process a success.

Meet the Carbon Filter: Your System's First Line of Defense

While the reverse osmosis membrane usually gets all the glory, the real workhorse for chlorine removal is actually the activated carbon pre-filter. This isn't just some minor preliminary step; it's a critical component that acts as your home system's first and most important line of defense against chlorine damage.

It all works because of a process called adsorption. Think of it like a magnet for contaminants. Instead of soaking up impurities like a sponge (that would be absorption), adsorption means the bad stuff sticks to the surface of the filter media. The activated carbon in these pre-filters is incredibly porous, giving it a massive internal surface area.

Just how massive? Get this: a single pound of activated carbon can have a surface area larger than 100 football fields. This intricate, web-like structure is what makes it so effective. As water rushes through, chlorine molecules are chemically attracted to the carbon's surface, where they get trapped and effectively neutralized.

An activated carbon filter cartridge and a pile of carbon granules sit next to a box labeled 'ACTIVATED CARBON FILTER'.

Every tiny crevice and passage you see in that image multiplies the surface area available for chlorine to grab onto, ensuring it's stripped out of the water before it can cause any trouble.

Why This Pre-Filter Is Not Optional

This carbon pre-filter stage is absolutely non-negotiable in a home RO system. Chlorine is a powerful oxidizer—that’s what makes it great for killing bacteria in city water, but it's also what makes it incredibly destructive to the delicate polyamide material of an RO membrane.

Without the carbon pre-filter, chlorine would literally burn microscopic holes right through the membrane. This damage would completely ruin the most expensive part of your RO system and let all sorts of other contaminants sneak through, defeating the whole purpose of having a filter in the first place.

This is why understanding will reverse osmosis remove chlorine means looking at the entire system. The carbon filter is the essential bodyguard, clearing out the threat so the RO membrane can do its job safely and effectively.

Granular vs. Solid Block Carbon Filters

When you're shopping for a home RO system, you'll generally see two types of carbon pre-filters. They look a little different but both get the same critical job done.

  • Granular Activated Carbon (GAC): These filters are filled with loose, coffee-ground-like granules of carbon. Water simply flows through the loose media, which offers a huge surface area for adsorption. They're fantastic for chlorine removal and getting rid of bad tastes and odors.
  • Solid Carbon Block: These are made from finely powdered carbon that’s been compressed into a solid block. They tend to provide even finer filtration, often coming with a micron rating that means they can trap sediment in addition to chlorine. Because the water is forced through the dense block, it gets more contact time with the carbon, which many consider to be a bit more thorough.

In the end, both GAC and carbon block filters are extremely effective at their primary mission: protecting your RO membrane from chlorine. Any high-quality home RO system will have one of these right at the front, guaranteeing you get pure, great-tasting water for years to come.

The RO Membrane: The Heavy Lifter of Water Purification

Once the carbon pre-filter has done its job and neutralized the chlorine, the real star of the show can get to work. The reverse osmosis membrane is what takes your water from simply being "filtered" to being genuinely pure. This is where the heavy lifting happens, targeting the stubborn, microscopic contaminants that most other filters can't touch.

A white and blue RO Membrane filter with water dripping on it, resting on a wooden surface.

Think of the RO membrane as an incredibly exclusive gatekeeper for your home's water supply. It’s a tightly wound sheet of material with pores so tiny—around 0.0001 microns—that only water molecules can get an invitation to pass through.

Just how small is that? It's about 500,000 times smaller than a single strand of human hair. Nothing but pure H₂O is getting past this bouncer.

How Pressure Does the Hard Work

Your home’s water pressure provides the force needed to push water molecules through this semipermeable membrane. While pure water squeezes through, anything larger is physically blocked and left behind. It’s a surprisingly simple yet profoundly effective process.

This is how the membrane rejects a massive list of unwanted guests in your water, delivering unparalleled purity.

If the carbon filter is the bodyguard that handles the obvious threat (chlorine), the RO membrane is the high-tech security system that scans for everything else. It separates pure water from a whole host of dissolved contaminants with incredible precision.

The contaminants that get rejected don't just build up and clog the system. Instead, they’re mixed into a small amount of wastewater (called brine) and flushed right down the drain. This keeps the membrane clean and efficient, ready for the next drop.

What the RO Membrane Really Removes

With chlorine out of the way, the membrane can focus on the contaminants that are often the most difficult to remove and potentially the most harmful. This is what truly separates RO from basic carbon or sediment filters you might find at the hardware store.

Here’s a shortlist of what the RO membrane is designed to eliminate from your drinking water:

  • Heavy Metals: Lead, arsenic, mercury, and cadmium don’t stand a chance.
  • Dissolved Solids (TDS): This includes things like salts, nitrates, and fluoride, which are all stripped away.
  • "Forever Chemicals": The membrane is one of the most effective ways to remove emerging contaminants like PFAS, microplastics, and trace pharmaceuticals.

By letting the carbon filter handle the chlorine first, the RO membrane is protected and can perform at its best for much longer. This teamwork is why a complete RO system can confidently eliminate chlorine while also tackling hundreds of other contaminants, giving you the purest water possible right from your kitchen tap.

Chlorine vs. Chloramine: Understanding Your Water Supply

Just when you thought chlorine was your main concern, another player has entered the game for many homeowners. A growing number of cities and towns—now over 20% in the U.S.—have made the switch from standard chlorine to a compound called chloramine to treat their water.

This change has some big implications for how you should filter the water in your home.

Chloramine is what you get when you mix chlorine with ammonia. It's a more stable compound, which means it lasts longer as it travels through the city's pipe system. While that's great for the municipality, that same stability makes chloramine a much tougher nut to crack for most home water filters.

Glass vial and blue box with 'CHLORINE vs CHLORAMINE' text discussing water treatment.

This is why it's so important to know what's in your water. A standard activated carbon pre-filter is fantastic at grabbing chlorine, but it really drops the ball when it comes up against the tough chemical bond in chloramine.

The Problem with Standard Carbon Filters

Think of a standard carbon filter like a magnet specifically designed to attract and hold onto chlorine. It works great for that one job. But when chloramine flows by, that magnet just doesn't have the right kind of pull. The filter gets overwhelmed and stops working effectively in no time.

If your water has chloramine, a standard carbon pre-filter won't do enough to protect your RO membrane. This can cause the membrane to fail way too early, torpedoing your system's performance and letting other contaminants slip right on through.

So, what's the fix? You need a filter that's built for the job.

The Solution: Catalytic Carbon

The answer is a special type of filter media called catalytic carbon. This isn't just a slightly beefed-up version of activated carbon; it's engineered from the ground up to break the stubborn bond between chlorine and ammonia. It acts as a catalyst, triggering a chemical reaction that dismantles the chloramine molecule.

Here’s a quick look at how the two filter types stack up against these disinfectants:

Filter Type Effective Against Chlorine? Effective Against Chloramine?
Standard Activated Carbon Yes No (Very limited)
Catalytic Carbon Yes Yes

Before you pick out a home RO system, you absolutely need to find out what your local water utility uses. You can usually get this info from your city’s annual water quality report, or you can just give them a call. Knowing whether you're dealing with chlorine or chloramine is the critical first step to ensuring your system will actually do its job and remove these chemicals from your home's water.

Comparing RO Against Other Filtration Methods

Walk into any home improvement store, and the wall of water filters is enough to make your head spin. You’ve got pitchers, faucet-mount gadgets, and a dozen other options. So, where does a reverse osmosis (RO) system actually fit in for a homeowner?

While most of those simpler filters do a decent job of making your tap water taste less like a swimming pool, that's pretty much where their job ends. They're a one-trick pony. This is where a home RO system really starts to shine.

Think of it this way: a basic pitcher or faucet filter is like a bouncer at a club. It checks for the most obvious problem—in this case, the taste and smell of chlorine—and lets everything else slide. They use a simple layer of carbon, make the water more drinkable, and call it a day.

A reverse osmosis system, on the other hand, is the full-on Secret Service detail for your water. It doesn’t just deal with the obvious threat; it runs a comprehensive security check to handle all the invisible troublemakers.

A Head-to-Head Comparison

The difference in what these filters can do is night and day once you look past just chlorine. While the simpler options are focused on a single problem, RO systems are engineered from the ground up to be a complete water purification solution for your home.

Sure, a standard carbon filter can knock out 85-95% of chlorine, and a pitcher filter might get you 75-90% of the way there. But an RO system goes further, removing over 95% of chlorine while also eliminating up to 98% of arsenic, 95% of lead, and 90-99% of nasty PFAS "forever chemicals." You can see the full list of contaminants an RO system handles on softprowatersystems.com to get the whole picture.

The real takeaway here is that while lots of filters can make your water taste better, an RO system is one of the few that provides true purification. It gets rid of the chlorine, then keeps going to tackle the heavy metals, dissolved solids, and other contaminants the others just can't touch.

To lay it all out, let's put these systems side-by-side. This simple table makes it crystal clear where each filter excels and where it comes up short.

Chlorine Filter Comparison RO vs Other Methods

When you're shopping for a chlorine filter, it helps to see exactly what you're getting for your money. Here's a quick rundown of the most popular options for home use.

Filter Type Chlorine Removal % Removes Other Contaminants? Average Cost
Water Pitcher Filter 75-90% Very limited (some sediment, maybe zinc) $20 – $50
Faucet-Mount Filter 85-95% Limited (often lead and some VOCs) $30 – $70
Reverse Osmosis System >95% Yes (heavy metals, TDS, PFAS, etc.) $200 – $600+

As you can see, asking if RO removes chlorine is really just scratching the surface. Its true value is in its power to do so much more, giving you a level of protection and peace of mind that single-stage filters simply can't offer for your home.

Keeping Your RO System Running Smoothly

Knowing how your reverse osmosis system works is one thing, but keeping it in top shape is how you get years of pure, fantastic-tasting water. A little bit of routine care goes a very long way in protecting your investment in your home's water quality.

When you're shopping for a system, keep an eye out for official certifications. These aren't just marketing fluff; they're your guarantee of performance. Specifically, you want to see NSF/ANSI 42 certification, which confirms the system is effective at reducing chlorine, taste, and odor. On top of that, NSF/ANSI 58 is the gold standard for the overall performance of RO systems, verifying their claims for reducing a whole host of contaminants.

Choosing a certified system means you're not just taking a manufacturer's word for it. You're buying a product that has been independently tested and proven to meet strict public health and safety standards.

Your Simple Maintenance Checklist

Once your system is up and running, the maintenance is actually pretty simple. It mostly just boils down to swapping out the filters on a regular schedule. If you let this slide, you'll start to see reduced water flow, off-tastes, and—worst of all—you could damage the delicate RO membrane.

Here are the dead giveaways that it’s time for a filter change:

  • Slower Water Flow: If your RO faucet has gone from a steady stream to a disappointing trickle, that’s a classic sign your pre-filters are clogged up and need to be replaced.
  • A Change in Taste or Odor: The return of that all-too-familiar "swimming pool" smell is a sure sign your carbon pre-filter is spent and isn't pulling chlorine out of the water anymore.

The easiest way to stay on top of this is to just set a calendar reminder to check your filters every six to twelve months. Sticking to a schedule is the single best thing you can do to make sure your system keeps removing chlorine and other gunk for years to come.

For more pro tips on system upkeep, check out the comprehensive advice on water filter maintenance from our specialists. This simple routine protects your system and guarantees the pure water you expect.

Got Questions About RO & Chlorine? We've Got Answers.

We get a lot of questions from homeowners trying to figure all this out. Here are some of the most common ones, answered straight and simple.

Will Reverse Osmosis Get Rid of That Chlorine Smell?

You bet. That "swimming pool" odor and weird chemical taste you get from the tap? That's all chlorine. The activated carbon filter that comes before the RO membrane is a superstar at grabbing those chlorine compounds right out of the water.

It completely knocks out the taste and the smell, giving you nothing but clean, fresh-tasting water right in your kitchen.

Can I Test My Water to Make Sure the Chlorine is Actually Gone?

Absolutely, and you don't need a science degree to do it. You can pick up some simple DPD test strips or drops—the same kind used for pools and spas—at most hardware stores. They're cheap and easy to use.

Just test a sample from your kitchen tap and then another from your RO faucet. When your RO water shows a reading of zero, you know your system is doing its job perfectly.

Is It Okay to Use an RO System With a Water Softener?

Not just okay—it's one of the best things you can do for your home's water system. A water softener's job is to remove hard minerals like calcium and magnesium, which are notorious for building up scale and wrecking the delicate RO membrane.

Think of the water softener as a bodyguard for your RO system. By letting the softener tackle the hard minerals first, you protect the most critical (and expensive) part of your reverse osmosis unit. This little bit of teamwork helps the RO membrane last longer and keeps the whole setup running at peak efficiency for years to come.


Here at Water Filter Advisor, our whole goal is to give you clear, honest, research-backed advice so you can feel good about the water in your home. Check out our detailed guides and reviews to find the right water filter for your family at https://www.waterfilteradvisor.com.

A Homeowner’s Guide to Filters That Remove Fluoride

When it comes to getting fluoride out of your home’s drinking water, here's the straight truth: your standard Brita-style pitcher filter just isn't going to get the job done. To really take on this specific contaminant, you need a filtration system built for the task. It's a special ops mission, and you need the right gear.

The most reliable, proven technologies are Reverse Osmosis (RO), Activated Alumina, and Bone Char Carbon. Each one uses a completely different process to grab and remove those tiny fluoride ions, ensuring your tap water is as pure as you want it to be.

Finding the Right Fluoride Filter for Your Home

A white water filter system on a modern kitchen counter with a glass of water and a faucet.

Picking the right water filter can feel like navigating a maze, but it’s simple when you know the secret: fluoride is a dissolved mineral. This means it behaves very differently in water than the chunky stuff like chlorine or sediment that most basic filters are designed to catch.

Think of it this way: a standard carbon filter is like a fishing net trying to catch grains of sand. The sand (our fluoride) is so fine it slips right through the holes. To actually filter out fluoride, you need a method with a much, much finer "net"—or one that can attract the fluoride ions like a magnet.

The Proven Technologies

This is where the three heavy hitters come into play. Each one has a unique superpower for tackling fluoride, and understanding their different approaches is the first step to choosing your champion.

Here's a quick look at how they work:

  • Reverse Osmosis (RO): This high-tech method uses serious pressure to force water through a special membrane packed with microscopic pores. Water molecules get VIP access, but fluoride and other dissolved solids are left behind at the velvet rope.
  • Activated Alumina (AA): This filter media acts like a specialized magnet for fluoride. As water passes over it, fluoride ions are literally pulled out of the water and stick to the alumina surface.
  • Bone Char Carbon: This is an all-natural media made from charred animal bone. It works through a process called adsorption, where fluoride ions chemically bond to its unique surface.

Understanding these core technologies is essential. You'll see a lot of products out there making big claims, but only filters using one of these three methods have been consistently proven to slash fluoride levels in your home's drinking water.

To give you a quick, at-a-glance comparison, the table below lines up these top methods side-by-side. It focuses on what matters most to homeowners—how well they work, what they cost, and where they make the most sense in your home. This should give you a solid starting point before we dig into the details of each.

Comparing Top Fluoride Removal Technologies

Here's a quick comparison of the most effective filter types for removing fluoride, highlighting their performance, cost, and best applications for homeowners.

Filtration Technology Fluoride Removal Rate Ideal Application Average Cost
Reverse Osmosis (RO) Up to 99% Under-sink systems for drinking/cooking water. Moderate to High
Activated Alumina Up to 98% Both under-sink and whole-house systems. Moderate
Bone Char Carbon Up to 90% Often used in countertop or pitcher-style fluoride filters. Low to Moderate

As you can see, each has its strengths. Now, let’s get into the nitty-gritty of how each one performs in a real-world home setup.

Why Your Standard Water Filter Can't Remove Fluoride

A white water filter pitcher and glass of water on sand, with a fishing net and a banner: "STANDARD FILTERS FAIL".

It's a mistake anyone could make. You've got that water pitcher in the fridge or a simple filter screwed onto your faucet, and you assume it’s taking care of everything. After all, you bought it to make your water safer, right? But when it comes to fluoride, that's almost never the case. Most standard filters just aren't built for the job.

The problem comes down to the very nature of fluoride in your water. Fluoride is a dissolved ionic mineral. Think about stirring salt into a glass of water—it vanishes, becoming one with the liquid. You can't see it, and you can't strain it out with a coffee filter.

That's exactly how your typical activated carbon filter sees fluoride. Imagine the filter is a fishing net. It's fantastic at catching the "big fish" like chlorine molecules, which are large enough to get snagged easily. It also grabs sediment and other gunk that makes water taste and smell off. But those tiny, dissolved fluoride ions? They're like grains of sand, slipping right through the holes.

The Science of What Slips Through

Standard activated carbon filters work using a process called adsorption. It’s a surface-level action where contaminants like chlorine literally stick to the carbon's massive internal surface. It's a bit like how lint clings to a sweater.

But this method is completely useless against dissolved minerals like fluoride. The fluoride ions just don't have the right chemical properties to "stick" to the carbon. This is the fundamental reason why your go-to pitcher filter can make your water taste a whole lot better, but leaves the fluoride level completely unchanged.

To actually pull fluoride out, you need a different game plan entirely. You need a filter that can either:

  • Physically block the ions with pores so tiny they can't pass through (like Reverse Osmosis).
  • Chemically grab and bond with the fluoride ions (like Activated Alumina or Bone Char).

The core takeaway is simple: standard filters target taste and odor by removing large contaminants. Filters that remove fluoride are specialized systems designed to target tiny, dissolved minerals that basic filters can't even see.

A Market Built on Two Sides of the Same Coin

It's a strange situation. While many of us are actively looking for filters that remove fluoride, a massive global industry is paid to do the exact opposite. Utilities across the United States and Australia deliberately add fluorosilicic acid to public water supplies to promote dental health.

This practice supports a market that's projected to be worth US$161.8 million by 2025, with water treatment making up almost half of that demand. This constant addition of fluoride is what directly fuels our need for specialized home filtration. It’s created a unique cycle of treatment and removal. You can dig into the scale of the fluorosilicic acid market over on fluoridealert.org.

Getting this distinction is the first step to avoiding products that don't work and money that's better spent elsewhere. Knowing what fails—and why—is the key to finding a solution that actually gets the job done.

The Big Three: A Look at Proven Fluoride Removal Methods

So, your trusty pitcher filter isn't cutting it for fluoride. That’s okay—it was never really designed for that job. Now, let’s talk about the heavy hitters, the specialized technologies that are actually built from the ground up to target and remove fluoride from your water.

When you get serious about filtering fluoride, there are really only three games in town. These are the methods that have been proven time and again in home water systems.

We’re going to break down each one, but don't worry, we'll skip the dense, jargon-filled textbook explanations. Instead, I'll give you some simple analogies to help you understand exactly how they work, what they're great at, and where you might run into some trade-offs.

Reverse Osmosis: The Bouncer of Water Filtration

Think of your water supply as an exclusive club, and only the purest water molecules can get inside. Reverse Osmosis (RO) is that huge, no-nonsense bouncer standing at the velvet rope, checking IDs and turning away anyone who isn't on the list.

An RO system uses the water pressure in your pipes to force water through a special semipermeable membrane. This isn't just any filter material; it's a sheet engineered with microscopic pores so incredibly small that almost nothing besides H₂O can pass through.

Bigger molecules—like dissolved salts, heavy metals, and of course, fluoride ions—are physically stopped in their tracks. They get denied entry and are rerouted down a separate drain line. What makes it past the bouncer is some of the purest water you can get.

  • The Good: RO is the undisputed champion of purity. These systems routinely remove 95% to 99% of fluoride, along with a massive list of other contaminants like lead, chlorine, arsenic, and nitrates.
  • The Catch: This level of filtration has a couple of strings attached. RO systems create wastewater (the stuff that gets "bounced"), and they require their own dedicated storage tank and faucet, which usually gets installed under your kitchen sink.

It's hard to overstate just how popular reverse osmosis has become for households looking to get serious about their water quality. RO systems now make up about 29% of the entire global water treatment market, giving them the biggest piece of the pie worldwide. The main reason? Sheer performance. A well-designed RO unit can strip out up to 99% of dissolved contaminants, including fluoride. This incredible effectiveness has made RO a go-to solution, especially in areas where fluoride levels in the groundwater are higher than the 1.5 mg/L guideline set by the WHO. You can dig into more stats on the water filtration market over at zionmarketresearch.com.

Activated Alumina: The Fluoride Magnet

If RO is the bouncer, then Activated Alumina (AA) is more like a high-powered, specialized magnet. It doesn’t physically block contaminants with a barrier. Instead, it pulls them right out of the water.

The filter itself is filled with a highly porous form of aluminum oxide. As your water flows through the filter cartridge, fluoride ions are chemically attracted to the surface of these little alumina beads, where they stick tight. The water flows on, but the fluoride gets left behind, clinging to the filter media.

This process is called adsorption, and it’s extremely effective for zeroing in on specific contaminants. And I know what you’re thinking—aluminum? Don't worry, a properly designed and certified system won't leach any significant amount of aluminum back into your water.

One thing to keep in mind with Activated Alumina is that its performance really depends on your water's pH. It works best in slightly acidic water (pH 5.0 to 6.0), and its ability to grab fluoride can drop off if your water is on the alkaline side.

Bone Char: The Original Natural Adsorber

The last of our proven methods is Bone Char Carbon, which is actually one of the oldest water purification tricks in the book. This filter media is made by charring animal bones at incredibly high temperatures without much oxygen, a process that creates a highly porous carbon material with a massive amount of surface area.

Bone char works a lot like Activated Alumina through the process of adsorption. But it has a secret weapon called hydroxyapatite. The chemical structure of hydroxyapatite has a natural, powerful attraction to fluoride and heavy metals, causing them to bond right onto the bone char's surface.

For centuries, bone char has been used not just for water but in other industries (like sugar refining) for its amazing purification abilities. It’s particularly good at removing fluoride, lead, arsenic, and chlorine.

  • The Good: It’s a very effective and completely natural way to filter water without any complex machinery. It’s also great at reducing a whole cocktail of common contaminants.
  • The Catch: Its fluoride removal rate, while good, typically maxes out at around 90%, which is a little less than what you can get from a top-tier RO or AA system. The quality of the bone char media can also vary a bit from one brand to another.

Each of these three methods will get you to your goal of fluoride-free water, but they all take a different road to get there. Getting a handle on these key differences is the first step in picking the perfect system for your home, your budget, and your water.

Now, let's stack these three technologies side-by-side to make the comparison even clearer.

A Deep Dive into Fluoride Filtration Technologies

Choosing a filter isn't just about picking the one with the highest removal rate. You also have to consider installation, maintenance, cost, and how it fits into your daily life. This table breaks down the key differences between the "big three" fluoride filters to help you see which one truly fits your needs.

Feature Reverse Osmosis (RO) Activated Alumina (AA) Bone Char Carbon
Fluoride Removal Rate 95% – 99%+ Up to 95% Up to 90%
How It Works Filtration: Pushes water through a micro-porous membrane, physically blocking contaminants. Adsorption: Fluoride ions chemically stick to the surface of the alumina media. Adsorption: Fluoride and heavy metals bond to the hydroxyapatite in the carbon structure.
Other Contaminants Removed Very broad spectrum: lead, arsenic, chlorine, nitrates, pesticides, pharmaceuticals, and many more. Primarily targets fluoride and arsenic. Can reduce some other contaminants. Effective for fluoride, lead, arsenic, chlorine, and other heavy metals.
Typical Installation Under-sink (Point-of-Use) with a dedicated faucet and storage tank. More complex installation. Can be used in countertop, under-sink, or whole-house (Point-of-Entry) systems. Can be used in countertop, under-sink, or whole-house systems.
Water Waste Yes. Produces wastewater (brine) that is flushed down the drain. No. Does not produce wastewater during the filtration process. No. Does not produce wastewater.
Impact on Water pH Can make water slightly acidic by removing alkaline minerals. No. Does not significantly alter water pH. No. Does not significantly alter water pH.
Best For Homeowners who want the absolute highest level of purity and need to remove a wide range of contaminants. Homeowners specifically targeting fluoride and arsenic who prefer a system with no water waste. Homeowners looking for a natural, effective filtration method without water waste.

As you can see, there's no single "best" filter—just the best one for your specific situation. If you're after ultimate purity and don't mind a more involved installation, RO is a powerhouse. But if you're focused on fluoride and want a simpler, zero-waste system, Activated Alumina or Bone Char are fantastic and highly effective alternatives.

Choosing Between Under-Sink and Whole-House Systems

So you’ve landed on the right filter technology for your needs. Great. Now for the next big question: where do you put it? This really comes down to a choice between treating the water at one specific faucet or treating every single drop that comes into your house.

It’s the classic showdown between a Point-of-Use (POU) system and a Point-of-Entry (POE) system. There’s no single right answer—it all depends on what you're trying to accomplish.

Think of your home's plumbing like a tree. A whole-house system (POE) gets installed right at the main trunk where water enters your home. It purifies all the water flowing to every branch—every shower, every sink, every appliance. An under-sink system (POU), on the other hand, is like hanging a small, specialized filter on just one of those branches, focusing only on the water you'll be drinking and cooking with.

Point-of-Use: The Targeted Approach

For most folks who are specifically concerned about fluoride, an under-sink system is the way to go. These units, which often use Reverse Osmosis, are installed right in the cabinet under your kitchen sink. They feed a small, dedicated faucet on your countertop, giving you purified water on demand.

This approach is smart, efficient, and easy on the wallet. You get incredibly pure, fluoride-free water exactly where you need it most—for drinking, making coffee, boiling pasta, and filling up water bottles. You’re not wasting money filtering the water you use to flush toilets or wash your clothes.

The chart below gives you a quick visual on how to decide between the most common filter types, which are almost always found in these targeted under-sink setups.

Fluoride filter decision guide flowchart presenting reverse osmosis, activated alumina, and bone char options.

As you can see, whether you go with Reverse Osmosis for the highest level of purity or an adsorption media like Activated Alumina, the technology is perfectly suited for a specific point of use.

Whole-House: The Comprehensive Solution

A whole-house system is a much bigger deal. We're talking a larger investment upfront and a more involved installation. These systems are workhorses, built to handle the high flow rates needed to treat thousands of gallons for your entire home.

Why would someone go this route for fluoride? The main reason is if you have serious concerns about skin absorption during baths and showers, or if you simply want the peace of mind of knowing there’s no fluoride in your laundry or dishwasher water.

Keep in Mind: While the skin can absorb certain things from water, fluoride absorption through bathing is generally considered pretty minimal for most people. The primary way we take in fluoride is by drinking it. This is why a targeted under-sink system is the most practical choice for the vast majority of families.

So, how do you decide? It really comes down to weighing a few key factors:

  • Cost: Under-sink systems are way more affordable. The initial price is lower, and the replacement filters won't hit your wallet as hard.
  • Installation: Many homeowners can tackle an under-sink filter installation as a DIY project over a weekend. A whole-house system? Not so much. It almost always requires a professional plumber because it involves cutting into your home's main water line.
  • Maintenance: Both systems need filter changes, but the big, heavy cartridges for whole-house units are more expensive and can be a real pain to swap out.
  • Your Goal: Is your main priority pure drinking water? An under-sink system is the clear winner. Do you want fluoride gone from every single tap, no exceptions? A whole-house system is the only way to make that happen.

When you're looking at different home water solutions, it's sometimes helpful to think about the bigger picture of your home's plumbing. You might need to coordinate a filter installation with other work. A company that provides a range of services, like water heater installation services, will have a good understanding of how all these systems tie together.

Ultimately, the choice is yours. Once you're clear on what you want to achieve with your water, you can confidently pick the system that’s the perfect match for your family’s needs and your budget.

Your Smart Buyer's Checklist for Fluoride Filters

A flat lay of a desk with coffee, a clipboard with a 'Filter Checklist' and a pen.

You've waded through the different technologies and you've got a good idea of where you want to install your filter. Now for the fun part—actually picking one out. But before you hit that "buy" button, it pays to run through a quick final checklist. This will make sure the system you choose is a genuine performer that actually delivers, without any nasty surprises down the road.

Think of it like a pre-purchase inspection. A great filter isn't just about a high removal rate; it’s about having proof of that performance, understanding the long-term costs, and finding a maintenance routine you can actually live with. Let's walk through the essential checkpoints.

Look for Third-Party Certification

First things first: verify the manufacturer's claims. The easiest way to do this is by looking for independent, third-party certifications. In the water filter world, the gold standard comes from groups like the NSF (National Sanitation Foundation) and ANSI (American National Standards Institute). These organizations don't just take a company's word for it—they put these filters through some seriously tough testing to prove they do what they claim.

When you're shopping for filters that remove fluoride, these are the key certifications you want to see:

  • NSF/ANSI 53: This is the big one for health-related contaminants, including fluoride. A filter with this stamp of approval has proven it can reduce high fluoride levels down to the EPA's maximum allowable limit of 4 mg/L.
  • NSF/ANSI 58: This standard is specifically for Reverse Osmosis (RO) systems. It's a really comprehensive certification that covers everything from fluoride reduction to the system's structural integrity and overall efficiency.
  • NSF/ANSI 42: While this one is more about aesthetics—like getting rid of that chlorine taste and smell—it's still a great sign of a quality product. You'll often see the best fluoride filters carry this certification alongside NSF 53 or 58.

Be wary of vague claims like "tested to NSF standards." True certification means you should be able to look up the product right on the official NSF website.

Scrutinize the Performance Data Sheet

Every legitimate water filter comes with a Performance Data Sheet. This is the spec sheet, the nitty-gritty document that spells out exactly what the filter removes and just how well it does it. You can usually find it on the product page online or tucked inside the box.

Don't just give it a quick glance—actually read it. Hunt for the line item for "Fluoride" and check the average percentage reduction. A top-tier system should be removing over 90% of fluoride, easy. This sheet is basically the manufacturer’s contract with you, so if a company can't or won't provide one, that's a huge red flag.

Calculate the True Cost of Ownership

The price you see on the website is just the beginning. The real cost of any water filter is what you spend over its entire life. This is called the total cost of ownership, and figuring it out now can save you a ton of money and frustration later on.

To get the real number, you need to add up:

  1. Initial Purchase Price: The upfront cost of the system.
  2. Replacement Filter Costs: This is the biggest ongoing expense. How much are the replacement cartridges?
  3. Filter Lifespan: How often do they need to be changed? Every six months? Every few years? A cheap filter that needs new cartridges constantly can end up costing you more than a pricier unit with long-lasting filters.

Think about it this way. System A is $150, but needs a $60 filter change every 6 months. System B is $300, but its $100 filter only needs replacing once a year. After two years, you’d have spent $390 on System A ($150 + 4x$60), but only $500 on System B ($300 + 2x$100). Knowing these numbers helps you make a smarter long-term investment.

Check Maintenance Needs and Ease of Use

Last but not least, be honest with yourself about maintenance. How easy is it to swap out the filters? Do you need a bunch of special tools or have to shut off the main water line to your house? Some under-sink RO systems have brilliantly simple twist-off cartridges, while others are a bit more involved.

Jump on YouTube and watch a video of the filter change process if you can, or at least read some customer reviews. A system that's a complicated, messy hassle to maintain is one you're going to put off dealing with, and that defeats the whole purpose.

For even more tips on picking the right unit, check out our general advice on water filters to help guide your decision. By running through this checklist, you can be confident you're choosing a reliable and effective solution for your home.

Common Questions About Fluoride Water Filters

Even after you've got a good handle on the technology, a few practical questions almost always come up when you’re about to pull the trigger on a filter. To help clear up any last-minute doubts, we’ve put together the most common questions we hear from homeowners. Think of these as the final pieces of the puzzle to help you move forward with confidence.

Let's dive in and tackle some of the biggest concerns.

Do Brita Pitcher Filters Remove Fluoride?

Nope. Standard pitcher filters like Brita or Pur just can't do it. These filters use a basic activated carbon, which is great for getting rid of that chlorine taste and smell, making your water more pleasant to drink. But when it comes to dissolved minerals like fluoride, they’re completely ineffective.

Imagine trying to catch salt dissolved in water with a spaghetti strainer—it's just going to pass right through. To actually grab onto fluoride ions, you need a specialized filter media like reverse osmosis, activated alumina, or bone char.

Does Boiling Water Get Rid of Fluoride?

This is a really common myth, and it's a dangerous one. Boiling water does the exact opposite of what you want. As the water boils, pure H₂O turns into steam and evaporates, but all the minerals—including fluoride—get left behind.

This actually makes the fluoride more concentrated in the water that's left. If you boil a liter of water down to half a liter, you’ve just doubled the fluoride concentration. This is a huge deal for anyone using tap water to mix baby formula or when cooking things that soak up a lot of water, like rice and pasta.

Is an Under-Sink System Enough or Do I Need a Whole-House Filter?

For most families, an under-sink system is the perfect sweet spot. If your main goal is simply to have pure, fluoride-free water for drinking and cooking, then a Point-of-Use (POU) system installed at your kitchen sink is the most effective and cost-efficient way to go.

A whole-house filter, or a Point-of-Entry (POE) system, is a much bigger and more expensive project. It's usually only necessary if you have very specific concerns about absorbing fluoride through your skin during baths and showers. Since drinking is the primary way we're exposed to fluoride, most people find that just treating the water they consume is more than enough.

Here's the bottom line: unless you have a compelling medical reason to treat every single faucet, an under-sink system delivers the best bang for your buck in terms of performance, cost, and convenience for removing fluoride.

How Can I Find Out if My Tap Water Contains Fluoride?

Knowing what you’re dealing with is always the first step. Thankfully, finding out your fluoride level is pretty straightforward.

  • For City or Municipal Water: Your local water utility is required by law to send out an annual water quality report, often called a Consumer Confidence Report (CCR). This report will list the average fluoride concentration. You can usually find it right on their website, or you can call and ask them to mail you a copy.
  • For Private Well Water: If you're on a well, you're the captain of your own ship—and that includes water testing. The only way to know for sure what your fluoride level is is to send a sample to a state-certified lab. They'll give you an exact number so you can choose the right filter for your situation.

Will a Fluoride Filter Also Remove Essential Minerals?

That’s a great question, and it comes up a lot, especially with Reverse Osmosis (RO) systems. The short answer is yes—because RO membranes are so fine, they strip out nearly everything, including beneficial minerals like calcium and magnesium.

But it’s important to keep this in perspective. We get the vast majority of our essential minerals from the food we eat, not the water we drink. While tap water can chip in a little, it’s not our main source. For anyone still concerned, many modern RO systems now come with a remineralization filter as the final step. This adds a healthy balance of minerals back into the water right before it hits your glass, which also improves the taste and pH.


At Water Filter Advisor, we're here to give you clear, research-backed advice to help you protect your family's health. Check out our detailed guides and reviews to find the perfect filtration system for your home.

Ready to find your filter? Learn more at https://www.waterfilteradvisor.com.

Does Reverse Osmosis Remove Chlorine From Your Water?

Yes, a reverse osmosis (RO) system is a powerhouse when it comes to getting chlorine out of your water. But here’s the twist: the famous RO membrane, the star of the show, isn't the component doing the chlorine-busting work.

The real MVP is an unsung hero—the activated carbon pre-filter that comes with every complete RO system. It’s the bouncer at the club door, handling all the chlorine before the water gets anywhere near the delicate, high-tech membrane.

Why the Pre-Filter is the Real Star of the Show

A blue pre-filter for water purification stands on a wooden kitchen counter next to a sink.

The water flowing from your kitchen tap has been treated with chlorine to kill off nasty bacteria and viruses—a standard public health practice that keeps us safe. While this is great for getting water safely to your home, it leaves behind that distinct "swimming pool" taste and smell.

Even worse, that same chlorine is public enemy number one for the heart of your RO system.

A proper home RO setup is a multi-stage affair, and it's designed this way for a very good reason. Think of the carbon pre-filter as a bodyguard for the RO membrane, neutralizing threats before they can cause any damage.

The Critical Role of Carbon Prefiltration

That first filter your tap water hits is typically an activated carbon block. Imagine it's a super-sponge with a massive, porous surface area that acts like a powerful magnet for chlorine. Through a process called adsorption, it grabs onto and neutralizes the chlorine molecules, stopping them in their tracks.

This isn't just a bonus feature; it's essential for the system's longevity. Chlorine is an oxidizer, meaning it would chemically burn and shred the thin-film composite RO membrane over time, completely ruining it.

A reverse osmosis system without a functioning carbon pre-filter is a system on a fast track to failure. Protecting the membrane is the single most important job of the pre-filtration stage.

So, while the RO system as a whole gets rid of chlorine, the credit really belongs to its hardworking carbon pre-filter.

You can count on this process being incredibly effective. Most residential RO systems with a standard carbon pre-filter will remove over 95% of chlorine. High-end systems can push that number up to an impressive 99–99.5%.

Considering that city water is usually treated with 0.2–1.0 mg/L of chlorine, this pre-filter step is more than enough to protect your system and give you fantastic-tasting water. You can learn more about the specifics of chlorine filtration from Island Well Service.

Chlorine Removal At A Glance: RO vs. Other Filters

It helps to see how a complete RO system stacks up against other common water filters when it comes to chlorine. While many methods work, they achieve it in different ways.

Filtration Method Typical Chlorine Removal Rate Key Mechanism
Reverse Osmosis System 95% to 99%+ Adsorption via carbon pre-filter
Activated Carbon Filter 95% to 98% Adsorption
KDF Filter 95% to 99% Redox (chemical reaction)
Catalytic Carbon Filter 98% to 99%+ Enhanced adsorption

As you can see, the carbon pre-filter in an RO system puts its performance right up there with dedicated chlorine filters. The main difference is that the RO system goes on to remove hundreds of other contaminants, too.

Understanding Why Chlorine Is The Membrane's Worst Enemy

To really get why reverse osmosis systems are built the way they are, you have to look at the relationship between chlorine and the RO membrane. It’s not just a minor tiff; it’s a full-on chemical assault that can wreck your entire filtration system. Without a pre-filter standing guard, the heart of your system gets destroyed in a shockingly short time.

Modern RO membranes are typically made from a material called Thin Film Composite (TFC). It's an incredible piece of engineering—a multi-layered polymer sheet rolled up like a scroll. It’s designed with microscopic pores, about 0.0001 microns wide, that are just big enough for water molecules to pass through while blocking almost everything else.

The Science Of Membrane Damage

This high-tech material is fantastic at its job, but it has one major kryptonite: it's extremely vulnerable to oxidation. Chlorine, the same chemical your city uses to disinfect the water supply, is a powerful oxidizing agent. When chlorinated water hits a TFC membrane directly, the chlorine literally attacks and burns the delicate polymer surface.

Think of it this way: your RO membrane is like a finely woven, high-tech piece of silk. Pouring chlorinated water onto it is like dumping bleach straight onto that fabric. The silk doesn’t just get a stain; its very fibers start to dissolve, weaken, and tear apart on a microscopic level.

This oxidative damage rips tiny tears and stretches the existing pores in the membrane. These new, bigger holes become a superhighway for all the contaminants the membrane was supposed to block in the first place.

Once a membrane is damaged by chlorine, it cannot be repaired. The damage is permanent and irreversible, allowing contaminants like heavy metals, salts, and dissolved solids to pass straight through into your drinking water.

The Consequences Of Chlorine Exposure

A membrane that's been hit by chlorine doesn't just work poorly—it fails spectacularly. Here’s what happens when that critical barrier is broken:

  • Contaminant Breakthrough: The system completely loses its ability to remove dissolved solids. Your water quality tanks as contaminants that were once blocked start pouring right out of your tap.
  • Reduced System Efficiency: A damaged membrane can't maintain the pressure needed for reverse osmosis to work. This leads to way more wastewater going down the drain and less purified water for you.
  • Costly Replacements: The RO membrane is the most complex and expensive part of the whole system. Letting chlorine get to it means you're looking at a big replacement bill much sooner than you ever should.

Ultimately, letting chlorine reach the RO membrane defeats the whole purpose of owning the system. You’re not just risking slightly less pure water; you're actively destroying its most important component, turning a powerful purification machine into little more than a leaky filter. This is precisely why the carbon pre-filter isn't just a nice-to-have—it's absolutely essential for protecting your investment.

Meet The Unsung Hero: The Carbon Pre-Filter

We’ve seen how chlorine can absolutely wreck a reverse osmosis membrane, but how do RO systems prevent this catastrophe? It’s all thanks to an often-overlooked component that does the heavy lifting.

While the RO membrane gets all the credit for its precision filtering, the real star of the chlorine removal show is the activated carbon pre-filter. Think of it as the system's bodyguard, working tirelessly to neutralize chlorine before it ever gets a chance to cause damage.

This little powerhouse works through a fascinating process called adsorption. This isn't the same as absorption, where a sponge soaks up water. Adsorption is all about molecules sticking to a surface.

Picture the activated carbon inside the filter as a massive, porous coral reef with an unbelievable amount of surface area. In fact, just one gram of activated carbon can have a surface area as large as a football field. As chlorinated water rushes through, the chlorine molecules are drawn to this huge surface and get trapped in all its nooks and crannies, sticking like tiny magnets.

Why Adsorption is a Game-Changer

This process is incredibly good at its job. The carbon pre-filter essentially sacrifices itself by adsorbing the vast majority of chlorine, keeping the delicate and expensive RO membrane safe and sound downstream. Without this critical first step, the entire system would be doomed to fail.

The diagram below shows exactly what happens when chlorine gets past this protective shield and reaches the membrane.

Flow diagram illustrating how chlorine causes oxidative stress, leading to membrane damage and contaminant entry.

It’s a simple but critical chain of events: a worn-out pre-filter leads directly to a damaged membrane, which ultimately lets contaminants sneak into your drinking water.

Two Key Types of Carbon Pre-Filters

When you’re shopping for a home RO system, you'll mainly run into two kinds of carbon pre-filters. Knowing the difference between them is key to understanding how well a system will protect itself from chlorine.

If you ever need help comparing systems or figuring out what’s best for your home, our experts at Water Filter Advisor have put together a ton of helpful water filtration advice to guide you.

Carbon Pre-Filter Showdown: GAC vs. Carbon Block

To really understand the difference, let's break down the two main players you'll find in home RO systems: Granular Activated Carbon (GAC) and Carbon Block filters.

Feature Granular Activated Carbon (GAC) Carbon Block
Structure Loose granules of activated carbon, similar to coarse sand or coffee grounds. Powdered carbon that has been compressed into a solid, dense block.
Water Flow Water flows around the loose granules, which can sometimes create channels and bypass some media. Forces water through the entire dense block, ensuring maximum contact time.
Performance Effective, but "channeling" can sometimes lead to slightly less consistent chlorine removal over time. Highly consistent and thorough removal of chlorine and other contaminants due to its uniform structure.
Contaminant Removal Primarily removes chlorine, taste, and odors. Less effective on very fine sediment. Excellent for chlorine, taste, odors, and can also filter out finer sediments and some VOCs.
Typical Lifespan Generally requires more frequent replacement due to potential for channeling. Often has a longer, more predictable service life because the entire media is used evenly.

Ultimately, for the best protection against chlorine, systems that include at least one carbon block pre-filter are the superior choice. Their solid design prevents water from finding an easy way out, ensuring every drop gets treated thoroughly. Knowing this helps you look past the marketing and see how well a system is truly built to last.

What Happens When Your Water Contains Chloramine

Just when you think you've got chlorine figured out, some cities throw a curveball: chloramine. This isn't just a fancy name for the same thing. It's a totally different chemical, made by mixing chlorine with ammonia.

Water suppliers love chloramine because it's tough and stable. It keeps doing its job disinfecting water as it travels through miles of pipes to get to your tap. That's great for public health, but its stubborn nature creates a real headache for most water filters.

Why Standard Carbon Filters Struggle

Your run-of-the-mill activated carbon pre-filter, which is a rockstar at grabbing free chlorine, just can't keep up with chloramine. The chemical bond holding the chlorine and ammonia together is incredibly strong, and simple adsorption just doesn't cut it.

Here’s a good way to think about it: a standard carbon filter is like a magnet for loose chlorine particles floating in the water. But chloramine is like chlorine that's been locked inside a chemical cage with ammonia. Your magnet can't just snatch it out; you need a special key to break the lock first.

If your city uses chloramine and your RO system only has a standard carbon filter, you're rolling the dice with your RO membrane. The pre-filter simply won't remove enough chloramine, letting it slip through and chew away at the membrane just like free chlorine would.

This is a huge deal for homeowners. You can't just buy a system that says "chlorine removal" and assume you're covered for chloramine, too. You need a filter specifically designed to break that bond.

The Solution: Catalytic Carbon

To really go to war with chloramine, you need to upgrade your ammo to catalytic carbon. This isn't just a re-branded filter. It's a special type of activated carbon that's been treated to give its surface a reactive charge.

This "catalytic" surface actively forces a chemical reaction to happen, shattering that stubborn bond between chlorine and ammonia. Once the cage is broken, the filter can easily grab the now-free chlorine and deal with the leftover ammonia.

Catalytic carbon is a complete defense system in one package:

  • It Breaks the Bond: First, it acts like the "key" to unlock the chloramine molecule.
  • It Adsorbs the Chlorine: Then, it works just like a standard carbon filter, pulling the free chlorine out of the water.
  • It Handles the Ammonia: Finally, it helps convert what’s left of the ammonia into harmless compounds that won't mess with your water quality.

For anyone living in an area with chloramine-treated water, picking an RO system with a catalytic carbon pre-filter isn't optional—it's essential. It is the only reliable way to protect your membrane and ensure your drinking water is truly free from these disinfectants. Anything less is like bringing a knife to a gunfight.

Keeping Your System's Chlorine Shield Strong

A man replaces a water filter in an under-sink reverse osmosis system beneath a kitchen counter.

Putting a reverse osmosis system in your home is a huge step toward better water, but its power to block chlorine isn't something you can just set and forget. That carbon pre-filter—your system's personal bodyguard against chlorine—is a consumable part. Think of it like the oil filter in your car; it needs to be changed regularly to keep the whole machine running right and protect the really expensive parts down the line.

Honestly, skipping this one simple task is the number one reason I see RO systems fail way too early. Once that carbon filter’s huge internal surface area gets clogged up with chlorine and everything else it has absorbed, it just stops working. This leaves your very delicate RO membrane totally exposed to the one chemical it was never built to handle.

Your Most Important Maintenance Task

If you do nothing else, the single most critical job for keeping your RO system alive is replacing the pre-filters on schedule. For most homes, this means you'll be swapping out the carbon and sediment filters every 6 to 12 months.

Picture that carbon filter as a sponge with a limited capacity. Once every microscopic pore is full, it physically can't grab another molecule of chlorine. From that moment on, chlorinated water just flows right past it and starts its destructive assault on the RO membrane.

Your maintenance schedule isn't just a friendly suggestion—it's the lifeline that protects your investment. A few dollars spent on new pre-filters can easily save you from a costly membrane replacement and ensure your system keeps delivering pure, chlorine-free water.

Sticking to the schedule is the absolute best way to guarantee your system's chlorine shield stays strong year after year.

How to Know When It's Time for a Change

While following the manufacturer's timeline is your safest bet, you can also use your own senses to tell when a filter is on its last legs. You just need to be on the lookout for a few key signs that chlorine is starting to slip past your system's defenses.

These clues mean your pre-filter is tapped out and needs to be replaced right away:

  • The Return of the Chlorine Smell: The most obvious sign is that faint but unmistakable swimming pool scent coming back to your purified water.
  • A Change in Taste: Your RO water should taste clean and crisp. If it starts to have a slight chemical or "tap water" flavor again, that's a red flag.
  • Visible Sediment: Noticing cloudy water or little particles could mean the sediment pre-filter is also clogged, which puts even more stress on the carbon filter.

If you want to be extra sure, grab some simple and cheap chlorine test strips. Just dip one into a glass of your RO water for a quick visual check. If that strip changes color, you know for a fact chlorine is getting through, and it’s time to change that pre-filter immediately.

How To Choose The Right RO System For Your Home

Now that you understand how a reverse osmosis system protects itself, picking the right one should feel a lot less intimidating. You know the secret: the carbon pre-filter is the unsung hero that takes care of the chlorine. With that piece of the puzzle in place, you can shop with confidence.

Your first move should be to zoom in on the pre-filtration stages of any system you're considering. Don't just glance at it—really look. You want to see models that specifically call out having at least one carbon block pre-filter. While a granular activated carbon (GAC) filter is okay, the tightly packed structure of a carbon block is way better. It forces the water to have more contact time with the carbon, which is key for completely wiping out the chlorine.

Check For The Right Certifications

How do you know if a system really does what it claims? Look for a crucial third-party seal of approval: NSF/ANSI 42. This is the specific industry standard for a filter’s ability to handle "aesthetic" issues like chlorine, funky tastes, and weird smells. When you see this certification, it means an independent lab has tested it and confirmed it actually works.

An NSF/ANSI 42 certification isn't just marketing fluff. It’s your proof that the pre-filters are up to the task of removing chlorine, which in turn protects the delicate RO membrane and gives you great-tasting water.

Address Chloramine If Necessary

Before you pull the trigger on a purchase, do one last bit of homework. Find out if your local water utility uses chloramine instead of just chlorine. This is a common practice. You can usually find this info on their website with a quick search, or just give them a call.

If they do use chloramine, you absolutely must get a system that has a catalytic carbon pre-filter. A standard carbon filter just won’t cut it against chloramine, and your expensive RO membrane will be left exposed to damage. By confirming what’s in your water first, you can match it to the right pre-filter technology and buy a system that’s truly built to last.

Common Questions Answered

Even after getting into the weeds of how reverse osmosis systems deal with chlorine, some specific questions always seem to come up. Let's get you some quick, clear answers to help you make the right call.

Does Reverse Osmosis Get Rid of Chlorine Taste and Odor?

You bet. In fact, killing that "pool water" taste and smell is one of the first things you'll notice. This job falls squarely on the carbon pre-filter. It grabs onto the chlorine compounds that cause the nasty flavor, leaving you with nothing but crisp, clean water.

Can I Add a Carbon Filter to My RO System?

Yes, and it's a super common maintenance step. If your current RO system isn't cutting it or you just want to beef up its chlorine defense, you can easily swap out the pre-filter cartridges. A great move is to upgrade from a standard Granular Activated Carbon (GAC) filter to a more solid carbon block filter for better performance and protection.

Your entire RO system's health really comes down to the pre-filters. Swapping them out on schedule is the single most important thing you can do to protect your investment.

How Long Does a Carbon Pre-Filter Last?

How long a carbon pre-filter lasts really depends on two things: how much chlorine is in your water and how much water your family uses. For most folks, you'll need to replace these filters every 6 to 12 months. A good carbon block filter might last a bit longer than a basic GAC one, but always stick to what the manufacturer says. Waiting too long is an expensive mistake you don't want to make.


Here at Water Filter Advisor, we're all about giving you the straight-up info you need to pick the best filtration setup for your family. Check out our detailed guides and reviews to find the right system for your home at https://www.waterfilteradvisor.com.

The Ultimate Guide to Choosing a PFAS Water Filter

Yes, the right PFAS water filter can absolutely get the job done. Top-tier technologies like reverse osmosis and activated carbon have been shown to slash these contaminants by over 90%. A good filter is really your last line of defense, because PFAS—often called "forever chemicals"—don't break down in nature and can build up in your body over years.

What Are These "Forever Chemicals" Lurking in Your Water?

Clean tap water fills a clear drinking glass from a kitchen faucet, bubbles visible.

Ever tried to clean up glitter after a craft project or a party? Just when you think you've vacuumed up every last speck, you find it weeks later in the oddest places. That’s the perfect way to think about PFAS, a group of man-made chemicals that have earned the nickname "forever chemicals" for sticking around in the environment—and in us.

PFAS is short for per- and polyfluoroalkyl substances. It’s not just one chemical, but a huge family of thousands of synthetic compounds that are incredibly good at repelling heat, oil, grease, and water. That stubborn resilience is what made them a go-to ingredient in all sorts of consumer and industrial products for decades.

Where Do PFAS Come From?

The very same quality that makes PFAS so useful also makes them a massive environmental headache. Because they don't break down, they just accumulate. These chemicals have a few common ways of getting into our home water supplies:

  • Industrial Sites: Factories that made or used PFAS in their processes often discharged them into nearby rivers and lakes.
  • Firefighting Foam: For years, a special foam called AFFF was used at airports, military bases, and fire training centers. It's a huge source of PFAS contamination that seeps into the ground.
  • Consumer Products: Things you use every day, like non-stick pans, stain-proof carpets, and even some food packaging, can shed PFAS particles that eventually make their way into our water cycle.
  • Landfills: When all those products get thrown away, they sit in landfills. Over time, the PFAS can leach out and contaminate the groundwater below.

Once they're out there, PFAS are highly mobile in water. That means they can travel far from the original source, getting into municipal water systems and private wells, and eventually, right into the glass of water on your kitchen counter.

A recent study from the U.S. Geological Survey was a real eye-opener, estimating that nearly half of all tap water in the United States has at least one type of PFAS chemical in it. That widespread contamination is exactly why people are looking for effective filtration at home.

Why Are They a Health Concern?

The fact that "forever chemicals" stick around isn't just an environmental problem; it's a very real health issue. Since they don't break down easily, they can build up in our bodies from repeated exposure. Even tiny amounts over a long time have been linked to a whole host of potential health problems.

Scientific studies have connected long-term PFAS exposure to things like hormonal imbalances, liver damage, developmental issues in kids, and a higher risk for certain types of cancer. This is precisely why finding a reliable PFAS water filter has become such a priority for families everywhere. The idea is to create a solid barrier between these invisible contaminants and your household, making sure the water you drink every day is as clean and safe as it can possibly be.

How to Know If Your Home Has a PFAS Problem

So, how can you tell if you have a PFAS problem? This is the tricky part. These "forever chemicals" are completely invisible—they have no color, no odor, and no taste. You could be drinking them every day and have no idea.

Fortunately, you don't have to stay in the dark. There are a few solid ways to figure out if these chemicals are coming out of your tap.

Start With Your Local Water Report

Your first move is to do a little armchair detective work. Every public water supplier is legally required to send out an annual water quality report, sometimes called a Consumer Confidence Report (CCR).

This report lists all the contaminants they've tested for and what levels they found. Scan through it for any mention of PFAS, PFOA, or PFOS. It's not always the easiest document to read, but it's your first clue.

Use Online Tools to Check Your Area

If you can't find your CCR or it doesn't mention PFAS, don't sweat it. Several public health groups have done the heavy lifting for you by building online maps of known contamination zones.

The Environmental Working Group's (EWG) interactive PFAS map is an excellent place to start. Just type in your zip code, and you can see if contamination has been documented nearby. While this won't give you the exact level in your kitchen sink, it's a powerful indicator of your potential risk.

Pro Tip: A "non-detect" result on a water report doesn't always mean the level is zero. It just means the amount was below what the lab's equipment could measure. That detection limit might still be higher than what's considered safe, which is why testing your own water is the only way to be certain.

The Only Way to Know for Sure: Professional Lab Testing

While reports and maps give you a good idea of the risk, the only way to get a definitive answer for your home is to get your water professionally tested. This is, without a doubt, the most accurate method.

You can order specialized test kits online that are designed specifically for PFAS. The process is dead simple:

  1. Order the Kit: Find a certified lab that does PFAS analysis and buy a test kit.
  2. Take a Sample: The kit arrives with a sterile bottle and clear instructions. Follow them to the letter to avoid contaminating the sample—it really matters.
  3. Ship It Back: Pop the sample into the prepaid mailer and send it off to the lab.
  4. Get Your Report: In a couple of weeks, you'll get a detailed breakdown of which PFAS were found and their exact concentrations, usually measured in parts per trillion (ppt).

This lab report is your personal roadmap. It gives you the hard data you need to stop guessing and start acting. With these numbers in hand, you can choose the right pfas water filter that will actually solve the problem you have.

The Best Technologies for Removing PFAS

So, you've done your homework and suspect PFAS might be in your water. The next question is obvious: how do you get them out? The good news is, you don't need a Ph.D. in chemistry to tackle this. Several powerful filtration technologies are readily available for home use, and each one has a unique way of dealing with these stubborn "forever chemicals."

To make sense of it all, let's use a few analogies. Some filters act like microscopic bouncers at a nightclub, while others are more like super-sticky flypaper. Let's break down the three most effective methods for any homeowner on the hunt for the best PFAS water filter.

Granular Activated Carbon (GAC): The Super-Sticky Sponge

Picture a sponge with a ridiculously massive surface area—we're talking millions of tiny nooks, crannies, and pores. That's a pretty good way to think about Granular Activated Carbon (GAC). This isn't your average backyard grill charcoal; it's a specially treated material engineered to be incredibly porous.

When water passes through a GAC filter, PFAS chemicals get stuck in those tiny pores through a process called adsorption. It’s almost as if the carbon is a powerful magnet and the PFAS are tiny bits of metal—they just cling to the surface and don't let go. GAC is especially effective at nabbing the larger, "long-chain" PFAS molecules. Its reliable performance has caused a huge surge in demand for these filters.

The global market for PFAS filtration, currently valued at USD 2.75 billion, is expected to skyrocket to USD 8.38 billion by 2035. This boom is largely driven by new regulations, particularly in North America where the EPA has set incredibly strict limits as low as 4 parts per trillion (ppt). Activated carbon filters, with GAC leading the charge, hold a massive 32.40% of the market thanks to their proven effectiveness in both homes and city water systems. For a deeper dive, you can read the full research about these market trends.

Reverse Osmosis: The Ultra-Strict Bouncer

If GAC is the sticky sponge, then Reverse Osmosis (RO) is the bouncer at the most exclusive club in town, and he has an incredibly strict guest list. An RO system works by using your home's water pressure to force water molecules through a semipermeable membrane—basically, a filter with unimaginably small holes.

These pores are so tiny that only pure water molecules can get through. Everything else—larger molecules like PFAS, salts, heavy metals, and other nasty stuff—is physically blocked. They get turned away at the door and flushed down the drain with the wastewater.

Key Takeaway: Reverse osmosis is widely considered one of the most effective methods for PFAS removal, often achieving a reduction rate of over 90% for a wide range of "forever chemicals," including both long-chain and the trickier short-chain versions.

Because it works so well, RO is a cornerstone technology for under-sink drinking water systems. These setups usually combine the RO membrane with other filters, like sediment and carbon pre-filters, to create a multi-stage defense against a whole host of contaminants.

This chart lays out the different paths you can take to figure out your home's PFAS risk, from checking public data to ordering a private test kit.

Concept map outlining the PFAS testing process from location selection to laboratory analysis and reporting.

Knowing your starting point—whether it’s from a city report, a risk map, or your own water test—is the critical first step before you pick a filtration technology.

Ion Exchange Resins: The Chemical Magnet

The third major player in the PFAS filtration game is Ion Exchange. This technology works on a completely different principle. It’s less about physically blocking things and more about chemical attraction.

Think of it like a magnet. Ion exchange systems use tiny resin beads that are engineered with a specific electrical charge. Since PFAS molecules have an opposite charge, they are irresistibly drawn to the resin beads as water flows past. In the process, the resin releases a harmless ion (like chloride) in exchange for the PFAS contaminant, effectively swapping the bad for the good.

  • How It Works: Specially designed anion exchange resins carry a positive charge that attracts and latches onto negatively charged PFAS molecules.
  • Where It Shines: This method is highly effective for both long-chain and short-chain PFAS, making it an incredibly versatile solution.
  • Common Applications: You'll often find ion exchange resins in high-capacity whole-house filtration systems, sometimes paired with GAC to provide a powerful one-two punch against contaminants right at the source.

Each of these technologies offers a proven way to get safer drinking water. The best choice for your home really depends on things like the specific PFAS levels in your water, your budget, and whether you want to treat all the water in your house or just the water you drink from the kitchen sink.

PFAS Filtration Technology Comparison

To help you see how these options stack up, here’s a quick side-by-side comparison.

Technology Effectiveness Pros Cons Commonly Found In
Granular Activated Carbon (GAC) Good to Excellent. Very effective for long-chain PFAS; less so for short-chain. Affordable, widely available, removes chlorine and improves taste/odor. Media needs regular replacement, can become saturated, less effective on short-chain PFAS. Pitcher filters, faucet filters, refrigerator filters, under-sink systems, whole-house systems.
Reverse Osmosis (RO) Excellent. Removes over 90% of a wide range of PFAS (long and short-chain). Extremely high removal rate for many contaminants, produces very pure water. Wastes water (brine), removes beneficial minerals, slower flow rate, requires more maintenance. Under-sink drinking water systems, countertop RO units.
Ion Exchange (IX) Resin Excellent. Highly effective for both long-chain and short-chain PFAS. Very targeted and efficient, high capacity, can be regenerated in some systems. More expensive upfront, can be affected by other water contaminants (like sulfates). Whole-house systems, specialty filter cartridges (often combined with GAC).

This table should give you a solid starting point for figuring out which technology aligns best with your needs and priorities.

Choosing the Right PFAS Water Filter for Your Home

A kitchen counter displays a sink, faucet, and multiple water filtration systems, advising to 'Pick the Right Filter'.

Knowing the science behind filtration is one thing, but picking the right filter off the shelf? That's the real trick. With a dizzying number of options out there, the best PFAS water filter isn't a one-size-fits-all solution. It’s about finding the perfect match for your home, your family, and your wallet.

Think of it like buying a car. You wouldn't buy a two-seater sports car to haul a little league team. In the same way, the filter that works for a single person in an apartment is going to be completely different from what a big family in a three-story house needs.

Let’s walk through the main types of filters so you can figure out which one makes the most sense for you.

Whole-House Systems for Total Protection

If you're after complete, set-it-and-forget-it protection, a whole-house system is the undisputed champ. Often called a Point-of-Entry (POE) system, it gets installed right where the main water line enters your house. This means it treats every single drop of water before it ever reaches a faucet, showerhead, or appliance.

You’re getting purified water not just for drinking, but for bathing, laundry, and everything in between. Since we know PFAS can be absorbed through the skin or inhaled as steam in a hot shower, this comprehensive approach offers the ultimate peace of mind. These systems typically rely on massive GAC tanks, sometimes paired with ion exchange resins, to handle the high volume of water your home uses every day.

  • Ideal User: Homeowners, especially those with kids, who want to slash their PFAS exposure from every tap in the house.
  • Installation: This is a job for a pro. It requires a plumber to cut into your main water line to get it installed correctly.
  • Cost: Be prepared for a significant upfront investment. These systems can run from hundreds to several thousand dollars, not including the plumber's fee. You'll also have the ongoing cost of replacing the filter media every few years.

Under-Sink Systems: The Drinking Water Powerhouse

Maybe your main goal is just to make sure the water you drink and cook with is as pure as possible. If that's the case, an under-sink system is the gold standard. These are called Point-of-Use (POU) systems because they treat water right where you use it. They fit neatly in the cabinet under your kitchen sink and feed a separate, dedicated faucet.

Most of the top-performing under-sink units are Reverse Osmosis (RO) systems. As we covered earlier, RO is a beast when it comes to removing PFAS and a whole host of other contaminants. These systems almost always include GAC filters before and after the RO membrane, creating a powerful multi-stage defense that delivers incredibly pure water without the cost of treating your entire home.

This focus on drinking water is a major driver in the market. Drinking water treatment commands a massive 55.54% of the PFAS filtration market share and is growing rapidly as utilities and families work to meet strict safety standards. Households are increasingly turning to solutions like under-sink systems to combat contamination from sources like industrial runoff and firefighting foam. Discover more insights about PFAS filtration market trends on mordorintelligence.com.

Countertop and Pitcher Filters for Flexibility and Affordability

For anyone who can't make permanent plumbing changes (hello, renters!) or is just working with a tighter budget, countertop and pitcher filters are fantastic, accessible options. Don't write them off as too basic; the best new models are specifically engineered to go after PFAS.

  • Water Pitcher Filters: This is the easiest and most affordable way to get started. Just be sure to look for pitchers that use a combination of GAC and ion exchange media and, most importantly, are certified for PFAS reduction. They're perfect for individuals or small households.
  • Countertop Filters: These units sit on your counter and hook directly up to your existing faucet. They give you a much higher capacity and faster flow than a pitcher, making them a great middle-ground choice that doesn't require a plumber.

While your average, everyday water pitcher won't do much against "forever chemicals," a new wave of high-performance models has hit the market to meet this challenge. No matter what you choose, always, always check for third-party certifications to make sure the filter can actually do what it claims. At the end of the day, the best PFAS water filter is the one you’ll actually use, day in and day out.

How to Read Filter Certifications and Performance Data

When it comes to your water, you can't afford to take chances. Flashy marketing and vague promises on a box mean nothing without cold, hard proof that a pfas water filter actually does its job. Learning to decode the technical language on certifications and data sheets is the only real way to know if a filter is effective or just an empty promise.

Think of it like reading a nutrition label. The front of the package might scream "healthy," but the tiny print on the back tells the real story. For water filters, that story is told through third-party certifications.

Demystifying NSF/ANSI Certifications

The most important acronyms to look for are NSF/ANSI. NSF International is the independent, non-profit referee of the water filtration world. They test products against rigorous public health standards, and when you see their mark, it means a filter has been put through its paces and proven it can do what it claims.

For getting rid of PFAS, two standards are key:

  • NSF/ANSI 53: This is the standard for filters that reduce specific health-related contaminants. It covers things like lead, cysts, and—most importantly for us—certain PFAS chemicals like PFOA and PFOS. A filter with this certification has proven it can pull these specific compounds out of your water.
  • NSF/ANSI 58: This one is specifically for reverse osmosis (RO) systems. It confirms the system can reduce a whole host of contaminants, including everything covered under NSF/ANSI 53, plus others like arsenic and fluoride.

An NSF certification isn't a one-and-done deal. To keep it, manufacturers have to undergo regular facility inspections and get their products re-tested. It’s a mark of ongoing quality and proof that the company is committed to high standards.

How to Read a Performance Data Sheet

Beyond the official seal, you need to dig into the filter's Performance Data Sheet. This document is the filter’s report card, and you can usually find it on the manufacturer's website. Don't let the charts and numbers intimidate you—you only need to spot a few key things to know what you're looking at.

First, find the section on PFAS reduction. Here’s exactly what to look for to size up any pfas water filter:

  1. Specific PFAS Tested: The sheet should list the exact "forever chemicals" that were tested. Did they only check for PFOA and PFOS, or did they also test for others like GenX? The more compounds on that list, the more thorough the testing was.
  2. Reduction Percentage: Look for the removal rate. You want to see 90% or higher. The best filters out there will often hit over 99% reduction for specific PFAS compounds. Anything less than 90% probably isn't giving you the protection you're after.
  3. Filter Capacity and Service Life: This number tells you how many gallons the filter can clean before it's full and needs to be replaced. Pay close attention to this. An old, maxed-out filter doesn't just stop working—it can actually dump all the nasty stuff it has captured right back into your water.

By learning to spot these details, you can cut right through the marketing noise and make a decision based on real, verifiable performance. This is how you choose a filter that truly protects your family.

Installation, Maintenance, and Long-Term Costs

Picking out the right PFAS water filter is a fantastic first step, but your work isn’t over once you hit that "buy" button. A filter is only ever as good as its upkeep, and getting a handle on the real-world costs and effort is crucial for making sure your system actually protects you for years to come.

Think of it this way: the sticker price is just the down payment. The true cost of owning a water filter includes installation, all those replacement cartridges, and maybe even a plumber's visit down the road. It’s an ongoing investment in your family's health, not a one-and-done purchase.

Getting Your System Up and Running

How tough is the setup? Well, that depends entirely on what you bought. A simple water pitcher is a breeze—you just unbox it, give the cartridge a quick rinse, and you're good to go. Countertop units are almost as easy and usually just involve screwing a small adapter onto your kitchen faucet.

But when you get into under-sink and whole-house systems, it’s a whole different ballgame.

  • Under-Sink Systems: Many of these are sold as DIY-friendly, but you’ll need some basic plumbing comfort. Get ready to work in that cramped cabinet under the sink, connect new water lines, and drill a fresh hole in your countertop for the system's dedicated faucet.
  • Whole-House Systems: Don't even think about DIYing this one. This is a job for a licensed plumber, period. The process requires cutting into your home's main water line, which can lead to major problems if not done correctly. Be sure to factor a plumber's fee into your total budget for these systems.

Critical Maintenance Insight: An old, maxed-out filter doesn't just quietly stop working. It can actually become a source of contamination itself. A clogged filter can eventually release a concentrated slug of the very PFAS chemicals it captured, a nasty phenomenon known as "dumping."

The Ongoing Commitment to Clean Water

Long-term care is where the real work begins, and it's absolutely non-negotiable. The single most important job you have is changing your filter cartridges on time, every single time. Sticking to the manufacturer's schedule isn't just a suggestion; it’s vital for the system to remain effective.

The cost and timing of these changes will be your main recurring expense. A pitcher filter, for instance, might need a new cartridge every 2-3 months at about $15-$30 a pop. A more complex under-sink reverse osmosis system has several filters—some need changing every six months, others annually, with yearly costs falling between $50 to $150.

For a big whole-house system, you might only have to replace the giant media tank every 3-5 years, but that can be a hefty bill, sometimes running several hundred dollars. By understanding these future costs upfront, you can make a choice that keeps your water safe and your budget happy for the long haul.

Your PFAS Water Filter Questions Answered

Let's dive into some of the most common questions we hear from homeowners trying to choose a PFAS water filter. Getting straight answers is the first step toward feeling confident you're making the right call for your family.

Do Regular Brita or Fridge Filters Remove PFAS?

This is a big one, and the short answer is: probably not effectively. Most standard pitcher and refrigerator filters use a simple form of activated carbon. While carbon can grab onto some PFAS, these small filters just aren't designed to be powerful enough for the job.

You really need to see proof. Unless the filter has been specifically tested and certified by an independent group like NSF International for PFAS reduction (that would be under the NSF/ANSI 53 standard), you should assume it’s not giving you the protection you're looking for. Always hunt down the performance data sheet to be sure.

Does Boiling Water Get Rid of Forever Chemicals?

It's an old myth that boiling water fixes everything. When it comes to PFAS, boiling is not only useless—it actually makes the problem worse.

Think about it: when you boil water, the pure H₂O turns into steam and escapes, but the heavy PFAS chemicals get left behind. This process concentrates them in the water that's left, meaning what you end up with is even more contaminated than what you started with.

Crucial Takeaway: Never, ever rely on boiling to make your water safe from forever chemicals. The only proven ways to get them out are with dedicated filtration technologies like reverse osmosis, granular activated carbon, and ion exchange.

How Often Should I Change My PFAS Filter?

Sticking to the filter change schedule is absolutely critical. It’s not just that an old, maxed-out filter stops working. It can actually fail and dump all the contaminants it has captured back into your water in a concentrated burst. This is a real phenomenon known as "dumping," and you want to avoid it at all costs.

Here’s a general rule of thumb:

  • Pitcher filters: Every 2-3 months.
  • Under-sink systems: Cartridges usually last 6-12 months.
  • Whole-house systems: The large media bed can last 3-5 years or even longer.

Always, always follow the manufacturer's specific timeline for your exact model. If you're still weighing your options, check out some more detailed advice on selecting the best water filtration systems to compare different setups.


At Water Filter Advisor, our mission is to provide clear, research-backed guidance to help you find the perfect filtration solution. Explore our in-depth reviews and buying guides to protect your family from water contaminants. https://www.waterfilteradvisor.com

Choosing the Best Fluoride Removal Filter for Your Home

So, you're on a quest for the perfect fluoride removal filter. What exactly is this magical device? Think of it as your home's personal water bodyguard, specifically trained to spot and remove fluoride from your drinking water.

These aren't your run-of-the-mill filters. They use specialized media like activated alumina, bone char, or hyper-advanced reverse osmosis membranes to latch onto fluoride ions and show them the door. This is a high-level security detail that a standard carbon filter—like the one chilling in your fridge pitcher—simply isn't equipped to handle.

Why Is Fluoride in Water Suddenly a Hot Topic?

It seems like everyone is suddenly a water quality expert, and fluoride is public enemy number one. But why the sudden buzz? For decades, fluoride was hailed as the dental hygiene superhero, a public health triumph for its incredible cavity-fighting powers. But today, the conversation has changed. People are starting to look at their tap water with a more critical eye, asking what's really in it and demanding more control.

This isn't just a random trend. It's part of a massive cultural shift towards personal wellness and taking charge of what we put into our bodies. It's like a vitamin that was once a blanket recommendation for everyone, but now you want to decide on the dosage yourself. Homeowners are graduating from passive water consumers to active managers of their home's ecosystem.

From Public Health Triumph to Personal Choice

The story of water fluoridation began as a sweeping public health initiative. It's been a charged topic ever since municipalities started adding it to public water supplies back in the 1940s to combat tooth decay. Fast forward to today, and over 73% of Americans on public water systems receive fluoridated water.

But here's the flip side: growing concerns about overexposure. Studies have linked excessive fluoride intake to issues like dental fluorosis, which affected an estimated 23% of U.S. kids according to 2010 NHANES data. This very concern has propelled the market for fluoride removal filters from a niche product into a household staple. You can see the explosive growth in the filtration market for yourself over at MordorIntelligence.com.

This history is why the debate is so complex. To truly get it, you have to acknowledge the widely promoted dental benefits of fluoride rinse and other topical treatments, which form the bedrock of pro-fluoridation arguments. The core of today’s conversation isn’t about dismissing those benefits, but about gaining control over the dosage and its source.

The question has evolved. It's no longer a simple "Is fluoride good or bad?" but rather, "How much fluoride am I getting from all sources, and can I have the final say?" This shift towards personal oversight is the real engine driving the demand for effective home water filtration.

Taking Control of Your Tap Water

As a homeowner, you're the captain of your ship. The surging interest in a fluoride removal filter is a direct result of this empowerment. It’s about making a smart, informed decision for your family's health, whether you're in a downtown high-rise or a quiet suburban home.

This guide is your machete to cut through the jungle of information. We're here to validate your questions and give you a clear, practical roadmap to finding the perfect filtration system for your home. We’ll dissect the technology, demystify the costs, and review the real-world performance to help you become the master of your water quality.

So, how do these fluoride removal filters actually work their magic? It’s not some mystical plumbing ritual. It’s just clever science, and you don’t need a chemistry degree to get it.

Let's break down the main technologies. Think of them as three different types of security guards for your water, each with a unique strategy for kicking fluoride and other troublemakers to the curb. Understanding how they operate is the first step to choosing the right system for your home.

This infographic gives you a great overview of the whole fluoride debate, from its controversial history to the solutions available today.

Infographic discussing the fluoride in water debate, detailing its history, health benefits, concerns, and solutions.

As you can see, concerns over water fluoridation aren't new, and they've directly fueled the development of the filtration tech we're about to dive into.

Comparing Fluoride Removal Filter Technologies

To keep things simple, here’s a quick head-to-head comparison of the top three contenders in the fluoride removal arena. This table cuts through the jargon and shows you exactly what each technology brings to the table.

Filtration Technology How It Works (Analogy) Fluoride Removal Efficacy Best For
Reverse Osmosis (RO) The "Microscopic Bouncer" 90-99% Ultimate purity; removes the widest range of contaminants beyond just fluoride.
Activated Alumina The "Specialized Magnet" Up to 90% Targeted fluoride, arsenic, and selenium removal, especially in slightly acidic water.
Bone Char Carbon The "Natural Sponge" Up to 90% A natural approach that also tackles chlorine, heavy metals, and even radioactive isotopes.

Each of these systems has its own superpower. Now, let’s take a closer look at what’s happening under the hood.

Reverse Osmosis: The Microscopic Bouncer

Reverse Osmosis, or RO, is the undisputed heavyweight champion of water purification. Think of it as a bouncer at an exclusive nightclub with an incredibly strict guest list. It uses your home's water pressure to force water through a special semipermeable membrane.

This membrane is the real VIP. Its pores are so ridiculously tiny that only pure H₂O molecules can squeeze through. Everything else—fluoride ions, heavy metals like lead, dissolved salts, you name it—gets stopped at the velvet rope and flushed away.

Because it's so uncompromising, RO is often called the gold standard, capable of removing 90% to 99% of fluoride. It's more than just a fluoride filter; it’s a full-spectrum purification system that tackles a massive list of contaminants.

  • Fluoride Removal Rate: Typically 90-99%.
  • Also Removes: Lead, arsenic, chlorine, pesticides, salts, and most other dissolved solids.
  • The Process: Water is pushed through an ultra-fine membrane, leaving impurities behind.

The trade-off? RO systems create wastewater (the rejected contaminants) and can strip beneficial minerals from the water. Many modern systems solve this by including a remineralization filter to add healthy minerals like calcium and magnesium back into the water before it hits your glass.

Activated Alumina: The Specialized Magnet

If RO is a general bouncer, Activated Alumina is a specialist, a magnet designed for one primary mission: grabbing fluoride. The filter media is made from aluminum oxide (the same stuff in sapphires and rubies), but it's processed to be incredibly porous with a massive surface area.

Picture your water flowing through a maze filled with tiny, powerful magnets that only attract fluoride. As water passes over the Activated Alumina beads, fluoride ions are literally pulled out of the stream and latch onto the media. This process is called adsorption.

This method is highly effective and is one of the few technologies officially certified by the NSF for fluoride reduction. It works best when your water's pH is slightly acidic, ideally between 5.5 and 6.5.

Activated Alumina can knock out up to 90% of fluoride, but its effectiveness drops as the media gets saturated. That means you have to stay on top of filter changes to keep it performing at its best. It's also a champ at removing arsenic and selenium.

Bone Char Carbon: The Natural Sponge

Our third guard is Bone Char, which acts like a highly absorbent natural sponge. This is actually one of the oldest and most trusted water purification methods on the planet. It's made by charring animal bones in a low-oxygen kiln, creating a porous carbon material that's rich in calcium.

Imagine that bone char as a sponge filled with countless nooks and crannies. As water flows through, the bone char’s surface—which is high in tricalcium phosphate—naturally adsorbs fluoride ions, trapping them so they don't end up in your glass.

Bone char is a powerhouse, often reducing fluoride levels by up to 90%. But it doesn't stop there.

  • Chlorine: It’s fantastic at eliminating that chemical swimming-pool taste from chlorine.
  • Heavy Metals: It can also pull out harmful metals like lead, mercury, and cadmium.
  • Radioactive Isotopes: Uniquely, it even has the ability to remove certain radioactive particles.

This approach offers a powerful, all-natural way to get cleaner, safer, and better-tasting water flowing from your tap.

Choosing Your System: Point-Of-Use vs. Whole-House Filters

Split image comparing a point-of-use water filter system under a kitchen sink with a whole house exterior.

Alright, you've mastered the technologies that zap fluoride. Now for the next big decision: where do you want to filter your water? This choice is less about the science and more about your lifestyle.

Are you focused on purifying just the water you drink and cook with? Or are you aiming for a fortress-like solution that purifies every single drop entering your home? This is the core difference between Point-of-Use (POU) and Whole-House (POE) systems. Each has its pros and cons, and the best one for you depends entirely on your goals, your home, and your budget.

Let's unpack both options so you can figure out which one is your perfect match.

What Are Point-Of-Use Filters?

Think of a Point-of-Use system as a specialist. It targets water right where you’re going to use it—almost always the kitchen sink. It’s like having a personal chef for your drinking water, ensuring every glass you pour and every pot you fill is pristine.

These systems are a fantastic choice for renters and homeowners who want to zero in on their drinking and cooking water. They don't require major plumbing surgery, are easier on the wallet upfront, and come in several convenient forms.

  • Under-Sink Filters: These are the most popular for a reason. They hide away neatly under your sink and connect to a separate, dedicated faucet. You get a steady stream of pure water without any clutter on your countertop.
  • Countertop Filters: As the name implies, these units sit on your counter and connect directly to your main faucet. Installation is usually a snap, making them a great option if you can't or don't want to mess with the plumbing under the sink.
  • Water Pitcher Filters: Here’s a crucial heads-up: most of the pitcher filters you see at the store don't remove fluoride. You have to find a specialized model that uses the right filter media for the job. They’re simple and portable, but do your homework to make sure you get the right one.

POU systems are a fantastic way to dip your toes in the water, so to speak. You get high-quality, fluoride-free water for all your consumption needs without the cost and complexity of a massive installation.

The All-Encompassing Whole-House Filter Solution

If a POU system is a personal chef, then a Whole-House filter is the entire five-star kitchen staff. These systems, also called Point-of-Entry (POE), are installed right where your main water line enters your house.

From that point on, they treat everything. Every faucet, every shower, and every appliance gets the same purified water. This is the ultimate setup for families concerned about more than just ingestion—like absorbing contaminants through the skin in the shower or inhaling them from steam. It offers complete peace of mind.

A whole-house fluoride removal filter is a true investment in your home's infrastructure. It does more than protect your family; it also guards your plumbing and appliances against the scale and chemical damage that can shorten their lifespan.

This level of coverage comes with a higher price tag and usually requires a professional plumber for installation. But for a homeowner who wants a complete, set-it-and-forget-it solution, the value is undeniable. Imagine showering in water that’s as pure as the water you drink. It’s a growing priority for many, which is why the global water filter market hit USD 14.26 billion in 2023 and is projected to reach USD 26.22 billion by 2032. You can dig into the numbers in the full report from SkyQuest.

Making the Right Choice for Your Home

So, which one is it going to be? The decision usually becomes clear when you answer a few key questions. Let’s put these two options side-by-side.

Feature Point-of-Use (POU) Whole-House (POE)
Scope of Filtration Treats water at a single point, like the kitchen sink. Treats all water entering the home.
Primary Goal Provides high-quality drinking and cooking water. Ensures purified water from every tap, shower, and appliance.
Installation Often DIY-friendly (countertop) or minor plumbing (under-sink). Usually requires professional installation.
Initial Cost Lower ($100 – $600) Higher ($1,000 – $5,000+)
Best For Renters, smaller households, or those on a tighter budget. Homeowners, large families, and those seeking total protection.

Someone renting an apartment would find an under-sink reverse osmosis system to be a perfect, non-permanent solution for amazing drinking water. On the flip side, a family settling into their forever home might see a whole-house system as a smart, long-term upgrade that adds value to both their health and their property.

Understanding the True Cost of Clean Water

When you’re shopping for a fluoride removal filter, the sticker price is just the tip of the iceberg. To really understand the investment, you have to look at the total cost of ownership—that’s the whole shebang, including the initial purchase, ongoing maintenance, and even a few hidden costs you might not expect.

Thinking about the full financial picture upfront saves you from surprise expenses down the road and helps you budget like a pro. It’s like planning a kitchen remodel; you wouldn’t just budget for the new cabinets and call it a day. In fact, many people consult detailed guides on home renovation costs to see the whole picture. The same mindset applies here.

Let’s break down exactly what goes into the cost of pure, fluoride-free water.

The Initial Purchase Price

First up is the system itself. As we’ve covered, the price range is wide and really depends on whether you go for a targeted point-of-use system or a comprehensive whole-house solution.

  • Point-of-Use (POU) Systems: These are your most affordable entry point. A quality under-sink reverse osmosis or activated alumina filter will typically set you back anywhere from $150 to $600.
  • Whole-House (POE) Systems: If you want to treat every drop of water in your home, the initial investment is much larger. You're generally looking at $1,000 to over $5,000, depending on the size of your home and the technology you choose.

This upfront cost gets you the main hardware—the filter housings, the first set of cartridges, a storage tank (for RO systems), and a dedicated faucet. But this is just the beginning of the financial journey.

Recurring Costs: Replacement Filters and Media

The real long-term cost of any water filter is its consumables. To keep your system working correctly, you must replace the filter cartridges or media on schedule. If you don't, your filter will stop removing fluoride and could even become a breeding ground for bacteria.

It's just like owning a printer; the machine is a one-time purchase, but you'll always need more ink.

A realistic annual maintenance budget for a typical under-sink reverse osmosis system is between $80 and $200. This covers the pre-filters, post-filters, and a new RO membrane every few years.

For a whole-house system, the costs can be higher, but replacements are less frequent. The large media tanks might only need new material every 3 to 5 years, but that replacement could easily run several hundred dollars when it's due.

Hidden Costs: Water and Electricity

Some filtration technologies have operational costs that aren't printed on the box. Reverse osmosis systems, our best weapon against fluoride, are a prime example.

Because RO works by forcing water through an incredibly fine membrane, it also produces wastewater that carries away all the rejected contaminants. Older systems were notoriously inefficient, wasting several gallons of water for every clean gallon produced. Thankfully, modern systems are much better, often getting close to a 1:1 waste ratio, but it’s still an extra utility cost to factor in.

Additionally, some larger RO systems or units with a UV purification stage need electricity to run booster pumps or lamps. This adds a small but steady amount to your monthly power bill. While these "hidden" expenses might seem minor, they all contribute to the true cost per gallon of your filtered water.

Installation, Maintenance, and Testing Your Water

Hands installing a white water filter under a sink, with a blue filter and tools nearby.

Okay, you've chosen your champion filter. That's a huge step, but the journey isn't over. Owning a fluoride removal filter is a lot like owning a car; you have to install it correctly, keep it maintained, and check under the hood occasionally to make sure it's doing its job.

This is the phase where you get to see the real-world results of your investment and achieve total peace of mind. Let's walk through everything from setup to testing, so you can keep that pure, clean water flowing for years to come.

Getting Your System Set Up

The installation can range from a five-minute task to a project requiring a professional plumber. It all depends on the system you chose. Figuring this out ahead of time will save you a world of headaches.

  • DIY-Friendly Options: Most point-of-use systems, like countertop units and faucet-mounted filters, are designed to be ridiculously easy. Pop it on, and you're good to go. Even many under-sink systems are manageable for anyone with basic DIY skills—it's usually just a matter of connecting a few color-coded tubes.
  • Professional Installation: Now, whole-house systems are a different animal. Since they tie directly into your main water line, this is almost always a job for a licensed plumber. A pro will ensure it's installed to code, won't leak, and doesn't negatively impact your home's water pressure.

A Simple Maintenance Checklist

Your filter is a workhorse, but it needs a little TLC to keep performing. Regular maintenance isn't optional if you want safe, effective filtration. Once a filter cartridge gets clogged, it stops removing fluoride, restricts water flow, and can even become a breeding ground for bacteria.

Think of your filter cartridges like the oil filter in your car. You wouldn't just ignore it, right? Neglecting it doesn't just hurt performance; it eventually causes much bigger problems. Sticking to a schedule is the single best thing you can do for your system's health.

Here’s a general timeline to keep in mind, but always, always follow the manufacturer's specific guidelines for your model.

  1. Pre-Filters (Every 6-12 Months): These are the gatekeepers, catching the big stuff like sediment and chlorine to protect the more sensitive (and expensive) filters down the line.
  2. Post-Filters (Every 12 Months): Think of these as the "polishers." They often treat the water after the main filtration stage to improve the taste and catch anything left over.
  3. Main Media/Membranes (Every 2-5 Years): This is the heart of your system—the reverse osmosis membrane, activated alumina, or bone char filter. These last much longer, but replacing them on schedule is absolutely critical.

How Do You Know It's Working?

This is the million-dollar question, isn't it? After you've invested in a quality fluoride removal filter, you deserve proof that it's delivering on its promise. The great news is you don't have to just take the company's word for it. You can test the water yourself.

  • Home Water Test Kits: You can find specialized fluoride testing kits online. They usually use color-changing strips or simple electronic meters to give you an instant reading. They’re a fantastic way to get a quick before-and-after snapshot of your water.
  • Professional Lab Analysis: For the most accurate, bulletproof results, send a water sample to a certified laboratory. They'll give you a precise measurement of fluoride concentration, down to the parts per million. This is how you confirm your filter’s performance with scientific certainty.

The demand for filters that can handle fluoride and other stubborn chemicals is exploding. In fact, the global market for media that filters out contaminants like PFAS is projected to grow by a staggering 183.7%, shooting up from $2.9 billion in 2026 to $8.2 billion by 2036. Technologies like Granular Activated Carbon (GAC) are at the forefront, making up a huge piece of the market for families wanting to ensure their water is truly clean. You can dive deeper into these market trends in a report from Fact.MR.

Common Questions About Fluoride Removal Filters

Even after doing your homework, a few nagging questions can keep you from pulling the trigger on the right fluoride removal filter. That's totally normal. Making a confident choice for your home means getting those last few uncertainties ironed out.

This section is dedicated to tackling those common questions head-on. We'll give you clear, straightforward answers so you can move forward with confidence.

Will a Standard Brita Filter Remove Fluoride?

This is probably the number one question out there, and the answer is a simple, resounding no. A standard Brita filter, or most basic carbon pitchers you grab off the shelf, will not remove fluoride.

Those filters are great for their intended purpose—mainly removing chlorine to make your water taste and smell better. They use a simple activated carbon that acts like a sponge for larger contaminants.

Fluoride ions, however, are tiny and slippery, requiring a more specialized filtration media to capture them. To actually remove fluoride, you need a system that uses technologies like reverse osmosis, activated alumina, or bone char—the very methods we've been discussing.

Do These Filters Also Remove Healthy Minerals?

Great question. The answer really depends on the filtration technology. Some do, and some don't, which is a key difference in the final quality of your water.

  • Reverse Osmosis (RO): Yes, RO systems are incredibly thorough. They strip out almost everything, which includes beneficial minerals like calcium and magnesium. The membrane's pores are just too fine for these minerals to pass through. To address this, many modern RO systems now include a remineralization filter as the final stage to add those healthy minerals back in before the water hits your glass.

  • Activated Alumina and Bone Char: These methods are much more selective. Think of them as specialists that target specific contaminants like fluoride, arsenic, and certain heavy metals. For the most part, they leave the healthy minerals alone, which is a huge plus if you prefer mineral-rich water.

It often comes down to personal preference: Do you want the absolute purest water possible (and then add good stuff back), or would you rather have a filter that surgically removes the bad stuff while leaving the good stuff intact?

How Can I Find Out My Local Fluoride Level?

You have to know your starting point. You can't tell if your filter is working if you don't know how much fluoride is in your tap water to begin with. Luckily, this is usually pretty easy to find out.

Most municipalities are required to provide residents with an annual water quality report, sometimes called a Consumer Confidence Report (CCR).

This report breaks down exactly what's in your water, including fluoride levels. You can usually find it on your local water utility’s website. If it’s not online, just give their office a call. If you're on a private well, the only way to know for sure is to get your water tested by a certified lab.

Are the Filtration Methods Themselves Safe?

Absolutely. The technologies used in a quality fluoride removal filter are well-established and proven to be safe for home use. Still, it's smart to be informed.

For example, some people express concern that activated alumina filters might leach aluminum into the water. It’s a valid question, but filters certified by organizations like the NSF (National Sanitation Foundation) are rigorously tested to ensure they're safe and don't add anything harmful. Any potential aluminum leaching is minimal and considered safe.

Bone char is a natural media, and reverse osmosis is simply a physical barrier. The biggest risk with any filter isn't the technology itself—it's poor maintenance. If you don't change filter cartridges on schedule, they can stop working and even harbor bacteria. For a deeper dive on different water treatment options and safety, you can find a ton of info in articles that offer expert advice on water filters.

Just stay on top of your maintenance schedule, and your system will keep providing clean, safe, and fluoride-free water for years.


At Water Filter Advisor, we believe everyone deserves access to clean, safe water. We're dedicated to providing the most reliable, research-driven reviews and guides to help you make the best choice for your family. Explore our in-depth resources and find your perfect filtration solution today at https://www.waterfilteradvisor.com.

How to Filter and Remove Fluoride from Your Water: A Homeowner’s Guide

Yes, the right filter can remove fluoride from your water, but here's the catch: your standard fridge filter or that basic pitcher in your kitchen probably won't cut it. To actually pull fluoride out, you need a system with technology specifically designed to capture tiny dissolved minerals like fluoride ions. Think of it as needing a specialist, not a general practitioner.

Your Quick Guide to Fluoride Filtration Methods

So, you're on a quest for the best way to remove fluoride from your home's drinking water? Fantastic! You've come to the right place. Most of us are familiar with filters that make water taste better by getting rid of chlorine, but taking out fluoride is a whole different ballgame. It's like going from playing checkers to playing chess.

The fluoride ion is incredibly small, which means it can zip right through the pores of a typical activated carbon filter. Imagine trying to catch sand with a fishing net—it just doesn't work. You need a much finer, more specialized tool for the job. Fortunately, several proven technologies are up to the task, each with its own clever approach.

A collection of water filtration systems, including reverse osmosis and bone char, labeled for fluoride removal.

The Four Main Technologies That Work

For homeowners serious about removing fluoride, it really boils down to four main technologies. Each one uses a different scientific principle to separate fluoride from your water, almost like a magic trick happening right under your sink.

  • Reverse Osmosis (RO): This is the heavy hitter of water purification. An RO system uses high pressure to push water through a special membrane with microscopic pores. These pores are so small they block fluoride, lead, chlorine, and a whole host of other contaminants, letting only pure water molecules pass through. It's the bouncer of the filtration world, letting only the VIPs (water molecules) through the velvet rope.
  • Activated Alumina (AA): This method works like a magnet for fluoride. The filter contains a porous material that chemically attracts and traps fluoride ions as water flows over it, effectively pulling them out of your drinking water.
  • Bone Char (BC): This might sound old-school, but it's incredibly effective. Bone char is a type of porous carbon media made from animal bones, and its unique structure is naturally excellent at adsorbing fluoride. It's one of nature's original water filters.
  • Distillation: This process is nature's own purification method, just done in a machine on your countertop. It works by boiling water to create steam, leaving fluoride and other heavy contaminants behind. The steam is then cooled and condensed back into pure, clean water.

Water fluoridation in the U.S. started way back in 1945 to help with dental health, and today, about 63% of Americans (that's over 200 million people) get fluoridated tap water.

Of all the options, reverse osmosis systems are a real standout. Independent lab tests for top brands show they can remove up to 99.9% of fluoride. If you want to dive deeper, you can explore more research on the water filtration market to see the performance data for yourself.

To help you get a clearer picture of which one might be right for you, here’s a quick rundown of how these technologies stack up.

Comparing Fluoride Filtration Technologies

This table offers a quick comparison of the most effective technologies for removing fluoride from your home's drinking water.

Filtration Method Fluoride Removal Rate Best For Pros Cons
Reverse Osmosis 90-99% Under-sink systems Highly effective; removes many other contaminants Wastes some water; higher initial cost
Activated Alumina 85-95% Countertop & under-sink Great for targeted fluoride removal Media needs regular replacement
Bone Char Up to 90% Countertop & pitchers Natural media; also removes other contaminants Slower flow rate; less common
Distillation 99%+ Countertop units Produces extremely pure water Slow process; uses electricity

As you can see, each method has its trade-offs. The best choice really depends on your budget, how much water you need, and your performance expectations.

Why Your Standard Water Filter Can't Remove Fluoride

It’s a common misconception, and a frustrating one for many homeowners. You buy that popular water pitcher or refrigerator filter, assuming it’s giving you pure, clean water. But when it comes to fluoride, that trusty filter is basically taking a nap. The reason is all about size and chemistry.

Your standard filter is great at its job, but its job description simply doesn't include catching something as tiny and slippery as a fluoride ion.

A water filter pitcher with a "Not for fluoride" label sits on a wooden kitchen counter.

Think of it like trying to catch fine sand with a fishing net. The net is perfect for catching fish, but the sand will slip right through the holes. That’s exactly what’s happening inside your filter. Fluoride exists in water as dissolved ions, which are incredibly small particles. Most basic filters use activated carbon as their main tool.

What Activated Carbon Filters Are Good At

Let's be clear: activated carbon is a workhorse. Its surface is a maze of microscopic pores and crevices, which gives it an enormous surface area. This structure makes it a master of adsorption—a process where certain contaminants literally stick to the carbon's surface as water passes by.

This is why it's so effective at tackling the big stuff that makes your water taste and smell off. Activated carbon filters are champs at removing:

  • Chlorine: This is their number one job. They excel at grabbing the chlorine used to treat city water, which is the main reason filtered water tastes so much cleaner and fresher.
  • Volatile Organic Compounds (VOCs): This includes a range of industrial chemicals and solvents that can sometimes seep into water sources.
  • Sediment and Particulates: They also trap larger bits of rust, silt, and sand that can make water cloudy.

The bottom line is that these filters are designed to improve the aesthetics of water by capturing large, clunky contaminants.

Activated carbon filters work by adsorption, where contaminants stick to the filter's surface. While this is great for chlorine and sediment, the fluoride ion is simply too small and not chemically attracted to the carbon in a way that allows for effective removal.

The Fluoride Filtration Challenge

Fluoride ions, however, play by a different set of rules. They are dissolved minerals, meaning they're completely integrated into the water at a molecular level. They are far too small to get physically trapped in the pores of a standard carbon filter.

On top of that, they don't have the right chemical charge to be "sticky" enough for the carbon to grab them. So, the fluoride ions just cruise right on through the filter along with the water molecules, completely untouched.

This is the fundamental mismatch. To pull something that small out of water, you need a totally different strategy. It requires more advanced technologies like reverse osmosis, activated alumina, or distillation, which are specifically engineered to separate these tiny dissolved solids—a task a standard carbon filter was never built to handle.

A Deep Dive into Effective Fluoride Filtration Technologies

So, you've figured out your standard carbon filter isn't going to cut it for fluoride. Now it's time to call in the specialists.

Think of it like this: your basic pitcher filter is a general practitioner, good for common stuff like chlorine. But for a specific issue like fluoride, you need an expert with the right tools. We’re talking about technologies designed from the ground up to pull dissolved minerals out of your water. These systems don’t just strain particles; they use some pretty cool science to get the job done.

We're going to break down the four heavy hitters in the fluoride removal game: Reverse Osmosis (RO), Activated Alumina, Bone Char, and Distillation. Each one works on a completely different principle, and each has its own set of pros and cons for your home.

Reverse Osmosis: The Purity Powerhouse

Reverse osmosis, or RO, is pretty much the gold standard when you want everything gone.

Imagine a bouncer at an exclusive club, but for water molecules. This bouncer is a special semi-permeable membrane with microscopic pores so tiny that only pure H₂O can squeeze through. Your tap water is pushed against this membrane under pressure, and while the small water molecules make it to the other side, bigger molecules—like fluoride, lead, arsenic, and salts—get bounced and flushed down the drain.

It’s a brute-force physical separation that’s incredibly effective. A good RO system will often strip out more than 90% of all total dissolved solids (TDS), making it the top pick if you're concerned about more than just fluoride.

Modern systems like reverse osmosis (RO), activated alumina, bone char, and ion exchange are game-changers, with RO leading at 99.9% removal efficiency in commercial tests. Take the Cloud RO: NSF-certified to standard 58, it erased 100% fluoride, chlorine, arsenic, and lead in rigorous trials, reducing TDS dramatically while remineralizing to a healthy pH of 9.7. Even pitcher options hold up—Clearly Filtered zapped fluoride from 2.18 mg/L to <0.01 mg/L (>99.54%), fluosilicate by 99.49%, and fluosilicic acid by 99.52%, tackling dental fluorosis head-on. You can discover more insights about these commercial fluoride removal systems to see the full scope of their capabilities.

Activated Alumina: The Fluoride Magnet

If RO is a bouncer, then Activated Alumina (AA) is a powerful magnet tuned specifically to grab fluoride. The filter media is made from aluminum oxide, which is loaded with tiny pores, giving it a massive surface area.

As your water flows through, fluoride ions are chemically drawn to the surface of the alumina and get stuck. This process is called adsorption—the contaminants literally stick to the outside of the filter material. It's a highly targeted approach that also works well on arsenic and selenium.

But there are a few catches with Activated Alumina:

  • Water pH is Key: It performs best in slightly acidic water, ideally with a pH between 5.5 and 6.5.
  • Slow and Steady: The water needs to hang out with the media long enough for the magic to happen. That means flow rates are typically on the slower side.
  • Needs Swapping Out: Eventually, the alumina gets clogged with fluoride and stops working. You have to replace the cartridge regularly to keep it effective.

Bone Char: The Natural Adsorbent

Okay, bone char might sound a little weird, but it's one of the oldest tricks in the book for getting rid of fluoride. It’s made from charred animal bones and has a super porous structure that’s fantastic at grabbing fluoride and other heavy metals.

Just like activated alumina, bone char works through adsorption. Its secret weapon is a high concentration of hydroxylapatite, a calcium-phosphate compound that has a natural attraction to fluoride ions. When water passes through, the fluoride gets pulled out and locks onto the bone char.

Lots of people prefer this method because it's a natural material, not something cooked up in a lab. It's also pretty good at removing chlorine and lead, making it a solid, well-rounded option for generally better water quality.

Distillation: The Classic Purifier

Distillation is basically nature's water cycle in a box on your countertop. The concept is dead simple, but it works like a charm. You boil water to create steam, leaving almost all the impurities behind.

Here's the play-by-play:

  1. Boil: Water in the distiller heats up and turns to steam. All the heavy stuff—fluoride, salts, heavy metals—can't evaporate, so it gets left behind.
  2. Cool: The pure water vapor travels into a cooling coil.
  3. Collect: As the steam cools, it turns back into liquid water, which drips into a clean container.

The water you get is about as pure as it gets, with fluoride removal rates often topping 99%. The trade-off? It’s slow, it uses electricity, and it removes everything, including the good minerals. That's why you usually see distillers used for small batches of drinking water, not for an entire house.

Choosing the Right Fluoride Filter System for Your Home

Knowing the science behind a filter to remove fluoride is one thing. Picking the perfect system for your kitchen? That's the real challenge.

What works great for your neighbor might be a terrible fit for you. It really boils down to your kitchen space, how much water your family uses, and your budget. Let’s shift from the technical specs to the practical reality of your home and look at the most common options—from heavy-duty under-sink units to grab-and-go pitchers.

Under-Sink Systems: The Hidden Powerhouse

If you’re looking for top-tier fluoride removal without a machine cluttering up your counter, an under-sink reverse osmosis (RO) system is the gold standard. These systems are tucked away neatly in the cabinet right below your sink, connecting directly to the cold water line.

They usually come with their own dedicated, smaller faucet that sits on your sink, giving you a constant supply of purified water for drinking and cooking. This setup is perfect for families who go through a lot of water and want the best filtration possible without sacrificing counter space. Installation is a bit more involved, but the sheer convenience of having pure water on tap is hard to beat.

Countertop Units: Versatility and Ease

Renting your home? Or maybe you just don’t want a permanent installation? A countertop filter is an excellent choice. These units sit right next to your sink and connect to your faucet with a simple diverter valve. When you want filtered water, you just flip a switch; the rest of the time, your faucet works like normal.

Countertop systems hit that sweet spot between power and convenience. They often use multiple filter stages, including activated alumina or specialized carbon, to effectively get rid of fluoride. Since they don’t require any permanent plumbing changes, they’re ideal for apartments or smaller kitchens where under-sink real estate is at a premium.

Specialized Pitchers: Portable and Practical

Don't expect your standard Brita to do the job here. While most pitchers won't touch fluoride, there are specialized models designed specifically for it. These pitchers use advanced media like bone char or ion-exchange resins to zero in on and capture fluoride ions.

They are by far the most affordable and portable option—great for a single person, a small household, or even for taking to the office. The trade-off is capacity and speed. You’ll be refilling the pitcher constantly, and it filters much slower than a larger system. But for low-volume needs, it’s a simple and effective solution.

If you're trying to figure out which style fits your daily life, this decision tree can help point you in the right direction.

A flowchart guiding users to choose the right fluoride filter based on volume, counter space, and portability.

As the chart shows, if you need a lot of water, an under-sink system is your best bet. If you're on a budget or need something you can move around, a pitcher is the way to go. Countertop units fill that middle ground perfectly.

Why Whole-House Fluoride Filtration Is Rarely a Good Idea

You might be tempted to just filter all the water coming into your home, but this is one of those cases where going bigger isn't better. Whole-house fluoride filtration is incredibly expensive and usually impractical for a couple of big reasons.

The main reason to steer clear of whole-house systems is the massive cost and waste. An RO system big enough to handle an entire house is a huge investment, and it generates a ton of wastewater, which can send your water bill through the roof. On top of that, you'd lose the topical dental health benefits of fluoride when you shower.

For these reasons, your best bet is to stick with a point-of-use filter for the water you drink and cook with. It's the most sensible and cost-effective approach. For more help finding the perfect fit, our collection of expert water filtration advice can offer more guidance.

Independent reviews often praise RO systems like Aquatru, which scored a 9.59 for its 100% fluoride elimination and impressive performance against PFAS and chlorine. Lab data for pitchers from brands like Clearly Filtered shows they can remove over 99.54% of fluoride. However, commercial stress tests show RO maintains its high removal rate of 99.9%, while some pitchers can drop below 50%. This makes your choice of system absolutely critical. Learn more about the global market for these powerful water filters to see how different technologies stack up in the real world.

How to Verify a Filter's Fluoride Removal Claims

The water filter market is a noisy place, full of bold promises. With so many brands claiming their filter can remove fluoride, how do you cut through the marketing hype to find a product that actually works? The secret is looking for independent, third-party proof.

Think of it this way: buying a water filter is an investment in your family's health. You wouldn't make that kind of investment without doing a little homework first. Thankfully, trustworthy manufacturers make it easy by providing clear, verifiable data that shows their products deliver.

A person at a desk examining documents related to certification, with a model house and Sica bottle.

Look for Independent Certifications

The single most reliable way to confirm a filter's claims is to look for a seal of approval from an independent testing organization. These groups have no skin in the game; their only job is to put a product through its paces against tough industry standards.

In the world of water filtration, the most respected name out there is the NSF (National Sanitation Foundation). When a filter is NSF certified, it means it's been rigorously tested to meet strict public health and safety standards. And for fluoride removal, one specific certification is the one you really want to see.

NSF/ANSI 58: The Gold Standard for Fluoride Reduction
This certification is designed specifically for reverse osmosis (RO) systems and requires testing for fluoride reduction. If an RO system has that NSF/ANSI 58 seal, it’s been independently verified to do the job right.

When you spot that certification, you can feel confident that the product’s claims were proven in a lab, not just dreamed up by a marketing team. You can usually find the NSF seal right on the product packaging, the system itself, or on the manufacturer's official website.

How to Read a Performance Data Sheet

Beyond the official seals, any reputable manufacturer should also provide a Performance Data Sheet. This is basically a technical report card that breaks down exactly which contaminants the filter removes and by how much. Don't let the technical jargon scare you off—you only need to look for a couple of key things.

When you get your hands on a data sheet for a filter you think can remove fluoride, just follow these simple steps:

  1. Find the Fluoride Entry: Quickly scan the list of contaminants for "Fluoride." If you don't see it, the filter wasn't designed or tested to remove it. Simple as that.
  2. Check the Reduction Rate: Right next to the fluoride entry, there should be a percentage. This number tells you how much fluoride the filter successfully removed during testing. For real-world effectiveness, you want to see reduction rates of 90% or higher.
  3. Note the Testing Conditions: The sheet should also mention the conditions of the test, like water pressure and pH level. This gives you some context for how the filter is likely to perform with the water coming out of your own tap.

By learning to spot these key details, you can tune out all the noise and make a truly informed decision. Choosing a certified filter with a clear data sheet is the best way to ensure you're getting a system that delivers on its promise of cleaner, healthier water for your home.

Looking Beyond the Sticker Price: The True Cost of Fluoride Filtration

When you're shopping for a fluoride filter, it’s easy to get tunnel vision and focus only on the initial price tag. But that's just the beginning of the story. The real cost of any water filter system isn't what you pay on day one—it’s the total cost of ownership over months and years of use.

Think of it like buying a car. The upfront cost is a big deal, but so are the ongoing expenses for gas, oil changes, and new tires. Water filters are the same. You're not just buying a piece of hardware; you're committing to its upkeep to keep it running right.

The Hidden Costs: What You'll Really Be Paying For

That initial purchase price is just the down payment. To keep getting clean, fluoride-free water, you'll need to account for a few other things that will definitely add up.

  • Replacement Filter Cartridges: This is the big one. It's the most significant and consistent expense you'll have. Whether it's an activated alumina cartridge or a reverse osmosis membrane, these filters don't last forever. They need to be swapped out on schedule to keep doing their job.
  • Your Utility Bills: Some systems use more resources than others. A water distiller, for example, has to boil water, which takes a fair amount of electricity and will show up on your power bill. Reverse osmosis systems are known for creating wastewater—for every one gallon of pure water you get, it might flush three to four gallons down the drain, slightly bumping up your water bill.

The single biggest long-term cost is almost always the replacement filters. If you put off changing them, you’re not just drinking lower-quality water; you could end up damaging the whole system and facing a much bigger repair bill.

A Five-Year Cost Showdown

Let's make this real. Here’s a look at how the costs stack up for two popular choices over a five-year stretch. It’s a perfect example of how a cheaper start doesn’t always mean you save money in the long run.

Cost Component Under-Sink Reverse Osmosis System Specialized Fluoride-Removing Pitcher
Initial Purchase $250 – $500 $50 – $80
Annual Filter Cost $60 – $120 (for pre-filters & post-filters) $120 – $180 (replacing every 2-3 months)
5-Year Filter Total $300 – $600 $600 – $900
Membrane Replacement $50 – $100 (once every 2-4 years) N/A
Estimated 5-Year Total $600 – $1200 $650 – $980

As you can see, that pitcher looks like a steal at first. But because you're replacing those filters so often, the total cost over five years can creep up to be nearly as much as a high-performance under-sink RO system. This is exactly why you have to look at the big picture before deciding.

Got Questions About Fluoride Removal? We Have Answers.

As you start looking into filters, you'll naturally run into some common questions. From kitchen myths to the practical side of testing, let's clear up the most frequent queries so you can move forward with confidence.

Will Boiling Water Get Rid of Fluoride?

This is a classic kitchen myth. While boiling is great for zapping bacteria and viruses, it actually works against you when it comes to fluoride.

When you boil a pot of water, pure H₂O escapes as steam, but the fluoride ions get left behind. This means the water left in the pot has an even higher concentration of fluoride than when you started. For removing fluoride, you need a filter, not heat.

Do Standard Brita Filters Remove Fluoride?

This is probably the biggest point of confusion out there, and the answer is a firm no. Your standard pitcher filter, like a Brita, uses activated carbon. That’s fantastic for making your water taste and smell better because it grabs onto things like chlorine.

But as we've covered, fluoride ions are tiny and just don't stick to regular carbon. They slip right through. So, while those pitchers are popular, they do not lower the fluoride level in your water. You absolutely need a specialized filter designed for the job.

The decision to remove fluoride is a personal one. It often comes down to your health philosophy, how much fluoride you get from other sources (like toothpaste), and the actual levels in your local water.

How Can I Test My Water for Fluoride?

You can't fix what you don't measure. Knowing your starting point is key. You've got two main ways to go about it:

  • Home Test Kits: You can find test strips or digital meters online that give you a quick reading. They’re convenient for a ballpark figure, but their accuracy can be a bit hit-or-miss.
  • Professional Lab Services: For a rock-solid, reliable number, you can send a water sample to a certified lab. Don't forget, your local water utility also publishes an annual report listing the average fluoride level in your city's supply.

Is It Healthy to Remove All Fluoride from Water?

This question gets right to the heart of a decades-long public health debate. For a long time, community water fluoridation has been praised for drastically cutting down on cavities. Supporters say removing it takes away a vital tool for public dental health.

On the other side of the coin, some people worry about their total fluoride exposure from all sources—water, food, dental products, you name it. They prefer to take control of their intake by using a filter to remove fluoride and relying on topical treatments like toothpaste for the dental benefits. At the end of the day, it's a personal call based on your own research and health priorities.


Here at Water Filter Advisor, we're all about giving you clear, research-backed advice to help you feel confident about your home's water quality. Dive into our in-depth guides and reviews to find the perfect filtration solution for your family at https://www.waterfilteradvisor.com.

How to Reduce TDS in Water for a Cleaner, Tastier Drink

If you're looking for the fastest way to lower the TDS in your water, you'll need a serious filtration system. We're talking about the heavy hitters of home water treatment: reverse osmosis, distillation, or deionization.

These methods are the special ops of water purification, designed to physically pull those dissolved solids out of the water. They go way beyond what a standard carbon filter can do, which mostly just handles things like chlorine and funky smells. For most homes, a reverse osmosis system is the undisputed champ for tackling high TDS.

What Is This TDS Stuff in My Water Anyway?

A kitchen counter with a glass of water, various solid particles, and a banner about Total Dissolved Solids.

Ever notice your water tastes a bit… off? Or that your "clean" glasses come out of the dishwasher looking like they have a case of the spots? Maybe your morning coffee just doesn't hit the spot. If any of this sounds familiar, you might be dealing with high Total Dissolved Solids, or TDS.

It sounds like a complicated lab term, but its effects are super practical and show up all over your home.

TDS is simply a measure of everything dissolved in your water that isn't pure H₂O. These particles are microscopic, so you can't see them, but they definitely make their presence known. Think of your water as a delivery truck, and TDS is all the cargo it picked up on its journey to your faucet.

Where Do These Solids Come From?

That "cargo" in your water comes from all sorts of places, both natural and man-made. As rainwater seeps into the ground, it naturally dissolves minerals from rocks and soil. This is why you hear about "mineral-rich" spring or well water—that's just a fancy way of saying it has high TDS.

The most common sources of TDS in your tap water include:

  • Good Minerals: Things like calcium and magnesium are big contributors to TDS and are the main reason you get "hard water."
  • Salts and Ions: Sodium, potassium, and chlorides often dissolve into water from natural deposits underground.
  • Trace Metals: Older plumbing can sometimes leach elements like iron, copper, or zinc into the water as it passes through.
  • Runoff: Agricultural runoff carrying fertilizers and pesticides, along with urban discharge, can add a whole host of other substances into the water supply.

Because the sources are so diverse, a TDS reading is really a measure of quantity, not quality. It tells you how much stuff is in your water, but it doesn't tell you what that stuff is. A high reading could just mean you have hard, mineral-heavy water, which is perfectly safe. But in some cases, a spike in TDS could hint at other, less desirable contaminants.

What High TDS Means for Your Home

The U.S. Environmental Protection Agency (EPA) doesn't regulate TDS as a direct health threat. Instead, they consider it a "secondary standard." But high levels can still create a whole bunch of annoying and expensive headaches around the house.

A high TDS reading is often the hidden villain behind common household frustrations. It affects everything from the taste of your food and drinks to the efficiency and lifespan of your water-using appliances.

Here’s where you’ll feel the impact of high TDS the most:

  • Taste and Odor: High concentrations of dissolved solids often give water a bitter, salty, or metallic taste. This ruins the flavor of your coffee, tea, and anything you cook with water, like pasta or soup.
  • Cleaning Nightmares: See those stubborn white spots on your dishes and shower doors? That’s mineral residue left behind when high-TDS water evaporates. It also makes it harder for soap to lather, leading to soap scum and laundry that feels stiff and looks dull.
  • Appliance Assassination: This is the big one. That mineral buildup, known as limescale, can clog pipes and coat the heating elements in your water heater, dishwasher, and coffee maker. This forces them to work harder, use more energy, and eventually, break down completely.

Getting a read on your water's TDS level is the first step. It gives you a clear baseline to figure out if it's a problem you need to solve to make life at home a little bit better.

Testing Your Water's TDS Level at Home

A hand holds a TDS meter above a glass of water next to a running faucet in a kitchen sink, illustrating water quality testing.

Before you can tackle a high TDS problem, you have to know if you even have one. You can't just guess based on spotty dishes or dull laundry—you need a real number. The good news? Getting that number is surprisingly simple and affordable, and you can do it right in your kitchen.

The quickest and most common tool for the job is a digital TDS meter. These handy little devices are inexpensive and give you an instant reading of the total dissolved solids in your water, measured in parts per million (ppm). Think of it as a pocket-sized detective for your water.

Getting a Good Reading with Your TDS Meter

Just dipping the meter in water isn't quite enough to get an accurate reading. To make sure your results are solid, there are a few quick steps to follow. This process will give you a reliable baseline to work from as you figure out how to best treat your water.

Here’s a simple routine for a dependable measurement every time:

  • Prep Your Samples: First, grab two clean, dry glasses. Fill one right from your kitchen tap with cold water, but let the faucet run for about 30 seconds first to clear the pipes. If you already use a filter (like in a pitcher or your fridge), fill the second glass with that water.
  • Ready the Meter: Pop the protective cap off your TDS meter and switch it on.
  • Take the Measurement: Submerge the meter's tip about an inch into the first glass of tap water. Give it a gentle swirl to knock off any air bubbles that might be clinging to the sensors.
  • Log the Number: Just wait a moment for the reading on the digital display to settle. That number is your water’s TDS level in ppm. Jot it down.
  • Rinse and Repeat: Before you test your filtered water, give the meter's probe a quick rinse with distilled water (if you have some handy) or just shake it dry. Then, repeat the whole process with the second glass. The difference between those two numbers is a great indicator of how well your current filter is working.

It's important to know what your TDS reading means. While the EPA suggests a level below 500 ppm for aesthetic reasons like taste and odor, most folks are aiming for a reading somewhere between 50-150 ppm for the best-tasting drinking water.

When a TDS Meter Isn't Enough

A TDS meter is a fantastic tool for getting a quick snapshot of your water, but it does have one big limitation: it tells you how much stuff is dissolved in your water, but not what that stuff is. It can't tell the difference between harmless minerals like calcium and more concerning contaminants like heavy metals.

I always recommend a professional lab test if:

  • You're on well water, which is far more prone to contamination.
  • Your TDS reading is consistently over 500 ppm.
  • You live in an area with known water quality problems or have very old plumbing.
  • You notice a sudden, big jump in your TDS levels that you can't explain.

A lab analysis will give you a detailed report breaking down the specific minerals, salts, metals, and anything else lurking in your water. This is the complete picture you need to choose the right filtration system for your home’s unique water profile, moving you from just a number to a real, targeted solution.

A Head-to-Head Comparison of TDS Reduction Methods

Flowchart illustrating three methods for TDS reduction: reverse osmosis, distillation, and deionization.

So, you've got your TDS number. Now what? The next step is figuring out the best way to lower it, and let's be clear—not all water filters are up to the task. That trusty pitcher filter you keep in the fridge is great for making tap water taste better by zapping chlorine, but it won’t do a thing for dissolved solids.

To really tackle TDS, you need to call in the specialists.

We're talking about three core technologies that are the go-to solutions for slashing TDS at home: Reverse Osmosis (RO), Distillation, and Deionization (DI). Each one has a completely different playbook for stripping solids out of your water, and they all come with their own set of trade-offs.

Reverse Osmosis: The Gold Standard for Home Filtration

For most people looking to get serious about their water quality, Reverse Osmosis is the undisputed champion. It’s the most practical and popular way to get low-TDS water right from your tap.

Think of it like an ultra-exclusive nightclub for water molecules. An RO system uses your home’s water pressure to push water through a special semipermeable membrane. This membrane is a marvel of engineering, with pores so tiny that only pure H₂O can get through.

Everything else—the salts, heavy metals, and other dissolved gunk—gets left behind and flushed down the drain. What comes out the other end is incredibly clean water, often with a TDS reading that’s nearly zero. A good RO system will reliably remove 95% to 99% of all total dissolved solids.

Distillation: The Tried-and-True Purifier

Distillation is one of the oldest tricks in the book for purifying water, and its elegance lies in its simplicity. It’s basically a man-made version of the earth’s natural water cycle.

A home distiller boils water, turning it into pure steam. As the steam rises, it leaves behind all the dissolved solids—minerals, salts, and other contaminants that can't evaporate. The steam is then cooled in a separate container, where it condenses back into liquid. The result is some of the purest water you can make, with a TDS of virtually zero.

While it’s incredibly effective, distillation isn’t always practical for a busy household. It's a slow process, it uses a fair amount of electricity to boil the water, and you can only make a few gallons at a time. It’s a great option for specific uses, but less so for the all-day demands of a family.

Deionization: The Ultimate TDS Scrubber

Deionization, or DI, uses a bit of chemistry to get the job done. A DI system sends water through special resins that are loaded with positive and negative charges. These resins act like super-magnets for dissolved solids, which are basically ions.

As water flows past, the resin beads snatch ions like calcium and chloride right out of the water, swapping them for hydrogen (H+) and hydroxyl (OH-) ions. Those two new ions immediately bond to form pure water (H₂O).

DI systems are amazing at producing ultra-pure water and can easily bring TDS down to absolute zero. But they’re usually reserved for specialized applications like reef aquariums or lab work, not so much for drinking water. The resin cartridges get used up quickly, especially in high-TDS areas, and can be pricey to replace.

For pure, great-tasting drinking and cooking water from a dedicated faucet, Reverse Osmosis is the clear winner. It offers the best balance of performance, affordability, and convenience for the modern home.

Comparing TDS Reduction Technologies for Your Home

To really see how these methods stack up, let's put them side-by-side. This table gives you a quick look at the top home water filtration methods for reducing Total Dissolved Solids (TDS).

Method TDS Removal Rate Initial Cost Ongoing Maintenance Best For
Reverse Osmosis 95-99% Moderate Filter changes (every 6-24 months) Creating superior drinking and cooking water at a dedicated faucet.
Distillation 99%+ Low to Moderate Regular cleaning to remove scale buildup Producing small batches of ultra-pure water for specific uses.
Deionization 99%+ Low to High Frequent resin cartridge replacement Polishing already filtered water for aquariums, labs, or medical use.

For many homes, the ultimate solution is often a tag-team approach. You might have a whole-house carbon filter to handle chlorine and sediment for all your taps and appliances, combined with a dedicated under-sink RO system for the purest possible water right at the kitchen sink.

Choosing the Right Filtration System for Your Home

Okay, you've got your TDS reading and you know the basics of how these systems work. Now it’s time to pick the right one for your home. This isn't about buying the most powerful or expensive system; it's about finding the one that actually fits your water, your budget, and your daily life.

The decision really comes down to a few key questions. Thinking through these helps you get past the technical jargon and focus on what you'll actually use day-to-day. A setup that's perfect for a big family on well water would be total overkill for someone in a city apartment. Let's match the solution to your specific problem.

Start with Your Water Source and TDS Reading

That TDS number you measured is your North Star. It sets the stage for everything else and tells you just how much work needs to be done. Your water source—whether it’s from the city or a private well—is just as important.

Let’s look at a couple of real-world scenarios:

  • The Suburban Family on City Water: Picture a family whose tap water comes from the city and has a TDS reading of 350 ppm. The water is safe, but they're annoyed with spotty dishes and that funky taste in their morning coffee. Their main goal is getting crystal-clear drinking and cooking water. An under-sink Reverse Osmosis (RO) system is a fantastic fit here. It targets the water they actually consume, it's budget-friendly, and it's often a manageable weekend DIY project.

  • The Rural Homeowner with Well Water: Now, think about a family with a private well. Their TDS reading comes in at a whopping 800 ppm, and it’s full of minerals like calcium and iron. They're not just worried about taste; they're seeing limescale build up on showerheads and they know it's slowly wrecking their water heater. A simple filter won't cut it. A whole-house water softener to knock out the hardness minerals, followed by an under-sink RO system for pure drinking water, gives them a powerful one-two punch that protects their appliances and their health.

Sizing Up Your Household Needs

How many people are in your home? How much water do you use? A single person might do just fine with a small countertop distiller, but a family of five would find it completely impractical.

You'll need to decide if you want to treat water at a single faucet (point-of-use) or treat all the water coming into your house (point-of-entry).

  • Point-of-Use (POU) Systems: These are your under-sink RO units and countertop distillers. They’re perfect for targeting just your drinking and cooking water. This makes them a really cost-effective way to improve taste and purity right where you need it most.

  • Point-of-Entry (POE) Systems: Also called whole-house systems, these are installed right where your main water line enters your home. Full whole-house RO systems are pretty rare and expensive for residential use, but a common strategy is to pair a whole-house sediment filter with an under-sink RO for drinking water.

As you can see, if getting the highest purity drinking water is your top priority, Reverse Osmosis is almost always the most direct and popular solution for homeowners.

Budget and Installation Considerations

Your budget is obviously a big factor. You'll want to think about the initial purchase price and the long-term cost of replacing filters. Under-sink RO systems usually hit a sweet spot, with prices ranging from a couple hundred to several hundred dollars. Whole-house solutions are a bigger upfront investment, but they can save you money down the road by protecting expensive appliances.

Pro Tip: Make sure any RO system you're looking at has an NSF/ANSI 58 certification. This isn't just marketing fluff. It's an independent verification that the system has been tested and proven to reduce TDS and other contaminants just like it claims. It's your peace of mind.

Finally, there's the installation. Many under-sink RO systems are designed for DIYers, complete with color-coded tubes and step-by-step guides. But if you’re not comfortable with basic plumbing, there’s no shame in calling a pro to make sure it’s done right.

Keeping Your System Running for Peak Performance

A person replaces multiple water filters under a kitchen sink, with new filters on the wooden floor.

Putting in a quality water filtration system is a huge first step. But the real secret to getting that clean, low-TDS water for years to come? It's all in the follow-through.

The initial setup and a consistent maintenance schedule are what truly keep your system at the top of its game. If you let it slide, you’re basically buying a high-performance car and never changing the oil. Sooner or later, you'll see that performance drop.

Setting Up Your System for Success

Getting your system installed can be anything from a simple Saturday project to a job for the pros, all depending on what you bought.

A standard under-sink Reverse Osmosis (RO) unit, for instance, is usually pretty DIY-friendly. Most people with basic tools can get one up and running. Manufacturers have really stepped up their game with things like color-coded tubes and dead-simple instructions.

A whole-house system, though? That's a different story. You’ll be cutting into your main water line, and that takes some serious plumbing know-how. If that sounds intimidating, it’s a smart move to call in a licensed plumber. They'll make sure it's done right, with no leaks, and everything's up to code.

A flawless installation is the foundation of a high-performing filtration system. Taking the time to do it right—or hiring someone who can—prevents common headaches like leaks, low pressure, and premature filter failure.

Your Essential Maintenance Checklist

Once you're all set up, the game shifts to routine maintenance. This isn't just about keeping the water on; it's about making sure your system is actually pulling its weight and cutting down those TDS levels. Over time, those filters get packed with all the gunk they’re supposed to be removing.

For a typical RO system, here’s a rough timeline to follow:

  • Pre-Filters (Every 6-12 Months): Think of these as the bouncers for your system. The sediment and carbon filters grab the big stuff—rust, silt, chlorine—before it can get to the more sensitive parts. Swapping these out on schedule is the best thing you can do to protect the RO membrane.
  • RO Membrane (Every 2-3 Years): This is the heart of the operation, where the serious TDS reduction happens. How long it lasts really depends on your water quality and how diligent you are with those pre-filters.
  • Post-Filter (Every 12 Months): This is the final polish. This last carbon filter gets rid of any lingering off-tastes before the water hits your glass.

This isn't just about under-sink systems, either. Even simpler filters need attention. Knowing the basics of routine filter changes keeps all your drinking water sources clean and safe.

Troubleshooting Common Filtration Issues

Even with the best maintenance, things can go sideways. No need to panic. Most problems have simple fixes.

If you suddenly notice a drop in water pressure, a clogged pre-filter is almost always the cause. If the water starts tasting "off" all of a sudden, that’s your post-filter telling you it's time for a change.

The biggest red flag, though, is a sudden spike in your TDS readings. If you test your water and see the numbers have jumped, it’s a strong sign your RO membrane has finally given up the ghost. Keeping a TDS meter handy lets you do quick spot-checks to catch these problems early. It’s this kind of proactive approach that ensures you always know how to reduce TDS in water.

Your Top Questions About Lowering TDS in Water

Once you start looking into TDS, it's natural for a bunch of questions to come up. It can feel like a whole new world. To help you out, we've gathered the most common questions and myths we hear from people just like you and answered them in plain English.

Think of this as your go-to guide for busting myths and getting clear on how to manage the TDS in your home's water. We want you to have the practical, real-world info you need to make the right choice for your family.

Is a High TDS Level Automatically Dangerous?

This is the big one, and the short answer is: usually, no. A high TDS number doesn't automatically mean your water is dangerous. Most of the time, it just points to a high concentration of harmless minerals like calcium and magnesium, which are the culprits behind "hard water."

The catch is that a basic TDS meter can't distinguish between those benign minerals and nasty stuff like lead, arsenic, or pesticides. That's why the EPA suggests keeping TDS below 500 ppm. If your reading is north of that—or if you're on well water—it's smart to get a proper lab test done. That's the only way to know for sure what you're dealing with.

Why Doesn't Boiling Water Lower My TDS?

This is a really common misconception. People assume boiling purifies water, and while it does kill germs, it actually makes your TDS worse.

Here’s why: when you boil water, the pure H₂O turns into steam and escapes, but all the dissolved solids—the salts, minerals, and metals—are left behind. As the water level drops, those solids become even more concentrated. So, while boiling is great for disinfecting water, your TDS reading will actually go up, not down.

Key Takeaway: Boiling water sterilizes it but concentrates dissolved solids, increasing the TDS level. True TDS reduction requires physically removing the solids through filtration or distillation.

What Is the Difference Between a Regular Filter and an RO System?

This is a super important distinction to understand. The standard carbon filter you have in your pitcher or fridge is designed to make your water taste and smell better. It does a fantastic job of grabbing things like chlorine and some organic chemicals.

A Reverse Osmosis (RO) system, on the other hand, is a whole different beast. It uses a high-tech semipermeable membrane with microscopic pores to physically block and strip out up to 99% of all dissolved solids.

Let's break it down simply:

  • Standard Carbon Filter: Think of it like a sponge that soaks up specific contaminants like chlorine. It won't do much for your TDS reading.
  • Reverse Osmosis System: This is more like a bouncer at an exclusive club. It only lets pure water molecules through and kicks almost everything else out. For lowering TDS at home, it’s the best tool for the job.

Can My Water's TDS Be Too Low?

It's a fair question. Once you see how powerful an RO system is, you might wonder if you can take too much out of the water. Some worry that removing minerals makes water unhealthy or "dead."

The truth is, we get the vast majority of our essential minerals from our food, not our water. The amount of calcium or magnesium you'd get from even very hard water is pretty tiny compared to what a balanced diet provides.

In fact, most people end up loving the pure, clean taste of low-TDS water, which typically clocks in between 0-50 ppm. For almost everyone, the peace of mind that comes from removing potential contaminants far outweighs the loss of a few trace minerals from your water.


At Water Filter Advisor, we believe everyone deserves access to clean, safe, and great-tasting water. Our in-depth guides and unbiased reviews are designed to help you find the perfect filtration solution for your home, so you can feel confident with every sip. Explore our expert buying guides and find your ideal water filter today.