Finding the Best Inline Filter for Your Home in 2026
When you’re hunting for the best inline filter for your home, the real question is: what problem are you trying to solve? A filter to stop your refrigerator’s ice from tasting funky has a totally different job than one installed under the kitchen sink to tackle serious contaminants. Think of it as hiring a specialist for a very specific task.
Top-tier options almost always feature multi-stage carbon block filters with a low micron rating—think 0.5 microns—and crucial NSF certifications. Those certifications are your golden ticket, the independent proof that the filter actually does what it claims, like kicking chlorine, lead, and sediment to the curb for water that just tastes, well, like water. Our guide will walk you through the best inline filter choices so you can find the perfect match for your home.
Your Quick Guide to the Best Inline Water Filters

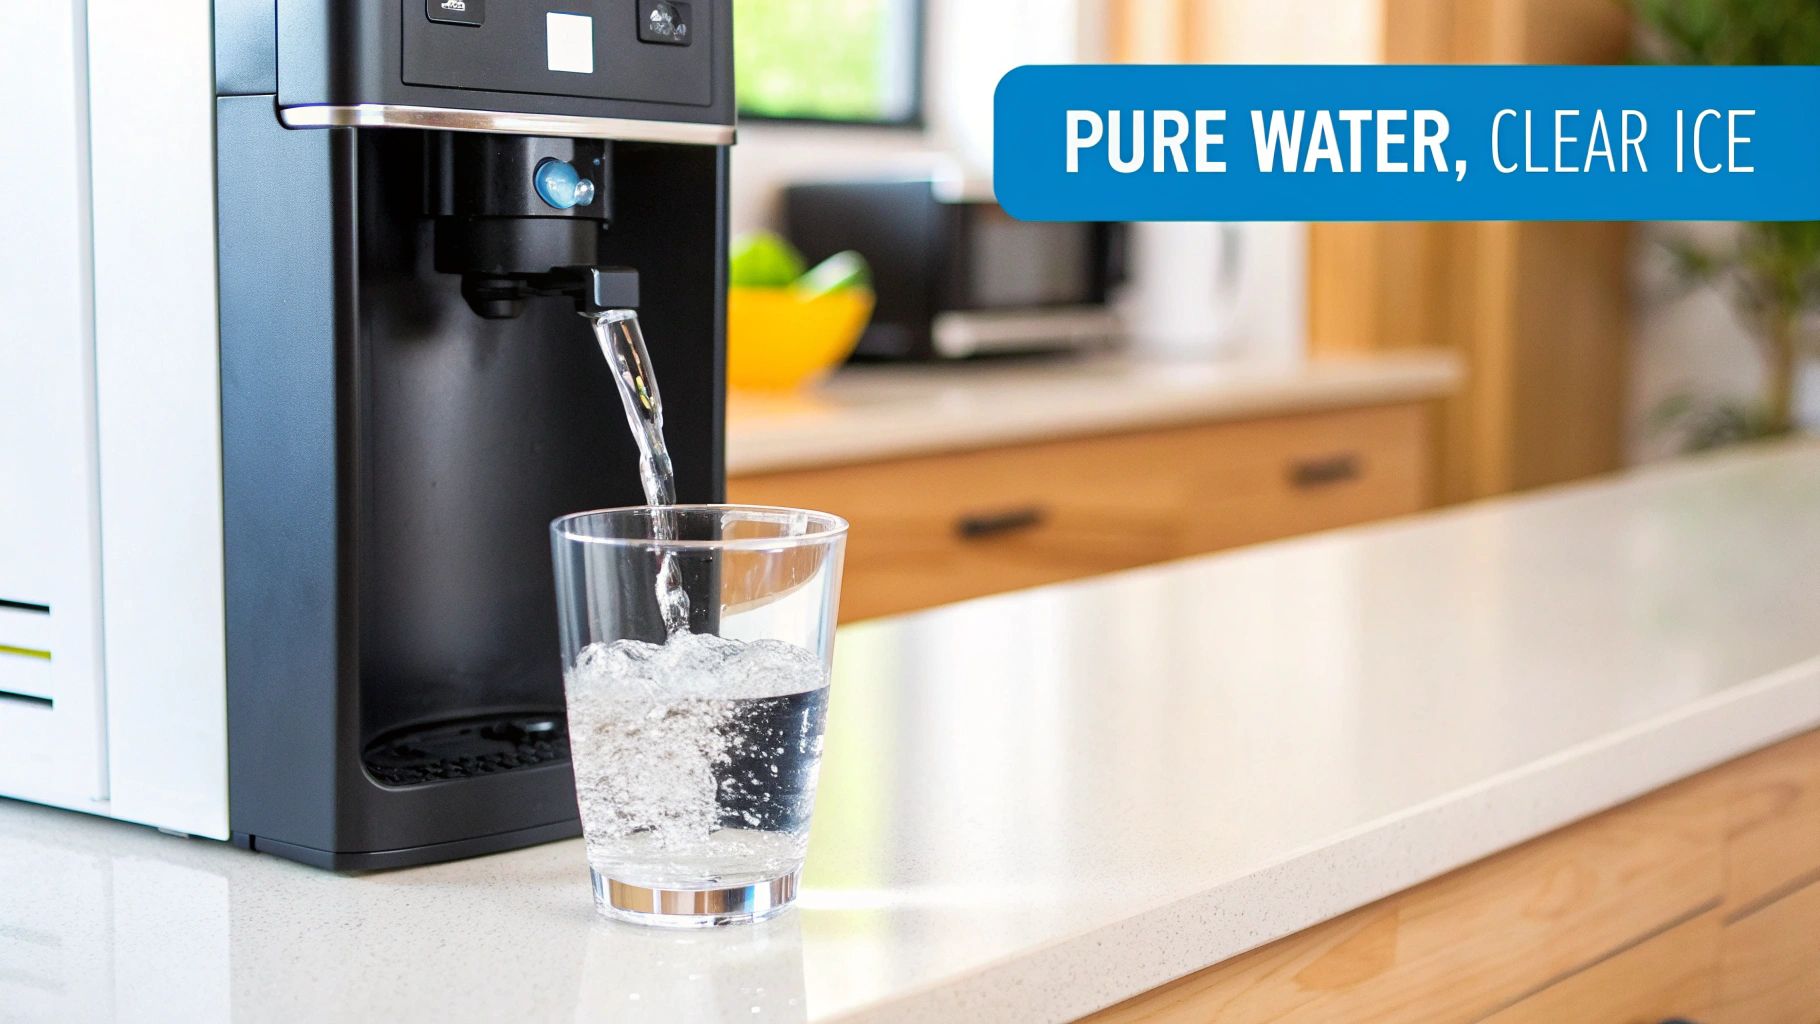
Picture this: crisp, clean water flowing from your fridge or a separate tap, without you ever having to fill a clunky pitcher again. That's the magic of a good inline water filter. It's a small but mighty device that gets spliced directly into your water line, providing targeted filtration right where you need it most.
These filters are the quiet workhorses of home water treatment. They're usually tucked away behind an appliance or under a sink, silently ambushing water before it reaches your glass, ice cube tray, or coffee maker. Their main job is to strip out the uninvited guests—impurities that ruin the taste, smell, and quality of your drinking water.
Why Choose an Inline Filter?
So, why are these simple filters becoming such a popular home upgrade? It all boils down to their focused, efficient approach. Instead of treating every single gallon of water in your home (including the water your toilet uses), an inline filter concentrates its power on delivering high-quality water for you to drink and cook with.
You’ll notice the benefits right away:
- Improved Taste and Odor: The biggest and most immediate change is the banishment of chlorine. That swimming pool taste from city water treatment? Gone. Your water will taste like… nothing. In the best way possible.
- Contaminant Reduction: Properly certified filters go beyond taste, reducing harmful contaminants like lead, cysts, and certain volatile organic compounds (VOCs).
- Appliance Protection: By blocking sediment and scale, these filters act as a bodyguard for the internal components of your refrigerator, icemaker, and coffee machine, which can extend their service life.
- Cost-Effective and Convenient: They are a far more affordable and sustainable solution than bottled water and only need to be replaced once or twice a year in most cases.
An inline filter is an ideal solution for renters or homeowners who want targeted filtration without major plumbing surgery. It offers a significant step up from a basic pitcher filter with minimal installation hassle.
To help you get started, we've put together a quick comparison table of our top picks for 2026. This chart lays out our favorite filters for the most common uses around the house, highlighting what makes each one a solid choice.
Quick Comparison of Top Inline Filters for 2026
This table highlights our top-rated inline filters for common household uses, allowing you to quickly compare their key specifications and find the best match for your home.
| Model / Type | Best For | Key Feature | Lifespan |
|---|---|---|---|
| EcoPure EP-INL30 | Refrigerator & Icemaker | 5-year/30,000-gallon lifespan | Up to 5 Years |
| CuZn ILFC-200 | Under-Sink (Chloramine) | KDF-55 media for chloramine & heavy metals | Up to 12 Months |
| Woder 10K-Gen3 | Dedicated Faucet (Lead) | Certified for lead, chlorine, and contaminants | Up to 3 Years |
| Culligan IC-EZ-4 | All-Purpose / Easy Install | Twist-on design and NSF 42/53 certification | Up to 6 Months |
This table gives you a high-level overview. Now, let's pull back the curtain and see what makes these filters tick.
How Inline Water Filters Actually Work
Ever wondered what’s going on inside that little tube hooked up to your fridge? It seems simple enough: your regular tap water goes in one end, and clean, crisp water comes out the other. It’s not magic, but it’s a brilliant bit of engineering that targets specific contaminants right at the point of use.
At its core, an inline filter is a tiny, self-contained purification plant. Water from your supply line gets pushed through a sealed cartridge that's packed with filter media. You can picture it as a microscopic maze where water molecules are allowed to pass, but all the unwanted gunk gets trapped.
This simple "point-of-use" convenience is why these filters are taking over. The global market was valued at $2.5 billion back in 2025 and is expected to hit $4.2 billion by 2033. People want an affordable, easy-to-install way to get rid of things like chlorine and lead, and many certified models can slash contaminants like total trihalomethanes (TTHMs) by up to 95%. You can check out the full market analysis on Data Insights Market to see how it’s changing household water quality.
The Core Components and Filter Media
An inline filter might look basic on the outside, but its power comes from what's packed inside. You've got two main parts doing all the work: the housing and the media.
- The Filter Housing: This is simply the tough outer casing, usually made of food-grade plastic. Its job is to hold the filter media and connect to your water lines, all while withstanding constant water pressure without springing a leak. No drama, just containment.
- The Filtration Media: This is where the action happens. Different types of media go after different contaminants, and the best inline filters will often layer a few kinds together for multi-stage cleaning.
The most common media you’ll find is activated carbon. Think of it as a super-powered sponge. A single gram of this stuff can have a surface area of over 3,000 square meters—that's about half a football field! It works through a process called adsorption, where things like chlorine, pesticides, and VOCs literally stick to its vast surface and are pulled out of the water.
Here’s a simple way to think about it: Activated carbon is like a contaminant magnet. As water rushes past, chemicals like chlorine are drawn to the carbon's surface and trapped, letting cleaner, happier water flow on through to your glass.
Understanding Micron Ratings
Another critical spec is the filter’s micron rating. This number tells you how big the pores in the filter media are. A smaller micron number means smaller holes, which means it can stop tinier particles.
Here’s a quick breakdown:
- A 5-micron filter is good for catching bigger stuff like sand, rust, and silt. It's great for protecting appliances but won't catch microscopic troublemakers.
- A 1-micron filter steps up its game, blocking smaller particles, including some cysts like Giardia and Cryptosporidium.
- A 0.5-micron filter is the bouncer at an exclusive club. It gives you even finer filtration, capable of reducing contaminants like lead, asbestos, and some bacteria, which is why it's a common rating for high-quality drinking water filters.
While a lower micron rating is usually better for purity, there’s a trade-off. Tighter pores can slow down your water flow and clog up faster if your water is heavy with sediment. That's why choosing the right filter is all about balancing your purification goals with your home’s water pressure and quality.
Comparing Key Filter Specifications For Your Water
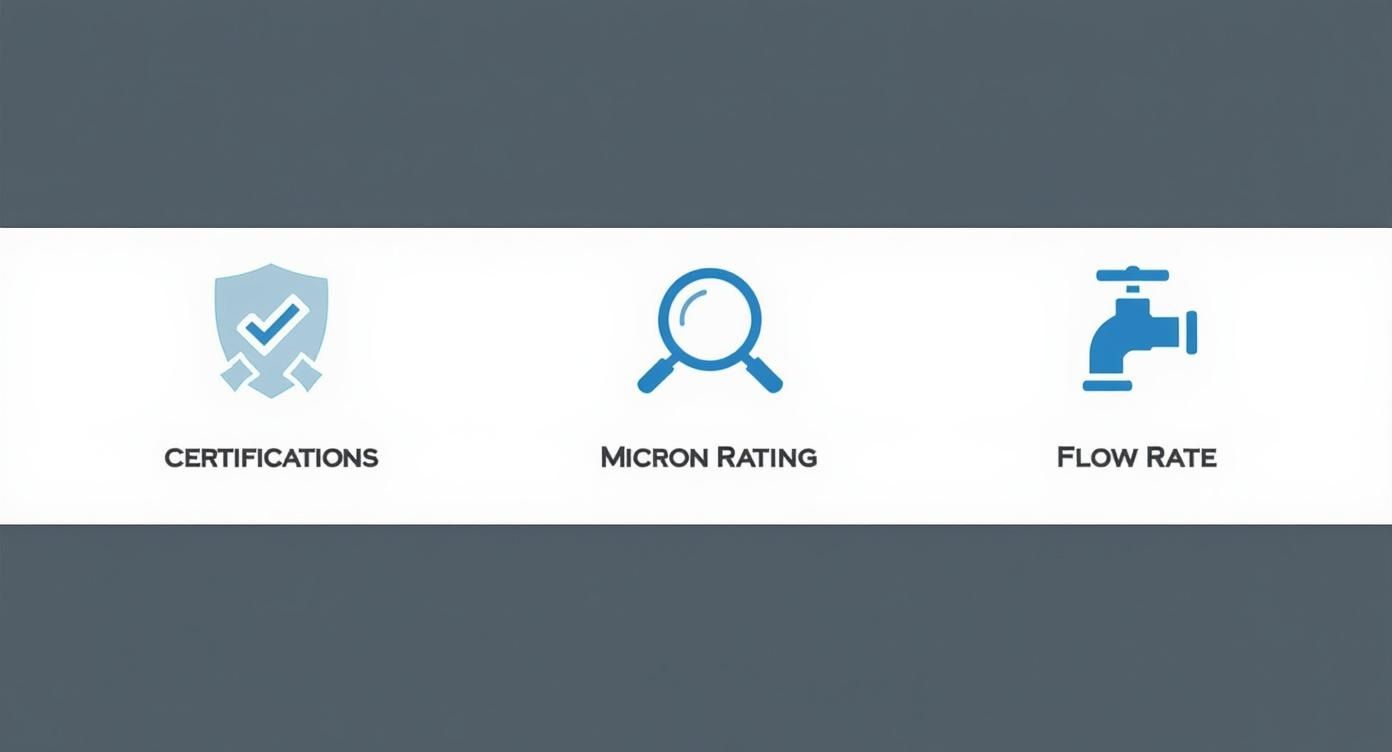
When you’re picking an inline filter, it’s easy to get lost in a sea of marketing jargon. To find the right one, you have to cut through the noise and look at the actual specs. Things like micron ratings, the type of carbon used, and flow rates are what really matter—they tell you if a filter can actually solve your water woes.
This flowchart is a great starting point. It helps you connect a common water problem to the right type of filter technology.

As you can see, different problems point to different solutions. Let's dig into the specs that make those solutions work.
Carbon Block vs. Granular Activated Carbon (GAC)
Most inline filters rely on activated carbon to make water taste and smell better, but how that carbon is constructed makes a huge difference. You'll mainly see two types: Granular Activated Carbon (GAC) and Carbon Block.
A GAC filter is just what it sounds like: a cartridge filled with loose carbon granules. Water meanders around the granules, which works well for reducing chlorine and improving taste. Because the media is loose, these filters usually have a higher flow rate.
A Carbon Block filter is different. It’s made of powdered carbon that’s been compressed into a solid brick. This forces water through a dense, torturous path of tiny pores, giving it way more contact time with the carbon.
While both will improve the taste of your water, a carbon block filter offers much more thorough filtration. Its solid form is better at removing a wider array of contaminants and prevents "channeling"—where water carves a lazy path through the loose media and bypasses the filtration process.
For a simple coffee maker where you just want better-tasting coffee, a GAC filter is probably fine. But if you're filtering drinking water from your kitchen tap, a carbon block is the superior choice.
To help you match the right filter spec to your specific water problem, we've put together this quick comparison table. It breaks down what each specification means and what it's best at targeting.
Inline Filter Specification Comparison for Common Contaminants
| Specification | What It Means | Best For Targeting… | Good to Know |
|---|---|---|---|
| GAC Media | Loose carbon granules. | Chlorine, bad taste, and odors. | Higher flow rate but can be prone to "channeling." |
| Carbon Block Media | Solid, compressed carbon. | Chlorine, lead, VOCs, cysts, and sediment. | More comprehensive filtration, lower flow rate. |
| 5 Micron Rating | Pores block particles 5 microns or larger. | Sediment, sand, silt, and rust. | Good for pre-filtration, not for health contaminants. |
| 0.5 Micron Rating | Pores block particles 0.5 microns or larger. | Cysts (Giardia, Crypto), asbestos, and particulate lead. | Essential for filtering health-related contaminants. |
| NSF/ANSI 42 | Certified for aesthetic improvements. | Chlorine taste and odor. | Your baseline for better-tasting water. |
| NSF/ANSI 53 | Certified for health-related contaminants. | Lead, mercury, VOCs, cysts, and other specific contaminants. | The gold standard for safe drinking water. |
This table should give you a clear idea of what to look for on a product's spec sheet based on the issues you've identified in your water.
Why The Micron Rating Matters For Your Safety
A filter's micron rating tells you the size of its pores, which determines the smallest particle it can stop. A lower number means finer filtration.
A 5-micron filter is great for catching larger particles like sand, rust, and sediment that you might see in your water. But for health-related contaminants, it just won’t cut it.
This is where a 0.5-micron rating becomes non-negotiable. Filters this fine are able to capture microscopic cysts like Giardia and Cryptosporidium, which are notorious for causing stomach illness and are resistant to chlorine. It’s also a must-have for reducing lead, which often exists as tiny particles. A 0.5-micron filter is far more effective at trapping lead than a 1-micron or 5-micron filter.
If the water is for drinking—especially for kids—you need a filter rated at 0.5 microns and certified for lead reduction. Period.
Flow Rate (GPM) What Your Appliances Need
Flow rate, measured in gallons per minute (GPM), is all about how fast water moves through the filter. This might seem like a boring detail, but it's critical for your appliances. A filter that's too slow can cause real problems.
- Refrigerators and Icemakers: A low GPM can make your water dispenser trickle or your icemaker take forever to fill. It can even lead to a "water hammer" banging sound in your pipes. For these, you need a filter rated for at least 0.5 to 0.75 GPM.
- Under-Sink Systems: For a separate drinking water faucet, 0.5 GPM is usually fine. But if you’re hooking the filter up to your main cold water line, you'll need a much higher flow rate—think 1.5 to 2.5 GPM—to avoid a major pressure drop at your sink.
Remember, a finer micron rating usually means a lower flow rate. You have to balance the need for high-level filtration with the flow rate your appliance demands.
Decoding NSF And ANSI Certifications
A certification from NSF/ANSI is the only way to know for sure that a filter does what it claims. These are independent, third-party tests that verify a manufacturer's performance claims. For inline filters, two standards are key:
- NSF/ANSI 42 (Aesthetic Effects): This certification is for non-health-related contaminants. If you just want to get rid of that swimming pool chlorine taste and smell from city water, this is the certification to look for.
- NSF/ANSI 53 (Health Effects): This is the one that really matters for safety. It's a tougher standard that certifies a filter can reduce specific health-related contaminants like lead, mercury, cysts, and certain chemicals (VOCs).
Always check the fine print to see exactly what a filter is certified to remove under NSF/ANSI 53. The best inline filter isn’t just one with a lot of marketing claims; it’s one with the specific certifications that match your water test results.
Practical Applications Where Inline Filters Shine

It’s one thing to understand the specs, but where do these filters really prove their worth? Their true value lies in their versatility. You can tuck these compact filters away to fix specific water problems right where they happen.
An inline filter is a simple upgrade with a surprisingly big impact on everything from your morning coffee to the ice in your drink. Let's look at the most common places to install one in your home.
Upgrading Your Refrigerator and Icemaker
This is probably the #1 reason people start looking for the best inline filter. The filter that comes with your fridge is often absurdly expensive, doesn't last long, and might only handle basic chlorine taste. Even worse, people often forget to change them, leading to cloudy, awful-tasting ice cubes that ruin a perfectly good drink.
Placing an external inline filter on the water line that feeds your fridge is a total game-changer.
- Better Tasting Water and Ice: A good carbon block inline filter does a much better job reducing chlorine and other chemicals than most stock filters. No more off-tastes or weird smells.
- Appliance Protection: These filters grab sediment and scale before they can clog the tiny, delicate valves and tubes inside your icemaker and dispenser.
- Cost Savings: One high-capacity inline filter can last for years and costs less than just one or two of the refrigerator's brand-name cartridges. It's a no-brainer.
Installation is usually a walk in the park. You just cut and splice the filter into the 1/4-inch water line behind your fridge. Most come with quick-connect fittings that just push on, so you don't need a toolbox full of special equipment.
For refrigerators, your main goal is improving taste and odor. You'll want an inline filter with a quality carbon block and an NSF/ANSI 42 certification. A 5-micron rating is plenty for this job.
Dedicated Purity for Under-Sink Faucets
If you want purified water on tap just for drinking and cooking, an inline filter hooked up to its own dedicated faucet is a fantastic setup. You get a steady supply of clean water without filtering all the cold water you use for washing dishes.
Under-sink systems are perfect for tackling more serious contaminants. Since it's for a dedicated faucet, you can choose a filter with a much finer micron rating (like 0.5 microns) and higher-level certifications without worrying about slowing down your main kitchen faucet.
This is where it really shines for specific water issues:
- Lead Reduction: An NSF/ANSI 53 certified filter is a must-have if you live in an older home with potential lead pipes or fixtures.
- Cyst Removal: A 0.5-micron filter is what you need to remove microscopic parasites like Giardia and Cryptosporidium.
- Chemical Contaminants: Check your local water quality report and look for filters certified to reduce VOCs or other specific chemicals you see listed.
Installation is a bit more involved here since you have to tap into your cold water line and run a new, smaller line to a separate faucet. The most common connector size is 3/8-inch, but always double-check your plumbing before you buy.
Enhancing Coffee and Espresso Machines
If you're serious about coffee, you already know water quality is everything. The minerals and chemicals in your tap water can completely sabotage the flavor of your expensive, single-origin beans. On top of that, scale buildup from hard water is the number one killer of coffee and espresso machines.
An inline filter is the perfect fix. You can install it on the water line of a plumbed-in machine or simply use it to fill the reservoir of a countertop model. The commercial inline water filters market is growing fast, projected to reach $1.85 billion by 2025. Businesses know that pure water equals happy customers and longer-lasting equipment—a trend largely driven by the $4.78 billion North American market. For more on this, you can review the commercial water filter market insights on Data Insights Market.
For coffee lovers, an inline filter delivers two key victories:
- Flavor Enhancement: It removes chlorine and helps balance minerals, allowing the true, nuanced notes of your coffee to shine through.
- Scale Prevention: Many inline filters designed for coffee makers include media that inhibits scale formation. This protects the heating elements and internal parts of your expensive machine from a slow, crusty death.
Look for a filter that specifically mentions scale control. These are often the best inline filter choices for protecting both your brew's taste and your appliance's lifespan.
Our Top Inline Filter Picks for 2026
Alright, we've waded through the technical details—micron ratings, certifications, and flow rates. Now it's time to put that knowledge to work and pick the right filter for your home.
Instead of just giving you a list, I'm going to show you which filters make the most sense for specific jobs, like your fridge's icemaker or the tap you use for drinking water. We'll look at the best filter for simply better-tasting water, and the top choice if you're worried about serious contaminants like lead.
There's a reason these little filters are getting so popular. The home water filtration market is projected to hit $7.13 billion by 2026, and inline filters are a huge part of that. They can slash contaminants like hydrogen sulfide by up to 95%, getting rid of that rotten-egg smell instantly. Plus, with replacement costs often 70% lower than whole-house systems, they just make financial sense. For many families, switching from bottled water saves over $1,000 a year. You can dig into the numbers in these home water filtration market trends on Arizton.
Best for Refrigerator Ice and Water
When you just want better-tasting water and clearer ice from your fridge, the goal is simple: get rid of chlorine and other funky tastes. You need a filter that lasts a long, long time and doesn't need constant changing.
- Our Pick: EcoPure EP-INL30
- Why It Wins: This thing is an absolute marathon runner when it comes to longevity. It’s rated for an incredible 5 years or 30,000 gallons. That's a true set-it-and-forget-it filter.
- Analysis: The EP-INL30 is all about improving taste and smell. It uses carbon to pull out the chlorine that makes tap water unpleasant. It's not designed for health contaminants (it doesn't have an NSF/ANSI 53 cert), but that's not its job. With simple 1/4" quick-connect fittings, it's the perfect, low-maintenance upgrade for any fridge.
If your main goal is just getting rid of that chemical taste in your fridge's water and ice, a long-lasting aesthetic filter is your best bet. It saves you from buying expensive, proprietary fridge filters every six months.
Best for Removing Lead Under the Sink
If you're dealing with a serious health concern like lead, especially from a dedicated drinking water tap, you have to get serious about your filter choice. Certification and a fine micron rating are non-negotiable here.
- Our Pick: Woder 10K-Gen3
- Why It Wins: This filter comes with both NSF/ANSI 42 and 53 certifications. It's been independently tested and proven to reduce lead, heavy metals, chlorine, and a whole list of other nasty stuff.
- Analysis: The Woder 10K-Gen3 is built to be installed on a single cold water line, usually for a separate drinking faucet. It provides a solid flow rate and can last up to 3 years or 10,000 gallons. What’s really impressive is its selective filtration, which removes over 99.9% of contaminants but leaves in healthy minerals like calcium and magnesium. For anyone living in a home with older pipes, this is a fantastic choice for peace of mind.
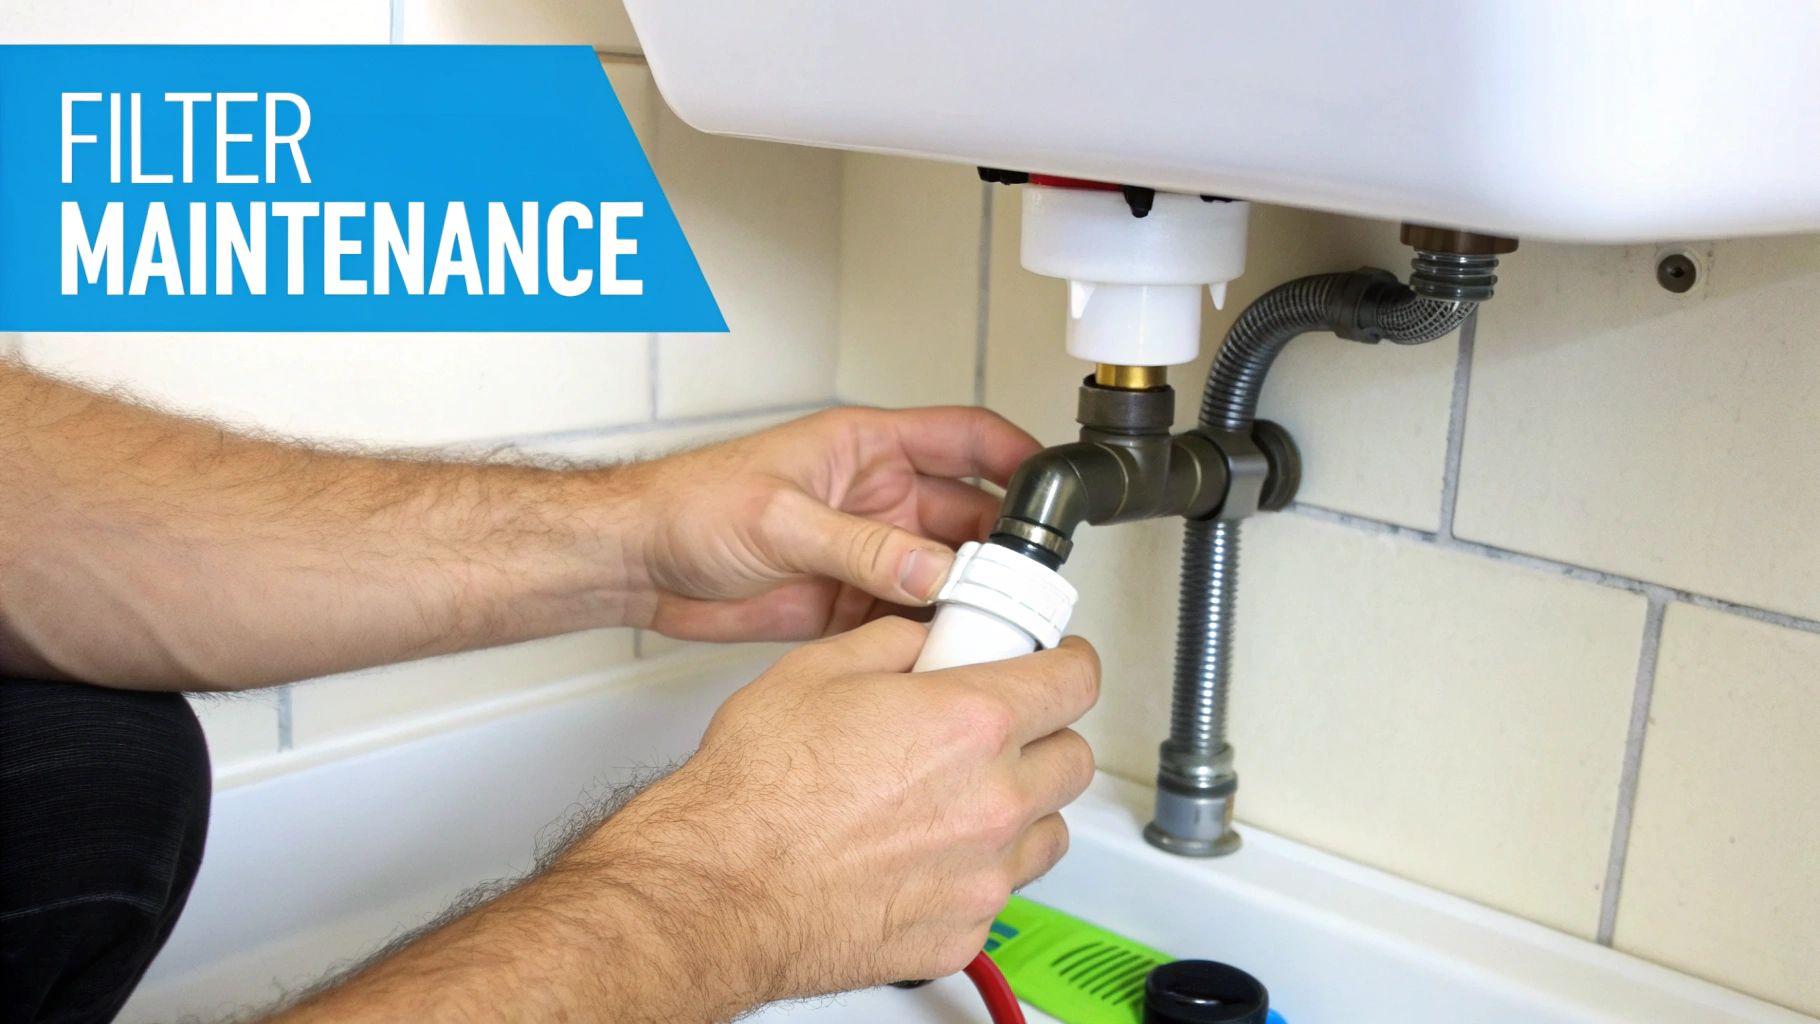
DIY Installation and Long-Term Maintenance

Getting the most out of your inline filter really comes down to two things: a solid installation and proper upkeep. The great news? You probably don’t need to call a plumber for this one. Most inline filters are designed for a quick and simple DIY install.
With just a few basic tools and a bit of focus, you can have cleaner, better-tasting water flowing in less than an hour. We’ll walk through the essentials right here, from getting started to handling the long-term care that keeps your water pure and your appliances protected.
Pre-Installation Checklist
Don't just jump in. Taking a few minutes to prep will save you a world of headache and a soggy floor. Make sure you knock these out before you ever think about cutting a water line.
- Shut Off the Water: Find the shutoff valve for the line you’re tapping into—it's usually under the sink or behind the fridge—and turn it completely off.
- Grab Your Tools: You’ll want a clean pipe or tube cutter, maybe an adjustable wrench or two, and definitely a towel or bucket for any leftover drips.
- Flush the New Filter: This is a critical step, so don't skip it. Before you install it, connect the filter to a hose and run water through it into a bucket for about five minutes. This clears out all the loose carbon dust from manufacturing.
Flushing your new filter is the single best way to avoid cloudy water or a clogged faucet aerator right after installation. It gets rid of all the harmless but messy black carbon fines that are normal in a brand-new filter.
Installing Your Inline Filter: A Step-by-Step Guide
Most inline filters with quick-connect fittings install the same way. The instructions might look a little different from brand to brand, but the core process is simple. Let’s use a standard refrigerator water line as our example.
Step 1: Find Your Spot
Pick a spot on the 1/4" water line behind the fridge where the filter will be easy to get to. Remember, you'll have to change it later, so don't bury it in a spot you can't reach.
Step 2: Cut and Connect
With the water off, use your tube cutter to make a clean, square cut in the plastic tubing. Push one end of the line firmly into the filter's "inlet" port and the other into the "outlet" port. There’s always an arrow on the filter showing the direction of water flow—make sure you follow it.
Step 3: Check for Leaks
Slowly turn the water back on. Now, watch the connection points closely for any signs of a drip. If you spot one, shut the water off again. Usually, it just means the tube isn't pushed in all the way or the cut wasn't perfectly straight.
Troubleshooting Common Installation Issues
Even the pros hit a snag now and then. If you run into trouble, it’s almost always one of these two things.
- Problem: Drips or Leaks at the Connection
- Solution: This is nearly always caused by a sloppy cut on the water line. Quick-connects need a perfectly flat, square edge to seal properly. Turn off the water, pull the tube out, and make a fresh, clean cut. Push it back in firmly.
- Problem: Low Water Pressure After Installation
- Solution: Did you flush the filter first? If you did, the next thing to check for is a kink in the water line. Pull the appliance out and make sure the tubing hasn't gotten pinched or bent behind it. For more tips on keeping your whole home in working order, you can explore resources on general home maintenance.
For a deeper dive into filter maintenance and other expert tips, our library has plenty of guides to help you out. You might be interested in our article which provides more water filter advice.
Frequently Asked Questions About Inline Filters
Even after you've done your homework, a few nagging questions can pop up. Let's walk through the most common ones we hear from people trying to pick the right inline filter.
How Much Will an Inline Filter Reduce My Water Pressure?
Any filter will cause a tiny drop in pressure, but it should be so small you don't even notice. For a properly sized inline filter, we're talking a drop of only 2-5 PSI. If you suddenly feel like your water is just trickling out, something's wrong.
The usual suspect is a mismatch between the filter and your water. Trying to use a very fine 0.5-micron filter on a line that's heavy with sediment is a classic mistake. The filter just clogs up instantly. Always match the filter's GPM to what your appliance actually needs, and if your water is full of gunk, put a simple sediment pre-filter in front of it.
How Long Does an Inline Filter Actually Last?
The timeline on the box? Think of it as a suggestion, not a rule. A filter’s true lifespan comes down to two things: what’s in your water and how much of it you use.
If your city goes heavy on the chlorine, that carbon media is going to get used up fast. The same goes for high sediment levels—they'll clog the works long before the "official" replacement date.
Forget the calendar. Pay attention to your water. The moment you start tasting chlorine again or notice the flow from your fridge slowing down, it’s time for a change.
Do I Need a Plumber to Install an Inline Filter?
Not usually. For most jobs, like hooking a filter up to your refrigerator’s 1/4-inch water line, it's a simple DIY project. Most people with quick-connect fittings can get it done in less than an hour.
That said, know your limits. If the job involves cutting into a main copper pipe or if you’re just not comfortable with plumbing, call a pro. A small mistake can cause a huge, expensive mess from water damage. It's always better to be safe than sorry.