How to Install a Water Filter: Your Ultimate Guide to Cleaner Sips
So, you're ready to learn how to install a water filter? Let's start with a splash of reality: not every filter is a perfect match for every home or DIY skill level. What's a dream for a renter in a tiny apartment is a plumbing nightmare for a homeowner battling cloudy well water.
The secret isn't just about plumbing; it's about matching the filter's complexity to your own comfort zone. Let's turn that tap water into liquid gold, one step at a time.
Matching a Filter to Your Home and Skills
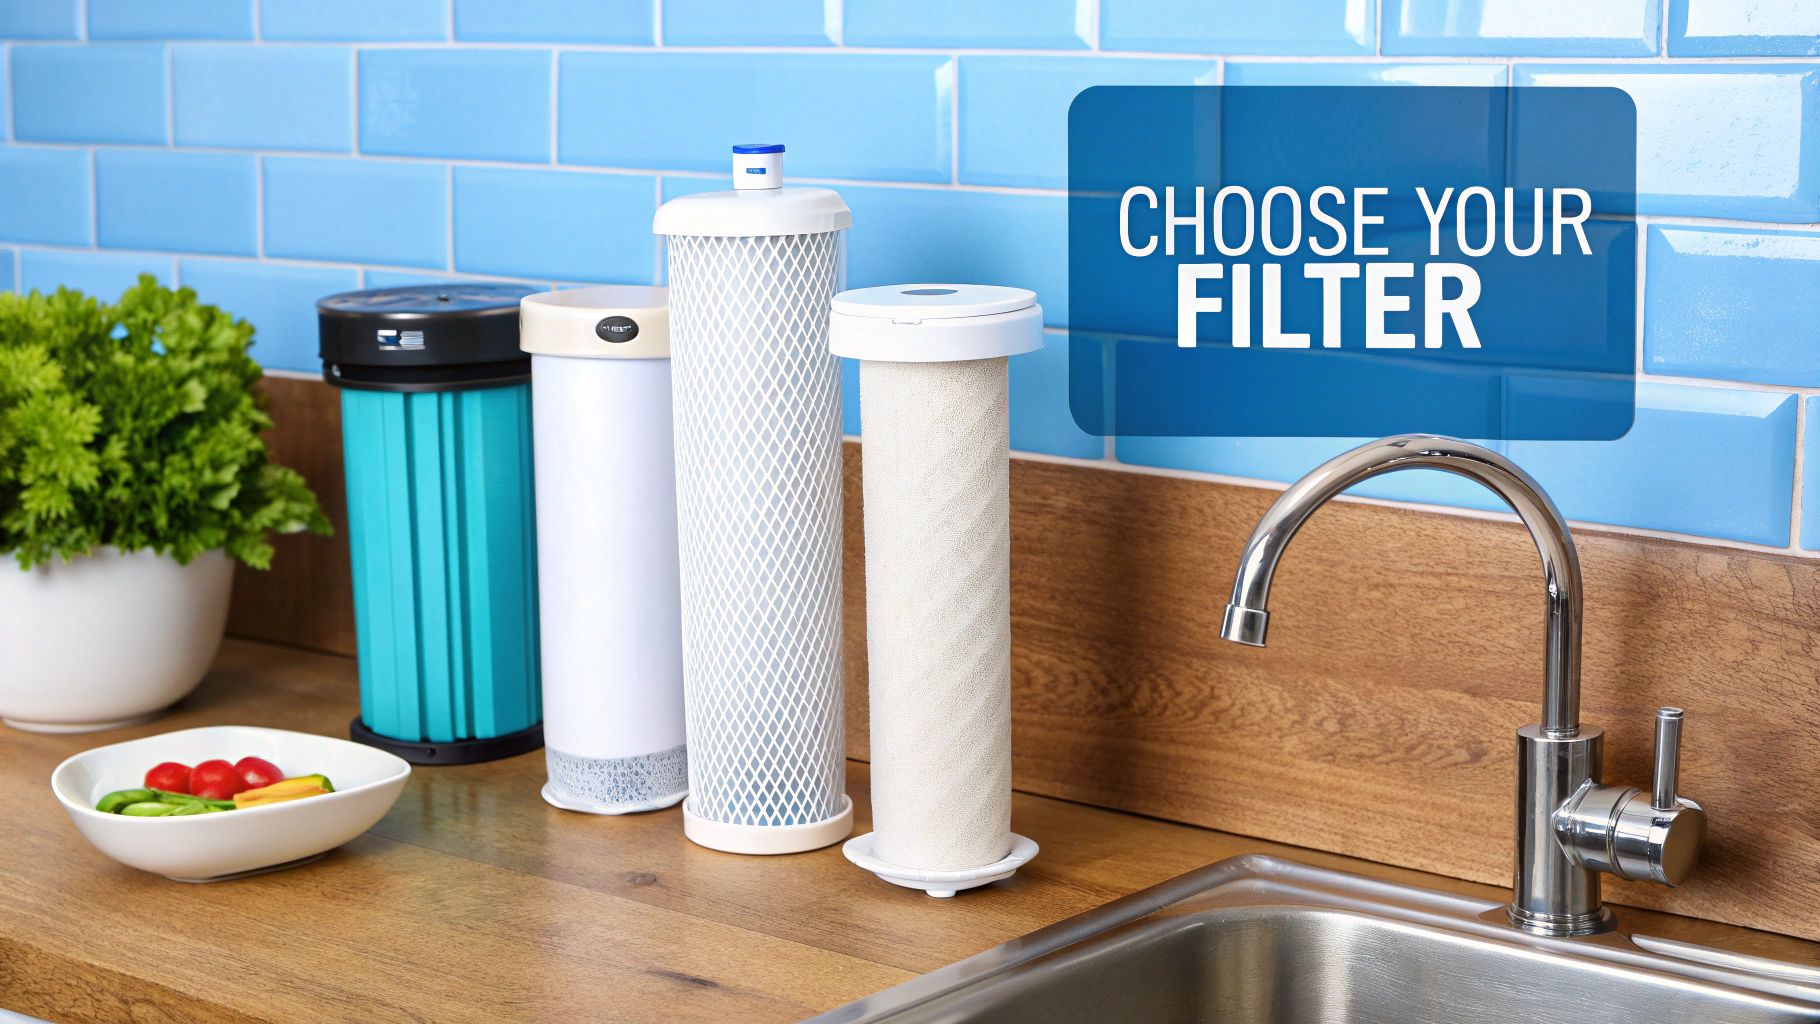
Before you even think about grabbing a wrench, you need to pick your battle. Installing a water filter isn’t a one-size-fits-all mission. The right choice boils down to your living situation, what you’re trying to filter out, and—let's be honest—your willingness to get up close and personal with the pipes under your sink.
It's no secret that the thirst for clean water is real. The global water filter market is projected to swell to an incredible $84.2 billion by 2032, a huge jump from $48.2 billion in 2025. This wave is powered by a growing focus on health and water purity. While this means you have more options than ever, it can also make choosing one feel like navigating a maze.
Finding Your Perfect Filtration Fit
Let's dive into a couple of common home scenarios.
If you're renting an apartment, making permanent changes to the plumbing is a one-way ticket to losing your security deposit. Your best friends here are a simple faucet-mounted filter or a countertop dispenser. These heroes usually require zero tools and can be set up in minutes, giving you an instant upgrade in taste and odor without any landlord drama.
On the flip side, if you own your home and want to declare war on specific contaminants like lead or chlorine, an under-sink system is your long-term champion. This is a more hands-on adventure. You'll need to shut off the water, possibly drill a hole in your countertop for a dedicated faucet, and ensure every connection is as tight as a drum.
Your goal isn't just to install a filter. It's to conquer a project that leaves you feeling accomplished and delivers delicious, clean water—without accidentally creating an indoor swimming pool. Choose a system that aligns with your skills today, not the master plumber you hope to become someday.
To help you out, here’s a quick comparison table that breaks down the most common home water filter types.
Home Water Filter Installation Comparison
| Filter Type | Installation Difficulty | Common Tools Needed | Best For |
|---|---|---|---|
| Pitcher/Dispenser | Very Easy | None | Individuals, renters, basic taste/odor removal |
| Faucet-Mounted | Easy | None, maybe pliers | Renters, small kitchens, improving tap water taste |
| Under-Sink | Moderate | Wrench, drill, bucket | Homeowners, targeted contaminant removal |
| Whole-House | Difficult | Pipe cutter, wrenches, plumbing tape | Homeowners, treating all water in the house |
This table should give you a clear starting point. A pitcher is a grab-and-go solution, while a whole-house system is a serious commitment—a true weekend warrior project.
Weighing Your Filtration Options
To zero in on your perfect match, keep these three key factors in mind:
- Installation Difficulty: Does it just screw on, or will you be cutting into your home's main arteries? Be brutally honest with yourself about what you can comfortably handle.
- Maintenance Commitment: How often does the filter cartridge need changing? A fridge filter is a 30-second snap, but wrangling a whole-house system in a cramped crawl space is a whole different beast.
- Long-Term Costs: Don't get mesmerized by the initial price tag. Calculate the cost of replacement filters over the next few years to see the real investment.
And remember, if you're eyeing a complex whole-house installation or the thought of touching your main water lines gives you the shivers, there's zero shame in calling in the cavalry. It's always a smart move to consult professional plumbing services when in doubt. Starting with the right filter for your home is the first and most important step to a successful installation.
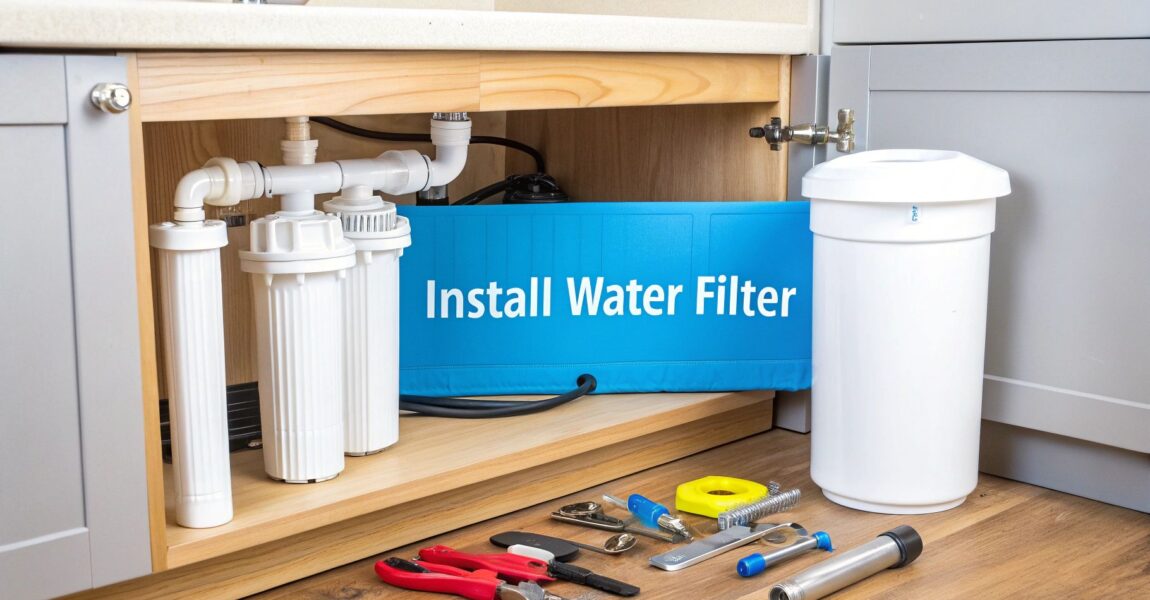
Your Pre-Installation Toolkit and Workspace Prep
I’ve seen it a thousand times: a flawless, leak-free water filter installation has less to do with being a plumbing wizard and more to do with what happens before you ever touch a pipe. A little preparation is what separates a smooth DIY victory from a frantic, wallet-draining call to a plumber. It all comes down to having the right gear and a clean battlefield.
Diving in without the proper tools is like trying to bake a cake without an oven—it’s just not going to end well. Ever try to tighten a fitting under the sink with just one wrench? The whole thing just spins around mockingly. That’s why having two adjustable wrenches is my golden rule; one to hold the fort (the fitting), the other to do the tightening.
Gathering Your Essential Tools
Beyond the wrenches, a few other items will become your new best friends. You’ll absolutely need a roll of Teflon tape (aka plumber's tape) to create those beautiful, watertight seals on threaded connections. And please, do not underestimate the sheer genius of a good headlamp. It’s a dark, mysterious world under that sink, and a headlamp frees up both your hands for the important work, instead of one holding a flashlight.
Make sure you also have:
- A bucket to catch the water that will inevitably escape the lines.
- A few old towels for the drips and spills that are guaranteed to happen.
- A utility knife or a dedicated tube cutter to get clean, square cuts on plastic tubing.
This nifty infographic breaks down the whole pre-installation game plan into three simple stages.
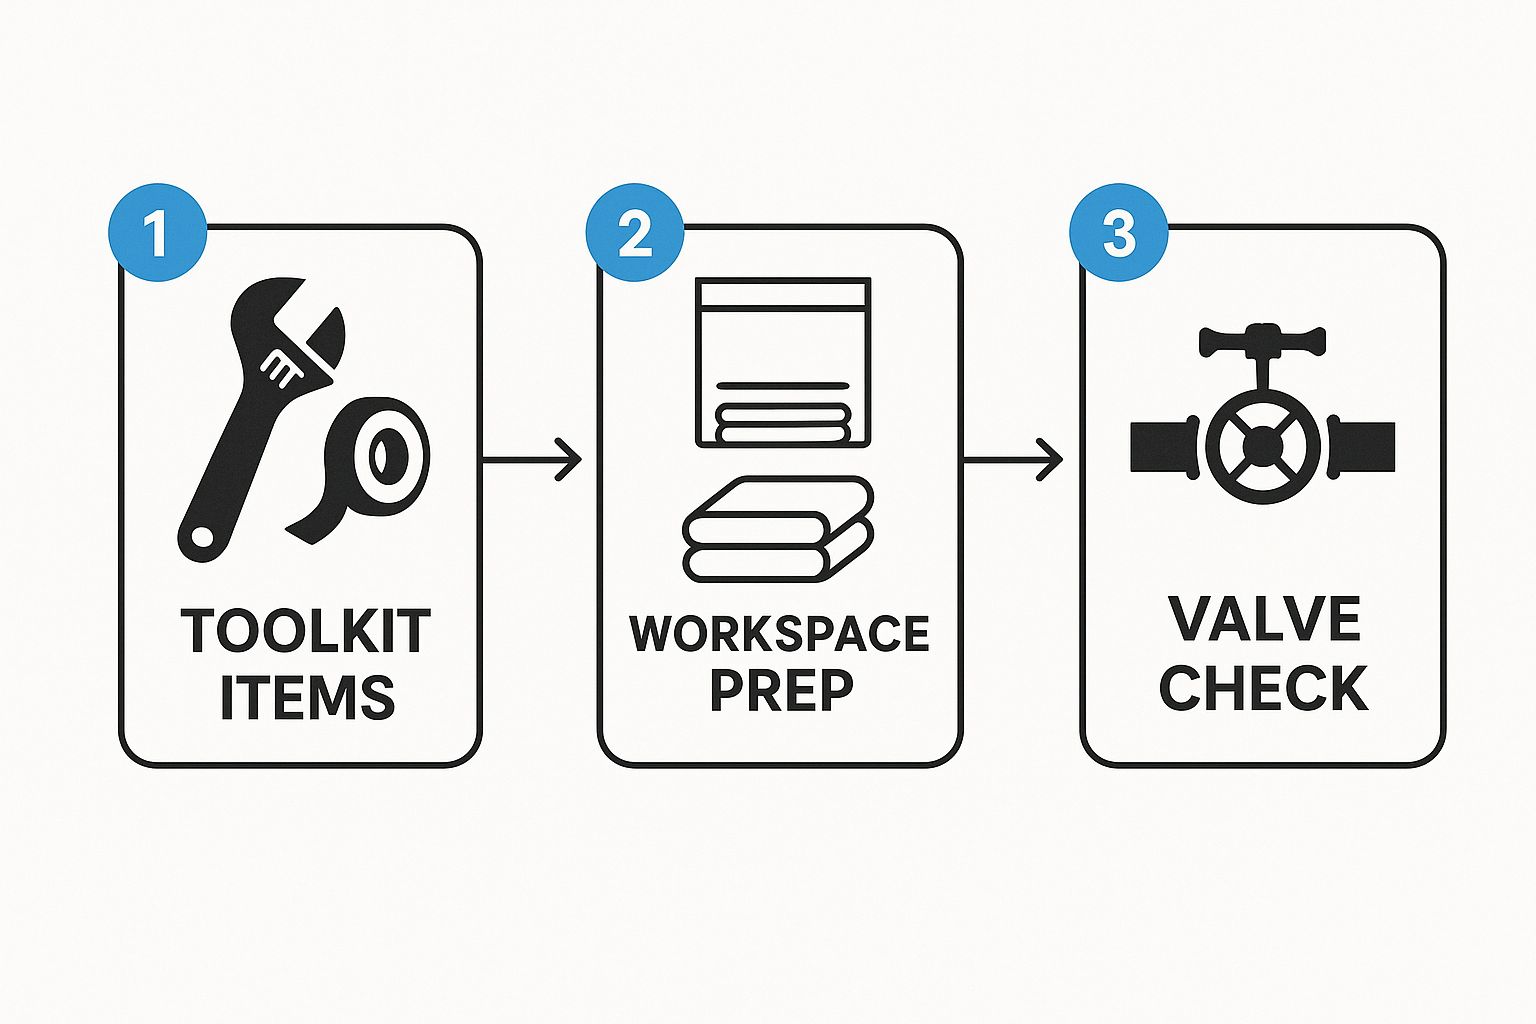
As you can see, a successful job starts with your toolkit, moves to prepping the space, and hinges on one critical action: shutting off the water.
Preparing Your Under-Sink Workspace
The space you're working in deserves just as much attention as your tools. First things first: completely empty that cabinet under your sink. You need room to maneuver and a clear line of sight to the plumbing. This isn’t just for comfort; it’s to save your cleaning supplies from an unexpected shower.
Here's the most critical tip I can give you: before you disconnect a single thing, find and test the water shut-off valves for your sink. Don't just assume they work. Old valves can seize up like they're frozen in time. Give each handle a gentle turn to make sure it moves freely and actually stops the water flow.
Once the cabinet is clear, lay down your old towels to cover the bottom. This small step is a game-changer, containing any stray water and making cleanup a breeze. With your tools at the ready and your space prepped, you’re officially ready to get started without any nasty surprises.
Installing an Under-Sink Water Filter
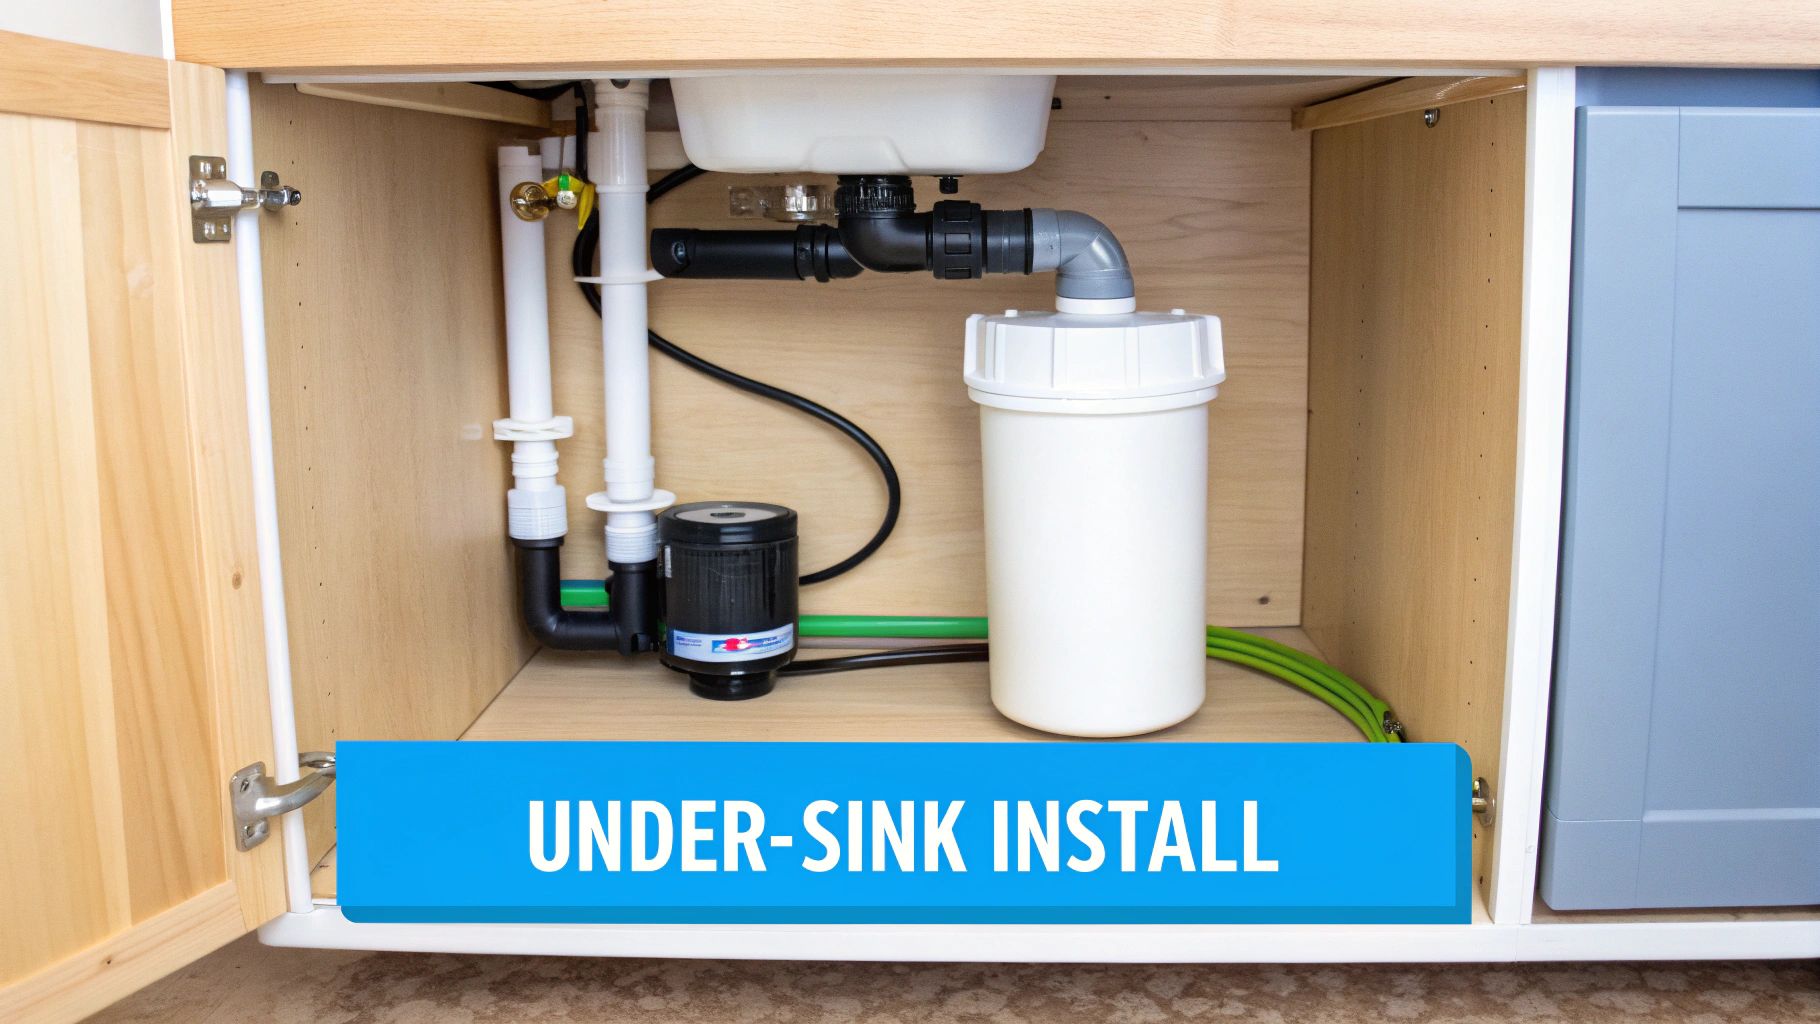
Alright, this is where the magic happens. Installing an under-sink water filter is hands-down one of the most popular and satisfying DIY projects for your home. It feels like a massive kitchen upgrade, but trust me, it’s completely manageable with a little patience. My goal here is to be your guide, walking you through it step-by-step so you end up with a professional, leak-free setup you can brag about.
First, and I cannot shout this from the rooftops enough: shut off the water. Find the cold water shut-off valve under your sink—it's that small, usually oval-shaped handle. Turn it clockwise until it stops. Next, open your kitchen faucet to let the line drain completely. This gets the leftover water out and, more importantly, relieves the pressure so you don’t get a surprise geyser to the face when you disconnect the supply line.
Making the T-Fitting Connection
That small T-fitting, sometimes called an adapter valve, is where most people get a little nervous. Don't be. This little piece is the heart of your new system. It brilliantly splits the cold water, sending some to your new filter and the rest along to your main faucet. With the water off, use an adjustable wrench to disconnect the flexible cold water line from the shut-off valve.
Now, screw the T-fitting directly onto the valve. Pro tip: wrap the male threads on the valve with a few layers of Teflon tape to guarantee a watertight seal. Once it's on, reconnect the original faucet supply line to the top of the T-fitting. And just like that, you’ve created a dedicated path for your filter.
A Word of Caution: When tightening the compression fittings on that T-adapter, you're aiming for "snug," not "crushed." If you unleash your inner Hulk and crank down too hard, you can damage the delicate plastic or rubber seals inside. That’s the number one cause of those slow, maddening drips that haunt you later.
Mounting the Filter and Faucet
With the plumbing rerouted, it’s time to find a forever home for the filter unit. Pick a spot on the cabinet wall where you can easily reach it for future filter changes. Don't banish it to the dark back corner where it can't be seen or reached! Mark your screw locations with a pencil, drill some small pilot holes, and then screw the mounting bracket securely to the cabinet wall.
Next up is the sleek new filter faucet that came with your kit.
- Look for an existing hole: Many sinks have a pre-drilled hole covered by a cap, perhaps for a soap dispenser or an old sprayer. This is your golden ticket—the path of least resistance.
- Drilling a new one: If you have to drill, lay down a layer of masking tape first. This gives your drill bit something to grab onto so it doesn't skate across your beautiful countertop. Always start with a small pilot hole before graduating to the larger bit designed for your specific material (like a diamond hole saw for granite).
This part requires a steady hand, but taking it slow is the secret to avoiding a countertop catastrophe.
Cutting and Connecting the Tubing
The final piece of this puzzle is all about precision. Your kit came with a roll of plastic tubing. You'll use this to connect the T-fitting to the filter's inlet, and then the filter's outlet to the new faucet. The secret to a leak-proof connection here is a perfectly square cut. If the end of the tube is jagged or angled, it won't create a proper seal inside the push-to-connect fittings.
I recommend using a sharp utility knife or, even better, a dedicated tube cutter for a clean, professional edge. Once cut, push the tube firmly into the fitting until you feel a distinct click or feel it bottom out. Give it a gentle tug to make sure it's locked in place. Repeat for all your connections, and you're golden.
This project is a fantastic way to upgrade your home’s water quality on your own terms. Of course, if this installation is part of a larger renovation or you'd just prefer a professional touch, you might want to look into professional kitchen remodeling services to get a seamless integration. But with these tips, you are well on your way to enjoying fresh, filtered water right from your own tap.
Whole-House Systems and Refrigerator Filters: The Full Spectrum
While an under-sink filter is a fantastic weekend project, it only purifies the water at one specific tap. If you're looking to go bigger—or even smaller and simpler—you'll encounter two other common players in the home filtration game: the mighty whole-house system and the humble refrigerator filter.
These two could not be more different in difficulty, but understanding them gives you the complete picture of your home water filtration options.
The Pro-Level Project: Whole-House Filter Installation
A whole-house filter is the undisputed heavyweight champion of water treatment. It cleans every single drop of water entering your home, meaning better water for your showers, your laundry, and every faucet in between.
But let's be crystal clear: this is a major league step up from an under-sink job. For most homeowners, this is a project best left to a professional plumber.
The process involves locating your main water line, usually hiding in a basement or utility closet, right after the water meter. You have to shut off the water to the entire house, drain all the pipes, and then physically cut into your main copper or PEX supply line. This is the point of no return where most DIYers understandably start to sweat. A mistake here isn't just a small leak under the sink; it's a potential indoor water park.
After the pipe is cut, the filter unit is installed using specialized fittings. These units are heavy, especially when full of water, so they also need to be securely anchored to a wall.
Even if you hire this job out, it pays to understand what's involved. You'll be able to ask your plumber intelligent questions, make sense of their quote, and know exactly what a safe, professional installation should look like.
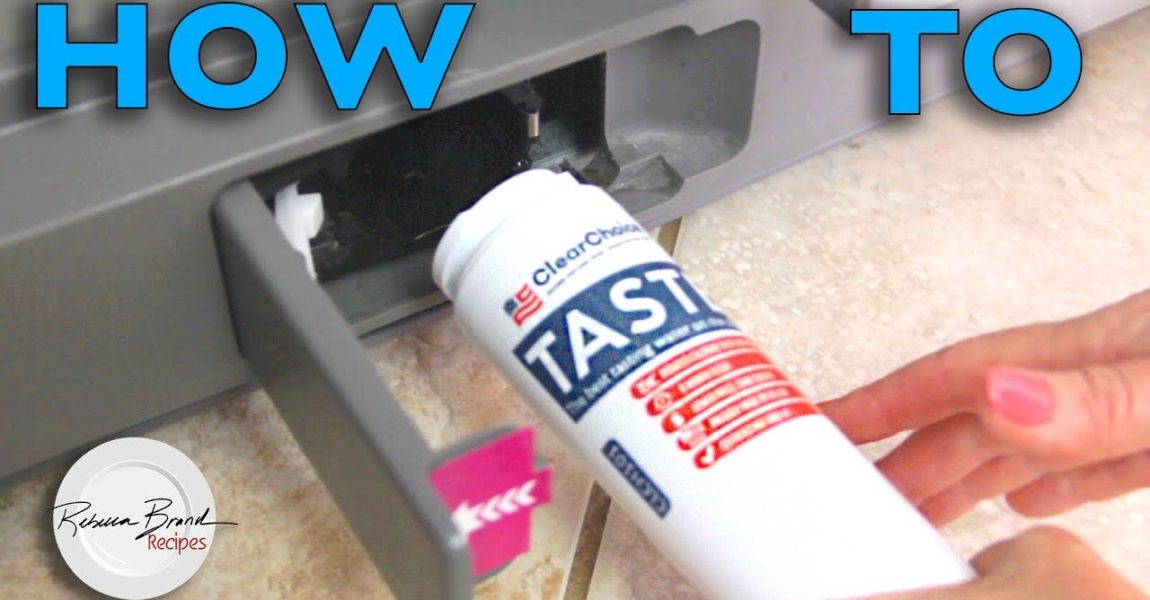
The Easiest Win: Swapping Your Refrigerator Filter
On the complete opposite end of the spectrum, you have the refrigerator filter. This is likely the simplest filter change you will ever perform in your home.
Most modern fridges with water and ice dispensers have a small, built-in filter that needs to be replaced every six months. If you forget, you'll eventually notice the water flow slowing to a trickle and your ice starting to taste a bit…off.
The manufacturers design this to be a ridiculously easy process:
- Find the filter. It's usually inside the fridge compartment behind a small pop-open door or tucked away at the bottom behind the base grille.
- Pop the old one out. Most use a simple push-button or a quarter-turn twist-and-lock mechanism to release the old cartridge.
- Slide the new one in. Just insert the new filter and twist it the opposite way until you hear or feel it click securely into place.
- Flush the system. This is a critical final step! Run about two gallons of water through the dispenser. This clears out any harmless carbon dust from the new filter and purges any trapped air bubbles, preventing sputtering.
Modern filtration technology, from complex membranes in reverse osmosis systems to the simple activated carbon in your fridge filter, has given homeowners incredible power over their water quality. As you'd expect, different technologies often need specific installation know-how to function correctly. You can dig deeper into how these advancements are changing the market by checking out recent industry research.
Whether you're tackling a major plumbing overhaul or just a five-minute filter swap, doing it right is the key to getting the clean, great-tasting water you deserve.
Final Checks and Troubleshooting Common Drips
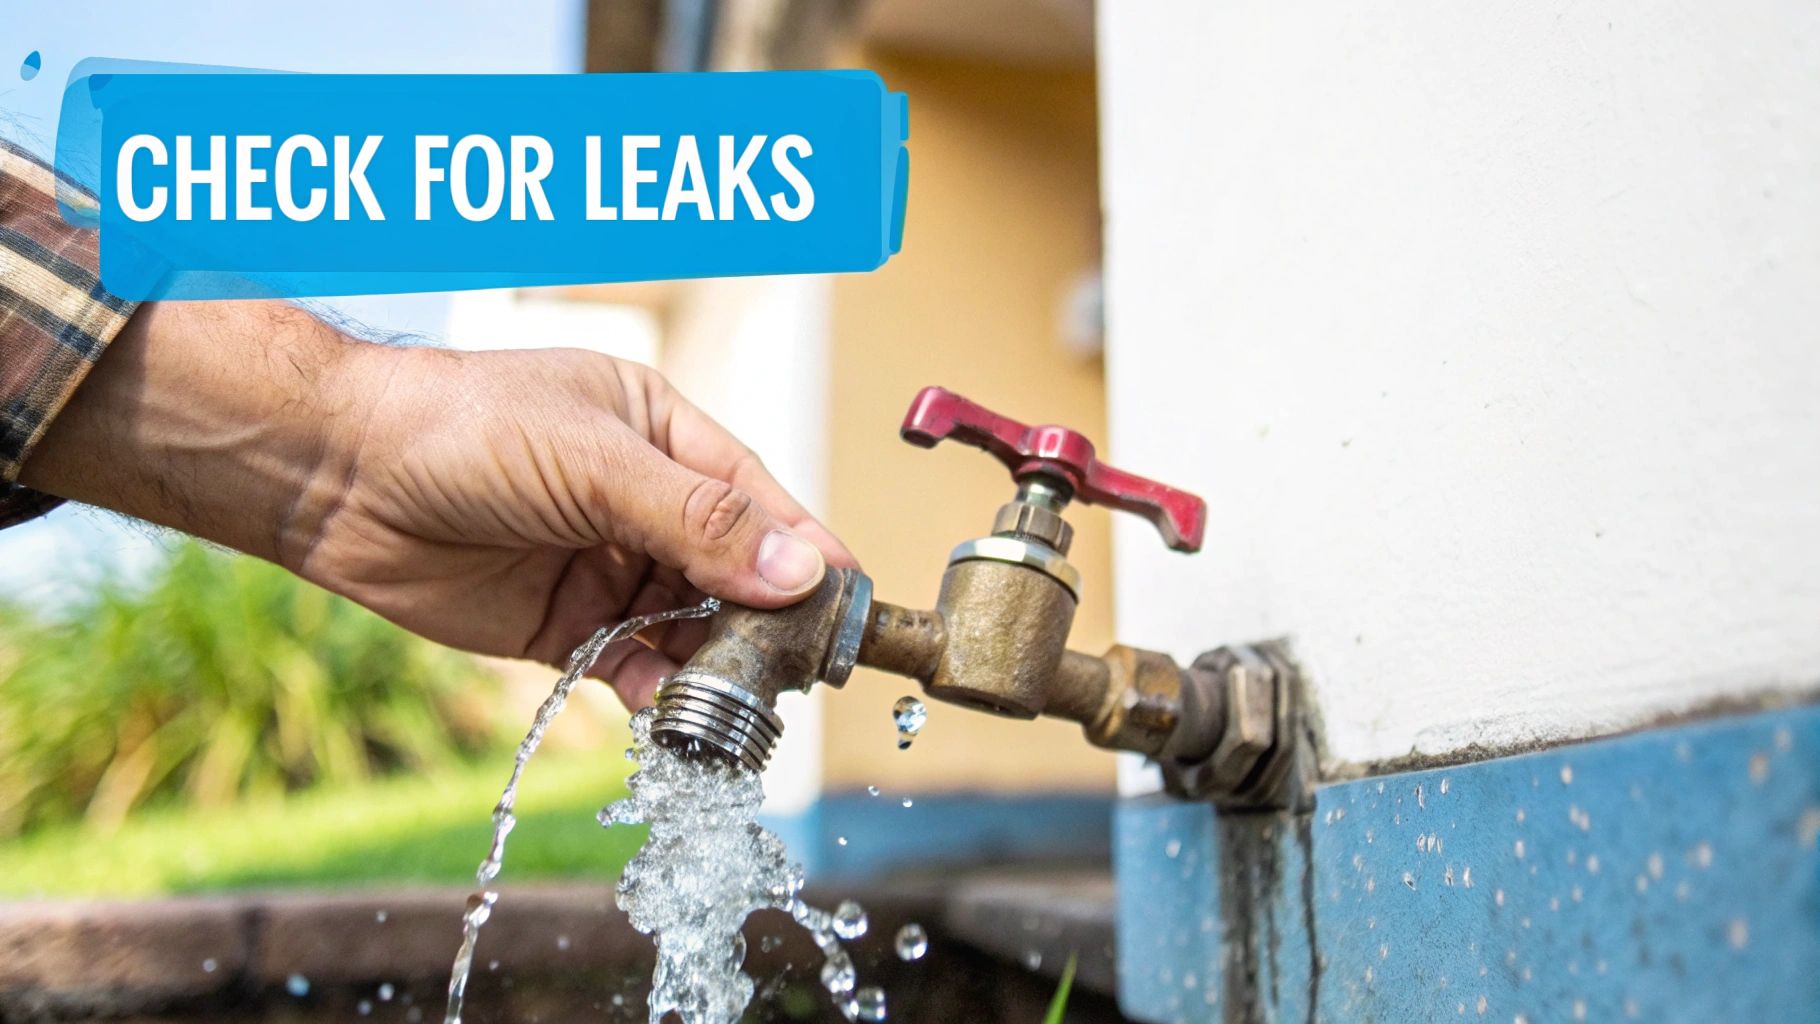
You’ve tightened the last fitting, the filter is mounted, and you're feeling victorious. It feels like you're done, right? Not so fast. These next few minutes are the most critical part of the entire installation. This is where we hunt down and eliminate the tiny drips that grow into big, ugly problems.
The trick is to reintroduce the water slowly. Don’t just crank the shut-off valve open. Crack it just a quarter turn to let the system fill up gently. You’ll hear the filter housing gurgle and sigh as it fills with water.
Now, pause. Just stop and listen for a moment. A hiss or a spray is an immediate red flag. If you hear anything like that, shut the water off instantly and revisit that connection. If all is quiet, you can proceed to the inspection.
The Paper Towel Test
This is an old plumber’s trick, and it's absolutely foolproof. Take a completely dry paper towel and wipe down every single connection you touched—the T-fitting, the lines going in and out of the filter, and the base of the new faucet.
Even the sneakiest, slowest seep will show up instantly on that dry paper towel. It’s a dead giveaway for a leak your eyes might have missed. A single drop every few minutes might seem harmless, but over time it’s more than enough to warp and rot the bottom of your cabinet.
A successful DIY job isn't about finishing fast. It's about not having to call a plumber a week later. Taking a few extra minutes for these final checks is your insurance policy against water damage and a world of frustration.
If everything stays bone-dry for a few minutes, you’re in the clear. Go ahead and open the shut-off valve the rest of the way. Now, run your new filter faucet for a while to flush the system out, just like the manufacturer's instructions recommend.
Solving Common Installation Hiccups
Even when you're careful, a couple of small issues can pop up. Don’t panic; the fixes are almost always surprisingly simple.
- A Stubborn Drip at a Fitting: If that paper towel test reveals a slow drip from a threaded connection, your first instinct might be to tighten it more. Resist! Turn off the water, disassemble the fitting, and simply re-wrap the threads with some fresh Teflon tape. For compression fittings, usually, a simple quarter-turn with a wrench is all it needs to get a good seal.
- Sputtering or Low Water Flow: This is almost always one of two things. First, quickly check that the plastic tubing hasn't been kinked or bent sharply. Second, you probably just have some air trapped in the lines, which is completely normal. Let the faucet run for a good 5-10 minutes. This will purge the air, and you’ll see the flow smooth out into a beautiful, steady stream.
By taking the time to perform these final checks, you can pack up your tools with the cool confidence of a pro. This careful finish ensures your hard work pays off with delicious, clean water and a leak-free setup you can count on.
Your Water Filter Installation Questions Answered
Got your filter installed? Fantastic. But if you’re like most people, a few questions are probably bubbling up right about now. It's totally normal to wonder about maintenance, how long the filter really lasts, and if you’ve set everything up for the best possible results.
Let's dive into some of the most common questions we hear in the world of home water filtration. Think of this as your final check-in to make sure you're ready to enjoy that pristine water with total peace of mind.
How Often Should I Really Change My Filter Cartridge?
This is the number one question, and the honest answer is: it depends. The manufacturer’s guideline—usually every six months—is a solid starting point. They base that on an "average" home with "typical" water.
But your home isn't average; it's yours. Your schedule might need to be different.
- Is your water full of sediment? If you're on a well or live in an area with old city pipes, you’ll probably notice your water pressure dropping sooner. That’s your filter's way of crying for help. Time for an early change.
- Do you have a big family? A house full of people cooking, drinking, and filling water bottles will exhaust a filter way faster than a single person would.
- Can you taste a difference? The most reliable sign is when that old chlorine taste or funky smell starts to creep back in. Trust your taste buds—they are your best indicator that the filter has given its all.
Do I Need to Sanitize the System During a Filter Change?
Yes, and please don't skip this crucial step! It’s super simple. Over time, the inside of the filter housing can develop a thin, slimy biofilm made of harmless bacteria. When you remove the old cartridge, you have the perfect opportunity to give the housing a quick clean.
All it takes is a little unscented bleach or a dedicated sanitizer solution followed by a thorough rinse. This simple habit ensures that the pure water coming through your brand-new filter actually stays that way.
Taking a moment to sanitize the filter housing is a small investment in maintaining the highest water quality. It prevents the system itself from becoming a source of contamination, ensuring every glass is as pure as the first.
It's no surprise that more and more people are focused on this. The global water purifier market was valued at around $35.25 billion in 2024 and is expected to more than double by 2034. That incredible growth shows just how much people around the world care about water safety at home. You can dig into the numbers and trends by checking out the latest market research on water purifiers.
Can I Connect My Under-Sink Filter to My Refrigerator?
Absolutely! This is one of our favorite DIY home filtration upgrades. You get pristine, filtered water and ice right from your fridge dispenser without having to buy those pricey, brand-specific refrigerator filters.
You'll just need a T-fitting and some extra quarter-inch tubing. This lets you "split" the filtered water line, sending it to both your new faucet and your fridge's icemaker line. Just double-check that your under-sink system has enough water pressure to run the icemaker properly. Most modern systems can handle it just fine.
At Water Filter Advisor, our goal is to empower you with the knowledge to achieve safer, better-tasting water at home. From choosing the right system to a successful installation, we're here to help every step of the way. Explore our in-depth guides and reviews at https://www.waterfilteradvisor.com.