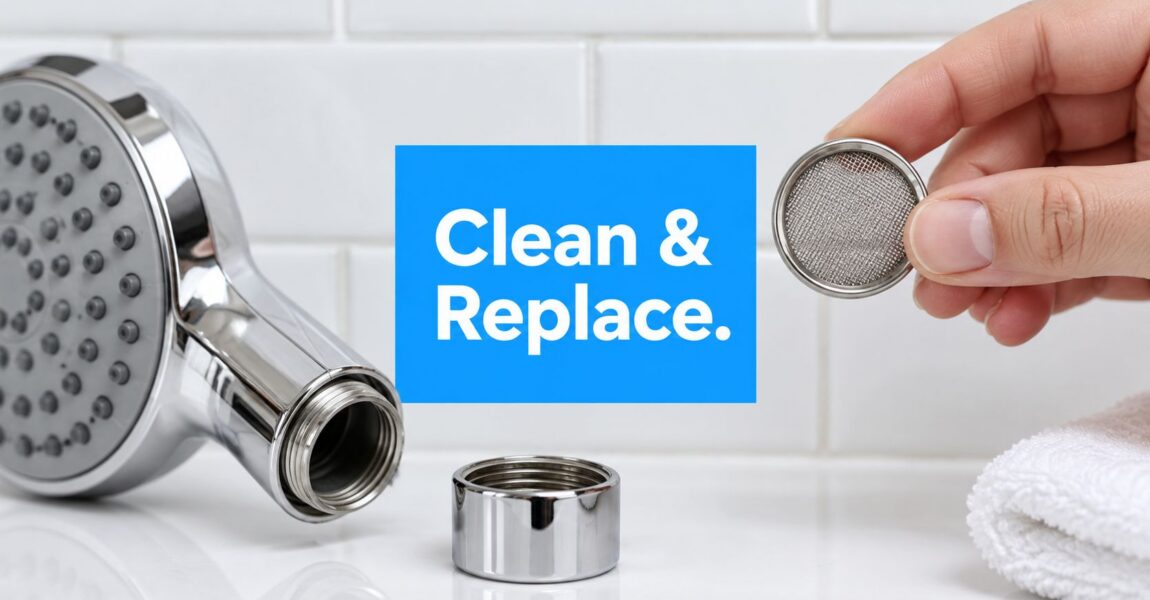
You turn on the shower and get a weak, uneven spray. The first instinct is usually to blame the showerhead or the filter cartridge, but the restriction may be a small mesh disc hidden inside the connection. That shower head filter screen catches grit, rust flakes, hair, and scale before they reach the nozzles. Once it loads up, flow drops, and the shower can feel broken even when the rest of the plumbing is fine.
Cleaning that screen often restores the spray. It won't, however, remove dissolved chlorine, chloramine, or other contaminants in the water. The practical approach is to treat the screen as a sediment pre-filter, then choose a full shower filter or broader home water-treatment system when the water chemistry calls for it.
What a Shower Head Filter Screen Does for Home Water Filtration
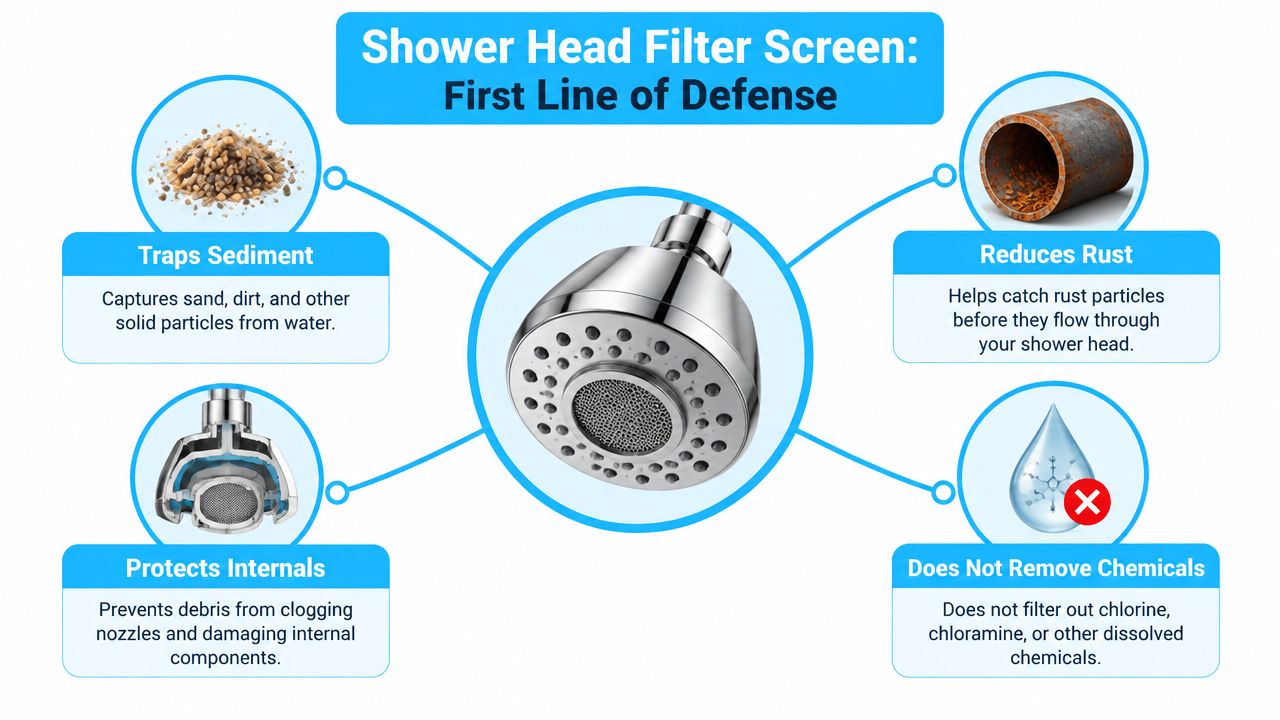
A weak spray does not always mean the showerhead or cartridge has failed. A small mesh insert at the water inlet may be packed with grit, rust, hair, or scale. The screen's job is mechanical: water passes through its openings while larger particles stay behind, protecting the showerhead's internal passages and spray nozzles.
Well-water users may find brown grit after a short period of use. In older buildings, rust-colored flakes and mineral fragments are common. Municipal water can leave a thin sediment layer that stays unnoticed until the spray weakens. In each case, the screen is collecting debris, not purifying the water chemically.
What the mesh catches
A screen can trap sand, rust, pipe debris, hair, and coarse mineral particles before they reach rubber spray nozzles or lodge inside a cartridge. Cleaning that mesh may restore flow without replacing the showerhead. It is a useful sediment pre-filter, especially where supply lines shed visible debris.
The screen also affects water-saving fixtures. U.S. shower heads are capped at 2.5 gallons per minute at 80 psi, while WaterSense-labeled models are limited to 2.0 gallons per minute or less. A partially blocked mesh adds resistance to a fixture that already has limited available flow, according to plumbing guidance on showerhead flow restrictions.
Practical rule: A clean screen protects flow. A clogged screen becomes part of the flow problem.
What the screen cannot do
Mesh does not remove dissolved chlorine, chloramine, or hardness minerals that remain in solution. It cannot make contaminated source water suitable for drinking. If chlorine odor is the concern, choose a certified shower filtration system with suitable media. A finer debris screen will not solve a chemical problem.
NSF/ANSI 177 provides useful context. Adopted in September 2004 after about three years of development, it was created specifically for shower filtration systems and remains the first and only American National Standard for shower filters, as described by WaterWorld Design Build. Products certified under the standard are designed to reduce free available chlorine, while the standard addresses aesthetic effects rather than broad contaminant removal.
Keep those jobs separate. Clean the screen when sediment restricts flow. Choose a suitable cartridge when chlorine reduction is the goal, and consider broader home treatment when the source water requires more than a shower filter can provide. A guide to cut water bills with shower heads can help compare flow efficiency without confusing water conservation with filtration.
How to Find and Identify Your Shower Head Filter Screen
Start with the water connection, not the spray face. A shower head filter screen is commonly found in one of three places: inside the showerhead inlet, between a shower filter and the shower arm, or inside a short adapter fitting. The exact location depends on the fixture design, so don't assume the screen is visible from the outside.
Turn the shower off and unscrew the showerhead by hand. If it won't move, wrap the fitting with a soft cloth before using an adjustable wrench. The cloth protects chrome, brushed nickel, matte black, or painted finishes from jaw marks.
Use the inlet as your visual reference
Look inside the female-threaded opening. You may see a flat rubber washer first, followed by a small circular mesh screen. The washer seals the connection, while the screen filters particles. They often sit together, so photograph the assembly before removing anything.
A flow restrictor is different again. It may look like a small plastic insert, a narrow opening, or a shaped disk designed to control water volume. Don't mistake it for the mesh. Removing a flow restrictor can change the fixture's intended flow behavior and may conflict with local plumbing requirements.
A stainless screen usually has a fine metallic weave or perforated mesh appearance. Plastic screens may look like a molded disk with a colored or translucent grid. Shine a flashlight across the opening rather than directly into it. Side lighting makes the weave, trapped debris, and scale easier to see.
Record compatibility before buying
Take clear photos of:
- The screen shape: Note whether it's round, oval, or molded into a cartridge end.
- The washer position: Keep the original washer until the replacement is installed and tested.
- The thread connection: Match the replacement to the fitting, not just the showerhead brand.
- The screen thickness: A deeper insert may not seat correctly in a shallow recess.
- The material: Record whether the existing mesh is stainless steel, plastic, or part of a disposable filter assembly.
Don't force a screen into place. A mismatched insert can sit crooked, fold the washer, or reduce the opening enough to create a new pressure complaint. If the screen is integrated into a cartridge or sealed fitting, replace the compatible assembly rather than prying into a sealed body.
Diagnosing Common Problems Like Clogs and Mineral Buildup
A weak shower tells you that water is meeting resistance, but it doesn't identify the source. The restriction may be loose sediment, hard-water scale, a damaged screen, a displaced washer, or a larger issue upstream. Diagnose the material and the timing before choosing a remedy.
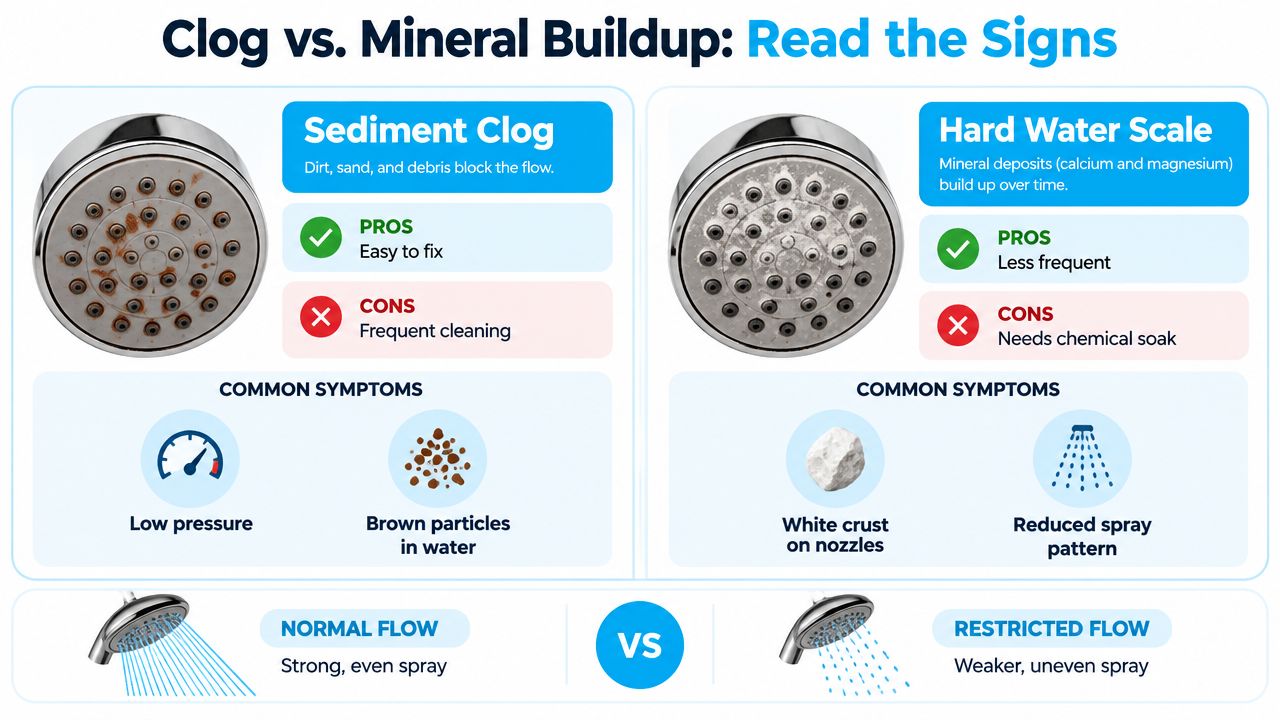
Sediment usually looks loose and granular. Rust may appear orange or brown, while sand and pipe debris can look gray, tan, or black. Scale behaves differently. Hard-water deposits form a pale crust on the mesh, threads, and spray openings, and they often remain attached when you rinse the part.
Read the symptoms before taking the head apart
A gradual pressure decline with visible grit points toward sediment loading. A spray that becomes distorted while the inlet screen looks clean may indicate scale inside the nozzles. A screen that clogs again soon after cleaning suggests the water supply is continually delivering debris, rather than a one-time showerhead fault.
| Symptom | More likely cause | First check |
|---|---|---|
| Brown or orange particles | Rust or sediment | Inlet screen and nearby plumbing |
| White crust | Hard-water scale | Screen, washer, and spray nozzles |
| Sudden flow loss after installation | Folded washer or misaligned part | Connection assembly |
| Repeated clogging | Upstream sediment or pipe corrosion | Screen condition after cleaning |
| Chemical odor with clean mesh | Dissolved disinfectant | Water chemistry and filter media |
A screen can also create a pressure-versus-capture trade-off. In one engineering test, flow fell from 46.2 to 25.8 m3/h as pressure drop increased from 0.2 to 0.6 bar, while filtration efficiency rose from 45% to 69% in the published screen-filter study. The household lesson is simple: a finer or increasingly blocked screen may capture more sediment, but it can make the shower noticeably weaker.
Clean-screen tests can mislead
Testing a new screen tells you how it performs before real debris arrives. It doesn't tell you how the same screen behaves once particles cover part of the mesh. The engineering study recommends measuring clean-screen flow, then repeating the test after incremental loading or partial blockage because headloss rises nonlinearly as blockage increases.
Independent testing also found that screen efficiency changed with contamination and flow. At a 5 m pressure drop, reported efficiency ranged from 80.1% at 100 ppm contamination and 1.5 lps to 59.8% at 400 ppm and 2.5 lps, and the test setup developed that pressure drop in roughly 10 minutes in the comparative screen-filter study. Those conditions aren't a direct household forecast, but they show why a screen that looks effective when clean can become restrictive under dirty-water conditions.
A chlorine complaint requires a different diagnosis. Wirecutter reported inconclusive shower-filter results because the unfiltered control already showed no detectable chlorine with the test strips used in its independent review. If the mesh is clean but the odor remains, cleaning won't solve the chemistry. You may need a full shower filter designed for the disinfectant in your supply, or whole-house treatment if the concern affects multiple fixtures.
How to Safely Remove Clean and Replace the Screen
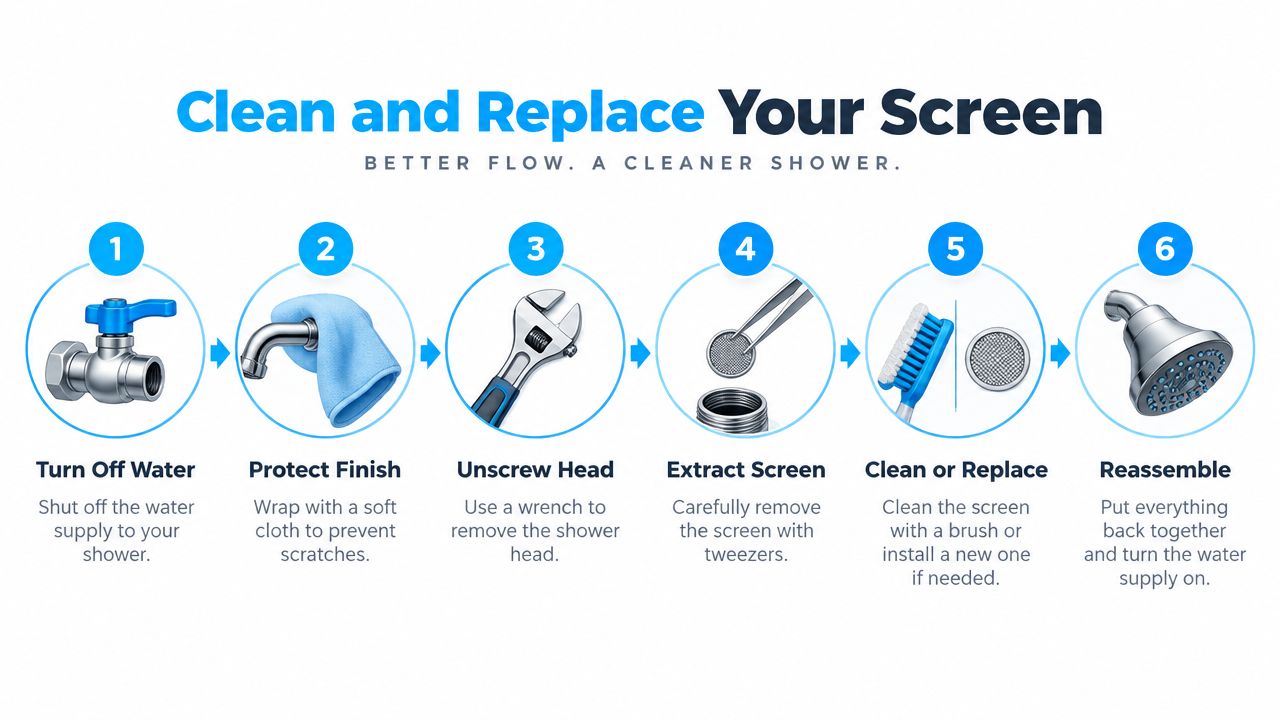
Have a towel, a soft toothbrush, a shallow container, and a replacement washer or screen nearby before you start. Shut off the shower valve, then run the fixture briefly to release trapped pressure. You usually won't need to shut off the home's main water supply, but close it if the fitting continues to run or the shower valve doesn't isolate the line.
Protect the finish with a cloth. Try loosening the showerhead or filter connection by hand first. If it resists, place an adjustable wrench over the cloth and apply steady pressure to the fitting, not the thin showerhead body. Sudden force can crack plastic threads or damage a decorative finish.
Remove the screen without damaging the seal
As the connection separates, watch for the rubber washer. Set it aside in the same orientation and take a quick photograph. Use a fingernail, plastic pick, or blunt tweezers to lift the screen. Don't stab the mesh with a pin or screwdriver. A punctured screen may pass debris directly into the nozzles and can distort the seal around the edge.
Rinse loose grit under running water. Hold the screen so water flows from the cleaner side toward the dirty side when possible. That pushes particles out instead of driving them deeper into the weave. For stubborn material, use a soft toothbrush with light strokes.
Scale needs a different approach. Place the screen in a small container of white vinegar and allow the deposit to soften, then rinse it thoroughly. Don't scrape aggressively, and don't use a sharp object to enlarge blocked openings. If the mesh is torn, badly corroded, permanently distorted, or still blocked after cleaning, replacement is the sensible option.
Reassemble with restraint
Clean the recess where the screen sits. Replace the screen flat, then position the washer exactly as it was. Start the connection by hand and turn it slowly. If the threads don't engage smoothly, back off and realign them. Cross-threading is easier to prevent than repair.
Hand-tighten until the joint is snug. Over-tightening can deform the washer, shift the screen, or damage plastic threads. Turn the water on slowly and inspect the joint for leaks. If water beads around the connection, shut it off, reseat the washer, and try again before reaching for more force.
Flush the shower into the drain before stepping under it. This clears loosened sediment and any cleaning residue. A spare screen and washer are inexpensive insurance, especially if your home has well water, aging pipes, or recurring rust debris.
Watch the removal and reassembly process before starting if you prefer a visual reference.
If the fitting is seized, the connection leaks inside the wall, or debris keeps returning after cleaning, stop before damaging the plumbing. A local professional, such as MG Plumbing Services LLC same-day service, can help separate a removable screen problem from a concealed plumbing restriction.
Choosing the Right Replacement Screen Material and Size
A replacement screen should match the debris problem, the fixture, and the flow you can accept. Finer mesh catches smaller particles, but it also loads faster when the supply carries rust, sand, or pipe scale. A coarser screen may be the better choice for larger debris because it protects the showerhead without restricting the spray as quickly.
Stainless steel suits installations that need repeated cleaning. It usually keeps its shape better than thin plastic mesh during removal, rinsing, and brushing. Plastic screens can work in compatible fittings and cost less to replace, but the material, thickness, and seating surface must match the original assembly.
Micron ratings indicate the approximate particle size a mesh is designed to capture. A 40-micron stainless steel screen can catch sand, rust, calcium deposits, and other coarse particles. 100-micron and 200-micron screens are suited to silt, fine sediment, algae clusters, and larger debris, as outlined in this mesh-selection guide.
| Micron Rating | What It Traps | Best For | Flow Impact |
|---|---|---|---|
| 40 micron | Sand, rust, calcium deposits, and coarse particles | Noticeable grit or rust entering the shower | Higher restriction risk as debris accumulates |
| 100 micron | Silt, fine sediment, algae clusters, and larger debris | General sediment protection with moderate loading | Moderate restriction when maintained |
| 200 micron | Larger debris and coarse material | Heavy particles where preserving flow matters | Lower initial restriction, less fine capture |
Match the screen to the whole assembly
Check the diameter, thickness, seat, thread connection, and washer arrangement before ordering. Determine whether the mesh is a loose insert or part of a cartridge end. A screen can match the opening yet fail to seal at the edge, allowing water to bypass it, leak, or shift into the flow path.
The fixture's flow ceiling matters too. U.S. showerheads generally operate within a regulated flow limit, while WaterSense models use a lower limit. A very fine screen can make a low-flow fixture feel weak, particularly as sediment accumulates. Choose the coarsest screen that handles the actual debris, then inspect it sooner when the water is visibly dirty.
Screen cleaning addresses particulate blockage only. It does not reduce dissolved chlorine or resolve a chemical odor. If chlorine is the concern, choose a complete shower filter with suitable media and credible performance documentation. If sediment reaches several fixtures, a whole-house sediment stage can protect the shower screen more effectively than repeatedly fitting finer mesh at the showerhead.
A screen is also the wrong replacement when the restriction comes from the cartridge, spray face, or supply plumbing. Match the part to the failure you are fixing, not to the smallest mesh available.
Ongoing Maintenance and Troubleshooting for Lasting Flow
Treat the screen as a service part, not a permanent filter. Practical maintenance guidance recommends checking and rinsing the inlet screen every six months in this showerhead maintenance guide, but hard water, well-water debris, pipe corrosion, and construction sediment can demand attention sooner. Let the symptoms guide you. A sudden weak spray deserves an immediate inspection, while a stable flow doesn't require unnecessary disassembly.
Keep the routine simple:
- Inspect the inlet: Look for grit, rust, hair, and white scale.
- Check the washer: Confirm it sits flat and hasn't folded into the water path.
- Rinse loose sediment: Use clean running water and a soft brush.
- Descale carefully: Soak removable scale-coated parts in vinegar, then rinse completely.
- Evaluate the cartridge: A clogged cartridge can restrict flow even when the screen is clean.
- Check the spray face: Blocked nozzles can imitate an inlet-screen problem.
- Flush after service: Run the shower into the drain before use.
- Watch the pattern: Recurring debris points to the source water or plumbing, not necessarily a defective screen.
A chemical odor needs separate treatment. The mesh catches particulate matter, but it doesn't remove dissolved disinfectants. If several showers or faucets show the same odor, investigate the supply and consider whole-house treatment rather than repeatedly cleaning one screen.
For household filtration choices, cartridge guidance, certification information, and maintenance advice, use the Water Filter Advisor water filtration advice as a reference point. The key is to match the treatment to the problem: screen cleaning for sediment at the fixture, a full shower filter for an appropriate chlorine-reduction claim, and broader treatment when the issue affects the home's incoming water.
Water Filter Advisor offers practical guides for comparing shower filters, replacement cartridges, filtration media, certifications, and whole-home treatment options. Visit Water Filter Advisor to identify whether your weak flow calls for a cleaned screen, a replacement part, or a more complete filtration solution.
- September 17, 2026
- Uncategorized
