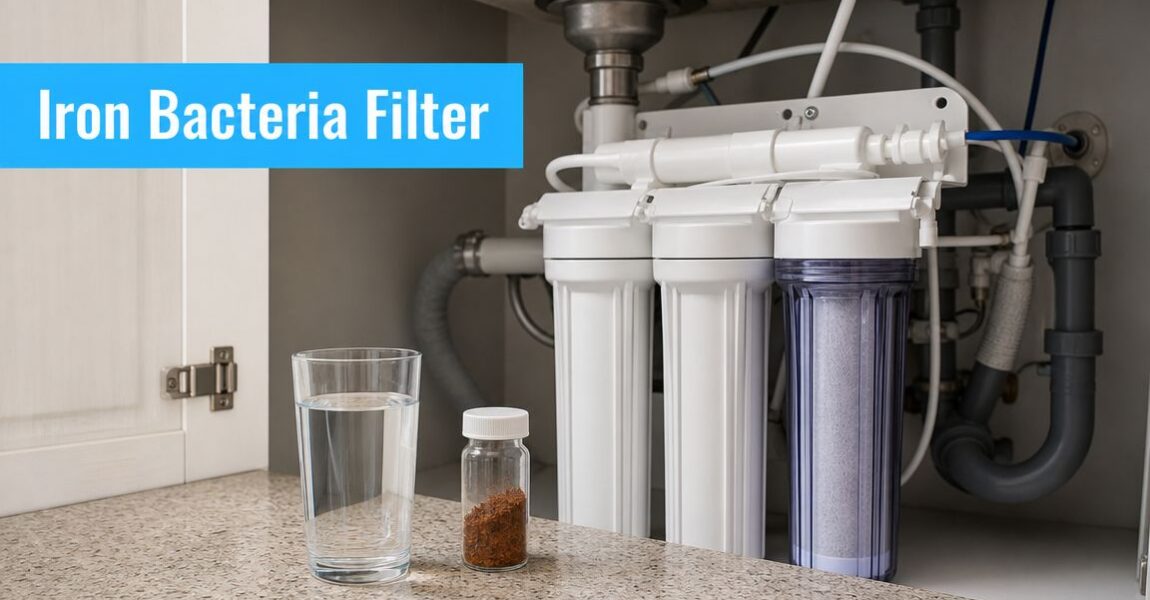
Best Chlorine Water Filter for Whole House: 2026 Guide
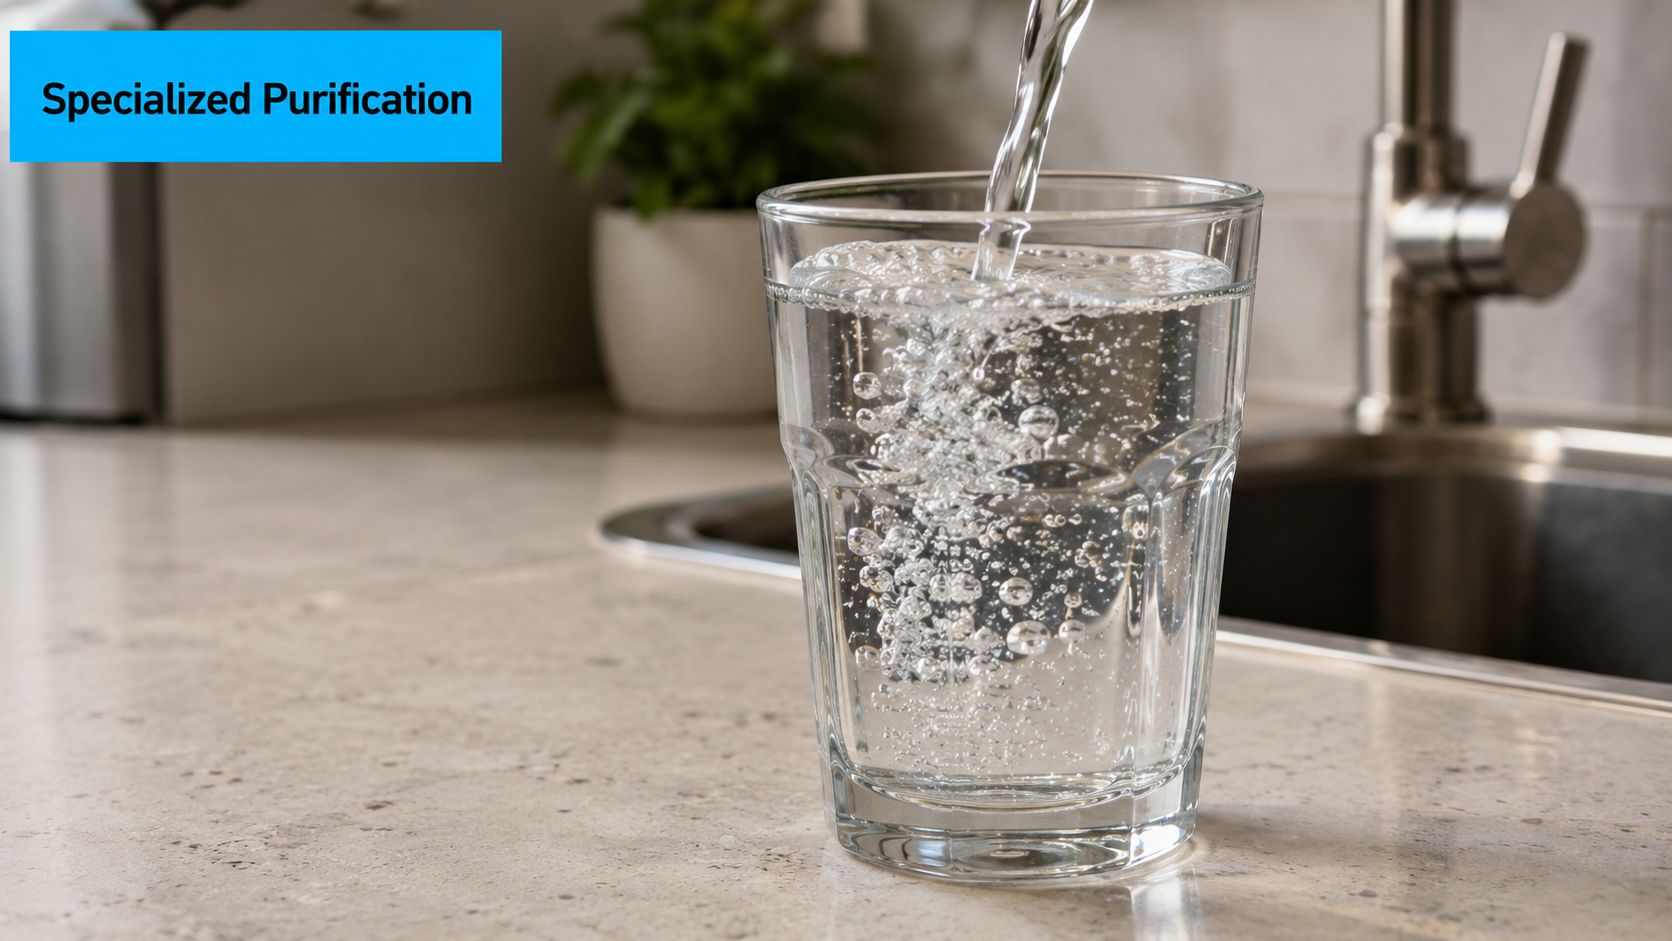
You turn on the kitchen tap, fill a glass, and catch that faint swimming-pool smell. Later, the shower leaves your skin tight, your hair rough, and the bathroom air harsher than it should be. That's the moment most homeowners start looking for a chlorine water filter for whole house use, not because they suddenly became water nerds, but because the water keeps reminding them something's off.
A good whole-house chlorine system fixes a very specific problem. It removes disinfectants and related byproducts from the water entering your home, so the water you drink, bathe in, cook with, and run through appliances feels less aggressive. But choosing the right setup isn't as simple as buying “a carbon filter.” The key decision comes down to media, sizing, certifications, and one overlooked issue that matters a lot: what happens in your plumbing after chlorine is removed.
What Is a Whole House Chlorine Filter
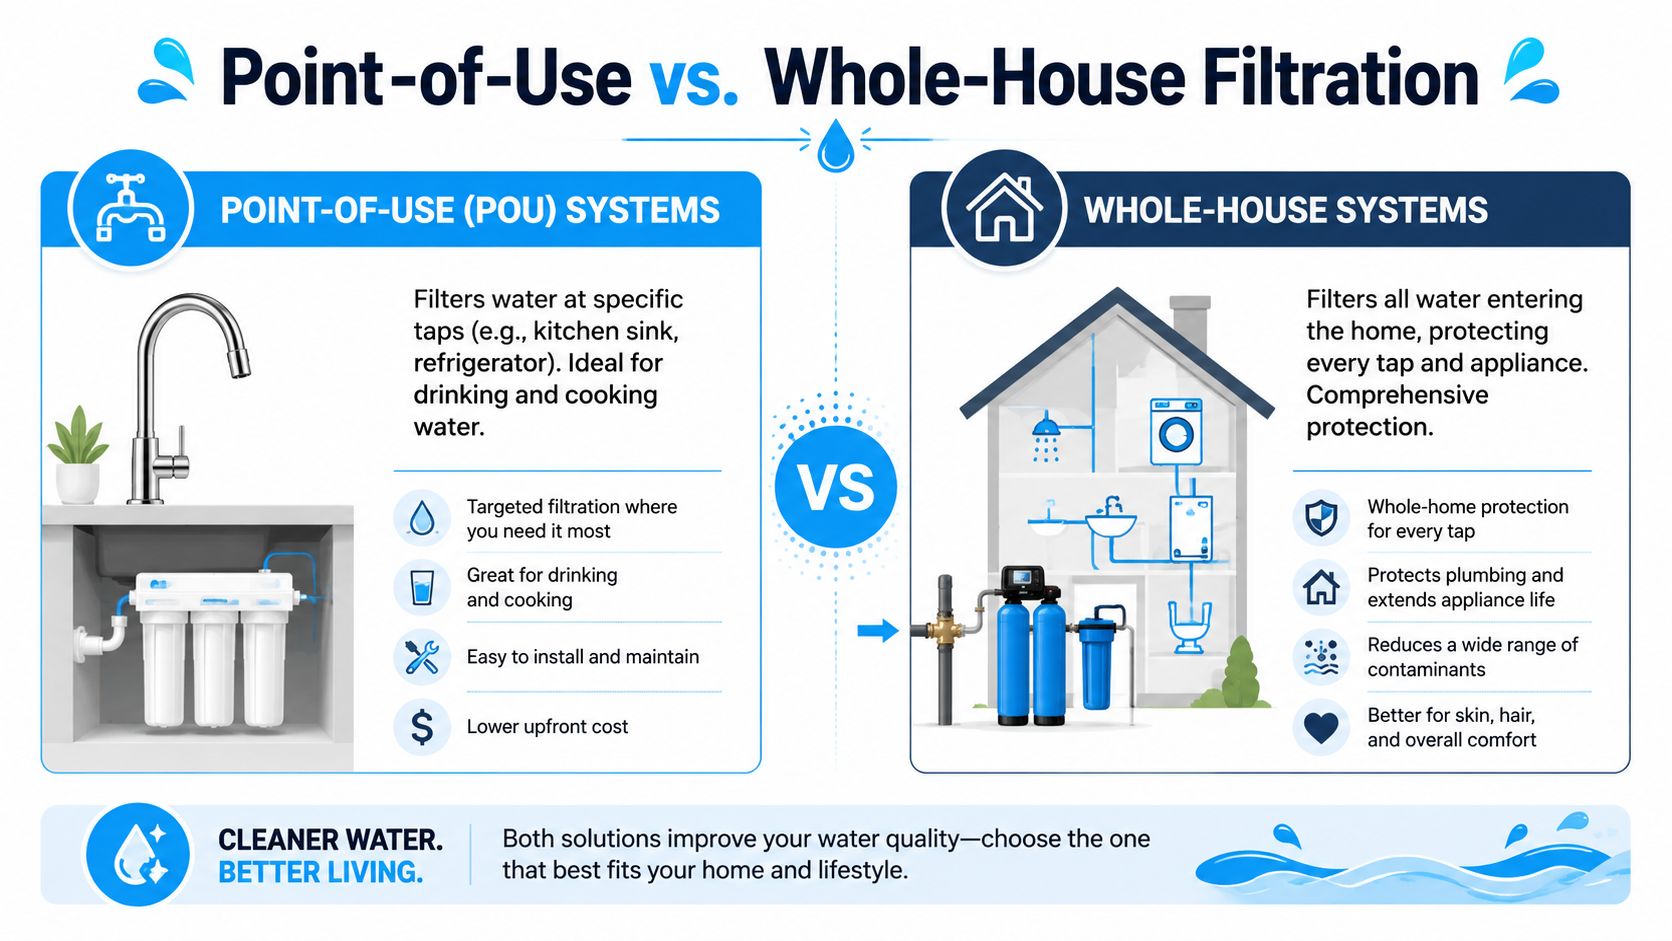
A whole-house chlorine filter is a point-of-entry system installed where the main water line enters the home. That placement matters more than people realize.
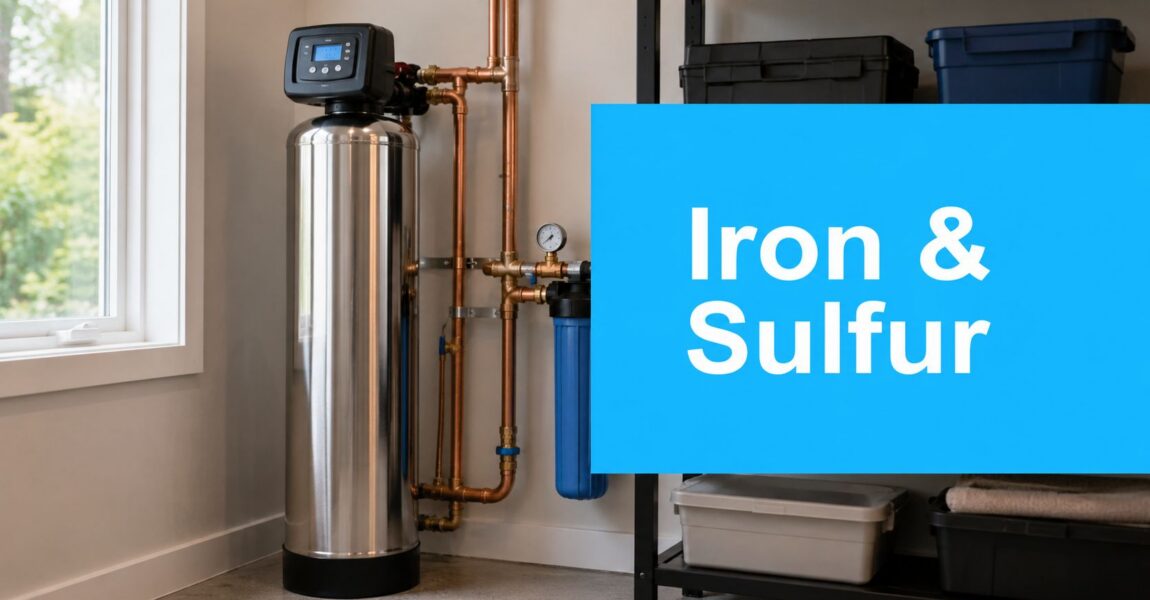
According to Culligan's whole-home filtration guidance, whole-house water filters are installed at the main water line entry point of a home, ensuring that 100% of the water used for drinking, bathing, cooking, and cleaning is filtered before it reaches any tap. This approach is essential for removing contaminants like chlorine, iron, and sediment from every drop of water entering the home.

Where it sits and why that changes everything
An under-sink filter only treats one faucet. A refrigerator filter only treats the water going to the dispenser. A shower filter only helps one bathroom. A whole-house system treats the supply before it branches off to showers, sinks, toilets, the water heater, washing machine, and dishwasher.
That means you're not only improving drinking water. You're also reducing chlorine exposure during showers and baths, and you're keeping chlorinated water from circulating through fixtures and appliances all day.
It's similar to installing one quality air filter at the main return of an HVAC system instead of taping tiny filters over random vents. The right location does the heavy lifting.
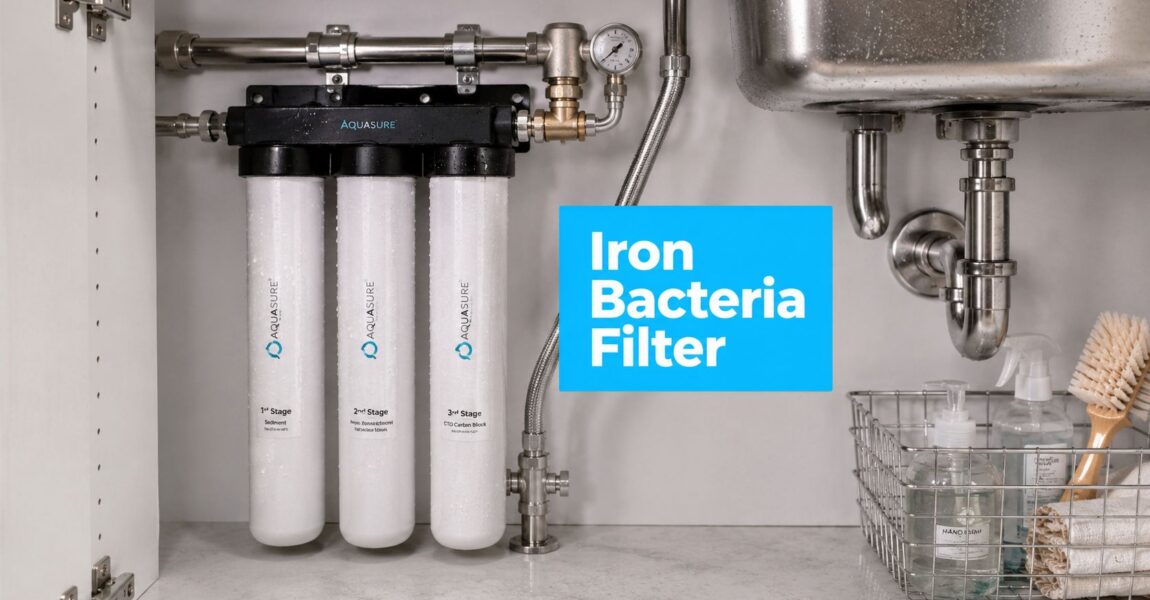
What a typical system includes
Most homes use a setup with these parts:
- Sediment pre-filtration: This catches grit, rust, or debris before it reaches the carbon media.
- Carbon-based filtration: This is the core stage for chlorine reduction.
- Optional specialty stages: Some systems add catalytic carbon, KDF media, or UV depending on the water and the home.
Practical rule: If a system isn't installed on the incoming main line, it isn't a true whole-house solution.
What homeowners usually notice first
The first changes are usually simple and immediate:
- Less odor: Tap water loses that pool-like smell.
- Better shower comfort: Skin and hair often feel less stripped.
- Cleaner everyday use: Cooking water, ice, laundry, and dishwashing all benefit because every fixture gets treated water.
That broad coverage is why a whole-house chlorine filter makes sense for families who want one central fix rather than a collection of small filters scattered around the house.
Why You Should Filter Chlorine from Your Water
Taste and smell are common starting points. That's a perfectly good reason. If your water smells like a public pool, you'll notice it in drinking water, tea, coffee, soup, pasta, and shower steam.
But the stronger case for filtration is that chlorine doesn't stay neatly in the “taste and odor” box. It affects comfort, it interacts with organic material in water, and it touches far more than what comes out of your kitchen tap.
Comfort matters more than people think
Chlorinated water can be hard on skin and hair. The effect is often most obvious after a hot shower, when the water and steam hit you for several minutes in a closed room.
The regulatory backdrop matters too. The U.S. EPA revised Trihalomethane regulations in 2007, which prompted many utilities to increase chlorine dosing. The same verified data notes that the CDC estimates millions rely on chlorinated water, where levels can exceed 4 ppm in some areas, potentially causing dry skin, hair damage, and respiratory irritation.
For many households, that means the issue isn't just drinking water. It's daily full-body exposure.
Chlorine isn't the only concern
When chlorine reacts with organic matter, it can form disinfection byproducts such as TTHMs. Municipal treatment is built around balancing pathogen control with byproduct limits, but homeowners often want another layer of reduction at the house level.
That's why a whole-house filter appeals to people who want more than “technically acceptable.” They want water that feels better to live with.
- Taste and odor: Carbon media is widely used because it targets the compounds that make water smell and taste chlorinated.
- Bathing and washing: Skin, scalp, and hair get exposed every day, not just when you drink a glass.
- Appliance protection: Less chlorinated water moving through seals, valves, and connected equipment is generally easier on the home's plumbing ecosystem.
If hard water is also part of the problem, it helps to understand the separate role of softening. This guide on the benefits of a home water softener is useful because softeners address hardness minerals, while chlorine filtration handles an entirely different issue.
Better water at home usually comes from matching the treatment to the problem, not expecting one tank to solve everything.
The practical takeaway
If your home uses municipal water and you notice chlorine taste, odor, dry skin, hair issues, or harsh shower air, a whole-house chlorine filter is solving a real problem. It's not just a luxury upgrade. For many homes, it's the difference between water that's merely delivered and water that's comfortable to use.
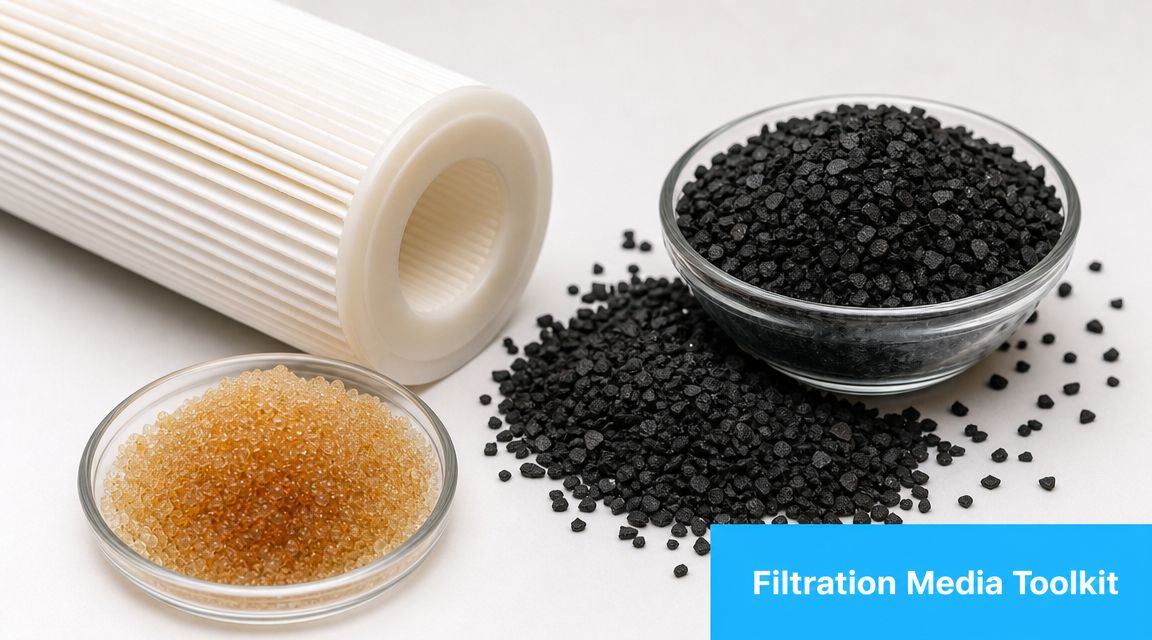
Filtration Technologies That Remove Chlorine
At this stage, buyers either make a smart decision or buy the wrong media and spend months wondering why the water still smells off.
The simplest way to understand filtration media is this. Some media mostly grab chlorine. Some media break down tougher disinfectants. The best systems combine jobs.
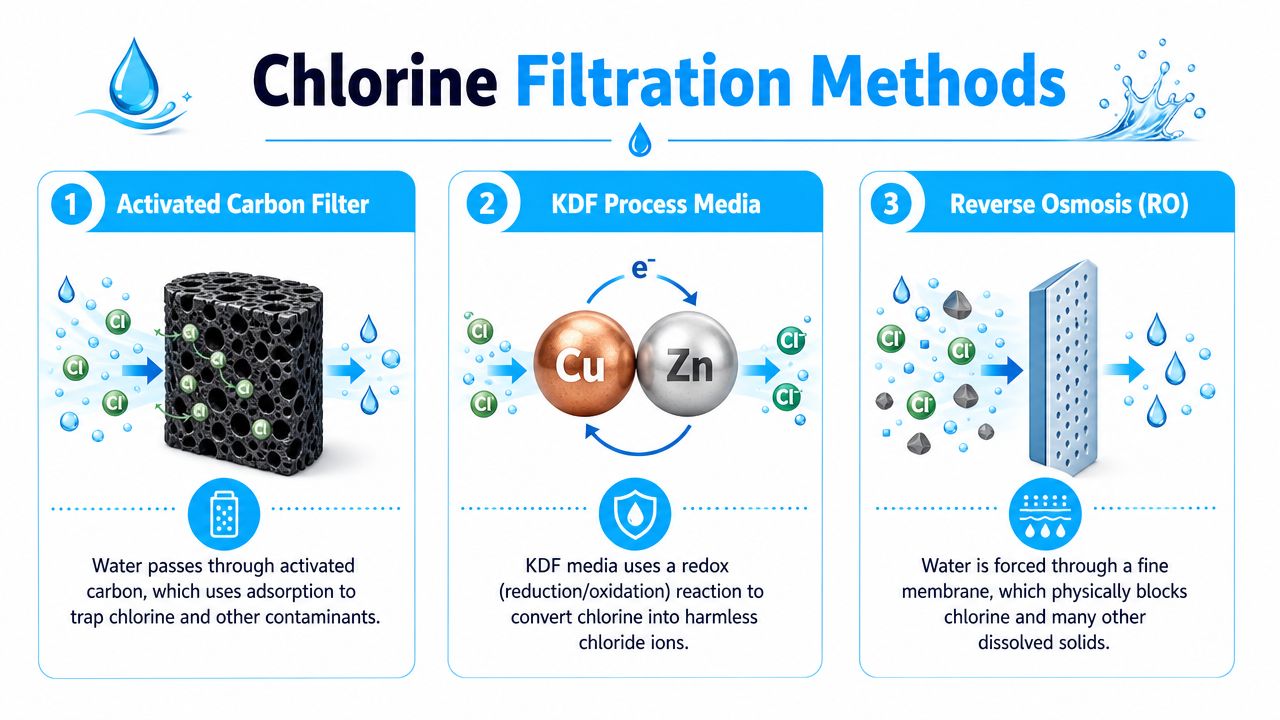
Activated carbon and why it works
Standard activated carbon is the workhorse for chlorine reduction. It acts like a dense, porous sponge with a huge internal surface area. As water passes through, chlorine molecules are adsorbed onto that surface and chemically reduced.
Verified performance data shows that whole-house systems equipped with activated carbon filters can remove up to 97% to 100% of chlorine and chloramine from municipal water supplies, and the NSF/ANSI 42 standard is the main certification benchmark for chlorine taste and odor reduction, confirming that certified systems consistently reduce chlorine levels to below 0.5 ppm for noticeable improvement.
For straight chlorine problems, carbon is often enough. For chloramine, things change fast.
Chloramine is the trap most buyers miss
Many homeowners shop for a “chlorine filter” without realizing their utility uses chloramine instead. That's a different disinfectant, and it's much harder to remove.
Verified data shows that advanced systems combine Catalytic Carbon with KDF media to tackle both chlorine and chloramine. In those systems, catalytic carbon accelerates the breakdown of chloramine, while KDF media facilitates chlorine reduction through a galvanic reaction and inhibits bacterial growth, achieving up to 99.6% chloramine reduction where standard carbon filters might only manage 50% to 60% in the cited testing and analysis from this industry video reference.
That's the practical dividing line. If your city uses chloramine, standard carbon can leave you disappointed.
Why KDF matters in a whole-house setup
KDF doesn't replace carbon. It supports it.
KDF media helps with chlorine reduction and also discourages bacterial and algae growth inside the filter housing. In whole-house systems, where water volume is high and equipment can sit between flow cycles, that's a meaningful design advantage.
Standard carbon is often fine for chlorine. It's often the wrong answer for chloramine.
Comparison of Chlorine Filtration Media
| Media Type | Effective Against Chlorine | Effective Against Chloramine | Typical Lifespan | Key Feature |
|---|---|---|---|---|
| Granular Activated Carbon | Yes | Limited to poor in many chloramine applications | Varies by design and water quality | Strong chlorine taste and odor reduction |
| Catalytic Carbon | Yes | Yes | Varies by design and water quality | Speeds chloramine breakdown |
| KDF Media | Yes, as a support medium | Limited on its own, stronger when paired with catalytic carbon | Varies by system design | Galvanic reaction and bacterial growth inhibition |
| Catalytic Carbon plus KDF | Yes | Yes, high-performance option | Often used in long-life whole-house systems | Best fit for mixed chlorine and chloramine concerns |
What works and what doesn't
Use this as a shortcut:
- If your water has chlorine only: A well-sized activated carbon system can work very well.
- If your water has chloramine: Look for catalytic carbon, not generic carbon language.
- If you want a stronger whole-house setup: A catalytic carbon plus KDF design is usually the more resilient choice.
Brand examples like SpringWell CF, Aquasana Rhino, and cartridge-based multi-stage designs show how different manufacturers approach the same problem. The label matters less than the media and the test data behind it.
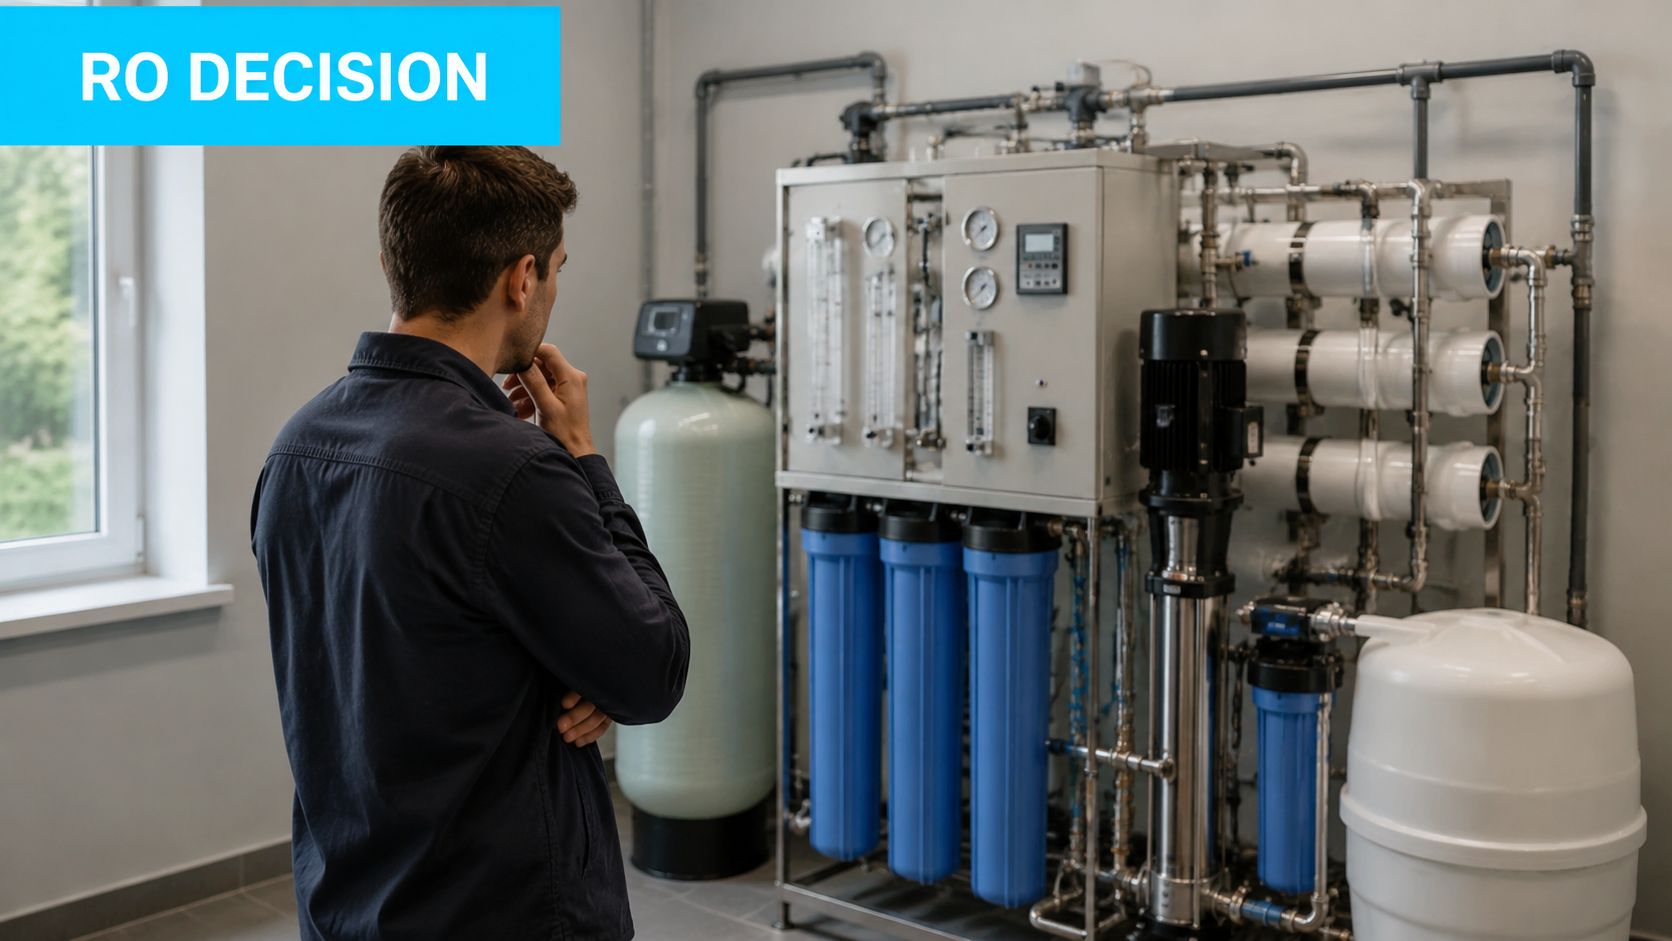
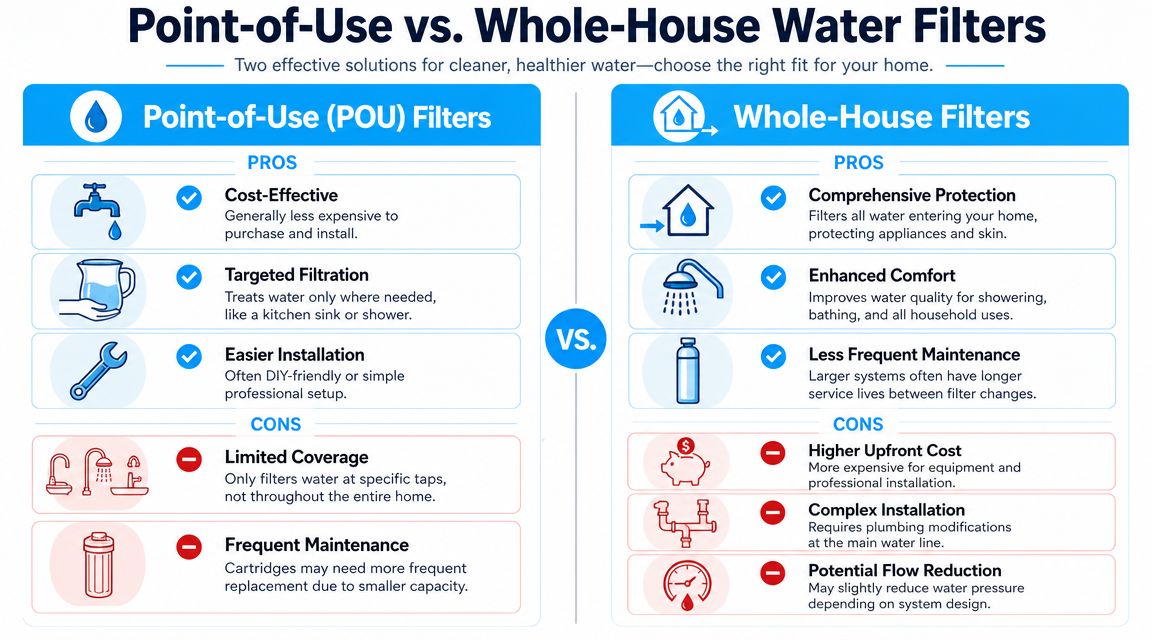
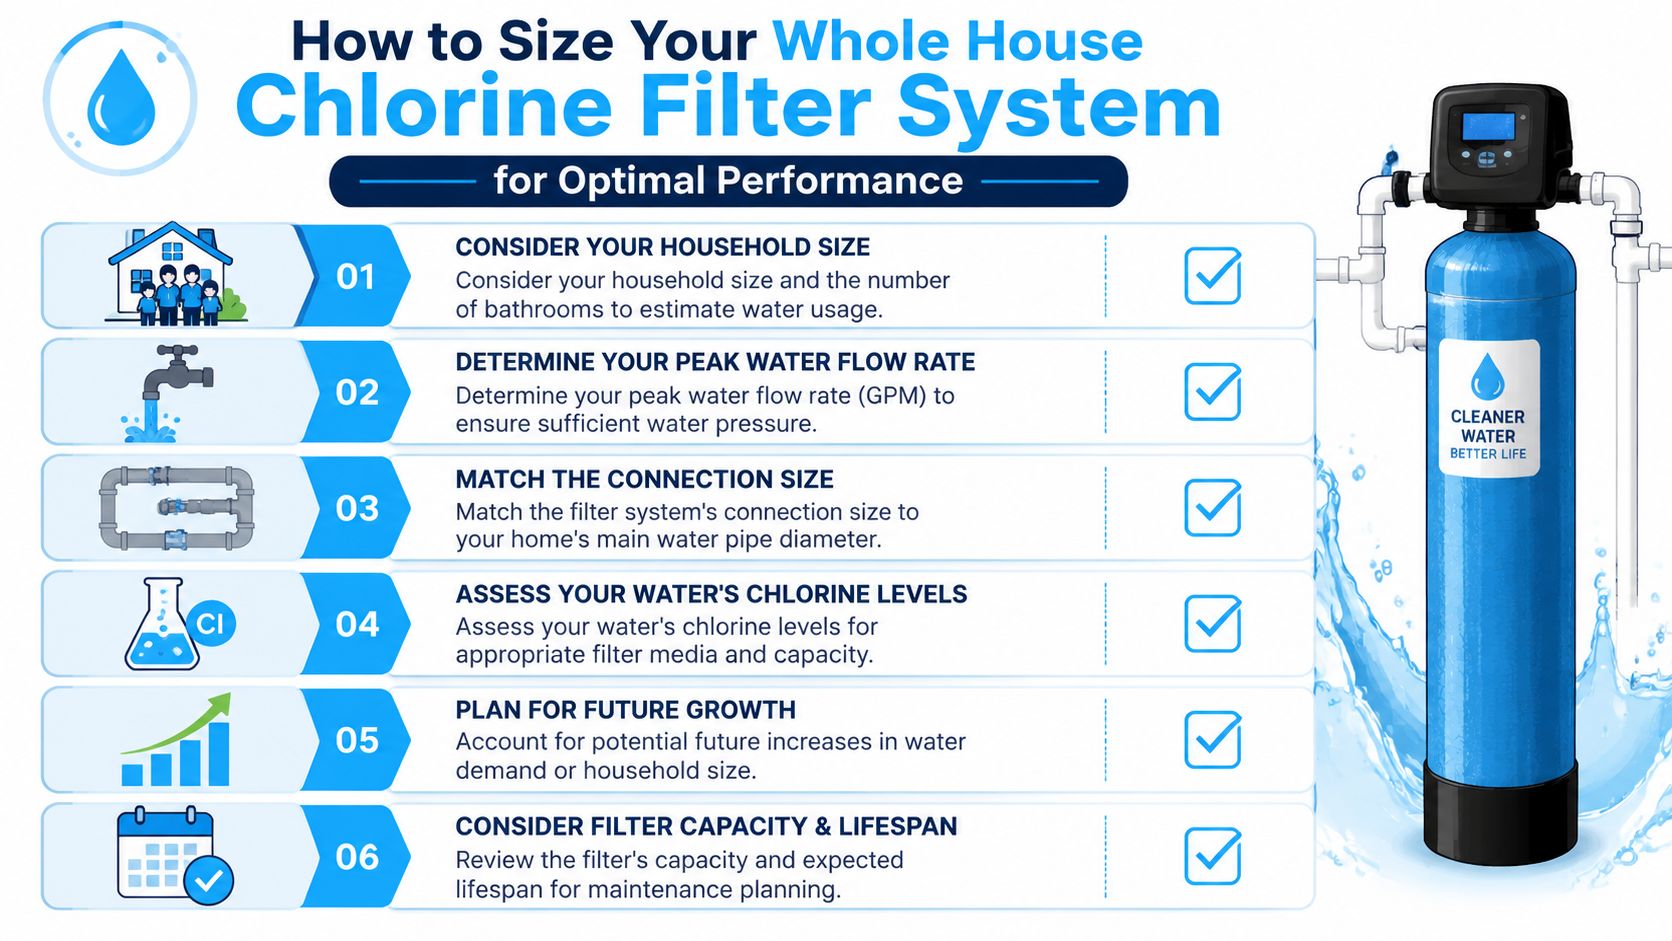
How to Size Your System for Optimal Performance
A filter can have excellent media and still perform badly if it's undersized.
Sizing is about two things. First, can the system handle your home's peak water demand without strangling pressure? Second, does the media have enough contact time to reduce chlorine effectively?
Think of flow rate like highway lanes
Your plumbing system has rush hour. A shower is running, someone starts the dishwasher, a toilet refills, and the washing machine kicks on. If the filter is too small, water has to squeeze through like traffic forced from four lanes into one.
That causes pressure drop and weak performance.
A practical benchmark from verified data helps here. At an incoming chlorine concentration of 2.0 ppm, a standard high-capacity cartridge system can treat approximately 570,000 gallons, but that capacity is non-linear and drops significantly as chlorine levels rise, according to Morton's chlorine reduction specifications. In plain English, dirtier or more heavily chlorinated water burns through media faster.
A simple way to size your home
Start with the home you have, not the marketing label on the box.
- Count simultaneous fixtures: Focus on what can run at the same time, especially showers, tubs, dishwashers, and laundry.
- Match plumbing connection size: If your main line is larger than the filter's connection, you're creating a bottleneck.
- Check chlorine level: Higher chlorine means shorter effective media life.
- Plan for your household: Guests, teenagers, future bathroom use, and additions all matter.
If you're already comparing larger home equipment, the logic is similar to finding the right 100-gallon unit. Capacity on paper only helps if it matches actual household demand.
A short visual guide helps when you're mapping the decision:
Don't ignore contact time
Bigger isn't always about more gallons. Sometimes it's about slower, better treatment. Water needs enough contact with the media for chlorine reduction to happen properly.
That's why two systems with similar marketing claims can behave very differently in the field. One has enough media volume and flow capacity for the house. The other doesn't.
Understanding Certifications and Performance Claims
Water filtration marketing is full of soft language. “Reduces contaminants.” “Improves quality.” “Advanced media.” Those phrases aren't useless, but they're not proof.
The easiest way to separate marketing from performance is to look for specific certifications and specific contaminants.
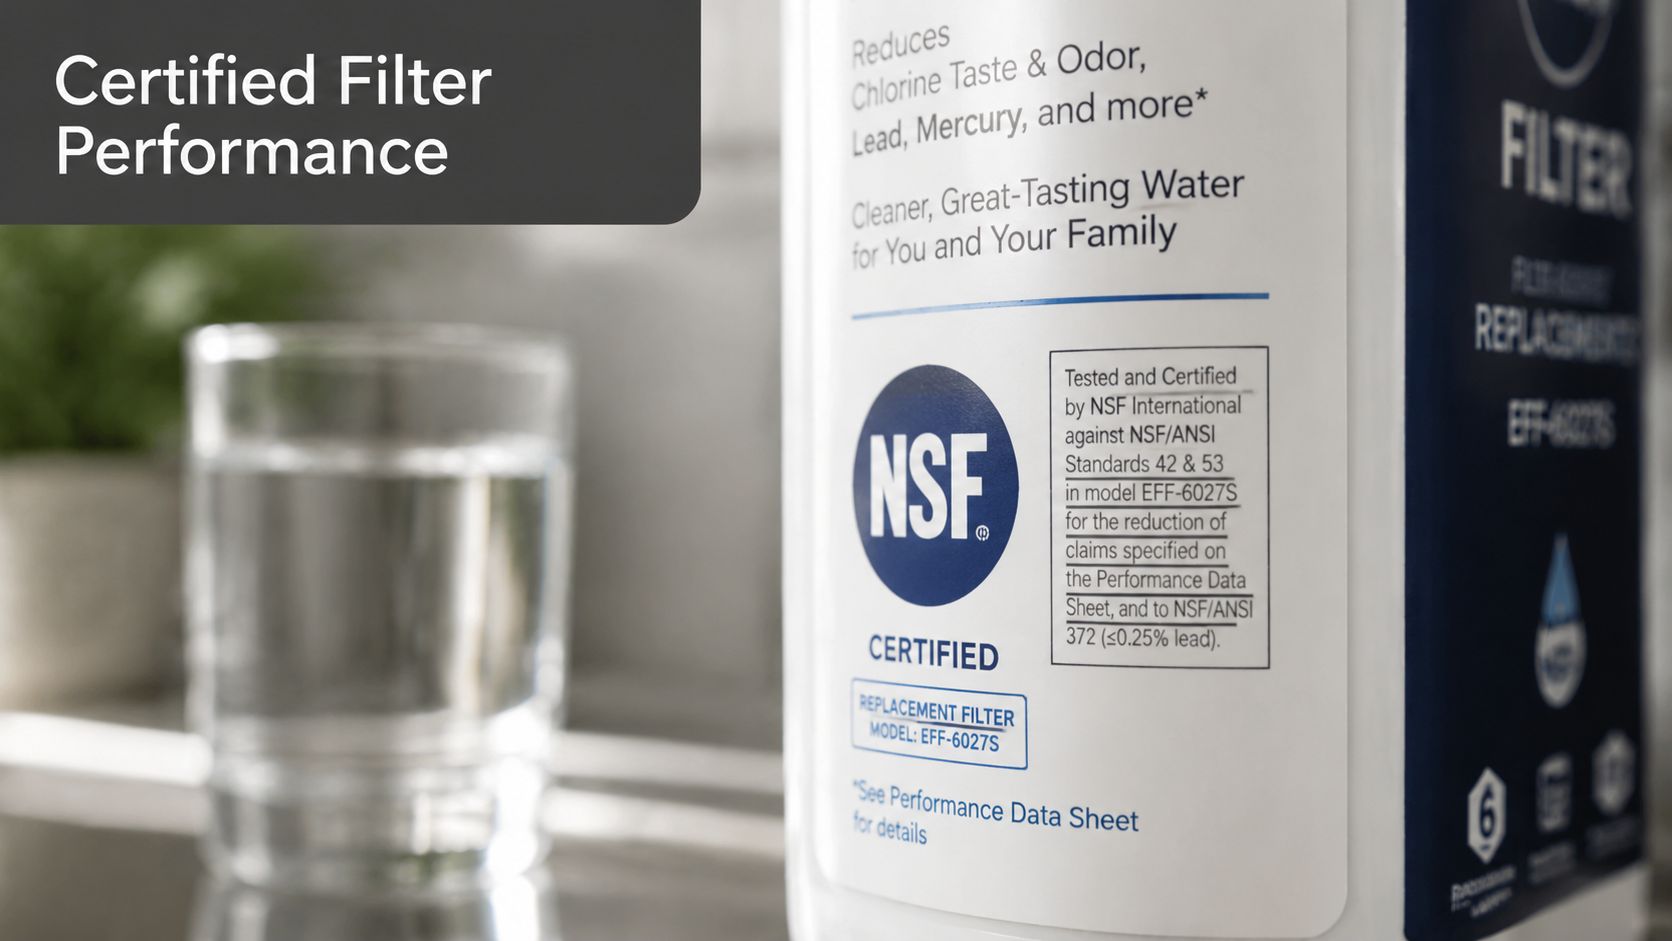
What NSF standards actually tell you
For chlorine-focused systems, NSF/ANSI 42 is the benchmark tied to aesthetic concerns such as chlorine taste and odor. If a system is certified under that standard, it's being tested for that job, not just vaguely described as “premium.”
Some advanced systems also incorporate NSF/ANSI 53, which is the health-effects standard used for certain contaminants beyond taste and odor. That doesn't mean every whole-house chlorine filter covers the same contaminant list. It means you need to read exactly what the system is certified to reduce.
The benchmark I'd want to see
Verified testing data sets a clear bar. For a whole-house system to be effective, it must achieve at least 100% chlorine removal and near-complete reduction of byproducts like chloroform. Independent lab tests of high-performance 3-stage filters have demonstrated this level of performance, as cited in this Waterdrop-related video reference.
That doesn't mean every good system must be identical in design. It means you should expect a manufacturer to show concrete performance data, not broad promises.
If a brand says “removes contaminants” but won't tell you which ones, under what conditions, and by what standard, keep shopping.
Claims worth trusting and claims worth questioning
Use this quick filter when comparing products:
- Good sign: Specific mention of chlorine or chloramine reduction.
- Good sign: NSF/ANSI 42 listed for chlorine taste and odor.
- Better sign: Lab data showing chlorine and byproduct reduction.
- Red flag: One number for “all contaminants.”
- Red flag: No distinction between chlorine and chloramine.
A serious manufacturer makes it easy to find the media type, gallon capacity, and testing basis. If that information is hidden, assume the performance is doing the same thing.
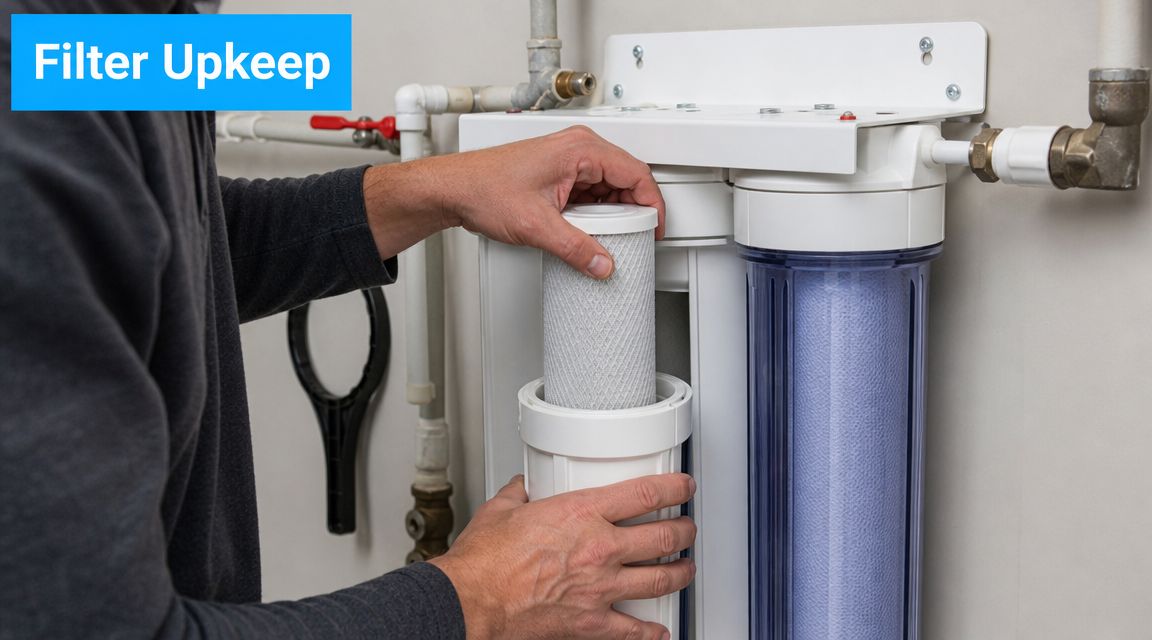
Maintenance and Long-Term Ownership Costs
The purchase price is only the opening bid. The full cost of a whole-house chlorine filter shows up over time through cartridge changes, media replacement, sediment loading, service calls, and whether the system was sized correctly in the first place.
A cheap system with frequent cartridge swaps can become more annoying and more expensive than a better-built unit with longer service intervals. On the other hand, a large tank system that's hard to service may frustrate DIY owners who wanted simplicity.
What maintenance usually looks like
Ownership depends on system style.
- Cartridge-based systems: Easier for many homeowners to understand and replace. You swap filters at intervals based on water quality and usage.
- Media tank systems: Often lower-touch day to day, but eventual media replacement is a bigger event.
- Pre-filters: These do the dirty work up front and can load up quickly if your supply carries sediment.
The hidden cost is neglect. Once carbon media is exhausted, flushing it doesn't restore full performance. Saturated media eventually needs replacement.
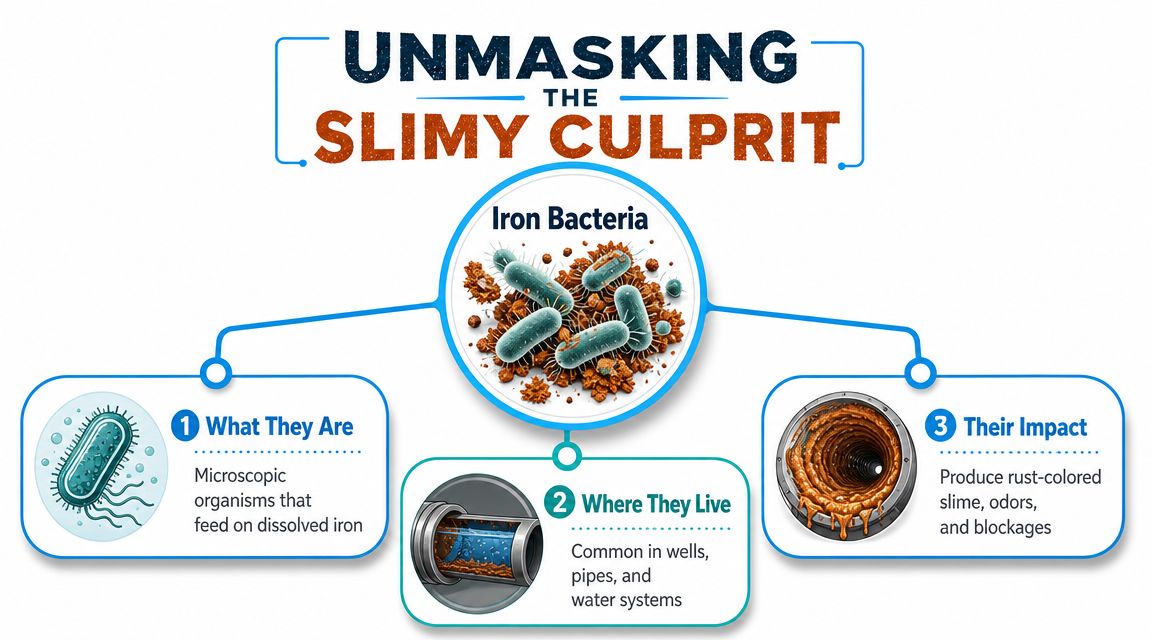
The bacterial growth issue most guides skip
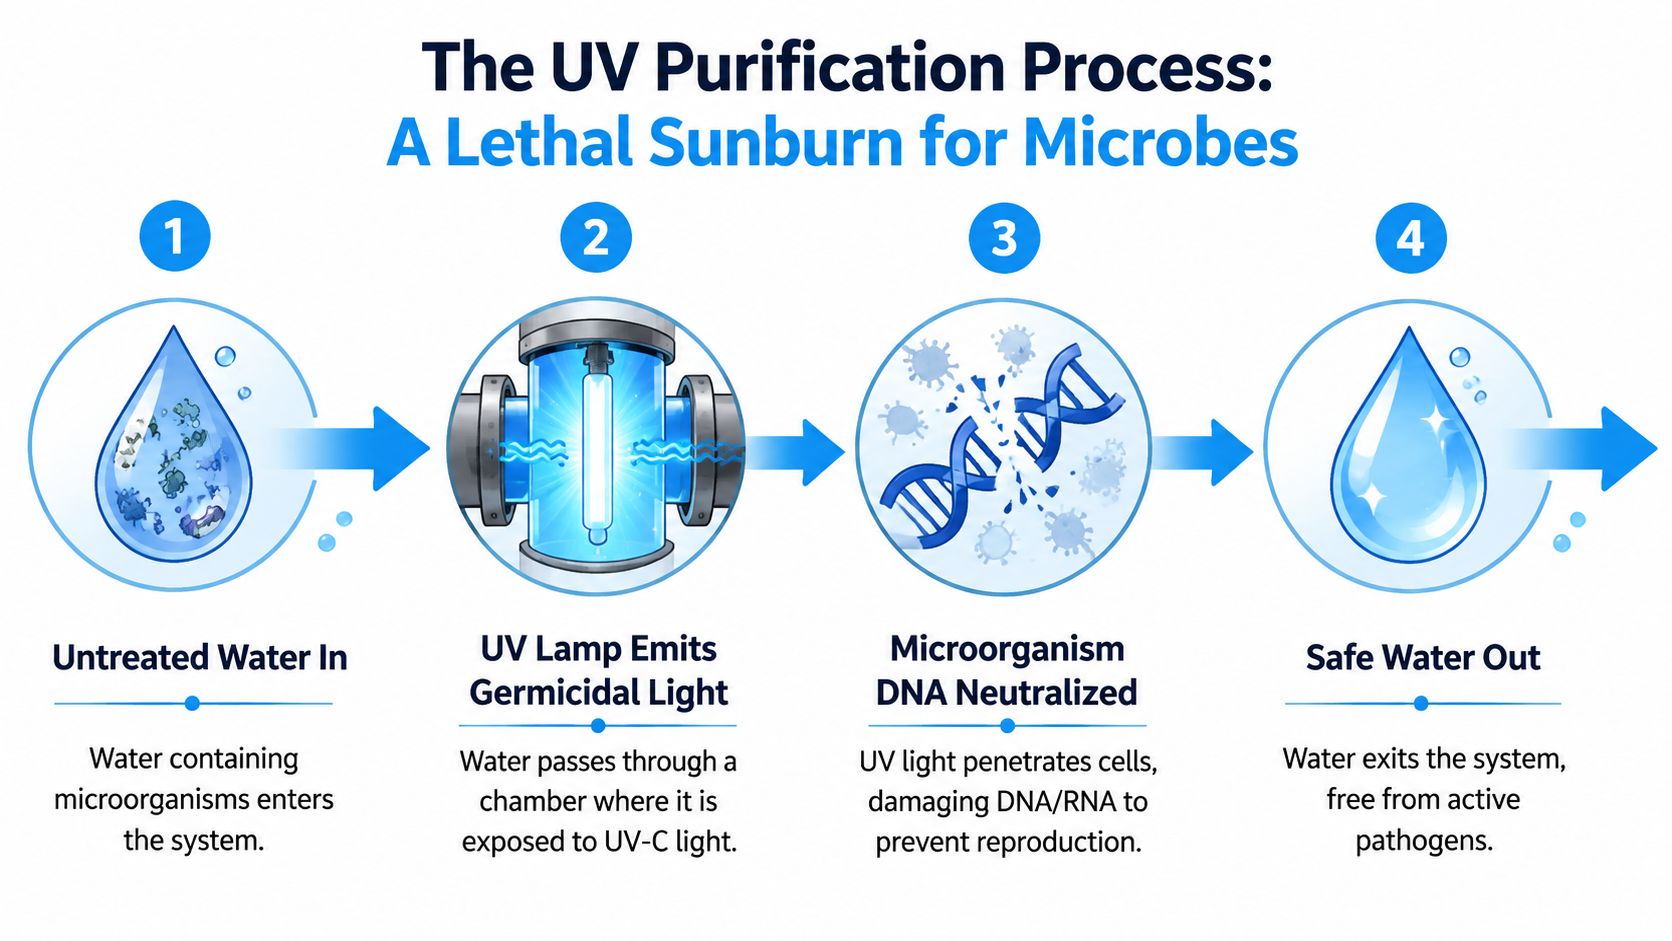
Here's the trade-off that deserves more attention. Chlorine is a disinfectant. When you remove it at the point of entry, you remove the residual protection that had been traveling through your plumbing.
The CDC warns that installing a whole-home filter that removes disinfectants like chlorine can allow germs to grow in plumbing post-filtration. Without a secondary disinfection stage like UV, this can create a paradoxical risk where water that tastes better may become a breeding ground for pathogens.
That doesn't mean whole-house chlorine filtration is a bad idea. It means you need to think one step beyond taste.
In homes where plumbing sits stagnant, biofilm risk deserves a real conversation, not a footnote.
When UV is a smart add-on
A UV stage makes the most sense when you want chlorine removed but also want a downstream disinfection barrier. It's especially worth considering in homes with periods of low water use, complex plumbing runs, or a history of water quality concerns.
For more homeowner-focused maintenance help and filtration decision support, the practical guides at Water Filter Advisor's advice hub are a useful reference point.
The best long-term setup isn't the cheapest system on day one. It's the one you can maintain correctly, with enough protection built in for the water conditions in your house.
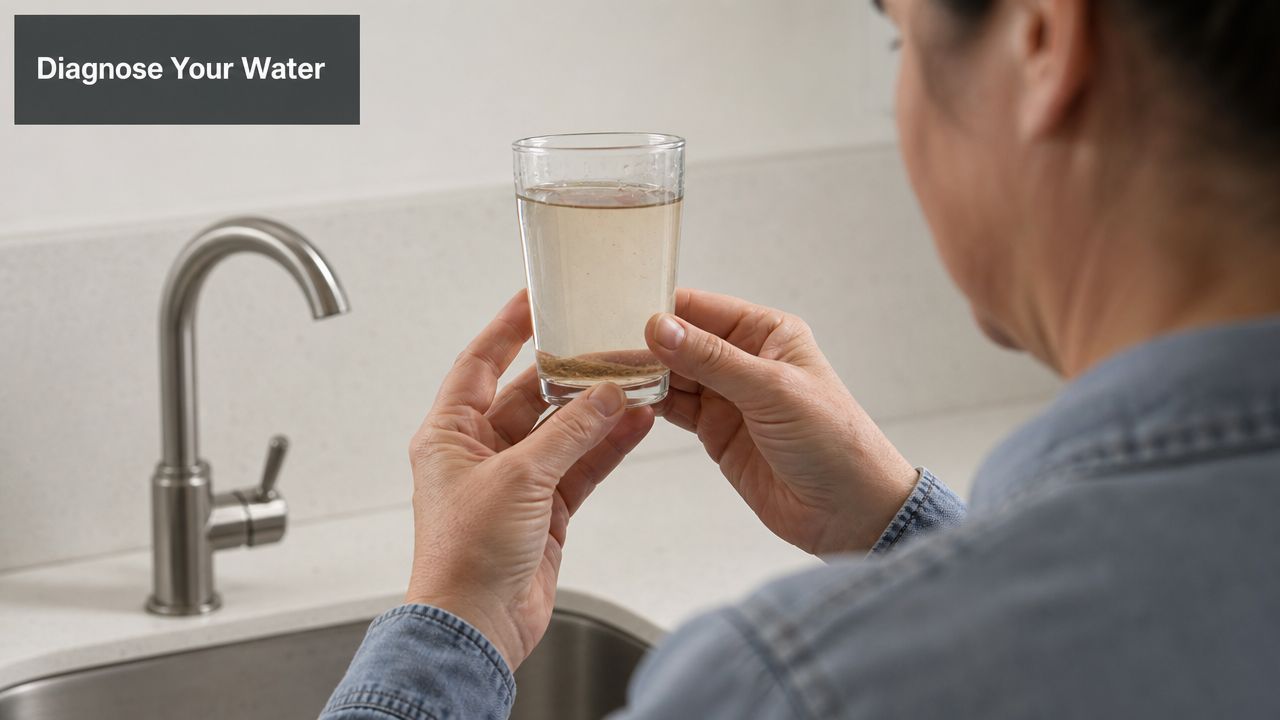
Troubleshooting Common Filtration Issues
Most whole-house filter problems come down to four causes. Wrong media, wrong size, exhausted filters, or installation issues.
If your system isn't giving you the result you expected, start with diagnosis before replacement.
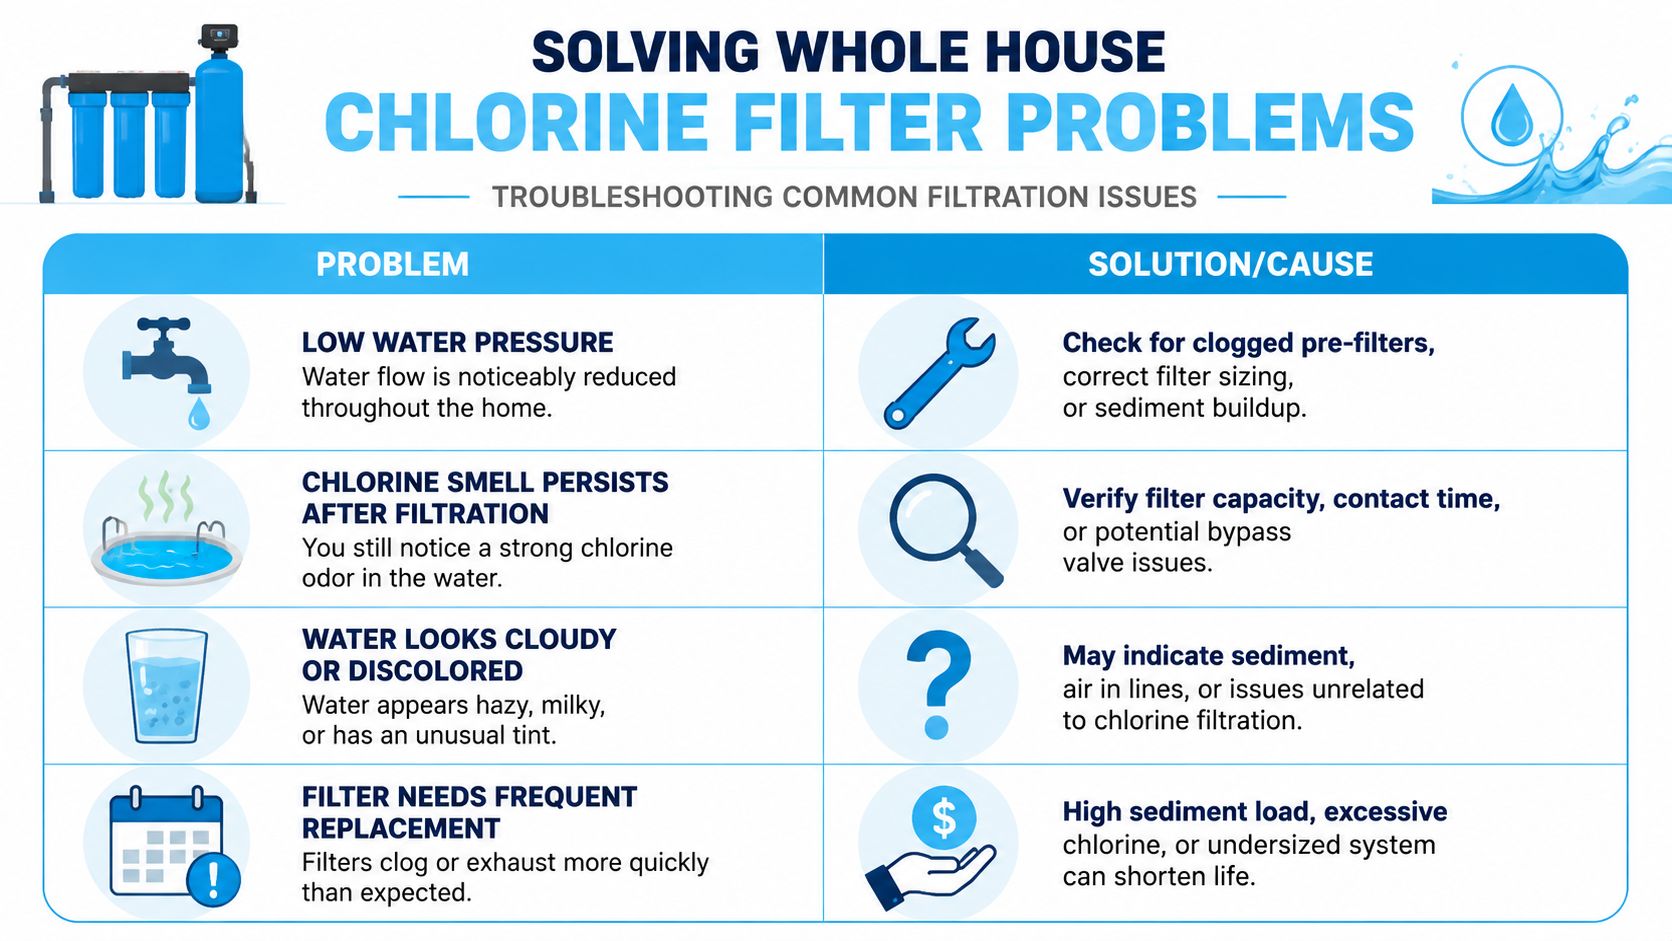
The big one, chlorine versus chloramine
The most common complaint is simple: “I bought a chlorine filter and the smell is still there.”
In many cases, the home doesn't have a chlorine problem. It has a chloramine problem. Verified data notes that chloramine is 300 times more stable than chlorine and requires specific media like catalytic carbon. Systems with this media can remove up to 99.6% of chloramine, whereas standard filters show negligible removal.
That's why the first troubleshooting step is to confirm what disinfectant your utility uses. If it's chloramine, a standard carbon unit may never perform the way you expected.
Other common problems and the likely cause
- Low water pressure: Check pre-filters first. A clogged sediment stage can choke the whole house. Undersized housings also create pressure problems.
- Chlorine smell persists: Verify the bypass valve isn't partially open, confirm the media type, and make sure the system still has remaining capacity.
- Cloudy or discolored water: That may be trapped air after installation, disturbed sediment, or a separate water issue not caused by chlorine filtration.
- Frequent filter changes: High sediment load, high disinfectant levels, or a too-small system can shorten service life.
A practical troubleshooting order
Use this sequence before you assume the product failed:
- Call the utility and confirm chlorine or chloramine.
- Inspect the bypass and valves to make sure water is flowing through the system.
- Check service life on cartridges or media.
- Review sizing against the home's peak demand.
- Upgrade media if the disinfectant type requires it.
Most failures aren't mysterious. They're mismatch problems. The system and the water aren't aligned.
If you want help comparing systems, understanding media, or figuring out whether your home needs carbon, catalytic carbon, KDF, UV, or a combination, Water Filter Advisor is a solid place to keep researching before you buy.