Best Shower Filter for Well Water in 2026: An Expert Guide
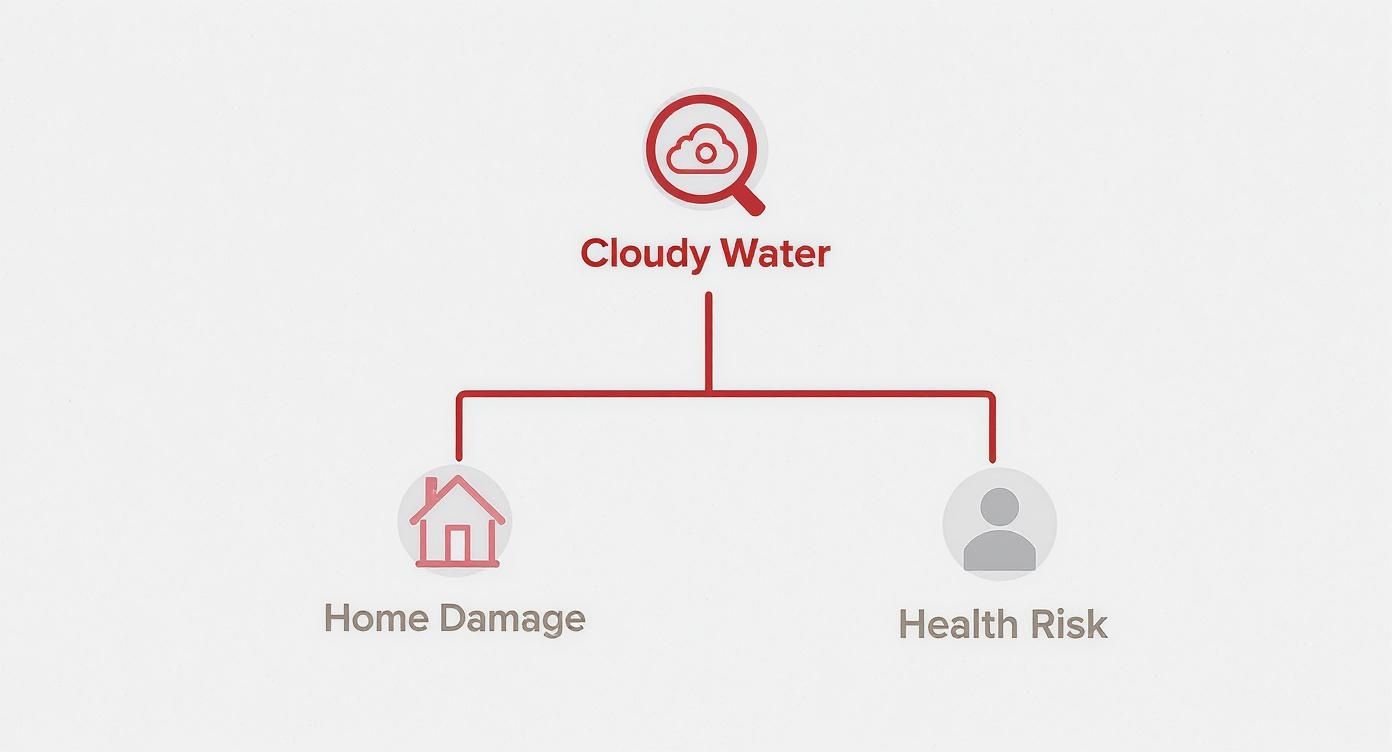
You turn on the shower and know what’s coming before the water even hits. The faint rotten-egg smell. The orange line creeping down the grout. Hair that feels rough no matter what conditioner you buy. Skin that comes out tighter and itchier than it went in.
That’s normal for a lot of private well owners. It’s also why generic “best shower filter” lists miss the point. A filter that works well on city chlorine can be a lousy fit for iron, sulfur, grit, and mineral-heavy well water.
The best shower filter for well water isn’t one universal product. It’s the filter that matches the problem in your water. If your shower leaves rust stains, you need different media than someone fighting sulfur odor. If sediment is choking pressure, design matters as much as filtration media. If your water has mixed issues, the only sensible choice is a multi-stage unit built for ugly water, not just treated municipal water.
Here’s a quick comparison before we get into the details.
| Well water problem | Best filter approach | Models worth considering | Main trade-off |
|---|---|---|---|
| Iron staining and metallic smell | Multi-stage filter with KDF-55 and an external sediment pad | AquaBliss SF500, AquaBliss well-water focused designs | More maintenance, especially if sediment load is high |
| Sulfur or rotten egg odor | KDF-55 paired with multi-stage media | AquaBliss SF500, other KDF-based multi-stage systems | Results depend on sulfur level and how much sediment is also present |
| Heavy sediment and grit | Filter with replaceable or rinseable external sediment stages | AquaBliss-style external pad systems | Sediment protection is great, but these don’t solve true whole-house issues alone |
| Chlorine plus broader contaminant reduction | Carbon-heavy design or advanced dual-media unit | Weddell Duo, Aquasana AQ-4100 Deluxe | Strong on chlorine and byproducts, but not the first thing I reach for in iron-heavy well water |
| Mixed well water issues | Layered media, ideally KDF + carbon + sediment management | AquaBliss SF500, Weddell Duo depending on contaminant profile | No shower filter can fix every severe well water problem |
Tired of Your Well Water Ruining Your Shower
A lot of people start shopping for a shower filter after they’ve already spent money everywhere else. New shampoo. Scalp treatment. Better body wash. A stain remover for the tub. Sometimes even a new showerhead because they assume the old one is the reason the spray turned weak and uneven.
Then they realize the actual problem is the water.

I’ve seen the same pattern over and over in homes on private wells. Orange staining around the drain points to iron. A sulfur smell usually means hydrogen sulfide is in the mix. Fine grit collecting in the shower arm or cartridge points to sediment. Soap that won’t rinse clean often goes hand in hand with hard water.
What frustrates people most is that the symptoms overlap. Dry skin can come from chlorine in treated water, but on a well it often shows up alongside iron, sediment, sulfur, or hardness. That’s why buying the first “15-stage” filter you see online often ends badly.
Most shower filters are marketed like they solve everything. Well water punishes that kind of thinking fast.
A useful buying decision starts with a simple question. What is your shower doing wrong? Smelling bad, staining, clogging, drying your skin out, or some combination of all four? Once you answer that, the right filter category gets a lot easier to spot.
What's Really Lurking in Your Well Water
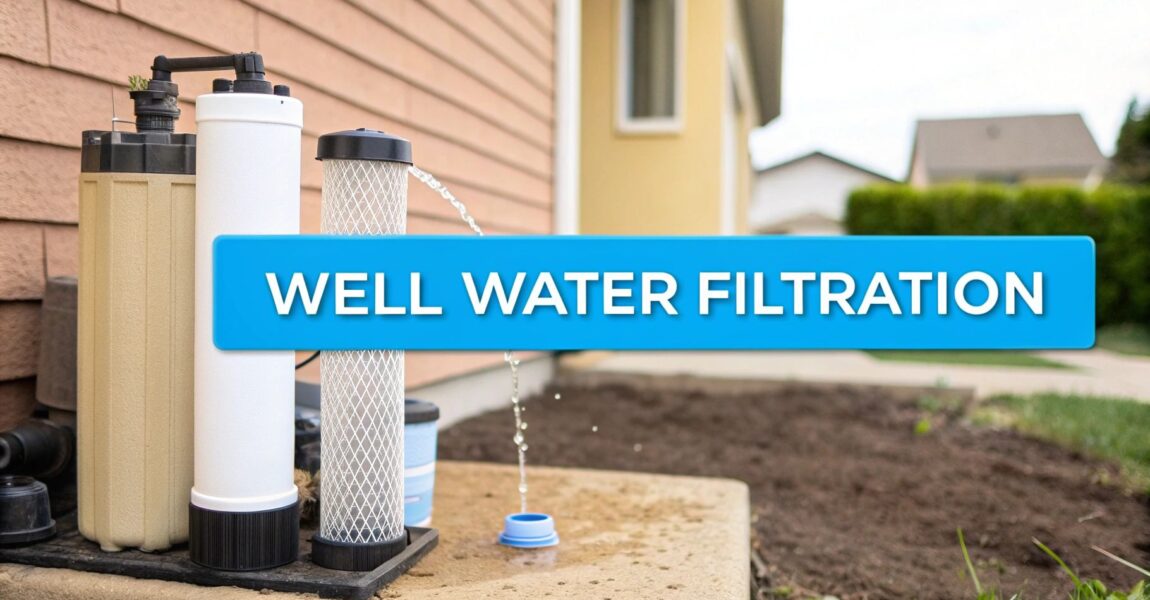
Private wells are inconsistent by nature. The water can change after heavy rain, during a dry spell, after pump work, or as mineral deposits build inside older plumbing. That gap is significant because many shower filters are built for municipal water and aimed mostly at chlorine, while well water usually brings a mix of minerals, gas, and grit.
Older shower filtration standards show that mismatch. NSF/ANSI Standard 177 was developed around chlorine reduction, which is useful for city water but only covers a small part of what well owners deal with in the shower.
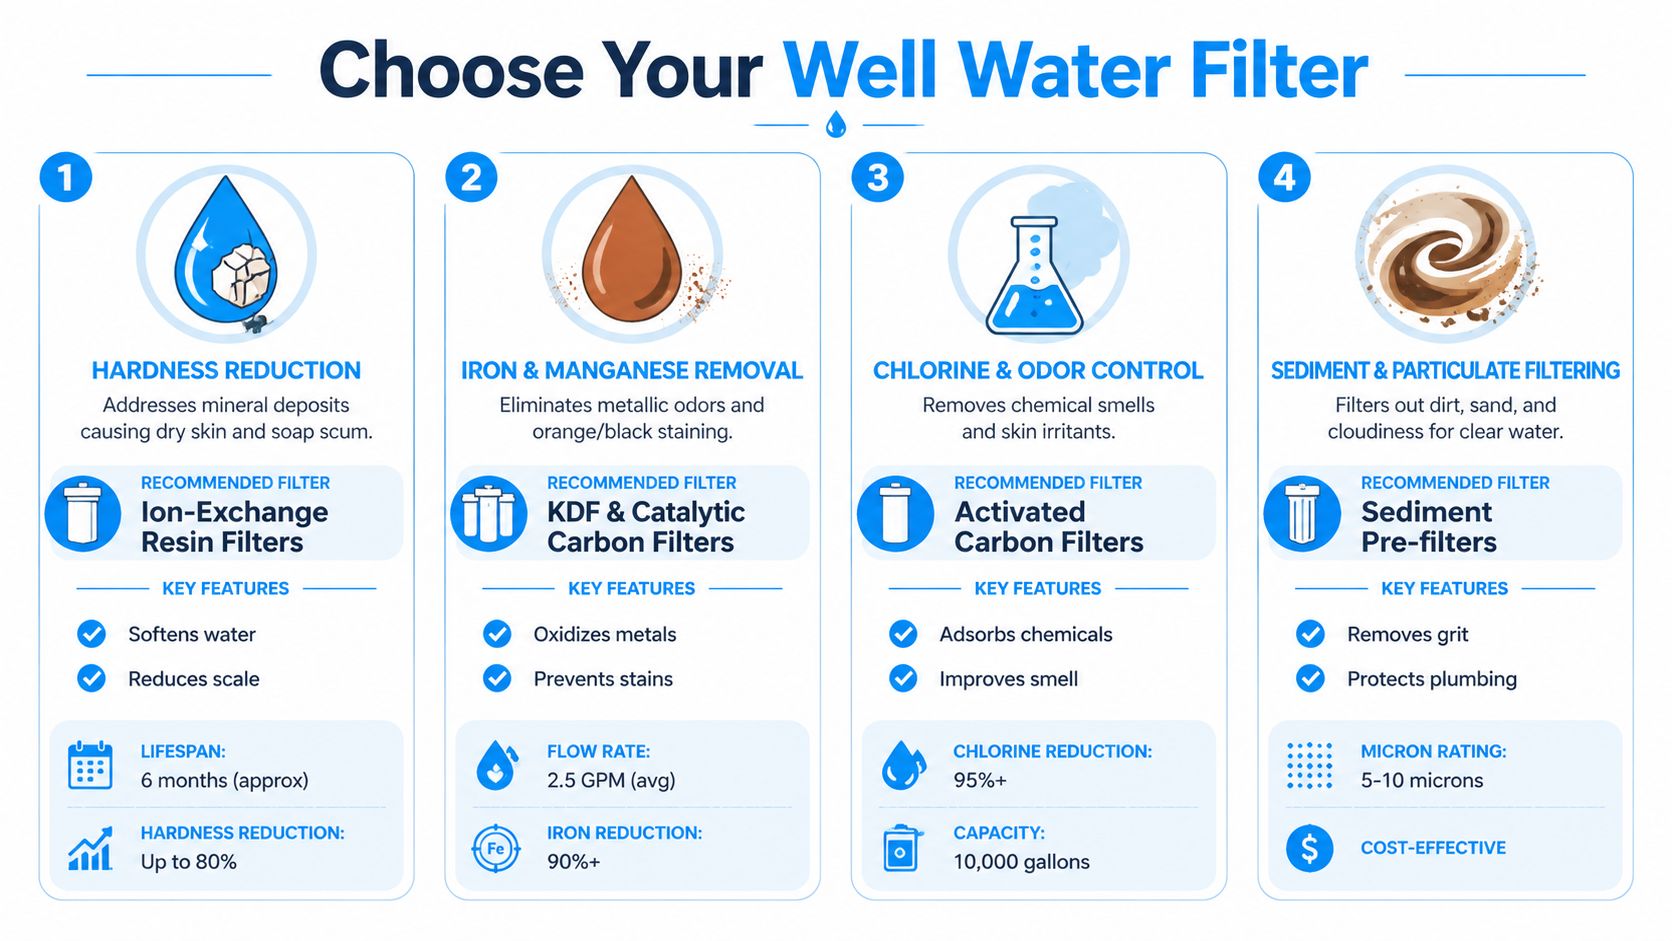
Iron and manganese
Iron is usually the first problem people notice. It leaves orange staining on tile, grout, tubs, curtains, and around the drain. In higher concentrations, it can also leave a metallic smell, especially once hot water hits the air and opens that odor up.
Manganese often shows up beside iron, but the staining is darker. Brown, gray, or nearly black marks on light surfaces are common. I also see it leave hair feeling rough or coated, which is one reason people blame soap or shampoo before they test the water.
The practical issue is simple. A filter that is good at improving taste or trimming chlorine will not necessarily do much for dissolved iron or manganese.
Hydrogen sulfide
Hydrogen sulfide is the rotten-egg smell that makes a shower unpleasant the second the water starts running. Some households only catch it with hot water. Others smell it at every fixture, but the shower feels worst because steam concentrates the odor in a small space.
This problem is easy to underestimate if the water looks clear. Clear water can still carry enough sulfur compounds to make bathing miserable. If odor is the main complaint, the filter choice has to focus on sulfur control first, not broad marketing claims about “multi-stage purification.”
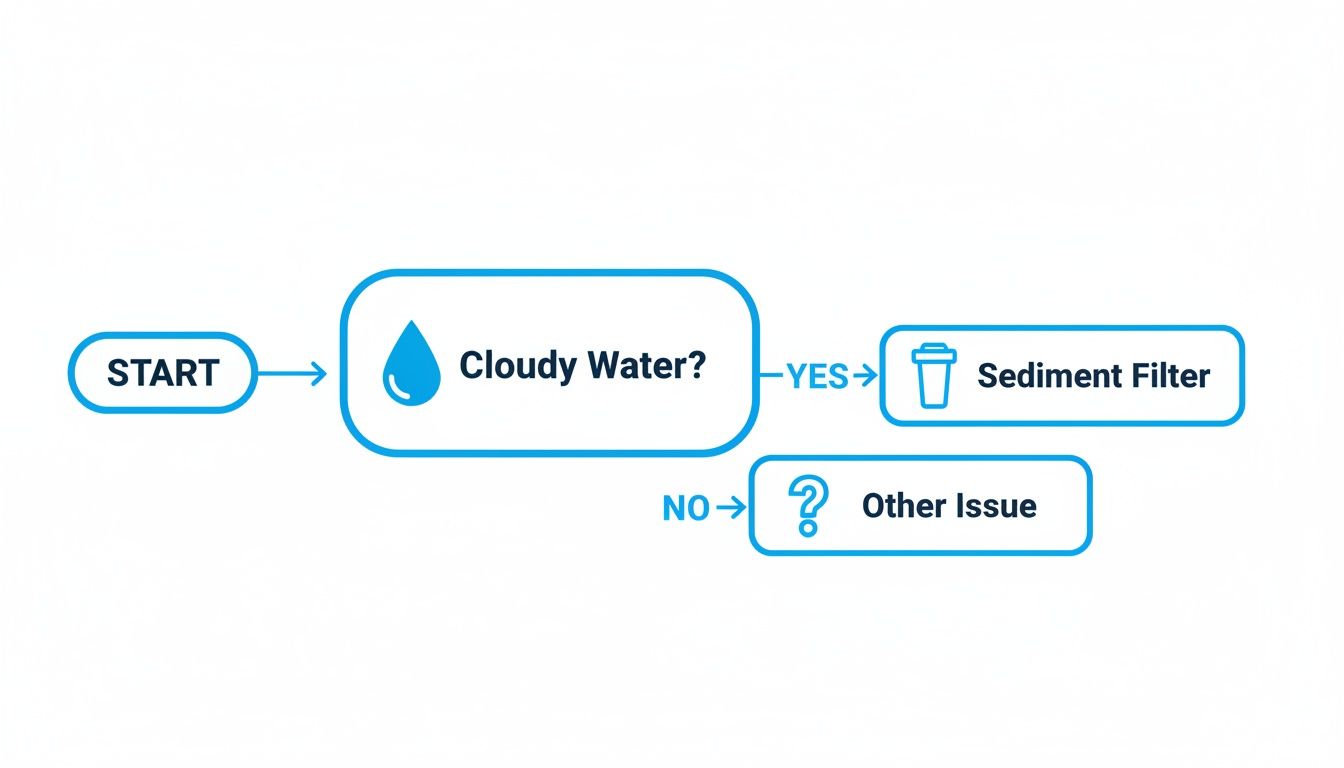
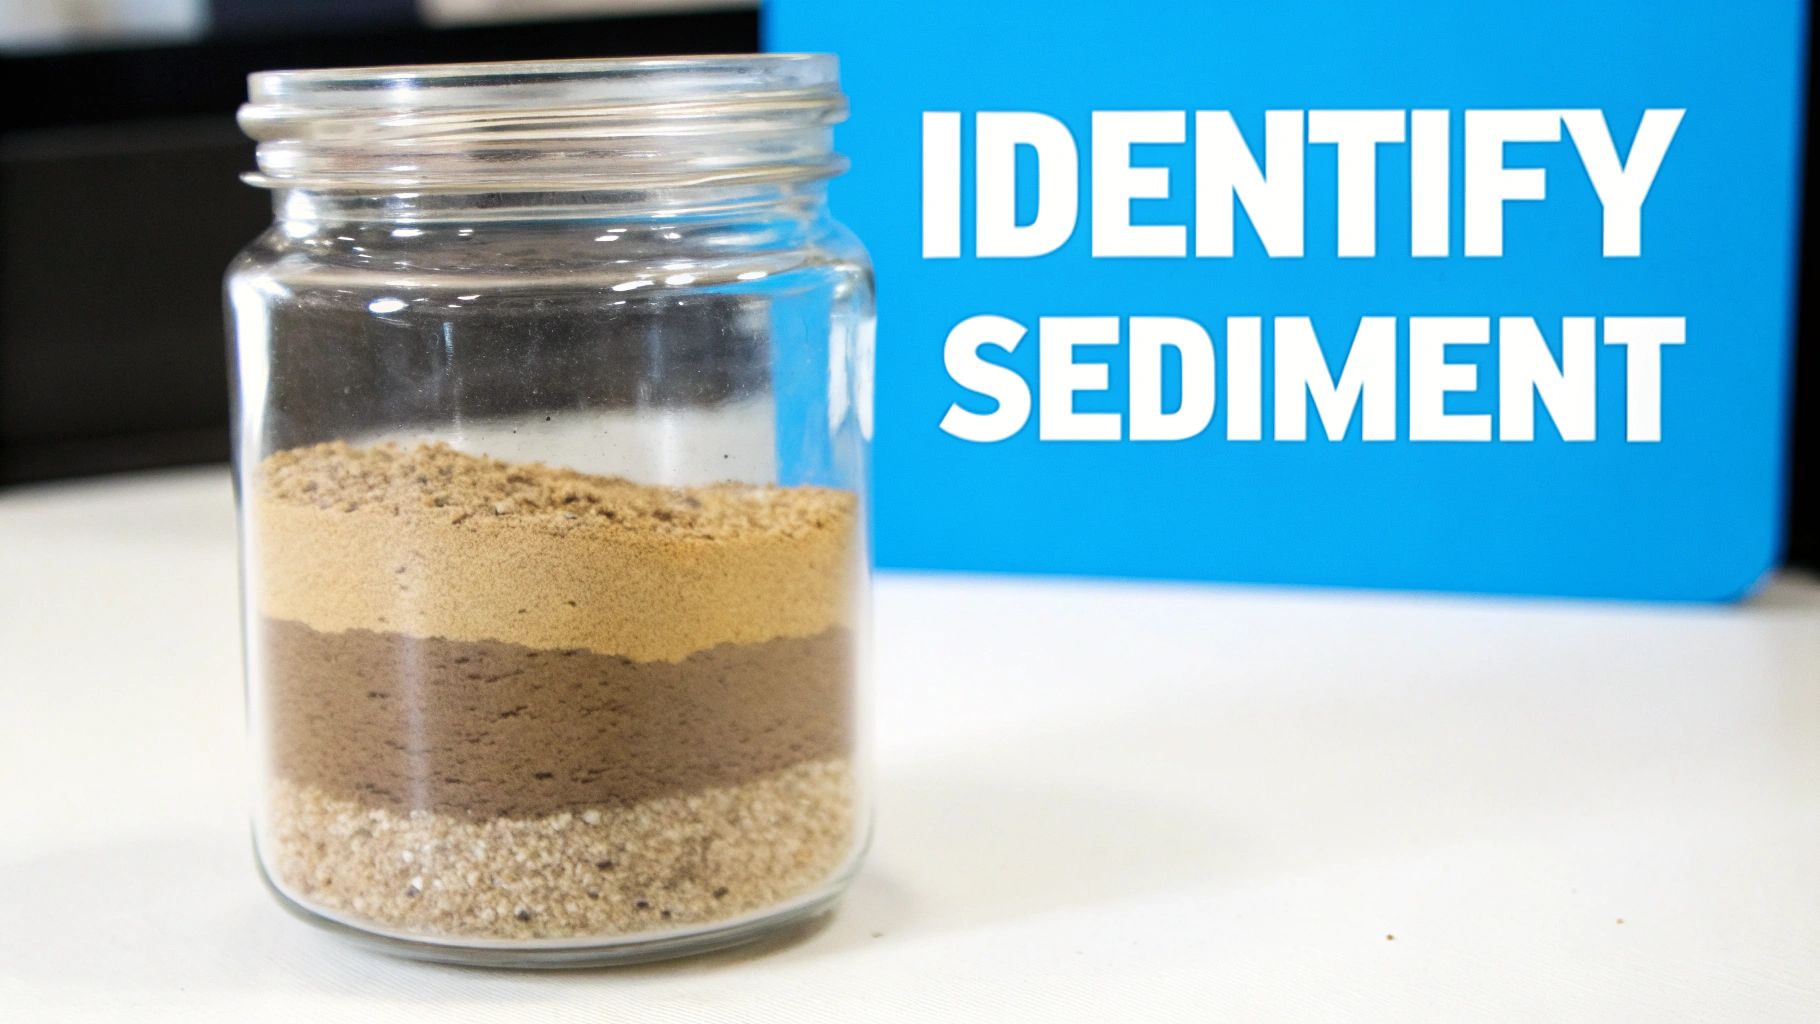
Sediment
Sediment causes more filter failures than people realize. Sand, silt, grit, and fine particulates collect in showerheads, cartridges, and housings, then the pressure drops and the filter gets blamed.
I see this a lot on wells that produce visible particles after storms or after the system has been idle.
Practical rule: If pressure falls off quickly after a new filter install, check for sediment loading before you assume the media is spent.
Sediment also changes the buying decision. On a clean municipal supply, a compact all-in-one filter can last a reasonable amount of time. On well water with grit, a unit with a prefilter or a stage you can rinse or replace separately is usually the better fit.
Hardness minerals
Hardness comes from calcium and magnesium. In a shower, it shows up as white scale on fixtures, soap scum on walls and glass, skin that feels tight after rinsing, and hair that stays dull or hard to manage.
Homeowners often get oversold on shower filters. A shower filter may reduce some of the nuisance effects, depending on the media inside, but it does not replace a true water softener. If hardness is severe, the right expectation is improvement at the shower, not full soft-water performance.
Why generic shower filters miss the mark on well water
Well water problems are usually specific. Iron stains. Sulfur smells. Sediment clogs. Hardness leaves scale and soap film. The best buying decision comes from matching the main symptom to the filter technology that can address it, instead of assuming one cartridge will solve every issue.
That is the part many product pages skip. They sell a universal answer for a water problem that is rarely universal.
For well water, the design priorities are more practical:
- Iron handling: Use media that can address iron-related staining, not just improve odor.
- Sulfur control: Choose a filter built to reduce odor-causing compounds, especially if the smell gets stronger in hot water.
- Sediment protection: Give grit a place to get trapped before it chokes the main filter.
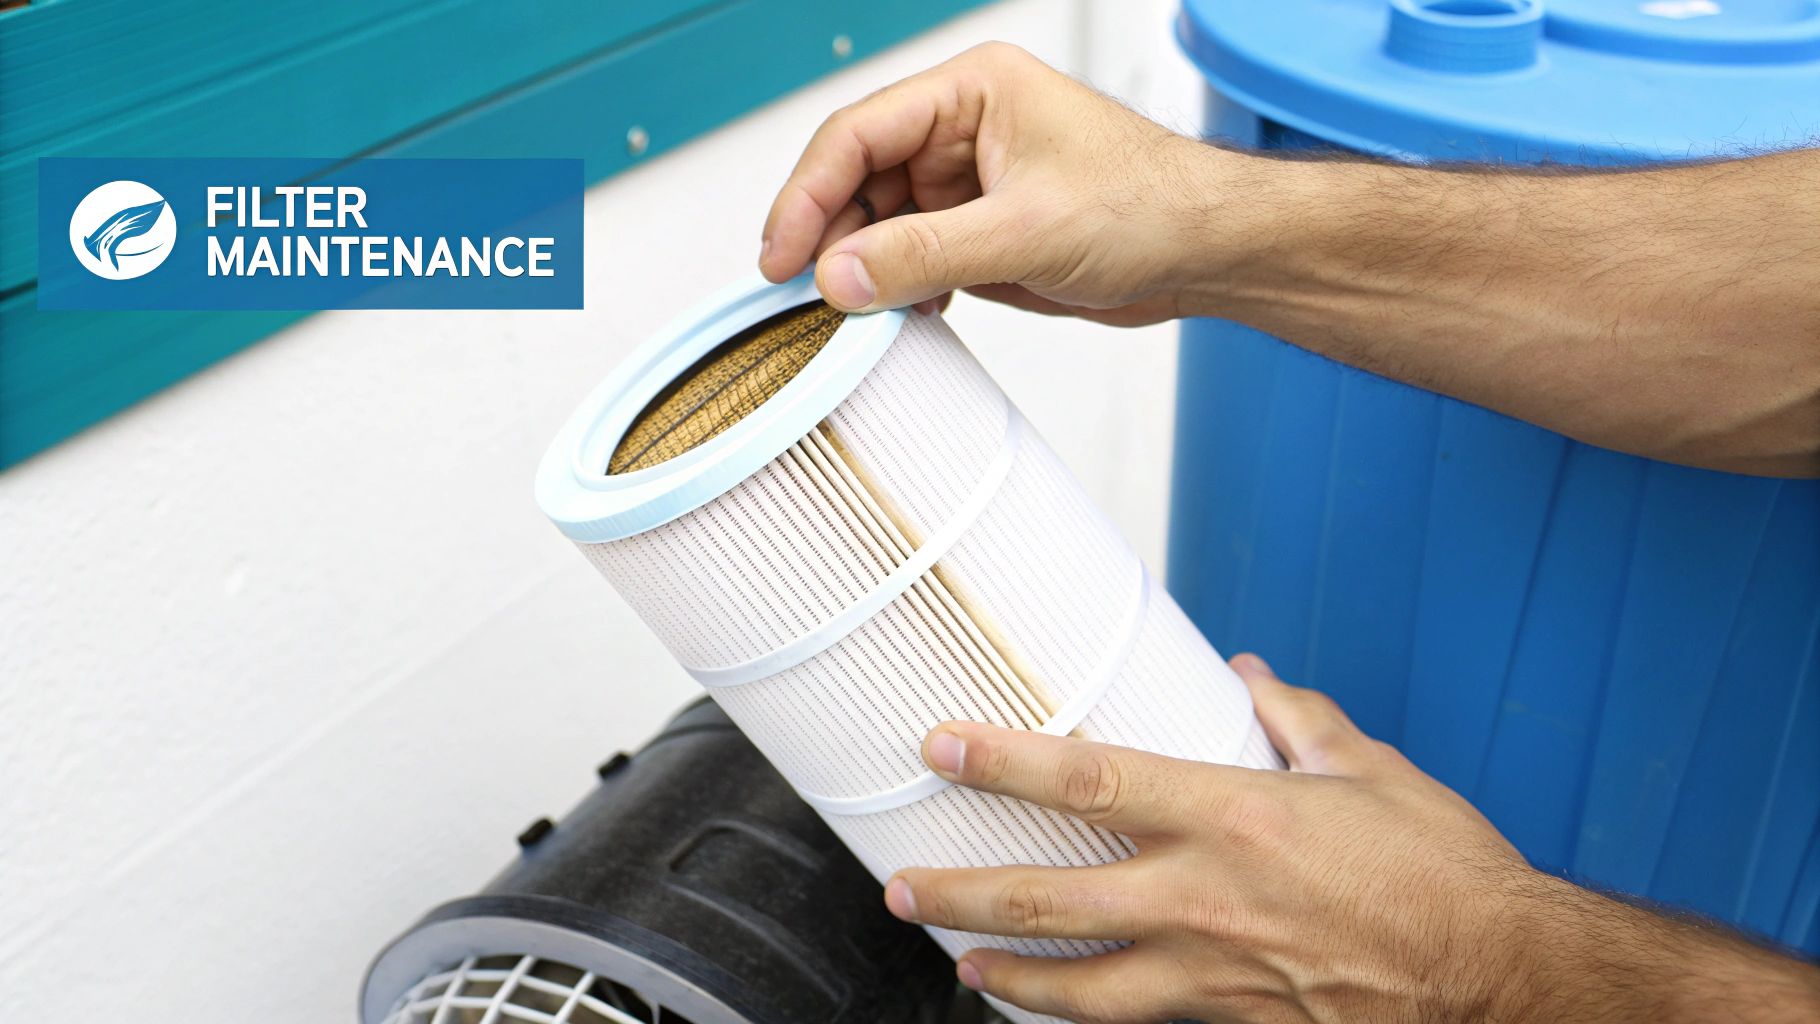
- Serviceability: On well water, filters with accessible stages are easier to live with and usually cheaper to maintain over time.
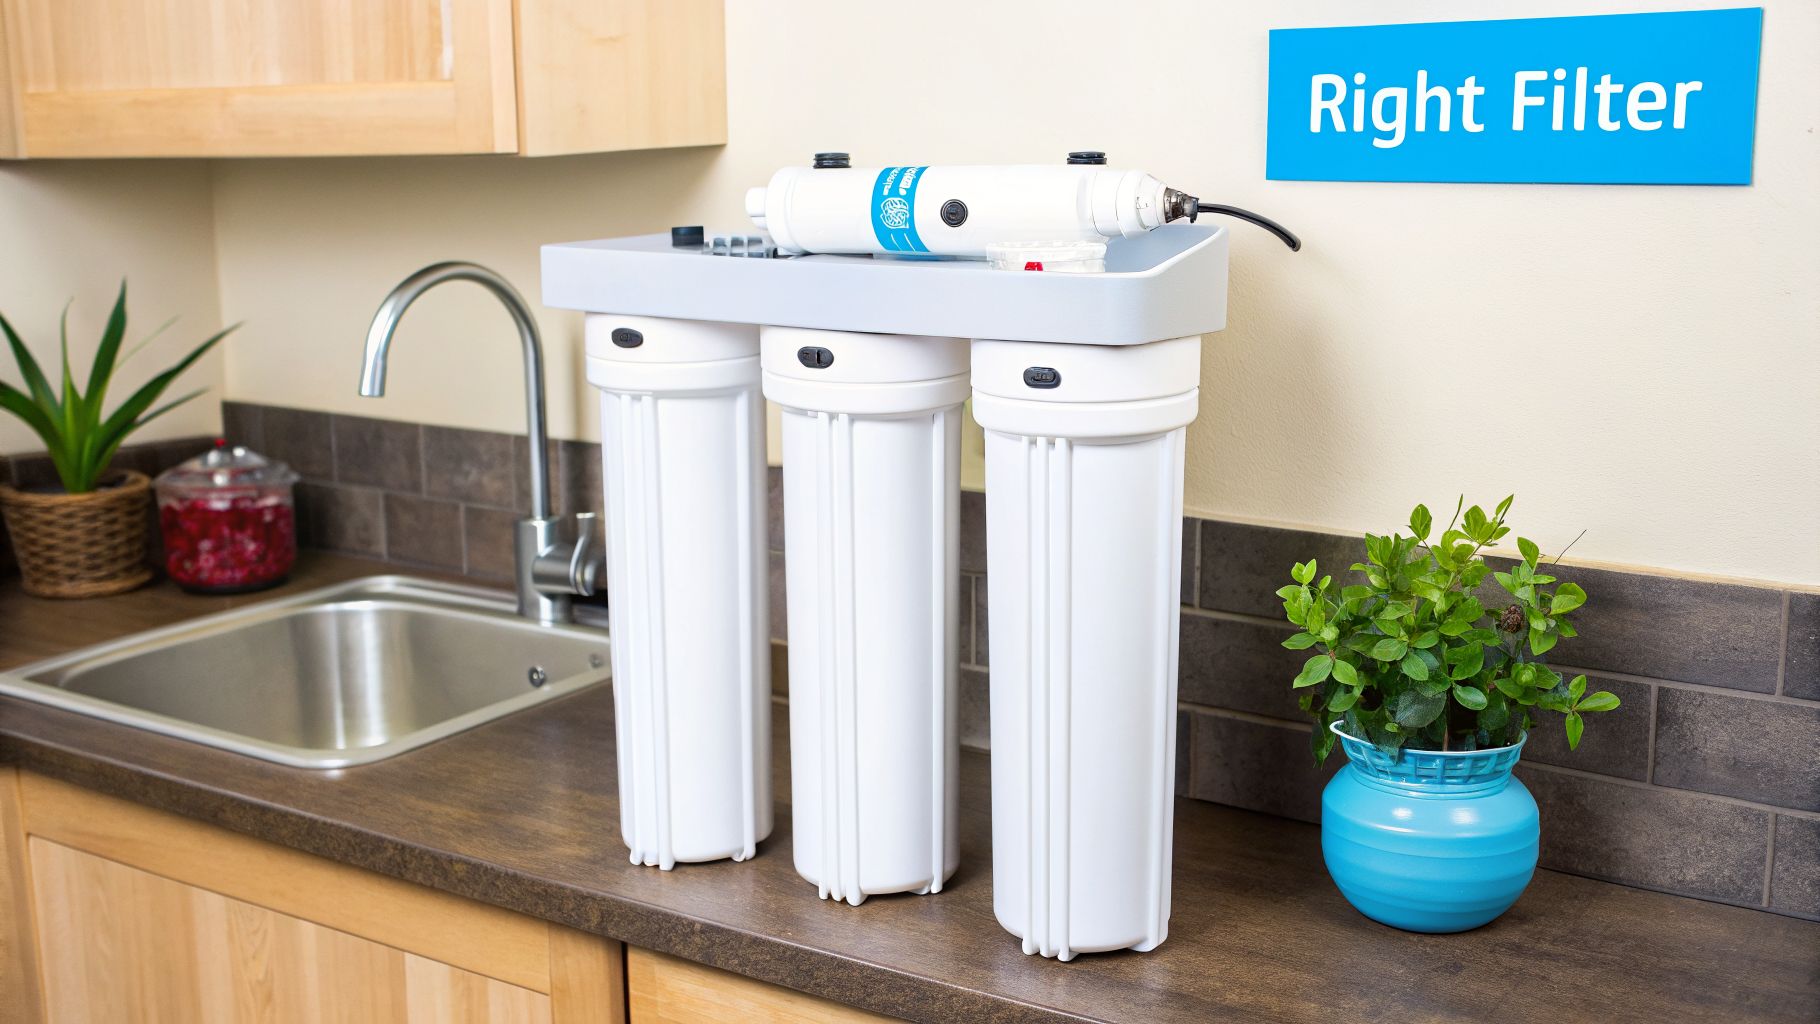
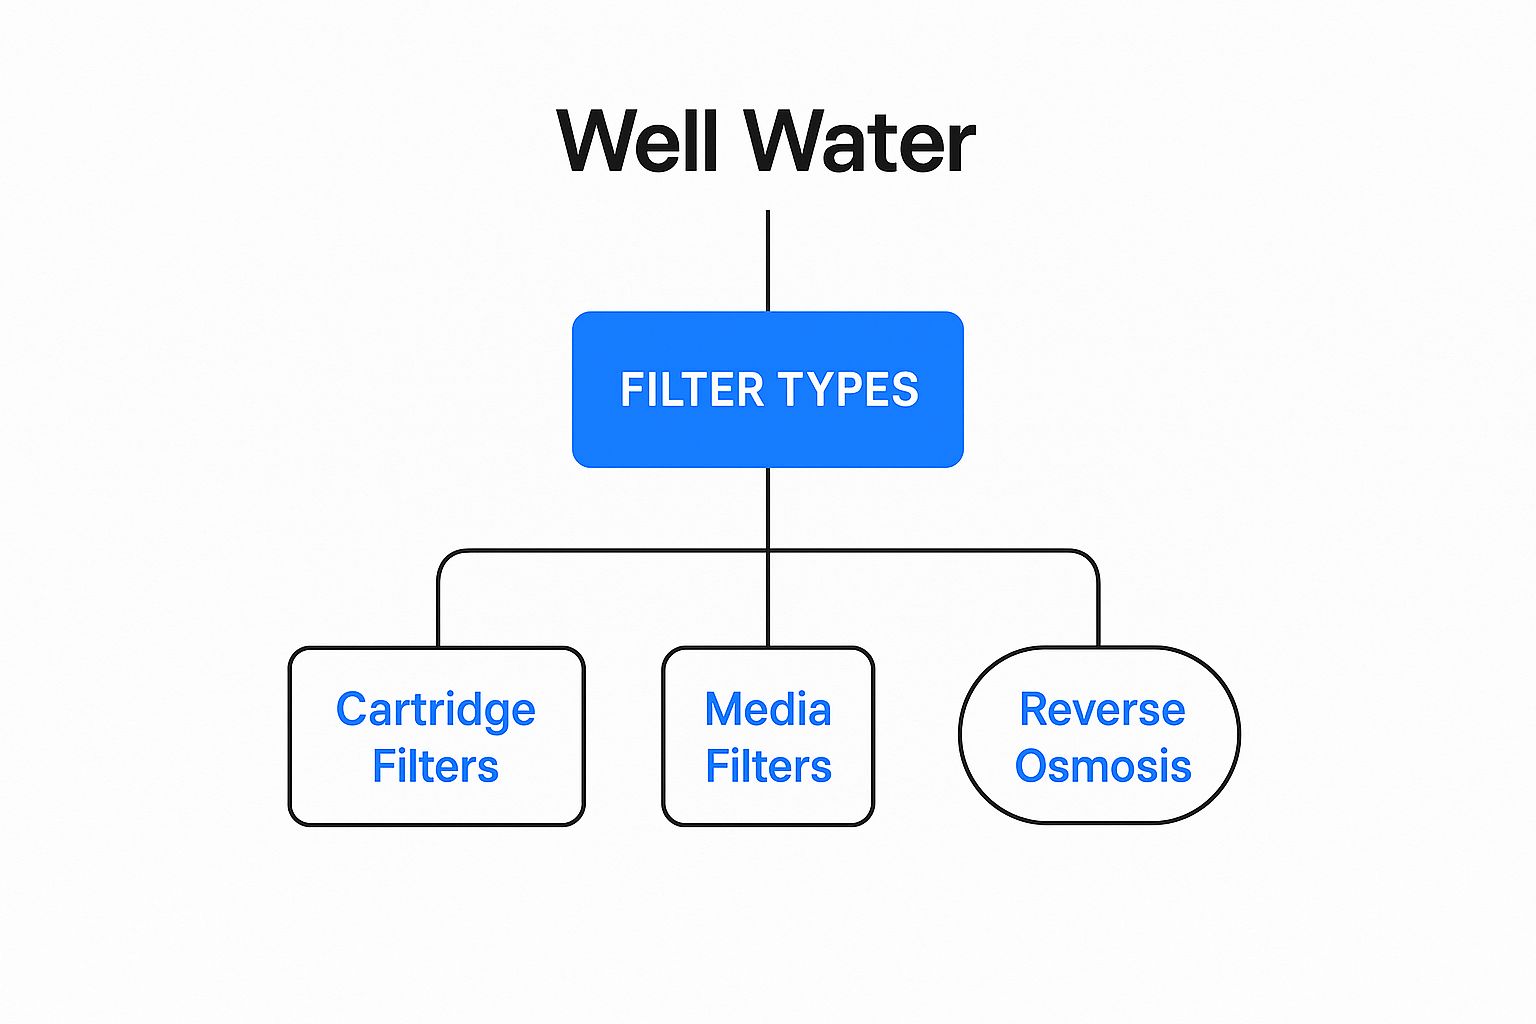
Decoding Shower Filter Technologies for Well Water
Shower filters for well water get marketed with a lot of vague language. I ignore the stage count and start with three practical questions. What media is inside, what problem is it meant to address, and what happens when your well sends sand, iron fines, or black sediment through it week after week?
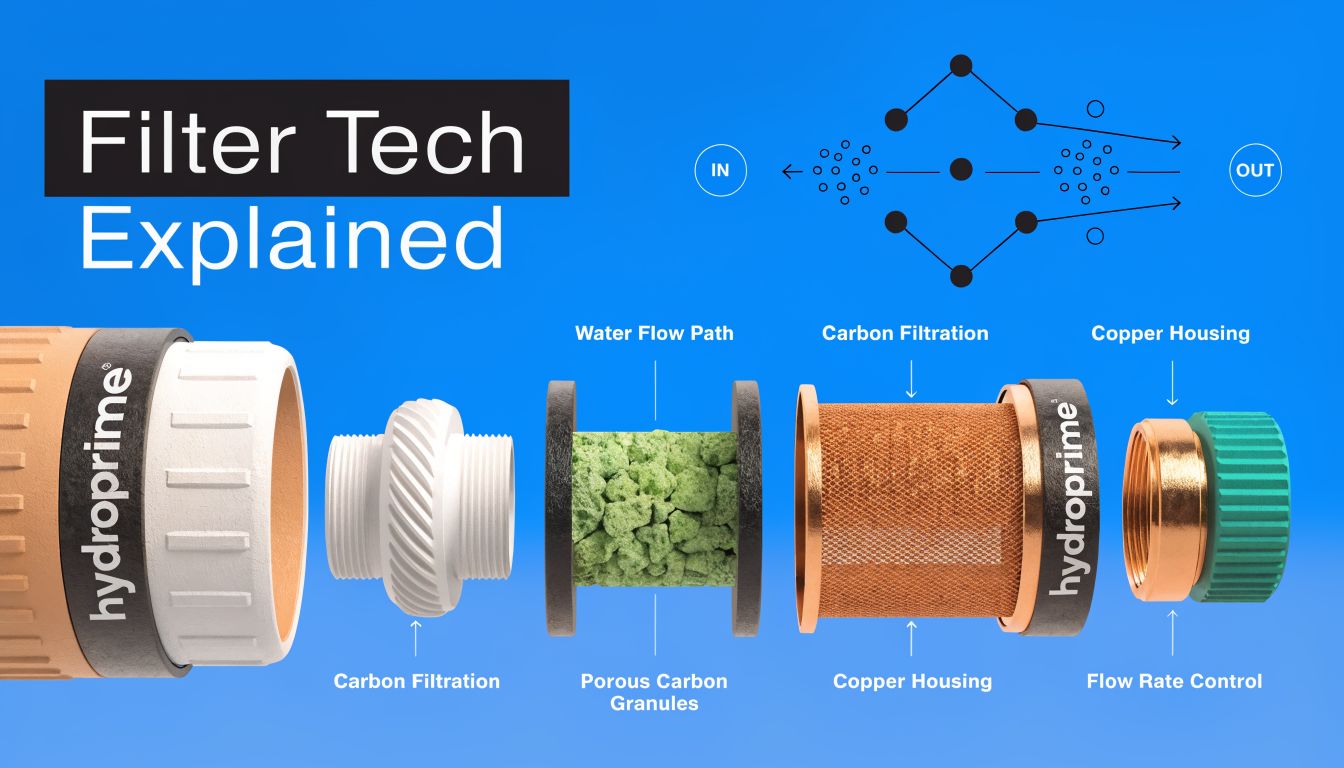
KDF-55 for iron sulfur and heavy metals
For actual well water use, KDF-55 is one of the few shower filter media I take seriously. In practice, it is most useful where the shower has that metallic smell, light iron staining, or a sulfur issue that gets worse with hot water. It can also help with certain heavy metals, which is part of why it shows up in better-built multi-stage units instead of novelty filters.
The catch is simple. KDF-55 is not a cure-all. If the water carries visible grit or a lot of iron sediment, the filter still needs a way to protect that media from getting buried too quickly. On wells, I trust KDF more when it is part of a system with sediment handling and, in many cases, a carbon stage behind it.
Carbon for chlorine odors and finishing work
Carbon still has a place, even on private wells. It is good at polishing water, improving odor, and reducing some of the off-notes that make a shower feel dirty even when the main issue is not obvious on a lab report.
Its weakness is maintenance under dirty conditions. Carbon performs best when the water reaching it is already fairly clean. Put it on a well with sand, rust flakes, or heavy particulate load, and pressure can drop fast. The homeowner usually notices that before they notice the filter media is spent.
That is why I treat carbon as a finishing stage, not the first line of defense for problem well water.
External sediment pads are a practical feature
On well water, an external sediment pad or other accessible pre-stage is not a gimmick. It is one of the more useful design choices you can get.
A removable pre-stage catches the ugly stuff early. Sand, grit, iron debris, and larger particles hit that first instead of packing into the main cartridge. You clean or replace the sacrificial layer, and the more expensive media lasts longer.
The practical advantage at home is:
| Technology | Best at | Where it struggles | Best use case |
|---|---|---|---|
| KDF-55 | Iron, sulfur, heavy metals | Limited by heavy sediment load and does not solve every issue by itself | Wells with staining, metallic odor, or sulfur smell |
| Carbon | Odor polishing, chlorine, broader cleanup of taste and smell issues | Clogs faster in dirty water | Cleaner wells or multi-stage filters with pre-filtration |
| Sediment pad or pre-stage | Grit, sand, visible particles | Does not remove dissolved contaminants | Wells with debris, pressure loss, or cartridges that plug early |
| Multi-stage combination | Several nuisance issues at once | More parts to service | The best fit for many well water showers |
Multi-stage filters usually make the most sense
After testing a lot of shower filters, I have learned that single-media units rarely hold up well on wells with mixed symptoms. A layered filter has a better chance because each stage handles one part of the problem. Sediment gets trapped early. KDF does its part on iron or sulfur. Carbon cleans up odor and improves the shower experience after the heavier work is done.
That setup does not turn a bad well into perfectly treated water. It does give you a more realistic match between the filter and the problem in front of you.
If a product page talks more about beads, stones, vitamins, or spa claims than it does about KDF, carbon, sediment control, and cartridge access, I treat that as a warning sign.
What usually disappoints on well water
Filters designed mainly for chlorine reduction are often fine on city water and underwhelming on private wells. The same goes for products that promise to fix heavy iron, sulfur odor, hardness, sediment, and every chemical concern with one vague cartridge and no clear media stack.
Well water exposes weak engineering fast. If the filter does not explain how it handles particles, dissolved contaminants, and cartridge fouling, expect short service life and uneven results.
Comparing the Best Shower Filters for Specific Well Water Problems
A good shower filter for well water depends less on brand and more on what your water is doing at the shower. Orange staining, rotten egg odor, gritty flow, and scale buildup do not respond to the same media. If you shop by star rating alone, you usually end up with a chlorine filter trying to solve an iron or sulfur problem.
I have found it more useful to sort shower filters by failure mode. What problem shows up first. What plugs cartridges early. What leaves residue after the shower. That approach gives you a filter that matches the water, not just a product page.
Best for high iron and staining
For iron-heavy wells, I favor a multi-stage inline filter that uses KDF media and has some way to catch visible sediment before the main cartridge loads up. Iron often arrives with fine grit, and that combination is what shortens cartridge life.
The distinction is important because a filter can look good on paper and still become a maintenance headache in a few weeks. If the housing clogs fast, flow drops, users remove the unit, and the filter stops solving anything. On wells with orange tub rings and rusty grout lines, serviceability matters as much as the media inside.
Good signs in this category:
- KDF-55 or similar redox media: Better suited to iron-related nuisance issues than carbon alone
- Prefilter screen, pad, or sediment stage: Helps protect the main cartridge from debris
- Clear replacement schedule: Well water is harder on cartridges, so vague lifespan claims are not useful
- Housing you can open or replace without a fight: A practical design gets maintained
If the staining is severe on every fixture in the house, be realistic. A shower filter can reduce the mess at one showerhead, but it will not replace a whole-house iron filter.
Best for sulfur odor
Rotten egg smell points to hydrogen sulfide or sulfur-related bacterial activity. In shower filters, the better match is usually a KDF-based multi-stage unit, sometimes paired with carbon for odor polishing. Carbon alone may improve the smell at first, but on sulfur-heavy wells it often loses consistency as the cartridge fouls.
This is one of the clearest examples of matching technology to symptoms. If the odor gets stronger with hot water and you also see dark specks or sediment, choose a filter built for dirty water conditions, not a spa-style cartridge loaded with minerals, beads, or cosmetic claims.
Expect improvement, not miracles. If sulfur odor is strong at every tap, the shower is only one symptom. Point-of-use filtration can make bathing more tolerable while you decide whether the well needs broader treatment.
Best for sediment and cartridge-clogging wells
Some well owners focus on smell or staining and miss the simpler problem. The water is dirty enough to choke the shower filter itself. If pressure falls off fast after a fresh install, sediment may be the main issue.
In that case, I would rather use a filter with a dedicated sediment stage than a fancier cartridge aimed at chemical reduction. Dirt, sand, and silt do not need marketing language. They need physical capture. A basic, replaceable sediment-first design often outperforms more complicated filters on these wells because it stays open longer and protects the downstream media.
Typical clues include:
- Pressure drops soon after cartridge changes
- Visible grit in the tub or shower basin
- Aerators and showerheads clog often
- Filter life is far shorter than advertised
If you are already replacing showerheads because of buildup, it helps to know how to swap hardware cleanly. Home Project Services' DIY guide is a useful reference for that part.
Best for hardness symptoms
Hardness is where expectations need a hard reset. A shower filter does not function like a water softener. It may reduce some scale-related annoyance, improve feel, or make the shower more pleasant if the cartridge combines KDF, carbon, and sediment control, but it will not deliver true soft water.
For hard well water, I only recommend a shower filter as a partial measure. It can help if your main complaint is mineral film on the glass or a rougher feel on skin and hair, especially when hardness is not extreme. If you are dealing with stubborn white scale on fixtures throughout the house, the primary solution is upstream treatment.
I would avoid any shower filter that hints it can fully soften water through stones, ceramic balls, or vague mineral balancing language. That claim does not hold up in the field.
Best for mixed well water problems
Mixed symptoms are common on private wells. A little iron. Some sediment. A bit of odor. Maybe hardness too. For that profile, the safest bet is a practical multi-stage filter with three features: sediment capture, KDF media, and carbon as a finishing stage.
That setup is usually the best all-around choice because each stage has a job. Sediment gets intercepted early. KDF addresses the nuisance contaminants that often show up in well showers. Carbon improves odor and overall shower feel after the heavier work is done.
Here is the framework I use:
| Well water problem | Best filter style | What to prioritize |
|---|---|---|
| Orange stains, metallic smell | KDF-based multi-stage | Iron handling, sediment protection, easy cartridge service |
| Rotten egg odor | KDF plus carbon | Sulfur odor control, steady flow, dirty-water tolerance |
| Grit, clogging, fast pressure loss | Sediment-first inline filter | Replaceable prefiltration, simple maintenance |
| Mild hardness symptoms | Multi-stage as a partial fix | Honest claims, scale reduction support, realistic expectations |
| Several nuisance issues at once | Multi-stage combination filter | Balanced media stack, serviceability, no gimmick stages |
What I would skip
I skip filters that sound impressive but do not explain their media clearly. Well water exposes weak designs fast.
That includes products that:
- Lead with stage count instead of filter media
- Claim to soften water without true softening technology
- Hide cartridge access or replacement details
- Rely on spa language more than treatment language
- Promise one cartridge will solve iron, sulfur, sediment, hardness, and everything else equally well
The best shower filter for well water is usually the one that matches your specific nuisance problem and keeps working long enough to justify the cartridge cost. That answer is less exciting than naming one universal winner, but it is a lot closer to how well water behaves in real homes.
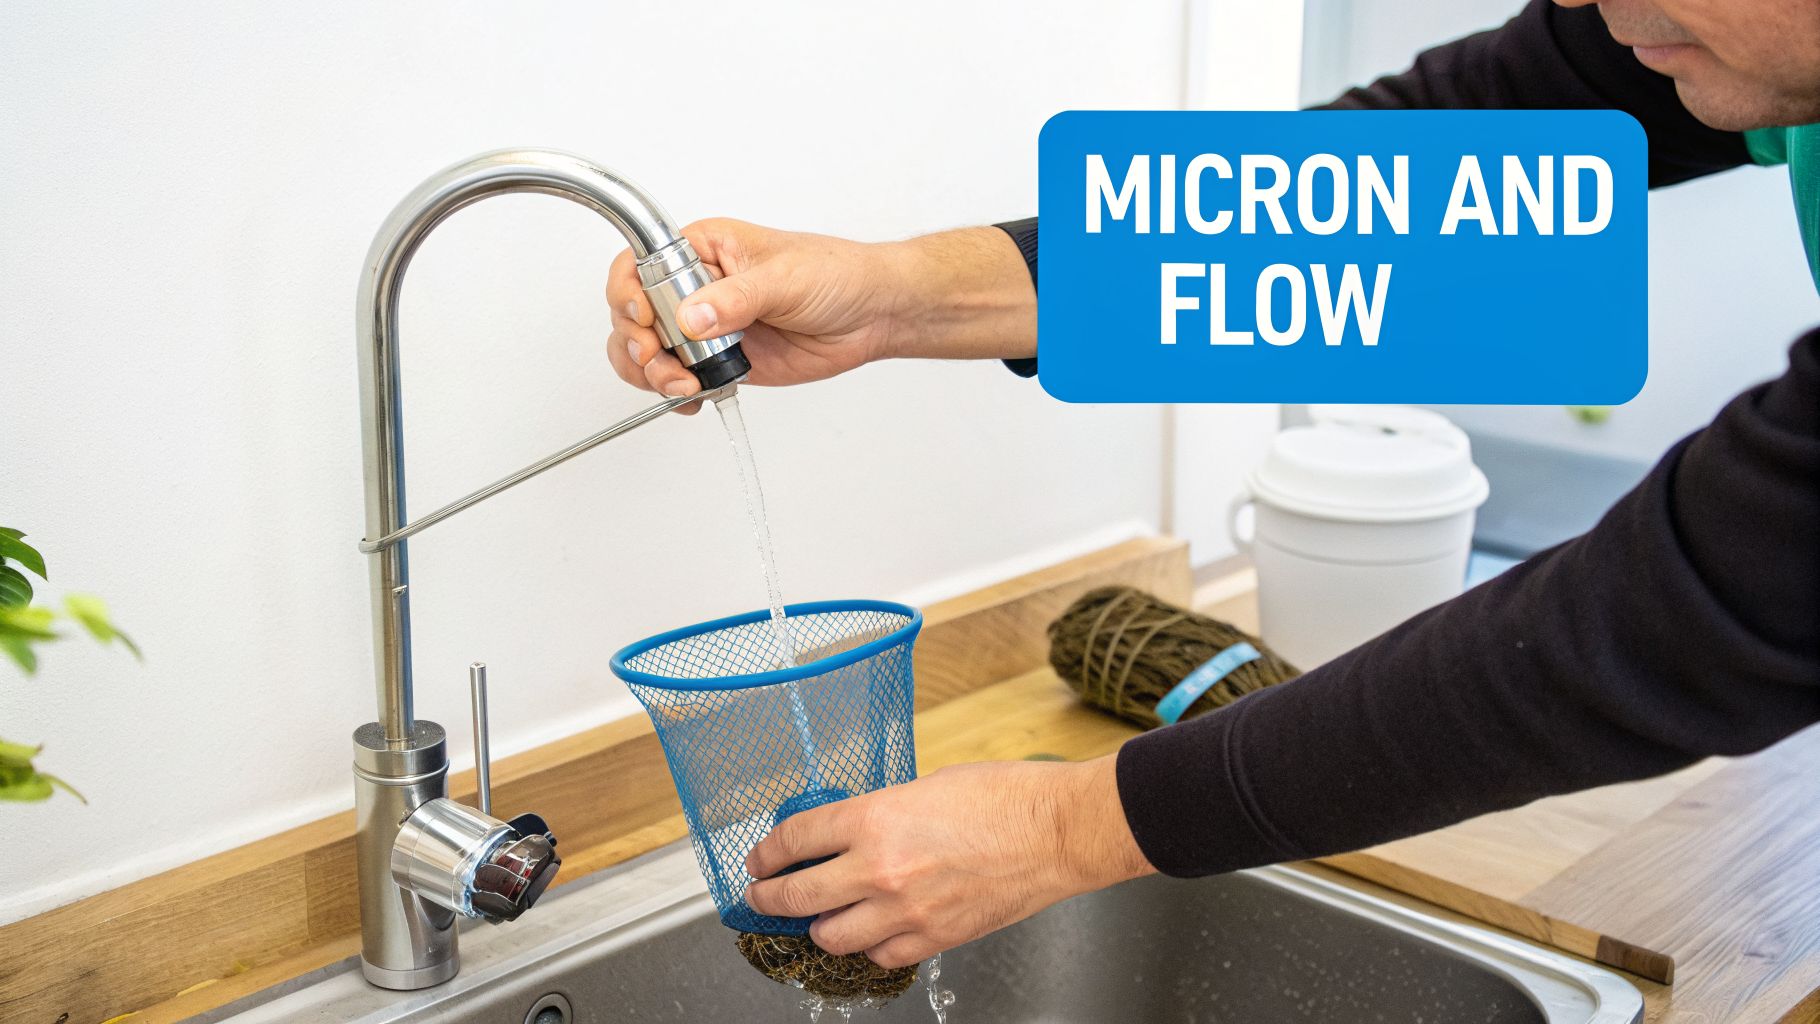
Installation and Plumbing Realities You Should Know
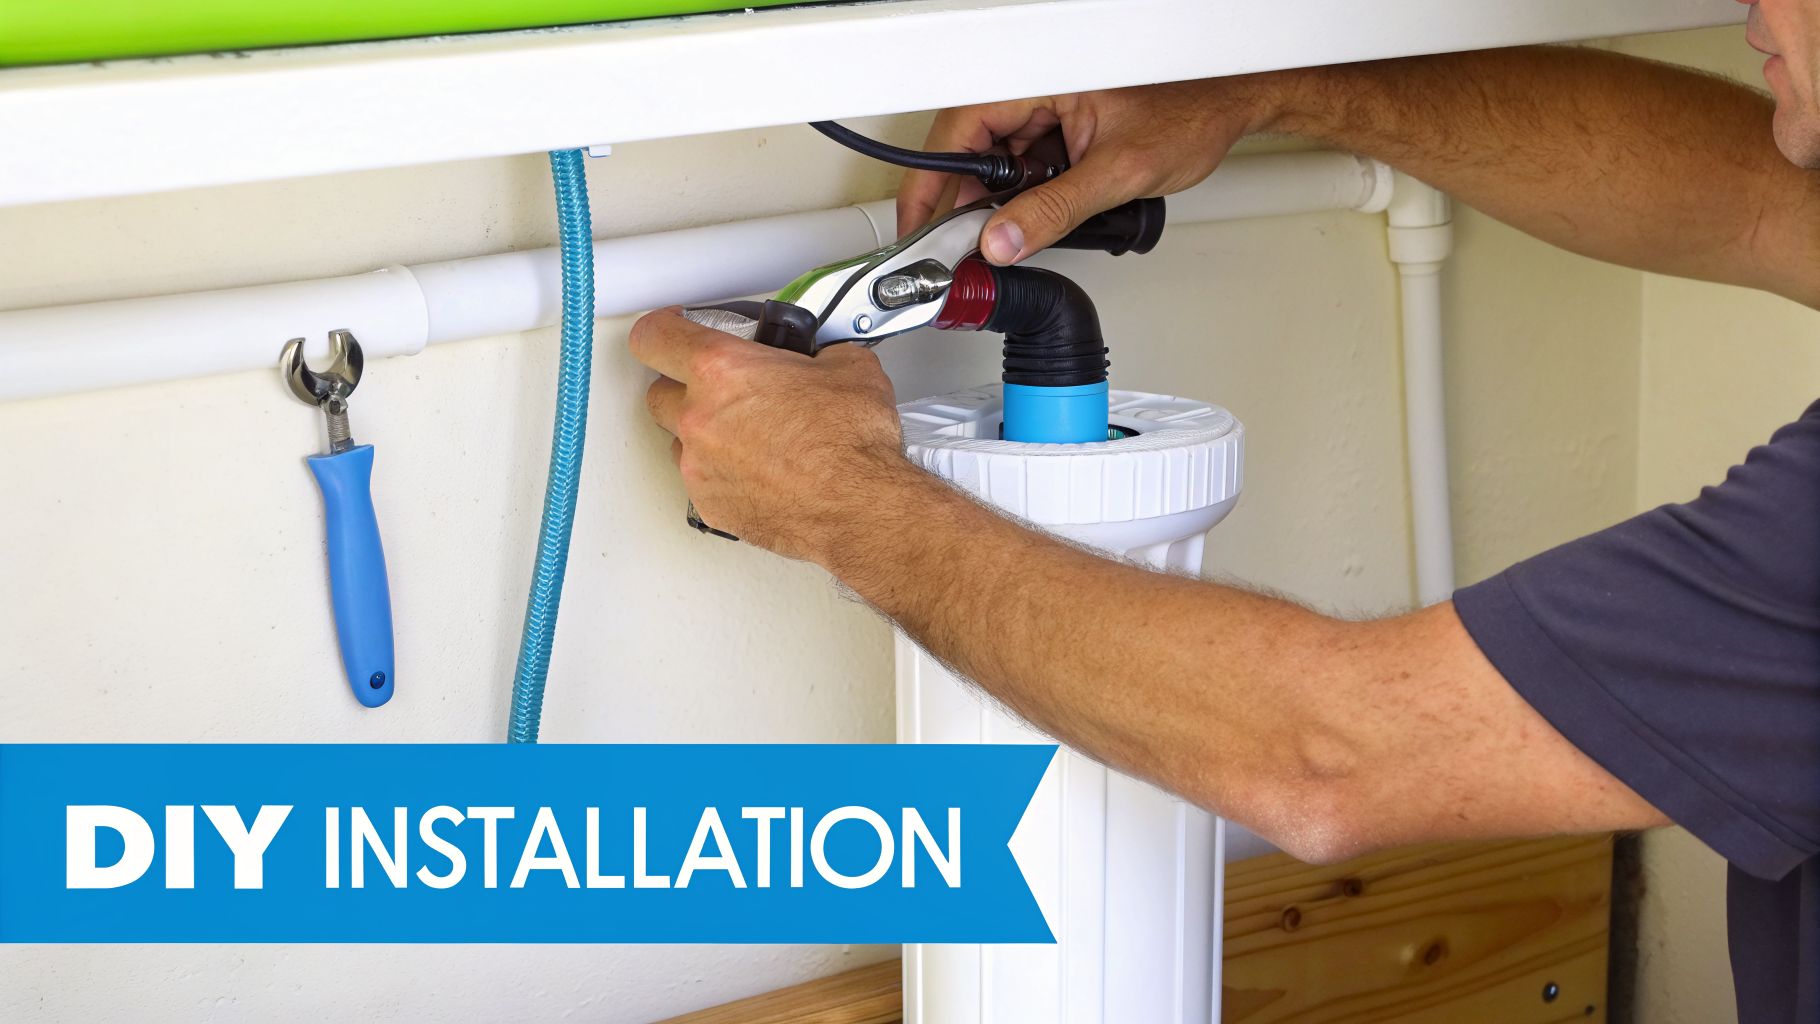
Most shower filters install more easily than people expect. In a standard setup, you’re unscrewing the existing showerhead, threading the filter onto the shower arm, then threading the showerhead onto the filter.

That said, well water adds a few realities people don’t think about until the box is open and the wrench is in hand.
What usually fits and what can get tricky
Most inline shower filters use standard shower connections, so they work with many fixed heads, handheld setups, and a good number of rainfall heads. The trouble starts when you have a cramped wall clearance, a decorative arm with odd proportions, or a very heavy showerhead that puts torque on the filter housing.
Renters usually like inline units because they’re reversible. Homeowners with elaborate shower hardware should check dimensions first, especially if the filter body is long and the shower arm sits close to tile.
A simple install checklist helps:
- Wrap threads carefully: Use plumber’s tape cleanly so you don’t create a slow leak
- Hand-tighten first: Then snug gently if needed. Overtightening can crack housings
- Flush the unit: Let the filter run before your first real shower
- Watch pressure early: A fresh filter should feel steady. A sudden weak spray points to sediment loading or a clog upstream
If you want a quick refresher on swapping shower hardware cleanly, Home Project Services' DIY guide is a useful reference for the basic process.
Pressure complaints are often maintenance complaints
A good shower filter shouldn’t destroy pressure on day one. But well water can load a cartridge fast if the water carries grit or iron particles.
That’s why I tell people to separate two questions. Did the filter reduce pressure immediately, or did pressure fade after some use? Immediate loss suggests compatibility or flow restriction. A gradual drop usually points to sediment accumulation.
This walkthrough gives a decent visual sense of what the install process looks like in practice.
When to call a plumber
You probably don’t need one for a straightforward inline shower filter. I’d call for help if the shower arm is corroded, the fitting is seized in the wall, or the pipe feels loose when you try to remove the head.
That’s not a filter problem. That’s a plumbing problem you happened to discover while trying to improve the water.
The True Cost of a Clean Shower with Well Water
The purchase price is only part of the bill. On well water, the primary expense often shows up in replacement frequency and maintenance hassle.
A cheap filter can look attractive until it starts clogging early, pressure drops, and you end up replacing cartridges more often than expected. Well water is harder on shower filters because sediment and mineral load can overwhelm internal media faster than cleaner municipal water.
What actually drives ownership cost
The two biggest factors are cartridge design and how dirty your water is. Filters with external sediment pads or separable stages can be less frustrating because you’re not throwing out a whole cartridge just because one dirty outer layer loaded up first.
Here’s the way I explain it to homeowners:
| Cost factor | Why it matters on well water |
|---|---|
| Initial filter price | Important, but rarely the deciding factor over time |
| Cartridge replacement schedule | Well water often shortens real-world lifespan |
| Sediment serviceability | Rinseable or replaceable pre-stages can reduce waste |
| Pressure loss tolerance | Frequent clogging means hidden cost in annoyance and performance |
| Availability of replacements | A great filter is less useful if refills are hard to source |
A simple annual-cost model
You don’t need a spreadsheet. Use this formula:
Annual filter cost = price of replacement media × how often your well water forces replacement
That last part matters more than the box estimate. Manufacturer lifespan claims are usually based on cleaner conditions than many private wells deliver. If your shower water carries visible grit or iron staining, assume your real maintenance interval may be shorter.
The cheapest filter to buy is often not the cheapest filter to live with.
For well owners, I’d rather buy a better-designed filter with straightforward replacement parts than chase a bargain unit that becomes a pressure problem. A shower filter should reduce friction in your routine, not add another household chore you resent every few weeks.
Where people overspend by accident
They overspend in two ways. First, they buy a chlorine-focused filter for iron-heavy water and keep replacing it when a poor technology match is the actual problem. Second, they ignore sediment until the filter performance falls apart.
If your water is rough enough that you’re changing shower filters constantly, the filter may not be the wrong brand. It may be the wrong category.
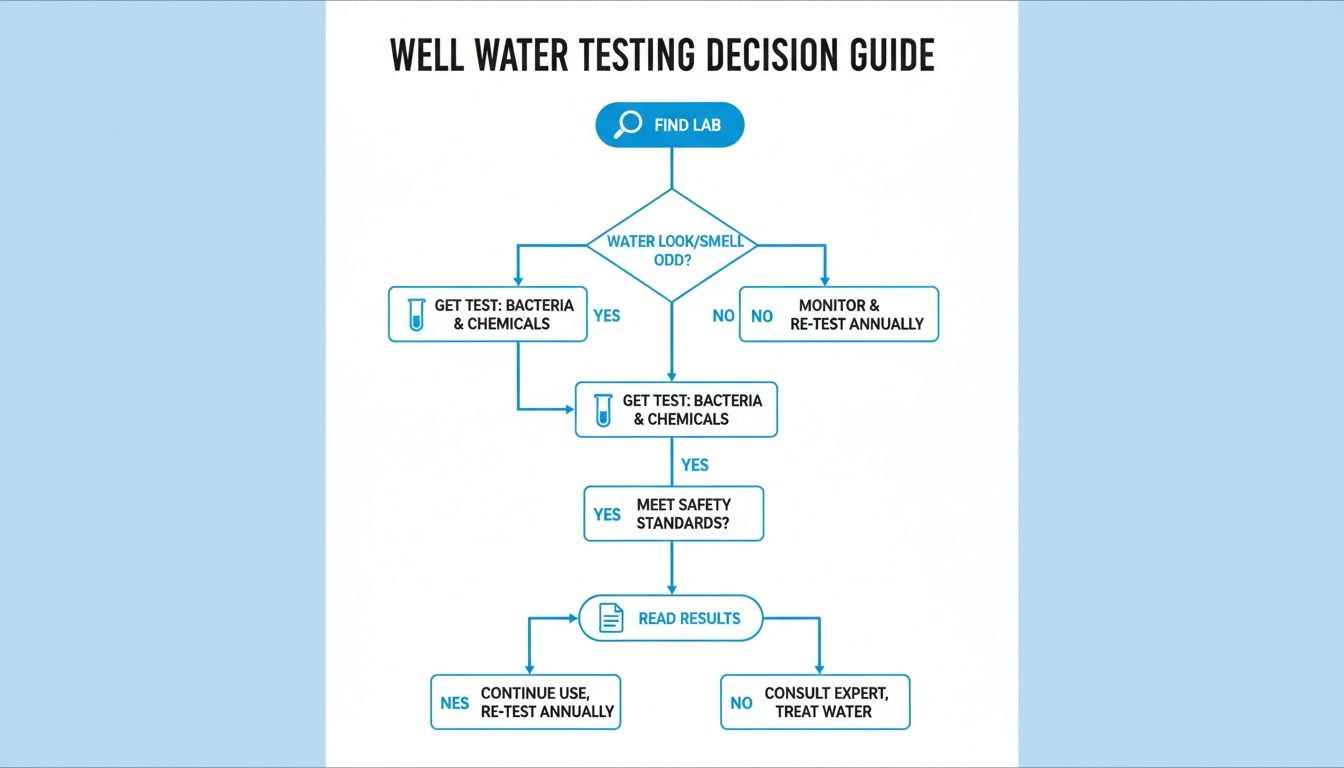
How to Make Your Final Decision and Test Your Results
A good buying decision for well water comes down to matching symptoms, media, and maintenance.
Start with your water, not the product page. If the shower smells like sulfur, prioritize KDF-based multi-stage filtration. If orange staining is the main issue, look for a design that handles iron and sediment. If your concern is a treated-water feel or broad contaminant reduction, carbon-heavy models with stronger testing support deserve a look.
A practical decision checklist
Test your water first
Use a home test kit or lab testing so you know whether iron, sulfur, sediment, or hardness is the lead problem.Match the main problem to the media
KDF-55 for iron and sulfur. Sediment stages for grit. Carbon for chlorine and broader polishing.Choose for maintenance, not just claims
On a private well, serviceable design matters.Verify after installation
Don’t just trust that a better shower feeling means the filter is working.
A few simple checks tell you a lot:
- Visual check: Are new orange stains appearing more slowly?
- Odor check: Is the sulfur smell reduced when hot water runs?
- Fixture check: Is the showerhead staying cleaner inside?
- Strip testing: Use basic iron or hardness strips before and after installation if those are your concerns
For ongoing guidance on reading results and troubleshooting household filtration choices, the practical advice library at Water Filter Advisor’s guidance hub is a solid next stop.
The key is to compare your shower now to your shower a few weeks after installation, not just the first day. Well water can fool you if a filter starts strong but loads up quickly.
Frequently Asked Questions About Well Water Shower Filters
Will a shower filter soften my well water
Usually, no. A shower filter can improve shower comfort and reduce certain contaminants, but it isn’t a true replacement for a dedicated water softener. If hard water is your main issue, a shower filter may help with feel and buildup to a point, but it won’t behave like whole-home softening equipment.
What’s the difference between a shower filter and a whole-house well water system
A shower filter treats water at one point of use. A whole-house system treats water before it reaches the bathroom, kitchen, laundry, and appliances.
That difference matters on severe wells. If iron, sulfur, or sediment affects the whole home, a shower filter can improve one problem area but won’t protect plumbing, water heaters, or every faucet. For some homes, a shower filter is the practical quick fix. For others, it’s only part of the answer.
Can I use my existing shower head with a shower filter
In many cases, yes. Most inline shower filters are built for standard shower connections and work with common fixed and handheld heads. You still need to check dimensions and clearance, especially if your current showerhead is oversized or unusually heavy.
How do I know if my filter is no longer working well
Look for the return of the original symptoms. Odor coming back, pressure falling, staining increasing, or the showerhead collecting grit again usually means it’s time for maintenance or replacement. On well water, performance problems often show up gradually, not all at once.
If you're still narrowing down the best shower filter for well water, Water Filter Advisor is a helpful place to compare filtration types, understand replacement needs, and sort through performance claims without the usual marketing fog.