
Choosing The Best Whole House Water Filter Systems
Ready to banish that chlorine smell from your showers and stop scrubbing rust stains from your sinks? Finding the best whole house water filter system ...
Ready to banish that chlorine smell from your showers and stop scrubbing rust stains from your sinks? Finding the best whole house water filter system ...

So, you've decided to upgrade your tap water. Fantastic! But as you start shopping for a water filter, you'll find prices are all over the map. You could spend $30 on a simple pitcher or go all-in with a $3,000+ whole-house system that treats every drop in your home. The final water filtration system cost really boils down to the type of filter, how tricky the installation is, and what it costs to keep it humming with fresh cartridges.
Diving into the world of water filters can feel like stepping onto a car lot. You've got your no-frills, get-you-from-A-to-B models (hello, water pitchers!) and your fully-loaded, luxury SUVs with all the bells and whistles (we're looking at you, whole-house systems). Each serves a different purpose and, naturally, comes with a very different price tag. This guide is your friendly salesperson, here to cut through the noise and give you a crystal-clear look at what you can expect to pay for better water at home.
First, let's take a quick snapshot of the typical price ranges for the most common home systems. Think of this as your cheat sheet—a way to get a feel for the market before you get lost in a sea of technical jargon. After all, the best filter is one that solves your water woes without springing a leak in your budget.
The true cost of a water filter isn't just the number on the box. It’s a cocktail of three key ingredients: the upfront price of the system, the ongoing maintenance (mostly filter swaps), and the specific water problem it’s built to solve. If you're a renter who just wants your tap water to taste less like a swimming pool, a simple faucet filter is a brilliant, low-cost fix. But for a homeowner trying to shield their pipes and appliances from the tyranny of hard water, a whole-house system is a much more significant, long-term investment.
This chart breaks down those core costs so you can see exactly where your money goes.

As you can see, the systems with a higher price tag upfront often treat more water and can sometimes have lower annual costs relative to their output. On the other hand, the simpler filters are cheap to get started with but need more frequent attention.
To lay it all out, here's a quick comparison of the most popular types of home water filters. This table breaks down what you'll pay initially, what you can expect to spend each year to keep it running, and who each system is really for.
The real water filtration system cost isn't just the initial purchase. It’s the total you'll invest over its entire life, including the hardware, any installation help, and all the replacement filters.
Use this table as a quick reference to match a filter to your needs and budget.
| Filter Type | Upfront Cost Range | Annual Maintenance Cost | Best For |
|---|---|---|---|
| Pitcher/Dispenser | $20 – $80 | $60 – $180 | Renters and individuals looking for basic taste and odor improvement for drinking water. |
| Faucet-Mounted | $30 – $100 | $50 – $150 | Easy, tool-free filtration for drinking and cooking water directly from the kitchen tap. |
| Under-Sink | $150 – $1,200 | $100 – $300 | Homeowners wanting advanced, multi-stage filtration for drinking water, hidden from view. |
| Whole-House | $500 – $4,000+ | $75 – $500 | Homeowners aiming to treat all water entering the house to protect plumbing and appliances. |
This at-a-glance view should give you a solid idea of which categories make the most sense for you to explore further.
Ever wonder why a whole-house system can set you back thousands while a simple faucet filter costs less than dinner for two? The upfront water filtration system cost is a lot like comparing home security. A basic door alarm is great for one entry point, but a fully integrated smart system protects the entire property.
Each filter type is engineered for a different mission, and its price tag reflects that—from its complexity and capacity to its raw power to yank out contaminants.

Let's start with the heavy hitters and work our way down. Knowing what you're paying for is the first step to making a smart investment in your home's water quality.
Whole-house water filters are the undisputed champions of home water treatment—and they have the price tag to prove it. Plumbed in right where your main water line enters your home, these systems treat every single drop you use, from the kitchen sink to the shower and washing machine.
Their price reflects their beefy construction and massive capacity. You aren't just buying a filter; you're investing in a serious piece of equipment designed to process tens of thousands of gallons.
That high upfront cost covers durable tanks, complex valve heads, and huge beds of filter media that are built to last for years.
For anyone who wants targeted, high-purity drinking water without a major plumbing overhaul, under-sink filters are a fantastic middle ground. Tucked away in a cabinet, these systems hook right into your cold water line and give you filtered water through a separate, dedicated faucet.
An under-sink system's price is mostly about its filtration tech. A simple two-stage carbon filter might run you $150, but a more advanced reverse osmosis (RO) system can easily jump past $500.
Reverse osmosis systems are wildly popular for a reason—they offer one of the most thorough filtration methods you can get at home. By forcing water through a super-fine membrane, they can remove up to 99% of dissolved solids, including nasty stuff like fluoride, lead, and arsenic.
The demand for these powerful systems is booming. The global water treatment market is expected to rocket from USD 45.15 billion in 2025 to USD 91.39 billion by 2034. Reverse osmosis units already grab a huge 29% share of that market, with home setups typically costing between $300 and $1,200. You can dig into the numbers and trends in this detailed analysis about global water treatment system growth on precedenceresearch.com.
Let's be real—not everyone needs or can afford a big, permanent system. Point-of-use filters are your friendly neighborhood heroes, offering an easy, budget-friendly way to get clean water right where you use it most. These devices are all about convenience and a low initial cost.
Their simplicity is their superpower, and it's what keeps them cheap. They use smaller, less complicated parts and are usually designed for you to install yourself, which saves you a plumber's fee.
Here’s a quick look at the most common types:
While the upfront cost is low, just remember their smaller filters need to be swapped out more often—we'll get into that in the next section on maintenance.
Buying a water filtration system is a lot like adopting a pet—the initial price is just the beginning. The real, long-term water filtration system cost comes from the ongoing care and feeding. It's the filter changes, occasional tune-ups, and other little expenses that you really have to budget for over its lifetime.
This is where you'll find the lifetime expenses you need to plan for. From replacement cartridges and plumbing fees to the subtle costs of extra water or electricity, knowing these factors helps you figure out the true cost of ownership before you commit.

The biggest recurring expense for any water filter is, without a doubt, the replacement cartridge. Think of it as a subscription for clean water. The filters are the unsung heroes, trapping all the gunk, but eventually they fill up and have to be swapped out to keep your water safe and delicious.
How often you do this—and how much it costs—varies wildly. A cheap water pitcher might seem like a bargain, but its small filters usually need replacing every 1-2 months. That can add up to $60 to $180 per year. On the other hand, a big whole-house system might only need a new filter once every 12 months or even longer, with annual costs running from $75 to $500.
Here’s a quick look at what to expect:
Putting off a filter change is a bad idea. Not only does it stop working well, but an old, clogged filter can actually become a breeding ground for bacteria. It can even release all the junk it trapped right back into your water, making it worse than when you started.
While you can install many smaller filters yourself, bigger systems like whole-house filters and some under-sink units are best left to a professional plumber. This is a one-time cost, but it's a big one, often adding $300 to $1,500 to your initial investment.
That fee covers the expertise needed to cut into your main water line, install the right valves, and make sure everything is leak-free and up to code. Sure, a DIY job can save you cash, but one mistake could lead to thousands in water damage. For complex jobs, a pro is worth every penny.
How do you know if your filter is actually doing its job? You have to test your water. While it’s not a direct maintenance cost for the filter itself, it's the only way to be sure you're getting the clean water you're paying for.
You've got a few options here:
My advice? Test your water before you buy a filter, and then re-test it once a year to make sure your system is still on its A-game, especially if you're on well water.
Finally, don't forget that some systems use water and electricity to run. Reverse osmosis (RO) systems are famous for being incredibly effective, but they also create wastewater. For every gallon of pure water you get, an RO system might send 3-4 gallons of concentrated, contaminated water down the drain. It's a necessary part of the process, but it will show up on your water bill.
Systems with UV purifiers or booster pumps will also draw a small but constant amount of electricity. It's not much, but it's another small piece of the total cost puzzle. A standard residential RO unit, for example, might run $200 to $800 upfront, with another $50 to $150 per year for filters.
For folks in the U.S., systems with official NSF testing offer peace of mind, and their lifetime costs can be 30% lower than buying bottled water over five years. With growing health concerns, U.S. households spent a whopping $15 billion on bottled water in 2023, which is driving more people to home filtration. You can dive deeper into this trend in the full market analysis on water purifiers from fortunebusinessinsights.com.
So, is a water filter actually worth the money? After looking at the upfront price tags and long-term upkeep, it’s easy to get lost in the numbers. Let’s shift the conversation from just cost to real-world value. Think of a filtration system less as an expense and more as a smart investment in your home.
The easiest way to see this is by looking at your wallet. The return on investment (ROI) is a fancy term for a simple idea: comparing what you spend on the system to what you save over time. For most people, the biggest and fastest savings come from finally kicking the bottled water habit.

Let's break down how quickly a filter can pay for itself and start putting cash back into your budget.
Picture a family that spends about $50 a month on cases of bottled water. That habit adds up to a surprising $600 per year. When you stack that annual cost against a one-time purchase of a filtration system, the benefits become pretty clear.
Faucet Filter Example: A simple $50 faucet filter with maybe $100 in replacement cartridges for the year brings your total first-year cost to $150. That little gadget would pay for itself in just three months, saving the family $450 in that first year alone.
Under-Sink System Example: Let's say you go for a more serious under-sink unit that costs $400 upfront, plus $150 for the first year's filters. Your total is $550. Even at that price, it pays for itself in just under a year. After that, it’s pure savings, year after year.
This quick ROI is getting easier to achieve. For homeowners who are comfortable with a little DIY, a $400 investment in a good under-sink system can cancel out a $600-a-year bottled water habit in as little as eight months. Plus, recent water treatment system advancements on precedenceresearch.com show that new materials have caused a 25% drop in filtration media costs since 2015, making bottled-quality water at home more affordable than ever.
The core idea is simple: you are shifting your spending from a disposable product (bottled water) to a durable home asset. Once the initial water filtration system cost is covered, your ongoing expense for clean water drops dramatically, often to just pennies per gallon.
While saving money is great, the true value of a water filter goes way beyond your budget. These are the "soft" returns—the daily quality-of-life upgrades you'll start to notice almost immediately.
It’s kind of like buying a really good mattress. You don’t just do it to save on future chiropractor bills; you do it for the immediate reward of better sleep and feeling great every morning. A water filter delivers similar, everyday perks.
Ever get out of the shower and your skin feels tight and itchy? Or your hair feels dry and brittle? The culprit is often chlorine, the standard disinfectant used in city water. A simple showerhead filter or a whole-house system removes that chlorine before it even gets to you.
The difference is immediate:
Think about it—your morning coffee is over 98% water. So is your tea, your soup, and the water you use to boil pasta. If your tap water tastes a little "off" because of chlorine or other chemicals, that flavor is going straight into everything you cook and drink.
With filtered water, you get:
In the end, calculating the ROI isn't just a spreadsheet exercise. It’s about recognizing that a water filtration system is a powerful investment in your home’s comfort, your family’s health, and your long-term financial well-being.
Getting clean, great-tasting water flowing from your taps shouldn't mean draining your bank account. The initial water filtration system cost can definitely look intimidating, but there are plenty of smart ways to chip away at both the upfront price and those pesky long-term expenses.
With a bit of planning, you can make a savvy financial choice without ever having to compromise on your family’s water quality. Think of it like grocery shopping—you could pay full price, or you can stack sales, coupons, and smart choices to get the exact same quality for a lot less. It’s all about knowing where to look.
Your first stop should always be a hunt for discounts. Manufacturers and big-box retailers are constantly running promotions, especially around holidays like Black Friday, Memorial Day, and Labor Day. A quick sign-up for a few brand newsletters can also give you a heads-up on flash sales or exclusive offers.
As you're zeroing in on a system, keep an eye out for coupons or promotional offers from both manufacturers and installers. A simple search can sometimes turn up a percentage-off deal or a rebate that takes a real bite out of the purchase price.
This one might feel a little backward, but spending a little more on a certified product can absolutely save you money down the road. You want to see systems that have been independently tested and certified by organizations like the NSF (National Sanitation Foundation) or ANSI (American National Standards Institute).
These certifications are your proof that a filter actually does what the box says it does. A cheap, uncertified filter might claim to remove lead and chlorine, but without that NSF/ANSI stamp, you’re just taking their word for it. Paying for performance you aren't actually getting is the quickest way to throw money away.
When you choose a certified system, you’re not just buying a filter; you’re buying confirmed results and avoiding overpaying for empty promises. If you need more in-depth guidance on finding the right system for your specific water issues, you can find a ton of resources and advice for water filters on waterfilteradvisor.com.
One of the biggest cost drivers is installation. While a big whole-house system is almost always a job for a professional plumber, a lot of the smaller filters are designed for an easy DIY install.
Let's be honest, the biggest long-term cost is replacing the filters. To make this easier on the wallet, a lot of companies now offer subscription services. Signing up often gets you a nice discount (usually 10-15%) on replacement cartridges, and they’ll show up at your door right when it’s time for a change.
This not only saves you money but also takes the guesswork out of maintenance, ensuring your system keeps running at peak performance.
To help you keep track of all the ways you can save, here’s a quick checklist you can use.
Use this table to pinpoint the best strategies for your budget and needs. A little effort upfront can lead to significant savings over the life of your system.
| Strategy | Potential Savings | Effort Level |
|---|---|---|
| Shop Holiday & Seasonal Sales | 15-30% off initial purchase price | Low |
| Search for Manufacturer Coupons | $25 – $100 or more off upfront cost | Low |
| Choose NSF/ANSI Certified Filters | Avoids wasted money on ineffective products | Medium |
| DIY Installation (for simple systems) | $200 – $500 in professional labor fees | Medium |
| Sign Up for Filter Subscriptions | 10-15% off all replacement filters | Low |
| Buy Multi-Packs of Filters | 5-10% discount compared to single packs | Low |
| Perform Regular Maintenance | Prevents costly repairs and extends system life | Medium |
By combining a few of these tips, you can make a huge dent in the total cost of ownership. Smart shopping and a little bit of planning go a long way.
So, what's the bottom line? Picking the best water filter isn't about grabbing the cheapest option you can find. It’s about matching a system to your home's specific water, your family's needs, and—of course—your budget.
Making a smart call means looking past the initial price tag. The real water filtration system cost shows up over years of use, once you factor in filter replacements and any ongoing maintenance. A simple pitcher is cheap to buy, but those filter swaps add up. A whole-house system is a bigger investment upfront, but it protects every tap in your home with less frequent upkeep. You just have to match the solution to the problem.
Think of a quality filter system as a proactive investment in a healthier home. For many people, it pays for itself a lot faster than you'd think.
For example, a solid reverse osmosis system can pay for itself in just 2-3 years by cutting out bottled water completely. With households spending an average of $300 on bottled water in 2023, the savings are real. As our water sources get more stressed, a good filtration system also protects you from potential price hikes down the road.
Ultimately, choosing the right system is just one part of a bigger plan to master your household monthly expenses and keep your finances in good shape for the long haul.
Here's the most important takeaway: the upfront price is just the first chapter. The total cost of ownership is what really impacts your wallet and your peace of mind.
Now that you know what to look for, your first step is simple: get your water tested. Once you know exactly what’s in your water, you can choose the right system with confidence and without wasting a dime.
Still have a few things you're wondering about? You're not the only one. When it comes to the cost of a water filtration system, the same handful of questions tend to pop up. Let's clear the air and give you the straightforward answers you need.
Here are some of the most common questions we hear from homeowners.
Getting a whole-house water filter professionally installed will typically run you somewhere between $300 and $1,500. Where you land in that range really depends on a few things: how complicated your plumbing setup is, the type of system you bought, and what plumbers charge in your neck of the woods.
A basic, single-tank carbon filter, for instance, will be on the lower end of that scale. But if you're installing a beefier, multi-stage system that includes a water softener, expect the price to creep toward that $1,500 mark. Sure, you can save that cash by doing it yourself, but unless you're confident in your plumbing skills, it's a risky move that could lead to some very pricey leaks.
In the long run? Absolutely, and it's not even close. The initial cost of a filtration system might seem steep, but it almost always beats a bottled water habit over time. Think of it as paying a bit more upfront to save a whole lot more down the road.
Let's do the math. A family spending just $30 a month on bottled water is shelling out $360 a year. A simple faucet filter or under-sink system will pay for itself in well under a year. Even a high-end whole-house system will give you a solid return on your investment within a few years, all while delivering clean water from every tap in your house.
More often than not, yes. Unlike city water that's been treated, well water is raw and can carry a much wider, and wilder, range of contaminants. You could be dealing with everything from heavy sediment and iron to bacteria that municipal water plants would have zapped long before it reached a home.
This means you’ll likely need a more powerful, multi-stage filtration system to get your well water clean and safe—and that naturally costs more. The single most important thing you can do is get your well water professionally tested first. Those test results will give you a perfect roadmap, showing you exactly what contaminants you need to target so you can buy the right system and not a penny more.
You can, but you have to be careful. Generic or third-party filter cartridges are usually a lot cheaper than the brand-name ones, which is obviously tempting. The catch is that they might not have the same quality, performance, or—most importantly—the certifications (like NSF/ANSI) that come with the manufacturer's own filters.
You could end up with a filter that barely removes contaminants or, worse, one that could damage your system. If you're going to try generic filters, do your homework first. Dig into the brand, check for any independent certifications, and read a ton of user reviews to make sure it's a safe and effective choice for your system.
At Water Filter Advisor, our goal is to help you find the right filtration solution for your home and your budget. Check out our in-depth guides and reviews to make a smart, confident decision for your family's health. Learn more at https://www.waterfilteradvisor.com.
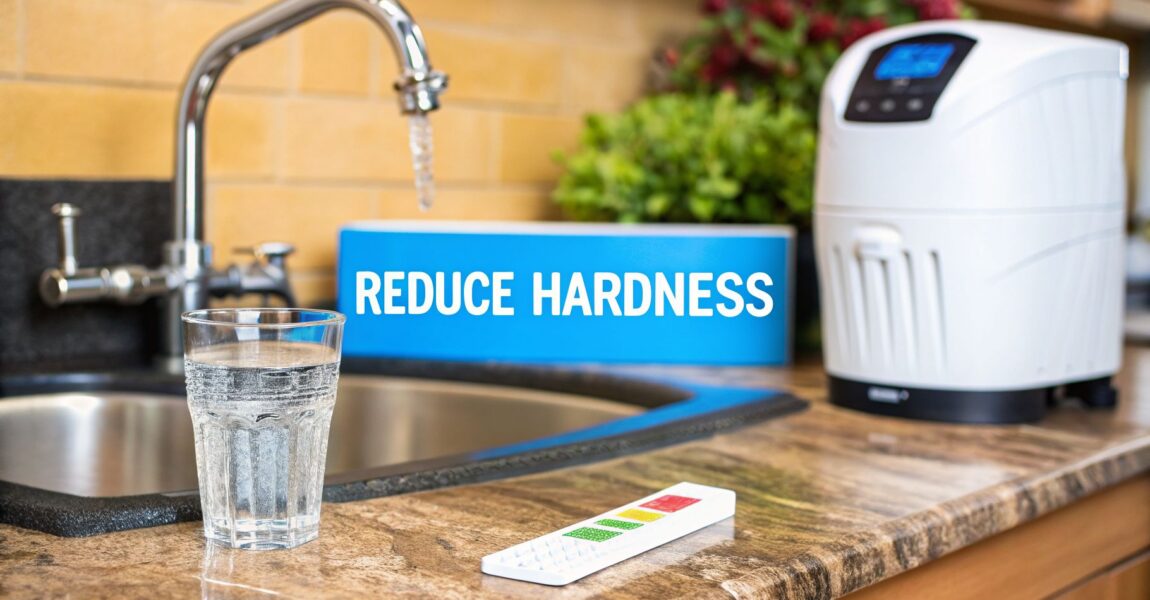
Ever notice those stubborn white spots on your glassware or feel like your “clean” laundry is still stiff and scratchy? You’re not just imagining it—you're dealing with hard water. The fix is a magical thing called water filtration, designed to remove or neutralize the high levels of dissolved minerals—mostly calcium and magnesium—that are wreaking havoc in your home. Think of learning how to reduce water hardness not just as a chore, but as a superhero move to save your plumbing and appliances from a slow, crusty demise.

If you've ever felt a chalky film on your hands after washing them or wondered why your shampoo just won't lather up, you've met hard water. It's what happens when water travels through rock and soil, picking up mineral hitchhikers along the way. While it's perfectly safe to drink, those minerals can create a surprising amount of chaos around the house.
And this isn't some rare occurrence. According to the U.S. Geological Survey, a staggering 85% of households in the United States have hard water. In big chunks of the country, like the Midwest and Southwest, hardness levels often top 120 mg/L of calcium carbonate—that's well above the 60 mg/L threshold considered even moderately hard.
The most common signs of hard water are the daily cosmetic annoyances. You’ve probably seen them:
But these everyday headaches are just the tip of the iceberg. The real damage is happening where you can't even see it.
The real villain here is limescale—a hard, chalky deposit of calcium carbonate. This stuff builds up inside your pipes, fixtures, and appliances, slowly choking off water flow and tanking their efficiency.
To put it simply, what you see on your faucet is also happening inside your home's vital systems. This table breaks down the daily struggles of hard water versus the perks of switching to soft water.
| Area of Impact | Problem with Hard Water | Benefit of Soft Water |
|---|---|---|
| Plumbing & Pipes | Limescale buildup clogs pipes, reducing water flow. | Pipes remain clear, maintaining strong water pressure. |
| Appliances | Reduced efficiency and shorter lifespan for water heaters, dishwashers. | Appliances run efficiently and last longer. |
| Kitchenware | Cloudy film and spots on glasses and dishes. | Sparkling, spot-free dishes and glassware. |
| Laundry | Stiff, scratchy fabrics and faded colors. | Softer, brighter clothes that feel and look newer. |
| Bathroom Surfaces | Stubborn soap scum on showers, sinks, and tubs. | Easier cleaning with little to no soap scum buildup. |
| Skin & Hair | Dry, itchy skin and dull, brittle hair. | Softer skin and smoother, more manageable hair. |
As you can see, the benefits go far beyond just looks.
Over time, that mineral buildup turns into a real financial drain. Limescale acts like an insulator, forcing your water heater to work much harder and burn more energy just to heat the same amount of water. This drives up your utility bills and can even shorten the appliance's lifespan, pushing you toward a costly replacement sooner than you’d expect.
And it doesn't stop there. Your coffee maker, dishwasher, and washing machine are all on the chopping block. The tiny valves and pipes inside these machines can get clogged, leading to breakdowns and expensive service calls. Another major headache from all this buildup is a drop in water flow, which often leads to frustrating issues like having no water pressure in your house.
Tackling this problem head-on is a wise investment in your home. By learning how to reduce water hardness, you aren't just making your daily life a little easier—you're protecting your most valuable assets from silent, creeping damage.

Before you declare war on hard water, you’ve got to know exactly what you’re up against. Think of it like a doctor needing a diagnosis before prescribing a treatment. If you just guess, you might end up spending a ton of money on a system you don't really need or, even worse, buying one that barely makes a dent in the problem.
The good news is that figuring out your water's mineral content is pretty straightforward. You don’t need a fancy chemistry degree to get a solid baseline. There are a few different ways to go about it, from a quick kitchen experiment to a super-precise professional analysis.
Let's start with the easiest method of all: the DIY soap test. This is a fantastic first step that gives you a rough idea of your water’s situation in just a few minutes, using stuff you already have lying around.
All you need is a clean, clear bottle with a lid that seals tight (a regular water bottle works great) and some basic liquid soap. Make sure to use a pure soap, not a detergent that has added softeners or perfumes.
While this test won't give you an exact number, it’s a great initial indicator. If you're seeing almost no suds and a lot of that soap scum, you know you’re dealing with a pretty significant hardness issue.
For a more precise, number-based reading, water hardness test strips are your best bet. They’re cheap, easy to find online or at any home improvement store, and incredibly simple to use. These kits give you a quantitative result, which is what you really need to choose the right size and type of water filter.
Using them is a breeze. You just dip a strip into a glass of your tap water for a couple of seconds, pull it out, and wait for the color to develop. After about a minute, you compare the color on the strip to the chart that came with the kit.
The chart will give you a reading in either parts per million (PPM) or grains per gallon (GPG). Just so you know, one GPG is the same as 17.1 PPM of dissolved minerals.
What does GPG mean for you? Here’s a quick breakdown of the water hardness scale:
- Soft: 0–3.5 GPG
- Moderately Hard: 3.5–7 GPG
- Hard: 7–10.5 GPG
- Very Hard: Over 10.5 GPG
Knowing your exact GPG number is a game-changer. A house with 10 GPG is going to need a much more powerful filtration system than a home with just 4 GPG. This little piece of data helps you avoid overspending and makes sure the system you buy can actually handle the job.
For most homeowners who get their water from a city or municipal supply, those simple test strips are more than enough. However, if your water comes from a private well, or if you have a nagging suspicion that there are other contaminants besides just minerals, professional lab testing is the most reliable way to go.
Well water isn't regulated by the EPA, so its quality can be all over the map. A professional test can nail down the exact hardness level and also screen for things like iron, manganese, sulfur, bacteria, and other nasty stuff that might require a more specialized, multi-stage filtration system.
To get a lab test done, you can start by contacting your local health department for recommendations or find a state-certified lab online. They’ll send you a collection kit with simple instructions. It’s the most accurate assessment you can get and gives you the complete picture to make the smartest long-term investment for your home.
Jumping straight to a whole-house water filter isn't always in the cards. Maybe you're renting, you're on a tight budget, or you just want to dip your toe in the water—pun intended—before committing to a big installation. The good news? You don't have to put up with the daily grind of hard water while you weigh your options.
There are some really effective, non-permanent ways to get immediate relief from the most annoying hard water problems. These quick fixes target specific issues, from scratchy towels to irritated skin, giving you a way to manage the problem without tearing into your plumbing.
Hard water and your washing machine are not friends. The calcium and magnesium in the water latch onto your detergent, making it way less effective. Instead of cleaning, a chunk of that soap turns into a nasty curd that sticks to your clothes, leaving them stiff, dingy, and dull.
You can fight back. The easiest weapon in your arsenal is a chelating agent, which you might know as a water conditioner. Products like Calgon or even good old-fashioned borax are fantastic for this. They work by grabbing onto those pesky mineral ions and neutralizing them, freeing up your detergent to do its job.
Just add a conditioner to each load, and you’ll see a real difference. Your whites will look brighter, colors won't fade as fast, and your towels will finally lose that crunchy, board-like feeling. It’s a simple, cheap trick for anyone trying to figure out how to soften water just for their laundry.
The daily battle with hard water gets personal in the shower. Those same minerals that leave spots on your glasses also leave a film on your skin and hair. This residue can clog pores, cause breakouts and dryness, and leave your hair feeling brittle, limp, and impossible to style.
A showerhead filter is a brilliant point-of-use solution here. These little devices just screw on between the shower arm and your showerhead—most don't even need tools to install. Inside, they use filtration media like KDF (Kinetic Degradation Fluxion) or activated carbon to specifically target the minerals and chlorine coming through your pipes.
You'll feel the difference almost right away. Your skin will probably feel less tight and itchy post-shower, and your hair will feel softer and look shinier because it's finally getting a clean rinse without a coating of mineral gunk.
Those ugly white deposits crusted around your faucets and all over your shower doors are the most obvious calling card of hard water. This stuff, called limescale, is basically rock and regular cleaners just can't cut it.
To get immediate results, you need something acidic to dissolve the mineral buildup. You've got a couple of options:
Making these little changes can help you keep the most visible signs of hard water in check. While these temporary fixes don't solve the problem at its source, they offer targeted relief and make everyday life a lot more comfortable.
If you're sick of scrubbing soap scum and dealing with scratchy towels, it's time to look past the quick fixes. A permanent, whole-house system is the only way to stop hard water problems at the source, protecting your pipes, appliances, and sanity. This is where the real game-changers come in.
Picking the right technology can feel like a chore, with a dozen different systems all claiming to be the best. Let's walk through the most common and effective options out there. We’ll cover true water softeners that rip minerals out of your water and conditioners that just stop them from making a mess, so you can figure out what truly fits your home and your budget.
When most people think of solving hard water, they’re picturing an ion-exchange water softener. This is the classic, time-tested method for actually getting rid of hardness minerals for good. It physically strips the calcium and magnesium from your water, giving you genuinely soft water at every single tap.
These systems work on a pretty clever principle. Your water gets routed into a large tank filled with thousands of tiny resin beads that are coated in sodium (or potassium) ions. As hard water washes over these beads, they act like tiny magnets, grabbing the "hard" minerals and releasing the "soft" sodium ions into the water instead.
This process is incredibly effective. Water softeners can slash water hardness by 95-99%, which is why they’re still the most powerful solution you can buy. This is a huge deal for the millions of households plagued by limescale buildup that wrecks plumbing and appliances.
Of course, those resin beads eventually fill up with all the minerals they’ve collected. That's when the system "regenerates" by automatically flushing itself with a saltwater (brine) solution from a second tank. This bath washes all the gunk off the beads, sends it down the drain, and recharges them with a fresh coat of sodium ions.
You have a choice of what to fill that brine tank with.
Maybe you love the idea of preventing scale but hate the thought of lugging 40-pound bags of salt into your basement. If so, a salt-free water conditioner might be exactly what you need. But let's be crystal clear: these systems don't soften the water—they condition it.
What's the difference? They don't remove the calcium and magnesium. Instead, they use a process called Template Assisted Crystallization (TAC). As water flows through the TAC media, the hard minerals are changed into microscopic crystals that can’t stick to surfaces.
These tiny, harmless crystals just flow right through your plumbing without ever building up as limescale on your pipes, faucets, or water heater. You still get the health benefits of drinking mineral-rich water, but you get the massive perk of scale prevention.
Key Takeaway: A salt-free conditioner is a scale-prevention tool, not a water softener. You won't get that slick, "slippery" feeling of truly soft water or see a dramatic change in soap lather. What you will get is protection for your home's plumbing and appliances from destructive limescale.
A whole-house system takes care of your showers and laundry, but what about the water you actually drink? A Reverse Osmosis (RO) system is what’s known as a point-of-use filter, usually installed right under the kitchen sink, and it delivers some of the purest water you can get.
RO systems work by forcing water through a special membrane that’s so fine it removes up to 99% of pretty much everything—hardness minerals, chlorine, lead, fluoride, you name it. It's the same technology used to make most bottled water.
A lot of homeowners go for the one-two punch: a whole-house softener to protect the entire home, paired with an under-sink RO system for pristine, amazing-tasting water for drinking and cooking. You can explore our guides for more in-depth advice on building the perfect setup.
This chart can help you quickly find a temporary fix for whatever hard water headache you're dealing with right now.

As you can see, whether it's your laundry, shower, or kitchen sink, there's always a targeted fix you can use while you figure out a permanent plan.
You've probably seen ads for magnetic or electronic "descalers" online. These are little gadgets that you just clip onto your main water line. They claim to use a magnetic field to change the structure of the hardness minerals so they can't form scale.
It sounds fantastic—no salt, no filters, no maintenance. The problem? The science backing these things up is thin, and their performance is highly debated in the industry. Unlike ion-exchange softeners or TAC conditioners, there are no real standards or certifications to prove they actually work. For results you can count on, you’re much better off sticking with proven technology. Even for small appliances, targeted solutions are key, which is why it's worth learning about specific water filters for preventing limescale where it matters most.
Picking out a water filtration system is a huge first step, but the journey doesn't end with the price tag. The real commitment comes with installation, ongoing maintenance, and what I call the "total cost of ownership"—what you'll actually spend over the system's entire life.
Figuring this out upfront means no nasty surprises down the road. Let’s walk through what you can realistically expect after you've made your choice, from getting it set up to keeping it running like a champ.
Once you have your new water softener or conditioner, you've got two roads to take: roll up your sleeves and DIY, or call in a professional plumber. Your decision really boils down to how comfortable you are with basic plumbing and the complexity of the unit you bought.
A DIY install can definitely save you a few hundred bucks if you're handy. Most systems come with pretty good instructions, and the job typically looks something like this:
If the thought of cutting pipes gives you a headache, hiring a pro is the stress-free route. A licensed plumber will make sure everything is installed correctly and up to code, which is great for peace of mind. You won't have to worry about leaks or performance problems.
Expect professional installation to run anywhere from $300 to $800, depending on how tricky your plumbing setup is and local labor rates.
Keeping your system in peak condition is pretty straightforward, but it does need some regular love. The to-do list changes based on what kind of system you have. For a traditional ion-exchange water softener, you'll be the most hands-on.
You’ll want to check the salt level in the brine tank about once a month and top it off as needed. A good rule of thumb is to keep the tank at least one-third full of salt pellets. For a typical family, this usually means adding a 40-pound bag of salt every couple of months.
Beyond just adding salt, it's a smart move to clean out the brine tank once a year. Over time, junk from the salt can create a "salt bridge" or a layer of sludge at the bottom, which can clog things up and stop the system from regenerating properly.
The resin bed—the real heart of the softener—is incredibly tough and can last 15 to 20 years with good care. If you have a lot of iron or chlorine in your water, though, using a special resin cleaner once a year will help it last even longer and work more efficiently.
Salt-free conditioners, on the other hand, are the champs of low maintenance. No salt, no electricity, no drain line. The internal media is built to last for years—often 6 to 10 years—before you even have to think about replacing it.
To really make a smart decision, you need to look at the whole financial picture. The sticker price is just the starting line. The total cost of ownership includes the unit itself, installation, and all the ongoing expenses.
A quality water softener can cost anywhere from $800 to over $2,500 for the unit alone. Factor in professional installation, and your upfront investment might be closer to $1,200 to $3,300. From there, your main ongoing cost is salt, which will likely run you $100 to $200 per year.
While that might sound like a lot, the payoff is huge. A 2023 study found that a whole-house water softener can cut your soap and detergent use by up to 50%, saving the average family $150 a year. Even better, it can extend the lifespan of appliances like water heaters by 30%, saving you from a premature replacement that could cost over $1,000. If you want to dive deeper into how water quality affects homes, you can explore the full findings on water stress.
Salt-free conditioners have a similar upfront cost but have almost zero ongoing expenses, saving you cash on salt and water. Reverse osmosis systems have their own costs, mainly filter replacements, which can range from $50 to $150 per year. By weighing these lifetime costs, you can pick a system that gives you great water without breaking the bank.
Deciding on a water treatment system is a big move, and it's totally normal to have some questions floating around before you commit. Once you start digging into how to fix hard water, you run into all sorts of myths and common worries. Let's tackle them head-on so you can feel good about your decision.
This is the first thing everyone asks, and I get it. The good news? No, it won't. A properly working water softener uses salt, but only to clean itself. That salty brine solution gets flushed right down the drain during the regeneration cycle—it never makes it to your tap.
A tiny bit of sodium does get swapped for the hard minerals, but we're talking a minuscule amount. To put it in perspective, an 8-ounce glass of softened water has less sodium than a single slice of white bread. Honestly, most people can't taste the difference at all.
You bet. For the overwhelming majority of people, softened water is perfectly fine for drinking, cooking, and everything else. The only exception might be for someone on a very strict, doctor-ordered, low-sodium diet.
If that's a concern for you, or if you just want the purest water possible, the gold-standard setup is a whole-house softener paired with a reverse osmosis (RO) system under the kitchen sink. The softener protects your pipes and appliances from scale, and the RO filter takes care of the drinking water, removing the trace sodium and just about everything else.
Here's a simple way to think about it: The whole-house softener is for your house. The reverse osmosis system is for your body.
Sizing a softener has nothing to do with your home's square footage. It’s all about two things: how much water you use and how hard that water is. A system that's too small will run itself ragged trying to keep up, regenerating constantly and burning out way too soon. Go too big, and you've just spent more money upfront than you needed to.
To nail the right size, you just need two key numbers:
Now for the simple math: multiply those two numbers together. For that family of four with water that’s 10 GPG, you'd get 3,000 (300 gallons x 10 GPG). This means you need a system that can remove at least 3,000 grains of hardness each day. Softeners are rated by their total grain capacity (like 32,000-grain or 48,000-grain), which tells you how much hardness they can pull out before they need to regenerate.
This is one area where you need to be a little strategic. Most houseplants and garden veggies aren't big fans of sodium. Over time, watering with softened water can cause salt to build up in the soil, which can stunt their growth or even kill them.
Thankfully, the fix is incredibly simple. When a softener is installed, the plumber should always set it up to bypass the outdoor hose bibs. Most systems also come with a built-in bypass valve. This gives you the best of both worlds: soft water inside for your showers and appliances, and the untreated hard water your garden needs—which still has the calcium and magnesium that plants actually like.
At Water Filter Advisor, our goal is to cut through the confusion and give you clear, practical information to find the right water solution for your home. From our in-depth guides to unbiased reviews, we’re here to help you get safer, better-tasting water. Explore all of our resources today at https://www.waterfilteradvisor.com.

The first step in well water sulfur smell removal is figuring out what’s causing that awful rotten egg smell. The culprit is almost always hydrogen sulfide gas (H₂S), a sneaky compound that can come from naturally occurring sulfur deep in your groundwater or from bacteria throwing a party in your plumbing.
Don't worry—while the smell is a massive nuisance and can even corrode your pipes over time, it's a completely fixable problem. With the right water filtration approach, you can banish that stench for good and get back to enjoying fresh, clean water.
If your well water suddenly smells like it's been hard-boiled and left in the sun, you're not alone. That unmistakable odor is one of the most common complaints we hear from homeowners on private wells. It comes from a gas called hydrogen sulfide, and even in microscopic amounts, it makes its presence known every time you turn on a faucet.
So where is this stinky invader coming from? There are two usual suspects:
Before you can choose the right filtration system, you have to play detective. Is the smell only coming from the hot water, or both hot and cold? Does it show up right away, or only after the water has run for a bit?
These answers are the critical clues. A problem isolated to your water heater, for instance, needs a completely different (and much cheaper) fix than an issue starting deep within your well that requires a whole-house filtration solution.
Hydrogen sulfide (H₂S) is a widespread issue for well owners. A detailed analysis of over 100 studies found that H₂S levels become noticeable by smell at just 0.05 mg/L. The research also showed private wells have prevalence rates up to 30% higher than municipal systems because the water is untreated.
In the U.S. alone, the EPA estimates 15 million households use private wells, and some reports suggest that up to 25% of them deal with sulfur odors. You can dig into the specifics in the full research on hydrogen sulfide prevalence.
To help you narrow it down quickly, here's a simple diagnostic chart focused on filtration-first thinking.
| Symptom | Likely Source | First Action Step |
|---|---|---|
| Smell is only in the hot water. | Bacteria in the water heater. | Turn up the water heater's temperature or consider a shock chlorination of the tank. |
| Smell is in hot and cold water, but fades after a few minutes. | Bacteria in the well or plumbing. | Perform a well shock chlorination to see if the smell disappears. |
| Smell is in hot and cold water and is constant. | Hydrogen sulfide (H₂S) is present in the groundwater itself. | Get your water tested to confirm the H₂S concentration and select the right filtration system. |
| Smell is only at one or two faucets. | Bacteria is likely localized in the faucet aerator or drain. | Clean the aerator and the drain P-trap thoroughly. |
Figuring out whether your problem is geological or biological is the single most important step toward choosing the right filtration solution.
The bottom line is this: that awful sulfur smell is a clear signal from your water system that something needs attention. Once you’ve identified the likely cause, you can move on to a simple diagnostic test to confirm your suspicions and find the right filtration solution.
Before you can tackle that rotten egg smell for good, you need to do a little detective work. Pinpointing where the problem is coming from is the only way to choose the right water filtration solution. A few simple diagnostic tests you can do right at home will save you a ton of time, money, and frustration down the road.
Your first clue is the easiest one to get: just turn on a faucet and trust your nose. That smell—or the lack of it—is your most powerful piece of evidence. I always tell homeowners to think of their plumbing as having three main zones: the well itself, the pipes running through the house, and the water heater. Any one of them could be the culprit.
This is, without a doubt, the most important test you can run. It’s a game-changer that immediately narrows down the suspects and points you toward the right fix.
Just head to the faucet closest to your water heater and run only the cold water for a minute or so. Do you smell it?
Now, switch over to the hot water. Let it run until it’s fully heated up, then give it another sniff. The difference you notice is the key.
Okay, so you’ve found the smell in both hot and cold water. There’s one more quick test to try. Turn on a cold-water faucet and fill up a glass. Smell the water in the glass right away. Then, walk into another room, away from the sink, and smell it again after a minute.
If that rotten egg odor was strong at first but seems to disappear pretty quickly, that's a good sign the hydrogen sulfide is being produced by bacteria within your plumbing. The gas simply dissipates once it hits the open air.
But if that smell stays strong and pungent, even away from the tap, the hydrogen sulfide is dissolved in the groundwater itself. This means the problem starts at the source—your well—and you’ll need a whole-house filtration system to fix it.
This chart can help you visualize how these simple tests guide your diagnosis.

As you can see, figuring out if the smell is in the hot, cold, or both is the critical first step to finding where the problem lies.
While these at-home "sniff tests" are fantastic for getting you started, they can't provide the one thing you absolutely need for a permanent fix: hard data. Getting a professional water test from a certified lab is your most powerful weapon in this fight.
A lab test doesn't just confirm that you have hydrogen sulfide; it measures the exact concentration in milligrams per liter (mg/L). This number is absolutely crucial for choosing a filtration system that’s strong enough for your water but isn't expensive overkill.
The lab will also check for other common well water troublemakers like iron and manganese, which often show up alongside sulfur. I've seen it countless times: someone buys a filtration system that works great for hydrogen sulfide, but it fails completely because high iron levels were never addressed. Skipping the professional water test is like trying to build a house without a blueprint—it’s just a recipe for costly mistakes and a smell that keeps coming back.
When that rotten egg smell hits, you want it gone yesterday. While a whole-house filtration system is often the long-term answer, you can get some serious relief right now by focusing on the most common culprit for a "hot water only" stench: your water heater.
Think of your water heater tank as the perfect incubator for sulfate-reducing bacteria. It's warm, dark, and low on oxygen—everything they need to thrive. As they multiply, they pump out hydrogen sulfide gas, which gets released the second you turn on a hot water tap.

Here's a pro-tip that solves this problem for a surprising number of people: check your anode rod. Most water heaters are sold with a standard magnesium anode rod. Its entire job is to sacrifice itself by corroding, which protects the steel tank from rusting out.
The catch? The chemical reaction from the corroding magnesium rod essentially supercharges the sulfate-reducing bacteria. It's like giving them an energy drink.
The fix is often as simple as swapping that magnesium rod for an aluminum/zinc alloy rod. The zinc is toxic to the bacteria, cutting off their power source and stopping the stinky chemical reaction cold.
For the handy homeowner, this is a very doable weekend project. It just requires shutting off the power and water to your heater first. If that sounds a bit out of your comfort zone, any plumber can knock it out for you in no time.
If a new anode rod doesn't quite do the trick, or you just want to completely reset the system, a deep clean is your next move. Flushing and disinfecting the tank will wipe out the entire bacterial colony that’s taken up residence.
Here’s the basic game plan:
If you suspect your water heater is the source of the problem or you're weighing your options, getting help from professional water heater services can give you a clear diagnosis and a fast, reliable fix.
What if the smell is in your cold water, too, but it seems to clear up after running the tap for a minute? That’s a classic sign the bacteria are living in the well itself or somewhere in your plumbing.
When this happens, shock chlorination is a powerful—though often temporary—solution. It involves pouring a high concentration of chlorine bleach directly into your well to disinfect the entire system from top to bottom. This is a much bigger job than cleaning a water heater and requires careful calculations to get the dosage right without overdoing it.
Keep in mind, shock chlorination is more of a reset button than a permanent filtration fix. If the bacteria are constantly seeping into your well from the surrounding aquifer, the smell will eventually return. It cleans the slate but doesn't solve the underlying problem.
So your water tests confirmed the rotten-egg smell is coming from the well itself. This means you've moved past temporary fixes and are ready for a permanent solution: a whole-house filtration system. This is the point where you invest in a system that cleans your water right as it enters your home, ensuring every faucet delivers fresh, odor-free water.

I know the sheer number of options can feel overwhelming. But here's the key: your decision should always come back to your water test results. The amount of hydrogen sulfide (H₂S), along with other common culprits like iron and manganese, will point you directly to the best technology for your situation. Let's look at the most common workhorses for well water sulfur smell removal.
Think of an AIO system as using a simple, powerful trick: oxidation. It's an elegant, single-tank setup that creates a pocket of compressed air at the top. When your well water flows through, it gets a shot of this oxygen, which instantly changes the dissolved hydrogen sulfide gas into solid sulfur particles.
Basically, it turns an invisible, stinky gas into tiny, filterable solids. The system’s filter media then easily catches these particles. Every so often, the system cleans itself out with a backwash cycle, flushing the trapped sulfur down the drain and refreshing its air bubble.
AIO systems are a fantastic choice for:
An air injection system can be a powerful cornerstone of your whole-house setup, offering a robust, self-managing solution for multiple water quality headaches at once.
If you're up against seriously high levels of hydrogen sulfide or have a stubborn bacteria problem, it's time to bring in the heavy artillery. Chlorination is a more aggressive method that uses a chemical feed pump to inject a very specific dose of chlorine into your water.
The chlorine is a potent oxidizer, knocking out H₂S on contact and killing any sulfur or iron bacteria in the process. From there, the water sits in a contact tank to give the chlorine time to work its magic. The final step is a carbon filter that strips out any leftover chlorine, taste, and odor, leaving you with purified water.
While it’s a more involved setup, chlorination is hands-down the most powerful tool for severe sulfur and bacteria issues. It’s the go-to solution when H₂S levels climb above 10 mg/L or if you’re also fighting a recurring bacteria problem.
The main ongoing task with this system is keeping the chemical solution tank filled. But for really tough water, its effectiveness is unmatched.
At first glance, a catalytic carbon filter looks just like a standard carbon filter, but it has a secret advantage. The carbon media inside has been specially treated to create a highly reactive surface. This "catalytic" surface turbocharges the reaction that turns hydrogen sulfide gas into harmless solid sulfur.
Once converted, these solid particles get trapped within the carbon's massive network of internal pores. This approach is incredibly effective for lower H₂S concentrations, typically in the 1-4 mg/L range.
The biggest draw here is simplicity. It's a single tank with no chemicals and very little maintenance besides the automatic backwashing cycles. The trade-off is that the carbon media will eventually wear out and need to be replaced, usually every 3-5 years, based on your water chemistry and how much water you use. It's an excellent "set it and forget it" choice for mild sulfur smells.
Here’s a side-by-side comparison of the most popular whole-house filtration methods for hydrogen sulfide, helping you choose the best fit for your home's needs and budget.
| Filtration Method | Best For (H₂S Level) | Pros | Cons | Estimated Cost |
|---|---|---|---|---|
| Air Injection (AIO) | Moderate (2-10 mg/L) | Chemical-free, low maintenance, also great for iron removal. | May not work on very high H₂S levels; needs a drain for backwashing. | $1,000 – $2,500 |
| Chlorination System | High (10+ mg/L) | Extremely effective on high sulfur and bacteria; kills microorganisms. | Needs ongoing chemical refills; more complex, multi-component installation. | $1,500 – $3,000+ |
| Catalytic Carbon | Low (< 4 mg/L) | Simple setup, no chemicals, very effective for low-level odors. | Filter media must be replaced periodically; not ideal for high iron. | $800 – $1,800 |
Choosing the right filtration system is a major step toward finally solving your water problems for good. Use your water test as your guide, and you can confidently pick the technology that will deliver the most effective well water sulfur smell removal for your home.
You’ve done the hard work—you’ve tested your water, weighed the options, and finally picked the right whole-house filtration system to knock out that sulfur smell. But the job isn't done yet. Getting the system installed properly and sticking to a simple maintenance routine is what separates a long-term solution from a temporary fix. Think of your new filter as a serious investment in your home's water quality; a little care goes a long way in protecting it.
Whether you're breaking out the toolbox yourself or calling in a local pro, the placement is non-negotiable. The filtration system needs to be installed on your main water line, right after the pressure tank but before the line tees off to your water heater and the rest of the house. This setup ensures that every single drop of water, hot or cold, gets treated before it reaches a tap.
If you're comfortable with basic plumbing, installing a single-tank catalytic carbon or an AIO filter can be a manageable weekend project. It typically involves cutting into your main water line, fitting the in/out connections, and setting the control valve's regeneration schedule. One pro tip I always give DIYers: make sure you install a bypass loop. This simple set of valves lets you shut off the water flowing to the filter for maintenance without turning off the water to your entire home.
That said, for more complex setups like a full-blown chlorination system, hiring a professional is almost always the better call. These systems have a lot of moving parts—chemical pumps, contact tanks, and delicate calibration—that need to be just right. A good water treatment specialist will not only install it by the book but will also fine-tune it to your home's specific flow rate and water pressure for peak performance.
A flawless installation is your first line of defense against future problems. An incorrect setup can lead to pressure drops, leaks, or even prevent the system from performing well water sulfur smell removal effectively.
A water filtration system isn't something you can just set and forget. It's working hard 24/7, and it needs a little TLC to keep doing its job. Luckily, most of the upkeep is straightforward and easy to schedule.
It’s just like changing the oil in your car—a small, proactive task that helps you avoid a huge, expensive headache down the road. Letting maintenance slide is the surest way to invite that rotten egg smell right back into your life. I once visited a homeowner whose AIO system failed after just a year. The culprit? He'd never once run a manual backwash cycle to flush out the gunk. The filter media was completely choked with sulfur and iron, rendering it useless.
Here’s a quick-glance maintenance checklist for the most common sulfur removal systems:
Air Injection (AIO) Systems:
Chlorination Systems:
Catalytic Carbon Filters:
Look, tackling a sulfur smell can be a really satisfying DIY project. There’s a certain pride in fixing your own water. But there are absolutely times when you need to put down the wrench, pick up the phone, and call in an expert. Knowing when to make that call can save you a ton of headaches, money, and time.
If your water test results come back looking like a complex chemical cocktail—say, sky-high hydrogen sulfide levels mixed with a heavy dose of iron and manganese—you're officially in professional territory. An off-the-shelf filter from a big-box store just isn't going to cut it here. This kind of water chemistry demands a custom-designed, multi-stage system, and that's something an expert needs to spec out to avoid creating new issues, like a massive drop in your water pressure.
Recurring problems are another huge red flag. Have you shock-chlorinated your well, only to have that rotten egg smell creep back a few weeks later? Then you do it again, and it comes back again? That points to a persistent, underlying issue that a professional needs to diagnose.
It also just comes down to comfort level. If you're not confident cutting into your plumbing or you're unsure how to properly integrate a whole-house filtration system, hiring a pro is the smart move. It’s all about peace of mind.
A certified water treatment specialist isn't just selling you equipment; they're providing a complete solution. They can spot underlying problems with the well itself, correctly size a system for your home's specific flow rate, and make sure the installation is done right the first time.
When you start looking for a professional, keep an eye out for certifications. A specialist certified by the Water Quality Association (WQA) has demonstrated their expertise and is bound by a strict code of ethics. Don't ever feel shy about interviewing them before you hire them.
Bringing in the right expert turns the challenge of well water sulfur smell removal from a stressful guessing game into a smart, confident investment in your home's water quality.
Even when you have a solid plan, questions are bound to pop up, especially when you're dealing with something as frustrating as that rotten egg smell. Let's tackle a few of the most common concerns homeowners have about well water sulfur smell removal so you can feel confident moving forward.
The short answer is yes, it's generally safe. At the levels you typically find in a household well, hydrogen sulfide (H₂S) is more of a nuisance than a real health threat. For most people, drinking it won't cause any issues, though some with sensitive stomachs might experience a bit of an upset. Showering in it doesn't pose a direct health risk, either.
That said, long-term exposure can leave you with dry, irritated skin and has a nasty habit of stripping color from dyed hair. And let's be honest, that lingering smell on your skin and hair really kills that fresh-out-of-the-shower feeling.
The biggest risk from sulfur in your water isn't actually to your health—it's to your home. Hydrogen sulfide gas is corrosive. Over time, it will eat away at copper and brass pipes, plumbing fixtures, and appliances, leading to some pretty expensive repairs down the road.
This is a classic misconception, and I hear it all the time. A standard salt-based water softener is built to do one thing: remove hardness minerals like calcium and magnesium. It isn't designed to deal with dissolved gases like hydrogen sulfide.
While some softeners might slightly reduce a very faint odor, they are absolutely not the right tool for a noticeable sulfur problem.
In fact, trying to make your softener do a job it wasn't built for will likely foul the resin bed, damaging the system and potentially making your water quality even worse. To get a real, lasting fix, our water filtration advice can guide you to the technology that actually targets your specific problem. It all comes down to using the right tool for the job.
Ready to enjoy fresh, odor-free water from every tap? At Water Filter Advisor, we provide the expert guides and unbiased reviews you need to choose the perfect filtration system for your home. Explore our resources today at https://www.waterfilteradvisor.com.

Ever stared at your tap water and wondered what's really in it? You're not alone. When you dive into the world of clean water, you'll h ...
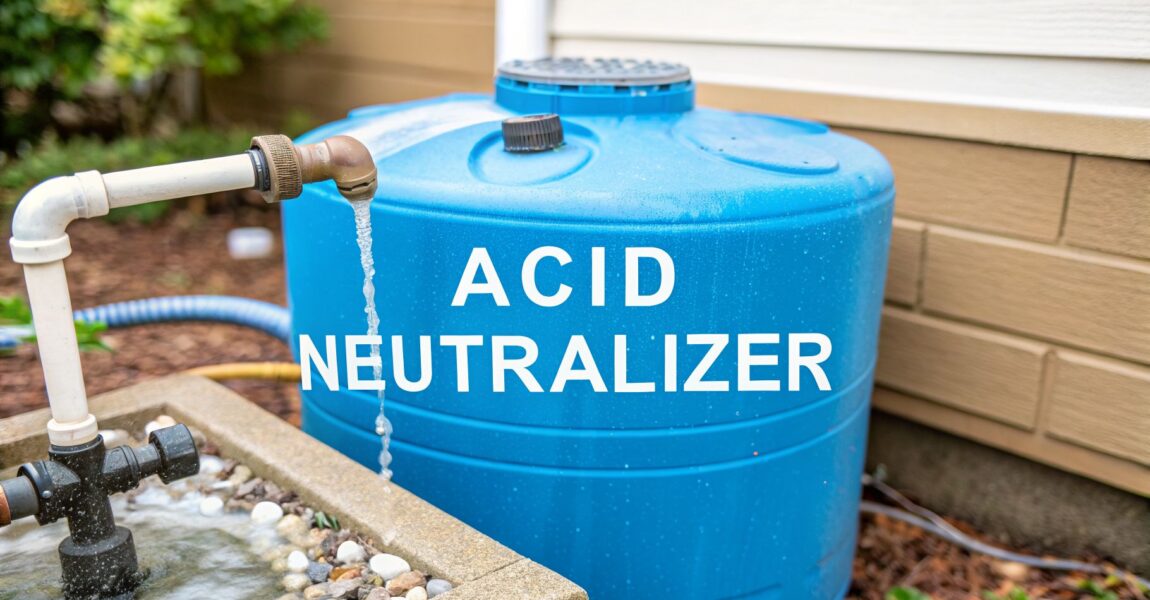
A well water acid neutralizer is a whole-house filtration system that does one thing exceptionally well: it raises the pH of acidic water. Think of it as a mighty, 24/7 bodyguard for your home’s plumbing. It uses natural minerals to get your water chemistry back in balance, protecting your pipes and appliances from the silent but costly damage of corrosion.

Have you spotted those sinister blue-green stains crashing the party in your sinks, tubs, and toilets? That's not just a cleaning nuisance; it's a neon sign screaming that there's a much bigger problem brewing. It's physical proof that acidic water is literally dissolving your copper pipes from the inside out.
For anyone on a private well, acidic water is a common villain that can turn into a serious financial drain. If you ignore it, you’re looking at an unwelcome future of pinhole leaks springing up in your pipes, expensive appliances like water heaters and dishwashers dying young, and even a sharp, metallic tang in your drinking water.
But here’s the good news: there's a straightforward and permanent fix. A well water acid neutralizer is the definitive hero because it tackles the problem right at the source, before a single corrosive drop enters your home. This isn’t a temporary patch; it's a smart investment that protects your entire plumbing system.
Imagine your home's plumbing as its circulatory system. Acidic water is a constant irritant, slowly eating away at this vital network. A neutralizer system is installed right where the water line comes into your house, making sure every tap, shower, and appliance gets balanced, non-corrosive water.
This single system offers several layers of defense:
At its heart, an acid neutralizer works by adding beneficial minerals back into the water. As acidic water flows through a tank full of natural media like calcite, it safely dissolves these minerals, and that simple process raises the pH to a safe, neutral level.
The process is both brilliantly simple and incredibly effective. Instead of waiting to deal with the expensive mess of damaged pipes, you proactively treat the water itself. For more on different water quality issues, you might find our general water filtration advice page helpful.

To get a handle on how a well water acid neutralizer protects your home, just picture it as a tough-as-nails bodyguard for your pipes. It’s not some complicated piece of high-tech machinery; it’s actually a brilliant system that runs on simple, reliable chemistry. Its only job is to intercept aggressive, acidic water as it enters your house and fix its pH before it can eat away at your plumbing.
The whole process is surprisingly simple. Your well water, with a pH below 7.0, flows into the neutralizer tank and passes through a bed of special minerals. These minerals are "sacrificial," meaning they are designed to slowly dissolve as the acidic water flows over them.
That dissolving action is the magic right there. As the minerals break down, they neutralize the acid and raise the water’s pH back up to a safe, non-corrosive level. It’s this simple reaction that puts a stop to those telltale blue-green stains on your fixtures and prevents tiny pinhole leaks from springing up in your copper pipes. Left untreated, acidic water can wreck your home’s plumbing, leading to expensive headaches that require professional pipe repair and replacement services.
At its heart, the science is pretty elegant. The tank basically mimics a natural limestone spring, adding back essential minerals that the acidic rainwater washed away. This one chemical reaction is what makes every acid neutralizer tick.
There are two main types of mineral media used to get the job done, and which one you need depends entirely on how acidic your water is.
This controlled dissolving doesn't just raise the pH. It also puts a small amount of healthy minerals like calcium and magnesium back into your water. As a side effect, this does make the water slightly harder, but that’s a small price to pay for stopping corrosion in its tracks.
While the chemistry is the same, the mechanics can differ. Acid neutralizers come in two main designs, and the right one for your home depends on what else is in your water besides just low pH.
1. Upflow Neutralizers
In an upflow (or non-backwashing) system, water enters at the bottom of the tank and flows upward through the mineral bed. This constant upward flow gently lifts and swirls the media, which stops it from getting packed down or creating "channels" where water just drills a single path through, missing most of the minerals. These systems are simple, use no electricity, and don't need a drain line, making them a great fit for well water that's already clean and free of sediment or iron.
2. Backwashing Neutralizers
If your well water has iron, manganese, or sediment in it, a backwashing system is non-negotiable. This setup includes a control valve that automatically reverses the water flow on a set schedule. This powerful backwash cycle is like hitting the reset button—it forcefully lifts, scrubs, and resettles the entire mineral bed.
This cleaning cycle is absolutely crucial. It flushes out all the trapped gunk like sediment and iron that would otherwise clog up the media and make it useless. It also re-sorts the mineral bed, ensuring that water always makes even contact for consistent pH correction.
More and more homeowners are recognizing the need for these systems. The global market for acid neutralizers was valued at around $1,433 million USD and is expected to climb to $2,209 million USD by 2031, growing at a steady clip of 6.4%. This growth is all about people becoming more aware of how much water quality affects their homes. As the market expands, we're seeing more advanced and efficient options become available for everyone.
So, you suspect something is off with your water. How can you be sure acidic water is the silent culprit behind your plumbing woes? Before you start shopping for a well water acid neutralizer, it’s a good idea to play detective in your own home. The clues are often hiding in plain sight.
Acidic water is naturally aggressive. As it travels from the ground to your tap, it acts like a solvent, dissolving tiny amounts of everything it touches. When "everything" is your home's copper or iron plumbing, the results start to become very, very visible. These aren't just cosmetic annoyances; they're warning signs that your pipes are slowly being eaten away from the inside out.
The most classic and tell-tale sign of acidic water is the appearance of blue-green stains on your fixtures. You’ll spot these distinct streaks in white porcelain sinks, bathtubs, and around drains. This isn’t soap scum—it’s the signature calling card of copper being leached from your pipes and deposited on your surfaces.
Of course, the color of the stain really depends on what kind of pipes you have.
Beyond staining, you might even start to notice pinhole leaks in your copper pipes. These tiny, frustratingly hard-to-find leaks are a direct result of long-term acid corrosion and can lead to some serious water damage if you don’t catch them.
Sometimes the evidence is something you can taste or feel, not just see. Because acidic water carries dissolved metals along for the ride, you might pick up on a distinct, unpleasant flavor when you take a drink.
If your water has a sharp, metallic, or slightly bitter taste, that's a huge clue. That flavor is coming from the elevated levels of copper, iron, or other metals that have been leached from your plumbing system.
You might also notice other subtle things, like your hair feeling brittle or looking dull after you wash it. Some people even report a weird "squeaky" feeling on their skin that isn't from being clean, but from the water's low pH stripping away natural oils.
While all these signs are strong indicators, they aren't a definitive diagnosis. The only way to know the exact pH of your water and confirm the problem is to test it. This step is absolutely non-negotiable before you invest in any kind of treatment system.
You’ve got two main options for testing.
It can be a little overwhelming to piece all these clues together. Here’s a quick reference table to help you connect the dots between what you're seeing and what it means for your well water.
| Symptom | What It Looks Like | What It Means |
|---|---|---|
| Blue-Green Stains | Streaks or rings on sinks, tubs, and around drains. | Copper is leaching from your pipes. |
| Rust-Colored Stains | Reddish-brown marks on fixtures, toilets, and laundry. | Iron is leaching from galvanized pipes. |
| Pinhole Leaks | Tiny, hard-to-find drips or wet spots on copper pipes. | Long-term acid corrosion has eaten through the pipe. |
| Metallic Taste | Water tastes like metal, bitter, or just "off." | Dissolved metals (copper, iron) are present in the water. |
| Dull/Brittle Hair | Hair feels weak and lacks shine after washing. | The low pH water is stripping natural oils. |
Seeing one or more of these signs is a very strong signal that it's time to get your water tested.
1. DIY Test Strips
These are simple, cheap strips you just dip into a water sample. They’ll give you a quick and easy pH reading, which is great for getting a general idea of where you stand. Think of it as a preliminary check.
2. Comprehensive Lab Tests
For a truly accurate picture, sending a sample to a certified water testing lab is the way to go. A lab test will give you a precise pH number and will also check for other important factors like hardness, iron, and—critically—the specific levels of dissolved copper and lead.
A pH reading below 7.0 is considered acidic, but for well water, any reading below 6.8 should be a real cause for concern. That's a strong signal that you need to find a solution.
You're not alone in this, by the way. The global acid neutralizer system market was estimated at around $800 million USD and is expected to grow to over $1.4 billion by 2033. That growth shows just how many homeowners are turning to these systems to solve the exact problems you might be seeing. You can discover more about this growing market and see just how common this issue is. Taking action to fix acidic water is a necessary step for millions of well owners.
Picking the right well water acid neutralizer is a lot like choosing an engine for a truck. Too small, and it’ll struggle under a heavy load. An undersized system can’t keep up, leading to low water pressure, incomplete pH correction, and the constant headache of refilling the media.
You want to get this right the first time. The goal is to find a system that perfectly matches your home's water demand and your well's specific chemistry. That’s how you solve your acidic water problem for good, without accidentally creating new ones.
The single most important number you need is your home’s peak flow rate, measured in gallons per minute (GPM). Think of it as your household’s "rush hour" water usage—that moment when the shower is running, the dishwasher is on, and someone starts a load of laundry.
If your neutralizer can't handle that peak demand, it becomes a bottleneck. Water pressure drops, and you're left with a frustrating trickle from the tap.
Here’s a quick way to get a ballpark estimate of your needs:
Add it all up, and you’ll have your target GPM. A home with two bathrooms, a kitchen, and laundry could easily demand 7-10 GPM at its peak. Always pick a system rated for your calculated peak flow rate to keep your water pressure strong and steady.
Once you know your flow rate, it’s time to pick a tank. The tank's size, usually measured in cubic feet, determines how much neutralizing media it can hold. This directly impacts how often you’ll be hauling bags of calcite to refill it.
Two main things affect how fast you’ll burn through media:
Opting for a larger tank means less frequent maintenance. For a typical family, a properly sized system might only need a top-off once a year.
This decision tree breaks down the common signs that point to acidic water.
As you can see, while stains and a metallic taste are huge red flags, nothing beats a real water test to get an exact pH reading and confirm what you're dealing with.
The final piece of the puzzle is choosing between an upflow (non-backwashing) and a backwashing system. Your decision here hinges entirely on your water quality, especially if you have any iron or sediment.
Making the right call between these two types is crucial for the long-term health of your system.
| Feature | Backwashing System | Upflow (Non-Backwashing) System |
|---|---|---|
| Best For | Water with iron, manganese, or sediment. | Clean, clear water with no iron or sediment. |
| How It Works | Periodically reverses water flow to "fluff" and clean the media bed. | Water flows upward through the media, preventing it from packing down. |
| Media Clogging | Prevents clogging by flushing out trapped contaminants. | Prone to clogging if iron or sediment is present. |
| Installation | Requires a drain line and an electrical outlet for the control valve. | Simpler installation with no need for a drain or electricity. |
| Maintenance | Higher upfront cost but protects media from fouling. | Lower upfront cost, but can fail if used with the wrong water quality. |
A backwashing system is non-negotiable if you have any iron, manganese, or grit in your water. It automatically cleans the media bed, preventing it from turning into a solid, useless block.
On the other hand, if your well water is crystal clear, an upflow system is a fantastic, simpler choice. It doesn't need a drain or electricity, making for a straightforward installation.
Homeowner awareness of water quality issues continues to grow, driven by environmental concerns and regulations. The broader industrial water treatment market was valued at $24.86 billion USD and is expected to reach $32.74 billion by 2031. This trend benefits residential consumers by leading to better products and more reliable solutions for issues like acidic well water. Learn more about the drivers of the water treatment market on Wise Guy Reports.

So, you're thinking about a well water acid neutralizer. Does that mean you’re signing up for another complicated appliance to babysit? Not at all. These systems are actually designed to be pretty hands-off, quietly doing their job in the background. Let's walk through what installation looks like and the simple upkeep needed to keep it running right.
While you can technically DIY the installation, I almost always recommend calling in a pro. They’ll make sure it's hooked up without leaks or pressure problems. The neutralizer gets installed at your home's "point of entry"—that’s right after your well's pressure tank and before the water heater. Putting it here ensures all the water flowing into your house gets treated first.
If your water has any iron or sediment (which is common), you'll need a backwashing model. For that, the installer will also run a drain line. This is just for the system to automatically flush itself clean every so often, washing away all the gunk it has trapped so the media bed stays fresh.
The main job you’ll have is topping off the mineral media. This is the stuff that does all the work, and because it’s designed to dissolve as it neutralizes the acid, it needs to be replenished. It’s a lot like adding salt to a water softener—a simple but necessary chore.
Most tanks have a fill port right on top, making it easy to add more media. The trick is to just peek inside every so often to check the level. As a rule of thumb, you want the tank to stay at least two-thirds full to get consistent pH correction.
How often will you be doing this? It really depends on how acidic your water is, how much water your family uses, and the size of your system. For a typical family, it’s usually a once-a-year task. I tell people to get in the habit of checking it every six months just to be safe.
When it's time to refill, it’s a straightforward job you can definitely handle yourself.
Pro Tip: After you’ve refilled the media, run a manual backwash cycle. This rinses any dust off the new minerals and helps the whole bed settle properly, getting it ready to go back to work.
Beyond adding media, there's not much else to do. If you have a backwashing model, the control valve is the brain of the system, and those things are built to last for years without any fuss.
Your only other task is to make sure the timer is set correctly for the backwash cycle—usually programmed to run once or twice a week in the middle of the night. Every now and then, take a quick look for any drips around the fittings, but a professionally installed unit should stay watertight for a long, long time. With just that little bit of attention, your neutralizer will be protecting your pipes for years to come.
Even after you’ve got a handle on how these systems work, a few questions always seem to come up. That’s totally normal—you want to be sure you're making the right call for your home. Let's run through some of the most common things homeowners ask us so you can feel completely confident.
We'll cover everything from water hardness and taste to how long your media will actually last. Think of this as the final check-in before you move forward.
This is probably the number one question we get, and for good reason. The simple answer is yes, an acid neutralizer will add some hardness to your water. But it’s important to understand what that actually means for your home.
The whole point of neutralization is to dissolve minerals—calcite (calcium carbonate) and sometimes magnesium oxide—into your water to raise its pH. Those are the very same minerals that cause water hardness. So, as the system does its job, it is, by definition, making the water harder.
For most people with slightly acidic water (think pH 6.0-6.8), the increase is pretty minor. You might not even notice it. But if your water is really acidic (below 6.0), the system has to work overtime, dissolving a lot more media. That can definitely push your water into the "hard" category. The fix is simple: just install a water softener after the acid neutralizer.
The Perfect Pair: An acid neutralizer followed by a water softener is the classic one-two punch for well water. The neutralizer saves your pipes from corrosion, and the softener steps in to remove the extra hardness. You end up with perfectly balanced water that’s safe for your plumbing and feels great.
This two-step setup solves the big problem (corrosion) without creating a new one (scale buildup).
The minerals inside your tank are "sacrificial," meaning they get used up over time as they neutralize the acid. So, how fast will you burn through it? The lifespan of your media really boils down to three things:
For a typical family with moderately acidic water, you can expect to top off the media about once a year. It’s a good habit to pop the lid and check the level every six months just to be safe. As long as you keep the tank at least two-thirds full, you’ll be in great shape.
Yes, and almost always for the better! Acidic water often has that sharp, metallic taste. That's the taste of dissolved copper and other metals leaching from your pipes. By stopping the corrosion, an acid neutralizer gets rid of the source of that nasty flavor.
Most homeowners tell us that after installing a system, their water tastes cleaner and much fresher—more like natural spring water. The small amount of added calcium and magnesium can even give the water a smoother, more pleasant feel, but it shouldn't taste salty or chemical-like at all. The goal is just to get your water back to a clean, neutral state.
Look, it's tempting to save a few bucks on installation, but unless you're very comfortable with plumbing, this is one job best left to a pro. A proper installation is key to making sure the system works right and doesn't create new headaches.
A professional plumber will make sure:
A bad installation can lead to big problems, like a serious drop in water pressure or, worse, a leak. Investing in a professional install is a smart move that ensures your system is protecting your home right from the start.
At Water Filter Advisor, we believe every homeowner deserves safe, clean water without all the guesswork. Our detailed guides and honest reviews are here to help you find the perfect fix for your home's unique water issues.
Take the next step toward better water by exploring our resources and buying guides at https://www.waterfilteradvisor.com.

Ever turn on your faucet and get hit with a smell that whisks you away to the local swimming pool? That powerful, chemical scent is almost always chlorine, and it’s coming straight from your tap.
It’s the number one reason people complain about a smell of chlorine in house, and it’s a direct result of how your city keeps its water supply safe for everyone. But just because it's common doesn't mean you have to live with it. The secret to kicking that smell to the curb lies in your water.

So, why is this pool chemical in your drinking water in the first place? For more than 100 years, chlorine has been the world's go-to disinfectant for public water systems. It’s incredibly cheap and brutally effective at wiping out the nasty germs that can make you sick.
Think of it this way: water has a long, winding journey from the treatment plant to your home. As it travels through miles and miles of pipes, it needs a bodyguard to keep it pure. Chlorine is that bodyguard, creating a protective barrier that kills off bacteria and viruses along the way. Your home is the final stop on its tour.
Have you ever noticed the chlorine smell is way more potent some days than others? You're not just imagining it. A few different things can cause the chlorine concentration in your water to spike temporarily.
The amount of chlorine in your water is carefully monitored. According to EPA standards, the maximum level allowed is 4.0 mg/L, but what you typically get at home is somewhere between 0.2–3.0 mg/L. For a lot of us, even the low end of that range is enough to cause that distinct, bleach-like smell. Discover more insights about chlorine in drinking water on frizzlife.com.
To help you narrow down where that smell is coming from, here’s a quick guide to common trouble spots.
This table can help you quickly figure out what's causing that chlorine odor by matching the location with common activities.
| Source Location | Common Activity | Why It Smells Stronger Here |
|---|---|---|
| Kitchen Sink | Washing dishes, filling a pot | The aeration from the faucet releases dissolved chlorine gas. |
| Bathroom Shower | Taking a hot shower | Hot water and steam cause chlorine to vaporize, concentrating the smell in a small space. |
| Washing Machine | Doing a load of laundry | The agitation and hot water used in a wash cycle can release a strong chlorine odor. |
| Dishwasher | Running a cleaning cycle | High-temperature water jets spray chlorinated water, releasing the gas inside the machine. |
This shows that while the source is always the water, certain activities and appliances can make the problem much more noticeable.
The problem isn’t just about an unpleasant odor in your drinking glass. When you do something like take a hot shower or run the dishwasher, the heat and steam work together to turn that dissolved chlorine into a gas.
This process, known as volatilization, releases chlorine straight into the air inside your home.
All of a sudden, the issue isn't confined to your water. It’s in the air you and your family are breathing in the bathroom and kitchen, which can really impact your home's air quality and overall comfort. For anyone with sensitivities, this airborne chlorine can be especially irritating. The smell is the most obvious sign, but it’s really a signal that your water could be affecting your daily life in ways you haven't even considered. A simple water filter can fix this.
That swimming pool smell you're noticing isn't just a weird quirk of your tap water—it's your home's way of telling you something is off. While the smell of chlorine in the house is the most obvious sign, the effects ripple out into your daily life in ways that might surprise you, creating hidden costs and constant little annoyances.
Ever get out of the shower and immediately feel like you need to slather on lotion? That tight, itchy feeling isn't your imagination. Chlorine is fantastic at its job, but it can't tell the difference between bad stuff in the water and the natural oils that keep your skin and hair healthy. The result is chronic dryness, brittle hair, and irritated skin.
Your laundry is another victim. That same chemical slowly but surely bleaches the life out of your clothes. If you've noticed your vibrant colors looking dull and faded way too soon, the chlorine in your wash water is likely the culprit, forcing you to replace favorite items more often.
Things get a lot more interesting when you turn up the heat. A hot shower is the perfect environment for chlorine to go airborne, turning from a liquid into a gas you can inhale. As your bathroom fills with steam, you're breathing in more than just water vapor.
For anyone in your family with asthma, allergies, or other respiratory issues, that vaporized chlorine can be a real irritant to their airways.
Here's something else to consider: the issue isn’t always just the chlorine itself. When chlorine mixes with the tiny bits of organic matter that are naturally in water, it can create a whole new class of compounds called disinfection byproducts (DBPs). Your water utility works hard to keep these within safe limits, but many people prefer to add their own layer of protection at home.
This is where filtering your water comes in. A whole-house water filter doesn't just get rid of the annoying smell—it tackles the root cause of dry skin, faded laundry, and those airborne irritants all at once. It’s a single move that brings comfort and peace of mind back to your entire home.
So you’ve noticed that distinct smell of chlorine in house, and your first instinct is to blame the tap water. You might be right, but it's not always the whole story. Often, an unexpected partner in crime is lurking right under your sink: your everyday household cleaners.
Think about it. Many of the most common all-purpose sprays, disinfectants, and toilet bowl cleaners are bleach-based. When you start cleaning and mix these with other products—especially anything with a citrus scent like lemon or orange—you can accidentally kick off a chemical reaction right in your home. This reaction can release airborne particles that make that chlorine smell feel way more intense.
This is where things get tricky. Your tap water might be contributing a baseline level of chlorine, but your cleaning routine can act like a powerful amplifier, making it nearly impossible to figure out what's really causing the smell. You end up pointing the finger solely at the water when your cleaning products are actually making the problem much worse.
It turns out there's some real science behind this. A fascinating study from Bucknell University found that when bleach fumes meet citrus compounds (the technical term is limonene) under normal indoor light, they create what are called secondary organic aerosols. These are tiny particles that can really irritate your eyes, nose, and throat. The smell threshold for chlorine is already super low, but this chemical mix can make the odor you perceive—and the potential for irritation—much stronger. You can read more about the study on common cleaners and its interesting findings.
This is exactly why a whole-house water filter can be such a game-changer. By stripping the chlorine out of your water right where it enters your home, you completely eliminate that baseline chemical odor. Suddenly, it becomes much easier to tell if other things, like your cleaning supplies or even your HVAC unit, are the real culprits behind any lingering smells. If you're trying to track down a strange scent, it’s worth understanding why your AC smells and how different issues can sometimes be mistaken for one another.
Once you have clean, chlorine-free water, managing these secondary sources is a breeze. Just improving your ventilation by cracking open a window or switching on an exhaust fan while you clean can make a world of difference. It's a simple habit that helps disperse any chemical fumes, leaving your home feeling—and smelling—much fresher.
Before you can fix that lingering smell of chlorine in house, you need to put on your detective hat. Pinpointing the exact source is the crucial first step. It ensures you’re tackling the real issue instead of just taking a wild guess.
Thankfully, you don't need a forensics lab—a few simple DIY tests can give you all the clues you need.
The easiest place to start is what I call the "glass test." Just fill a clean glass with water from the faucet you suspect is the problem. Then, take the glass and walk into a different room, well away from the sink area. Now, give the water a sniff. This simple move isolates the water's scent from anything else that might be going on, like drain odors or leftover cleaning spray in the sink.
Next up, let's see if temperature makes a difference. Test your hot and cold water taps one at a time. First, run the cold water for about a minute and smell it. Then, do the exact same thing with the hot water.
Is the chlorine smell way more intense from the hot tap? That's a huge clue. Hot water makes it easier for dissolved chlorine to turn into a gas (a process called "volatilization"), which concentrates that swimming pool smell, especially in a small space like a shower.
If the odor is only strong on the hot side, it could point to a problem inside your water heater. Sediment buildup at the bottom of the tank can sometimes react with the chlorine in your water and make the smell worse. But if the smell is equally strong from both hot and cold taps, the culprit is almost certainly the water coming from your city's supply.
Sometimes, what your nose registers as chlorine is actually an imposter. In older homes, a musty, chemical-like odor can come from mold compounds that trick you into thinking you're smelling chlorine. When you're trying to track down a mysterious smell, getting accurate info from something like a guide for an air quality testing kit can be a big help. In fact, some Swedish studies of homes built before 1980 found that specific "mold odors" can easily be mistaken for chlorine.
This flowchart can help you trace that chemical smell back to its origin.

As you can see, the process helps you figure out if the smell is real, if it's a "smell-alike" like mold, or if it’s definitely coming from your water.
If you're ready to move past the sniff test and get some hard numbers, a home water testing kit is your best friend. These kits are incredibly simple to use and will tell you the exact concentration of free chlorine in your water.
You’ll generally find two types:
Once you run these simple diagnostics, you’ll have the evidence you need. Knowing for sure that chlorine is in your water—and at what level—gives you the power to move forward with confidence. From there, the next step becomes obvious: finding the right water filtration system to get rid of it for good.

Alright, you've pinpointed the source of that pesky chlorine smell. Now, let's talk about the most effective way to get rid of it for good: a solid water filtration system.
When it comes to battling chlorine, one material is the undisputed champ: activated carbon.
Think of activated carbon as a highly porous sponge, but on a microscopic level. It has an enormous surface area packed into a small space. As water passes through, the carbon uses a process called adsorption to essentially grab and hold onto chlorine molecules, trapping them so they can't get through to your tap. It’s a simple but incredibly powerful method that zaps that chemical taste and odor, leaving you with nothing but clean, great-tasting water.
Not all filters are built the same, and the best one for you really boils down to your budget, whether you own or rent, and just how thoroughly you want to tackle the chlorine issue.
You’ve got two main paths you can take: a point-of-entry system that treats every drop of water in your home, or a point-of-use filter that focuses on a specific faucet or outlet.
A whole-house system is the all-in-one solution. It’s installed right where your main water line enters your house, meaning every faucet—from the kitchen sink and washing machine to every shower—gets purified water. This is the top choice for homeowners who are serious about protecting their skin, hair, and even their appliances from chlorine's harsh, drying effects.
On the other hand, if you’re renting or just need a more targeted, budget-friendly fix, point-of-use filters are a fantastic option. You can install one under your kitchen sink for clean drinking and cooking water, or even attach a filter directly to your showerhead. That last one is a game-changer for anyone tired of breathing in chlorine steam during a hot shower.
The Gold Standard of Certification
When you're shopping for a filter, keep an eye out for the NSF/ANSI 42 certification. This is an independent seal of approval. It proves the filter has been put through its paces and is guaranteed to reduce aesthetic issues like chlorine taste and odor. Think of it as your peace of mind that the product actually does what it claims.
To help you find the perfect match, let's compare the most common types of filters. Each offers a different mix of coverage, cost, and convenience.
| Filter Type | Best For | Chlorine Removal Effectiveness | Typical Cost Range | Installation |
|---|---|---|---|---|
| Whole-House Filter | Homeowners wanting a complete, set-it-and-forget-it solution for every tap. | Very High (Typically removes 97% or more of chlorine from all water) | $500 – $1,500+ | Professional installation is often recommended. |
| Under-Sink Filter | Renters or homeowners who want purified water for drinking and cooking at the kitchen sink. | High (Excellent removal for a single, targeted faucet) | $150 – $400 | DIY-friendly for most people with basic plumbing skills. |
| Showerhead Filter | Anyone wanting to protect their skin and hair from chlorine's drying effects. | High (Specifically designed to remove chlorine from hot shower water) | $30 – $100 | Very easy DIY installation; usually just screws on. |
Ultimately, picking the right filter comes down to what you’re trying to achieve. Do you just want better-tasting drinking water? Or are you looking to get rid of chlorine everywhere, from your laundry to your shower? Our experts have put together more detailed advice on all kinds of water filtration topics, which can help you find the best solution for your needs.
By weighing these options, you can confidently invest in a filter that brings that fresh, clean feeling back to your home.
Putting in a water filter is a huge win against the smell of chlorine in your house, but don't hang up your toolbelt just yet. The job isn’t quite finished.
Think of your filter as a hardworking gatekeeper. If it gets overloaded, it simply can’t do its job effectively. Regular, consistent maintenance is the real secret to keeping that clean, fresh water flowing for years to come.
The single most important task is changing the filter cartridges on schedule. This isn’t a friendly suggestion—it’s absolutely essential for the system to perform as it should. Over time, the activated carbon inside gets completely saturated with chlorine and all the other gunk it's been pulling out of your water. Eventually, it just can't trap anything else.
A clogged filter doesn't just stop working; it can become a breeding ground for bacteria or even release concentrated bursts of the very contaminants it was meant to remove. Sticking to a schedule is non-negotiable for safe, odor-free water.
Different types of filter media, like granular activated carbon (GAC) and carbon block, have different lifespans. These typically range from six months to a year, so check the manufacturer's recommendation.
The easiest way to stay on top of it? The moment you install a new cartridge, pull out your phone and create a calendar reminder for the replacement date. Simple as that.
For bigger jobs, like installing a whole-house system, calling in a professional plumber is always the smartest move. And if that chlorine smell ever comes back out of the blue, take it as a clear signal from your system that it’s time for a professional check-up.
Even after you've pinpointed the source of that chemical smell, a few questions might still be nagging you. Let's get you some clear, straightforward answers so you can finally knock out that smell of chlorine in your house for good.
It's not just your imagination—that chemical odor often ramps up in the winter, and it's usually because we're using more hot water. When you heat chlorinated water for a shower or to do dishes, you're speeding up the process where chlorine turns into a gas. This gas gets released right into the steamy, enclosed air of your bathroom or kitchen.
On top of that, the colder, drier air in winter can actually make our sense of smell a bit more sensitive to these chemicals. A whole-house water filter tackles this problem at the source, removing chlorine before it gets to your water heater. That means even the longest, steamiest winter shower will be free of that harsh chemical smell.
Nope, a standard water softener isn't built for that job. Water softeners are fantastic at removing hardness minerals like calcium and magnesium through a process called ion exchange, but that process does absolutely nothing to dissolved chlorine.
The real hero for getting rid of chlorine smell is a filtration system that uses activated carbon. Think of carbon as a sponge for chlorine—it adsorbs and traps the molecules, completely neutralizing both the taste and odor.
You can find some great modern systems that actually combine both softening and carbon filtration into a single unit. This gives you a one-two punch, solving both hard water spots and that nasty chlorine smell at the same time.
This is a common one, and there are a couple of likely culprits. First, if you're using a point-of-use filter, like one that screws onto a single faucet, it's only treating the water at that one spot. You'll still get that chlorine smell from your showerhead and every other tap in the house.
If you already have a whole-house filter and the smell has come back, it's almost a sure bet that your filter cartridge is done and needs to be replaced. Over time, that carbon media gets clogged up and can't grab onto any more chlorine. Keeping up with a regular replacement schedule is the key to making sure your filter keeps doing its job, giving you fresh, odor-free water everywhere in your home.
At Water Filter Advisor, we're all about giving you in-depth guides and honest reviews to help you find the right water filtration solution. Check out our expert advice and take the first step toward pure, clean water today at https://www.waterfilteradvisor.com.
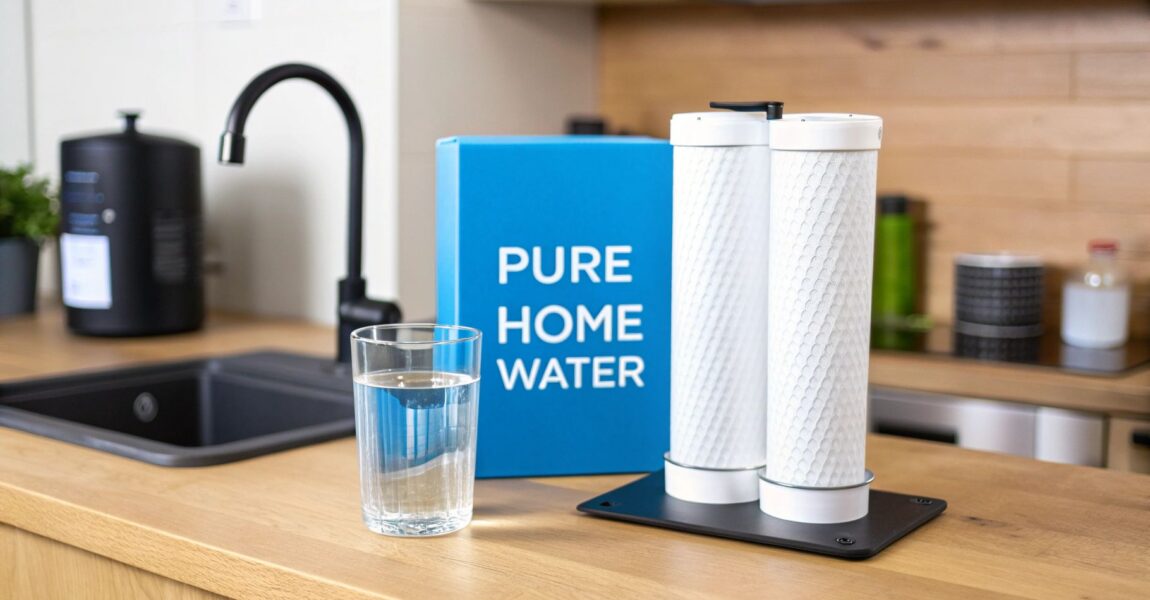
Ever wish you had a personal spring of pure, delicious water right in your kitchen? That's the magic of a countertop water filter. Think of it as your personal hydration station, sitting smartly next to your sink, ready to transform your tap water from "meh" to "magnificent" without you having to touch your plumbing.
This is why they've become the rockstars of home water treatment—you get a massive upgrade in water quality without the commitment of a complex installation. They're the perfect sidekick for both homeowners and renters who are thirsty for better water, right now.
Imagine unboxing a sleek gadget, spending a few minutes setting it up, and instantly having access to crisp, clean water. That’s the brilliant reality of countertop water filtration. These systems masterfully bridge the gap between a simple water pitcher and a full-blown under-sink renovation.
It operates a bit like a high-tech coffee machine, but instead of brewing your morning joe, it perfects your H₂O. You just connect it to your faucet or fill up a reservoir, and it immediately gets to work, evicting funky tastes, weird smells, and a whole rogues' gallery of contaminants. It's this blend of simplicity and power that has so many people raising a glass.
Before we dive into the nitty-gritty, here’s a quick cheat sheet on the main types of countertop filters. This table will help you spot which one might be your perfect match at a glance.
| Filter Type | Best For | Installation | Typical Contaminants Removed |
|---|---|---|---|
| Faucet-Connected | High-volume, on-demand filtered water for busy kitchens. | Attaches to faucet with a diverter valve. ~10 minutes. | Chlorine, lead, sediment, bad tastes, odors. |
| Dispenser/Gravity-Fed | Flexibility and portability. Great for offices, dorms, or kitchens with non-standard faucets. | No installation needed. Just fill the reservoir. | Chlorine, heavy metals, bacteria, viruses (depending on filter). |
| Reverse Osmosis (RO) | Maximum contaminant removal for the purest possible water. | Connects to faucet; requires drain line for wastewater. | Fluoride, arsenic, salts, nitrates, and 99%+ of dissolved solids. |
Each of these systems brings something unique to the party, but they all deliver on the core promise: better water with zero fuss.
This isn't just a trend; it's a movement. People are more curious and concerned than ever about what’s lurking in their tap water. In fact, the global market for home water filtration is projected to swell to an impressive USD 7.13 billion by 2026. This boom is fueled by growing awareness and a demand for home solutions that are both effective and easy. You can dive into the data in this home water filtration market analysis.
So, what makes countertop filters the hero of the modern kitchen? It all comes down to a few knockout advantages:
Here's the bottom line: a countertop water filter is your ticket to an immediate and significant upgrade in your drinking water. It blends serious filtration power with absolute convenience, putting you back in control of your home’s water quality.
By placing a compact, powerful filter right where you need it most, you gain the peace of mind that every sip is cleaner, safer, and more delicious.
You don't need a degree in chemistry to understand the wizardry happening inside your countertop water filter. These clever devices employ a few different battle-tested methods to purify your water, with each one targeting specific types of unwanted guests.
Think of it like having an elite security team for your water glass. Each "guard" is a specialist trained to stop a particular kind of intruder—from the chlorine that makes your water taste like a swimming pool to invisible bacteria—before it ever reaches you. This multi-stage approach is what makes these home systems so effective; they’re not just straining things out, they’re actively transforming your water on a molecular level.
Let's pull back the curtain on the most common technologies and see how they deliver that crisp, clean taste right to your kitchen.
Activated carbon is the undisputed champion of the water filtration world, and for good reason. Picture a tiny, hyper-porous sponge. Its surface is a labyrinth of microscopic nooks and crannies, creating a massive surface area that acts like a powerful magnet for certain chemicals.
As water flows through, a process called adsorption kicks in. This is where chemicals like chlorine, pesticides, and funky-tasting volatile organic compounds (VOCs) get snagged and stuck to the carbon's surface. It's why carbon filters are absolute rockstars at eliminating that "pool water" taste and smell from city tap water.
Ceramic filters operate on a simple yet incredibly powerful principle: mechanical filtration. Imagine a maze with passages so tiny that only water molecules can navigate them. The filter itself is a ceramic shell riddled with these minuscule pores, often less than a micron wide.
This physical barrier is like a brick wall for larger contaminants. Anything bigger than the pores—like sediment, protozoan cysts (think Giardia and Cryptosporidium), and most bacteria—is physically blocked from passing through. It's a straightforward, chemical-free method for tackling major microbiological threats in your home.
The real secret sauce of modern countertop systems is combining these methods. Many filters use a ceramic outer shell to block microbes and an activated carbon core to grab chemicals, giving you the best of both worlds.
When you demand the absolute purest water your home can produce, Reverse Osmosis (RO) is the undisputed king. Think of an RO system as an ultra-exclusive bouncer at a club. It uses your home's water pressure to force water through a special semipermeable membrane—a material with pores so infinitesimally small that almost nothing besides H₂O can squeeze through.
This process is incredibly thorough, capable of removing up to 99% of all dissolved solids. RO is the go-to for the tough stuff other filters leave behind, including:
Because the filtration is so fine, it produces a small stream of wastewater that carries the rejected contaminants down the drain. While this makes it a bit less water-efficient, its purification power is second to none for those with serious water quality issues.
Some home systems bring in extra tools for specific jobs. Ion exchange, for instance, is designed to combat "hard" water. It uses tiny resin beads that cleverly swap out hard mineral ions (like calcium and magnesium) for "softer" sodium ions. This not only improves your water's taste but also cuts down on that scaly buildup in your kettle.
Finally, you might find some high-end units that include UV (ultraviolet) sterilization. Imagine a special light that zaps viruses and bacteria on contact, scrambling their DNA so they can't make you sick. A UV lamp acts as a final, powerful line of defense, ensuring your water is biologically pristine and safe to drink.
Now that we’ve peeked under the hood at the technology, let's talk about the actual hardware you’ll have sitting on your counter. The world of countertop water filtration isn't a one-size-fits-all affair. Each system is engineered to solve a specific problem, fitting different lifestyles, kitchens, and water challenges at home.
Choosing the right one is much easier once you can picture how it would fit into your daily routine. Think of this as going from reading the engine specs to actually taking the car for a test drive. We’ll look at the three main players, giving you a clear idea of which one might be the perfect sidekick for your daily grind.
Imagine a storm knocks out your power for a couple of days. The faucet runs dry, but you’re not worried. You have a sleek, stainless-steel gravity-fed filter on your counter, ready to turn potable water—even from a rain barrel—into safe drinking water for your family. That’s the real superpower of these units.
They're beautifully simple: two stacked chambers. You pour water into the top, and gravity does all the work, pulling the water down through powerful filter elements (usually ceramic or carbon block) into the bottom reservoir. Because they need no electricity or plumbing connection, they're the ultimate tool for emergency prep and off-grid living.
Now, picture someone living in a rented apartment. They want better water but can’t touch the plumbing. A faucet-diverter filter is the perfect answer. It just screws right onto the existing faucet in minutes, and a small lever lets you switch between regular tap water and clean, filtered water on demand.
This setup is the definition of convenient. When it’s time to move, you just unscrew it and take it with you, leaving no trace. You get a continuous flow of filtered water for drinking and cooking without sacrificing precious fridge space for a pitcher.
These systems are a great example of how accessible clean water at home has become. Their simplicity is a big reason why the global countertop water filter market was valued at an impressive US$11,020 million in 2023 and is still growing. You can dig into the numbers in recent market analysis reports.
Finally, think about a family whose local water report shows high levels of tough contaminants like fluoride, arsenic, or just a lot of dissolved solids (TDS). They need the strongest filtration they can get without tearing up their kitchen. A standalone countertop reverse osmosis (RO) system delivers exactly that.
These compact units sit next to the sink, connecting to the faucet when you need them and usually draining a small amount of wastewater. They force water through the same powerful RO membranes found in bigger under-sink models, knocking out over 99% of contaminants. For anyone who wants the absolute highest level of water purity for their home, a countertop RO system is the clear winner—it offers performance other portable filters just can't touch.
So, how do countertop systems really stack up against the other popular options for the home? Each has its place, but seeing them side-by-side makes the decision much clearer.
| Feature | Countertop Systems | Under-Sink Systems | Pitcher Filters |
|---|---|---|---|
| Installation | Super easy; often screws onto the faucet in minutes. No tools needed for gravity models. | Requires plumbing work and drilling a hole in the countertop. | No installation needed; just fill and go. |
| Performance | Excellent; removes a wide range of contaminants, including lead, chlorine, and VOCs. RO models offer top-tier purity. | The best performance available; can handle heavy contamination with multi-stage filters and RO. | Basic; mainly improves taste and odor by reducing chlorine. Limited on other contaminants. |
| Convenience | On-demand filtered water right from the tap (diverter models) or a large reservoir (gravity models). | The most convenient; filtered water comes from a dedicated faucet seamlessly. | Not on-demand. Requires constant refilling and waiting. |
| Cost | Mid-range initial cost ($50 – $400). Filter replacements are a recurring expense. | Highest initial cost ($200 – $600+), plus potential plumber fees. | Lowest initial cost ($20 – $50), but frequent filter replacements add up. |
| Space | Takes up counter space next to the sink. | Hidden away under the sink, keeping countertops clear. | Takes up space in the refrigerator or on the counter. |
| Best For | Renters, small kitchens, and anyone wanting a balance of performance and easy installation. | Homeowners who want the highest level of seamless, invisible filtration. | Individuals or small households looking for a simple, low-cost taste improvement. |
Ultimately, the best choice boils down to your specific needs. If you're a renter or just want a powerful, easy-to-install solution, countertop filters are hard to beat. If you own your home and want top-tier filtration that's out of sight, an under-sink system might be worth the investment. And for basic taste improvement on a budget, a pitcher is a fine starting point.
Think of a countertop water filter as a bouncer for your drinking glass—it decides what gets in and what gets kicked to the curb. While you can't see the action happening inside, these systems are working hard to target a whole host of unwanted stuff. Knowing exactly what a filter is designed to remove is the first step in picking the right one for your home.
Let's be clear: not all contaminants are the same. Some are just annoying, messing with the taste and smell of your water. Others are far more serious, posing real health risks over time. We'll break down the common culprits to see how different filters stack up.
This is usually the first thing people complain about—the water just tastes… wrong. These are called aesthetic contaminants. While they aren't usually harmful, they can make drinking tap water a real chore.
Heavy metals are a much bigger deal. Things like lead can leach into the water from old plumbing, and you'd never know it because they're invisible and have no taste. Over time, they can build up in your body and cause serious health problems.
A filter's ability to handle heavy metals really depends on the technology inside. A basic carbon filter might reduce a little lead, but for a real solution, you need something more powerful.
Reverse Osmosis (RO) is the clear winner for removing heavy metals. Its membrane is so fine that it acts as a nearly impenetrable wall, blocking lead, mercury, arsenic, cadmium, and chromium from getting through.
Our water supplies can pick up a mix of man-made chemicals from farms and factories. These are the silent threats, from pesticides to industrial byproducts.
Concerns over these chemicals are a big reason why advanced home filtration is becoming so popular. In fact, the market for countertop reverse osmosis systems is expected to hit $13.23 billion by 2025, driven by worries over waterborne diseases that, according to the WHO, cause over 485,000 deaths each year. You can dig into the numbers in this global market forecast on RO purifiers.
If you're on well water or live in an area that gets boil-water advisories, then bacteria, viruses, and other microbes are your main concern.
You can find a ton of great information on the NSF website about which certifications match up with specific contaminants.
This image from the NSF site shows why it's so important to look for official certifications. When a product has an NSF/ANSI number on it, you know it's been independently tested to back up its claims, whether it's for lead, cysts, or something else.
One of the best things about countertop water filters for the home is just how ridiculously easy they are to get going. You can forget about calling a plumber or making major modifications under your sink. Most of these systems are designed to go from the box to pouring pure water in just a few minutes flat.
The whole process is refreshingly simple. For a faucet-diverter model, you just unscrew the little aerator at the end of your faucet and screw on the filter's diverter valve. Flip a tiny switch, and voila—water flows through the filter instead of straight into your sink. Gravity-fed systems? Even easier. Just assemble the chambers, pop in the filter elements, and pour water into the top. It’s a true "no plumber, no problem" situation.
Once you’re up and running, keeping that great performance comes down to a little bit of routine maintenance. Think of it like changing the oil in your car—if you skip it, things start to go downhill. For your water filter, that means staying on top of filter changes.
A filter that’s clogged or past its prime simply can't do its job. Your water flow will slow to a trickle, and worse, it might stop removing contaminants effectively. In some cases, a neglected filter can even start releasing the gunk it has already trapped right back into your water.
Following the manufacturer's replacement schedule isn't just a friendly suggestion—it’s the golden rule for ensuring your water stays consistently clean and safe. The easiest way to stay on top of this is to set a reminder on your phone or calendar the day you install a new one.
Here’s a rough guide for how often you'll be swapping out filters:
When you're shopping for a countertop water filtration system, don't just stop at the initial price tag. The true cost of ownership is a combination of that upfront purchase and the ongoing expense of new cartridges. It might seem like an extra bill, but when you pit it against buying bottled water, the savings become crystal clear.
Let's break down what a typical year might look like for a family home:
| Filtration Method | Initial Cost (Average) | Annual Replacement Cost (Average) | Total First-Year Cost |
|---|---|---|---|
| Countertop Filter | $70 | $60 | $130 |
| Bottled Water (Family) | $0 | $400+ | $400+ |
| Pitcher Filter | $30 | $120 | $150 |
The numbers don't lie. Even when you factor in the cost of replacement filters, a countertop system is dramatically cheaper than a bottled water habit. You're not just saving a significant amount of money over time; you're also drastically cutting down on plastic waste. It's a smarter move for both your wallet and the planet.
Now that you're armed with knowledge about the different technologies and filter types, you're ready to pick a winner. But remember, the "best" countertop filter isn't the one with the most bells and whistles or the highest price. It's the one that fits perfectly into your home and your life.
Think of it as getting a personalized prescription for better water. To figure that out, we just need to answer a few key questions about your home. This will quickly cut through the noise and point you straight to a system that feels like it was made just for you.
The goal here is to match a filter's strengths with what you actually need at home. Let’s start with the big questions that will determine your daily happiness with your filter.
This flowchart can help you visualize the decision-making process, starting with your water's contaminants and moving through your daily use and budget.
When you start with these priorities, you can immediately narrow your search to the type of system that makes the most sense for your home.
By thoughtfully answering each of these questions, you build a clear profile of your ideal countertop water filtration system. This moves you from simply browsing options to making a strategic, informed decision you'll feel great about for years.
The goal is to find a system that blends right into your daily routine, giving you clean, fantastic-tasting water without any fuss. If you’re ready to dive deeper and get more tailored recommendations, you can find a ton of expert advice on water filters here.
It’s totally normal to have a few questions before you commit to a new water filter for your home. You're making an investment in your family's health and well-being, so getting the details right is crucial.
Let's tackle the most common questions we hear, from what happens to healthy minerals to whether these systems are a good fit for well water. Think of this as your final checklist before finding the perfect filter.
Great question! The answer really comes down to the type of filtration technology you choose for your home.
Most standard countertop filters, especially those using activated carbon or ceramic shells, are quite selective. They're designed to target and grab contaminants like chlorine and lead while letting beneficial minerals like calcium and magnesium pass right on through. You get cleaner, safer water without stripping out the good stuff.
The main exception here is Reverse Osmosis (RO). An RO system is incredibly thorough, and its membrane is so fine that it removes almost everything—including those minerals. To solve this, many modern countertop RO units now include a remineralization stage that adds a balanced mix of healthy minerals back into the water right before it hits your glass.
This is a big one, and sticking to the schedule is non-negotiable if you want your filter to keep doing its job. The lifespan of a filter cartridge depends on the specific model, the quality of your tap water, and how much water your household uses.
Always, always follow the manufacturer's directions. A filter that's past its prime doesn't just stop working—it can get clogged and become a breeding ground for bacteria. Even worse, it could start releasing all the contaminants it's been holding back into your water. The easiest trick? Set a recurring reminder on your phone's calendar.
You absolutely can, but there's a critical first step for any home on well water: get your water tested. Well water isn't treated by a municipality, so it can have a unique set of challenges, like high iron, bacteria, manganese, or even hydrogen sulfide (that "rotten egg" smell).
Once you have a water test report, you'll know exactly what you're dealing with and can pick a filter certified to remove those specific contaminants. For wells, a multi-stage system is almost always the best bet. A gravity-fed unit with powerful ceramic filters or a countertop RO system usually has the strength needed to make your well water perfectly safe and great-tasting.
This is a common worry, but it’s usually not an issue. If you choose a filter that connects directly to your faucet, you will notice a slightly slower flow only when the diverter is switched to the filter. That's actually a good thing! It means the water is getting enough contact time with the filter media to be purified properly.
Your normal, unfiltered water pressure from the tap remains exactly the same. Even better, standalone units like gravity-fed systems or countertop RO distillers don't connect to your main faucet at all, so they have zero impact on your sink's water pressure.
Ready to stop wondering and start enjoying pure, great-tasting water? At Water Filter Advisor, we provide in-depth reviews, comparisons, and practical guides to help you find the perfect filtration solution for your home. Explore our expert resources and make a confident choice today at https://www.waterfilteradvisor.com.
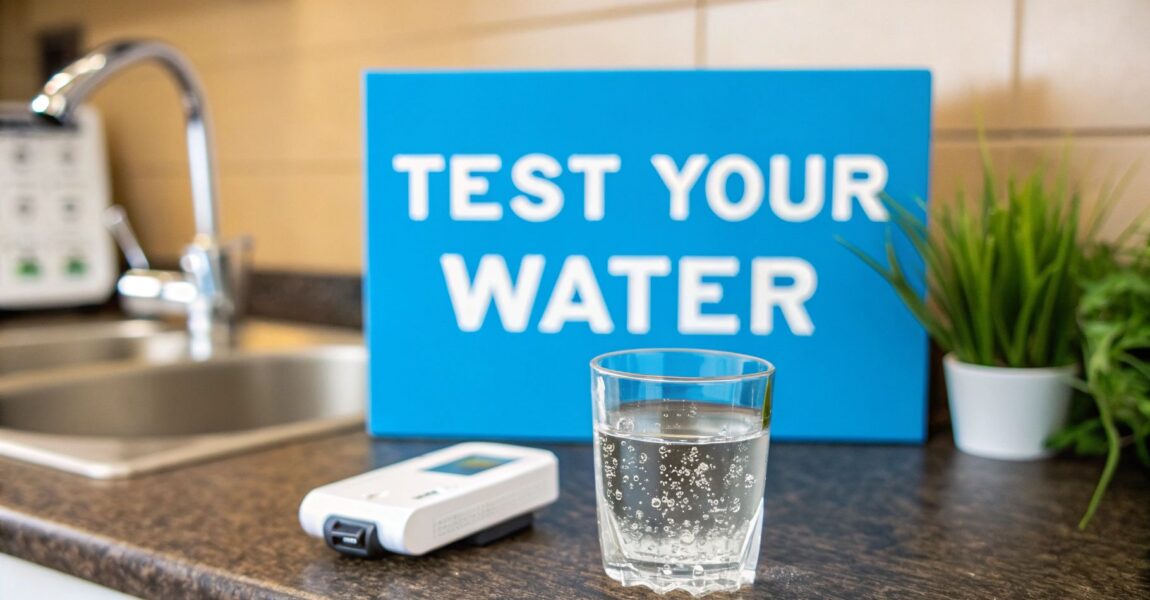
Think your tap water is just plain old H₂O? Think again. What if I told you your morning coffee tastes a little 'meh' because of invisible m ...
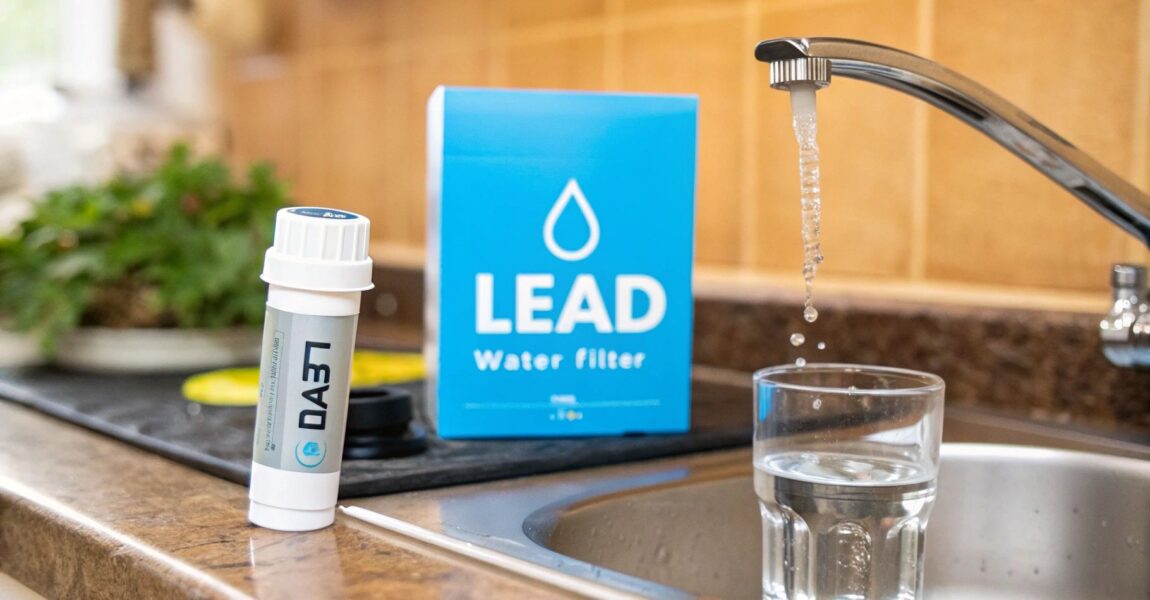
When you turn on your faucet and fill a glass, you expect that water to be pure. But what if it's hiding an invisible neurotoxin? Knowing how to filter lead from water isn't just another home improvement task—it's a critical step in protecting your family's health. This guide gives you the actionable steps you need to secure your home's water supply.
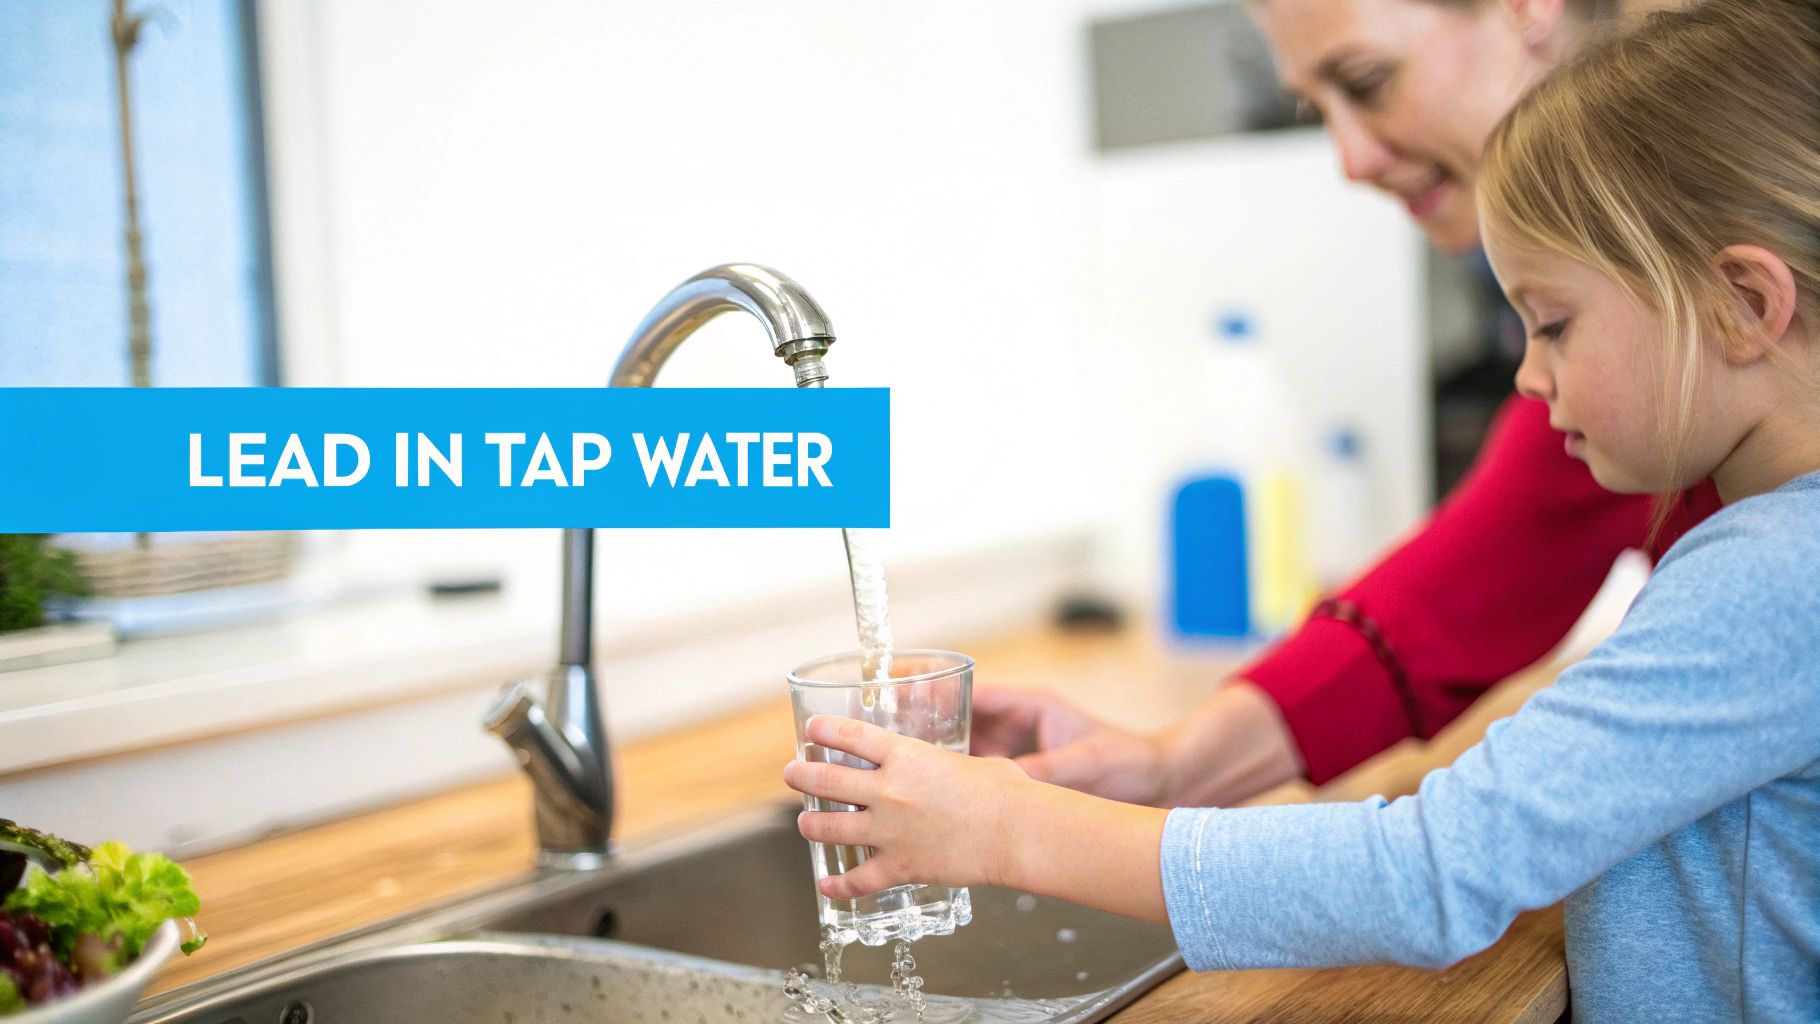
The water flowing from your kitchen tap looks clean. It’s clear, has no odd smell, and tastes fine. Yet, a hidden danger could be lurking inside—one you can't see, smell, or taste. Lead, a potent heavy metal, can leach into your drinking water from the very pipes that deliver it.
This isn't just a problem for old industrial towns or historic homes. While houses built before the 1980s are at higher risk because of lead pipes and solder, even modern plumbing isn't completely safe. Today's regulations for "lead-free" fixtures still permit trace amounts of lead in brass fittings, faucets, and valves, which can contaminate your water over time.
Here’s the hard truth: there is no safe level of lead exposure. The health effects are serious and often permanent, which makes the need to filter lead from water an urgent issue for every household. The risks are especially high for the most vulnerable among us.
This is why this contaminant needs your immediate attention:
This problem points to a troubling global reality. According to the World Health Organization (WHO), about 1 in every 3 children worldwide—a staggering 800 million kids—have elevated blood lead levels from sources that include drinking water. It really drives home the need for effective filtration. At Water Filter Advisor, we recommend certified systems proven to capture over 99% of lead, drastically cutting these risks. You can read more about the global commitment to safer drinking water on sdgs.un.org.
The biggest danger with lead in water is how sneaky it is. Contamination happens silently, day after day, and the health problems can build up for years before you even notice them. This is why being proactive with filtration is the only reliable way forward.
To fix the problem, you first have to know where it's coming from. Lead usually gets into your water after it leaves the municipal treatment plant. The contamination happens somewhere in the distribution system or right inside your home's plumbing.
The pipes that run from the street to your house, known as service lines, are a common source. Inside your home, older copper pipes joined with lead-based solder or old brass faucets are also big offenders. Because the problem is often so close to your tap, a point-of-use filter is an incredibly powerful defense. By taking control of your water quality right at the source, you create that final, vital barrier to protect your family.
Before you can even think about a filter, you have to know what you’re up against. Guessing just won’t cut it when it comes to your family’s health—you need to know for sure if lead is in your water and, if so, how much.
Think of it as the diagnostic step. You wouldn't take medicine without a diagnosis, right? Same principle. You have two solid options to get the data you need: quick-and-easy DIY kits or a full professional lab test.
For a fast, initial screening, a DIY home test kit is a decent place to start. You can grab these online or at most big-box hardware stores pretty cheaply. Most of them are simple test strips that change color if lead is detected above a certain level, usually around the EPA's action level of 15 parts per billion (ppb).
A word of caution, though: make sure you buy a kit specifically for water, not lead paint. While these kits are handy for a quick "yes" or "no" answer, that's all they give you. They can't tell you the exact concentration, just that you're over a certain threshold. They're great for a first look, but they don't give you the whole story.
If you want the real numbers, nothing beats sending a sample to a professional lab. This is the gold standard. It’s the most accurate method and gives you a detailed report with the precise concentration of lead, and often a whole list of other potential contaminants, too. This is the hard data that lets you choose the right filter with total confidence.
Finding a certified lab is simple. Just check with your local health department or water utility; they’ll have a list of state-approved labs.
The process is a breeze:
In a week or two, you’ll have a full report in your hands. This is the information you need to take targeted, effective action.
Pro Tip: The First Draw Technique
The "first draw" is key. It means you collect water from your tap first thing in the morning before you've run the shower, flushed a toilet, or made coffee. This captures the water that’s been sitting in your pipes overnight, which is when the highest amount of lead leaches out. It gives you the worst-case scenario reading, which is exactly what you need to know.
Your report will show a number in parts per billion (ppb) or micrograms per liter (µg/L). Here's the most important thing to remember: health experts agree that there is no safe level of lead. The EPA's 15 ppb "action level" is a guideline for municipal water systems, not a safety threshold for your home.
Any detectable lead is a signal to take action. Even a reading as low as 5 ppb means you should be seriously considering a filtration system. Now that you have the facts, the guesswork is over. You know the scale of the problem and can move forward to pick the right solution to get that lead out of your water for good.
Okay, you've got your water test results. The guessing game is over, and now you have the facts. This is the moment you switch from reactive to proactive, choosing the right defense to get that lead out of your water for good.
Stepping into the world of water filters can feel a bit overwhelming at first, with all the talk of "adsorption," "microns," and "membranes." But don't sweat it. We're going to break down the three most effective technologies for lead removal into plain English so you can feel confident in your choice.
When you want the absolute highest level of purification, you look at Reverse Osmosis, or RO. Think of it as the ultimate bouncer for your water supply—it has an incredibly strict guest list.
RO systems use household water pressure to push water through a special semi-permeable membrane. This membrane is so fine that only tiny, pure water molecules can pass through. Heavier stuff like lead, arsenic, and fluoride simply can't make it and get flushed away. It's a remarkably effective process, making RO a go-to for anyone who wants to be absolutely sure they’re getting rid of lead.
This flowchart can help you visualize the steps from initial testing to making a decision.
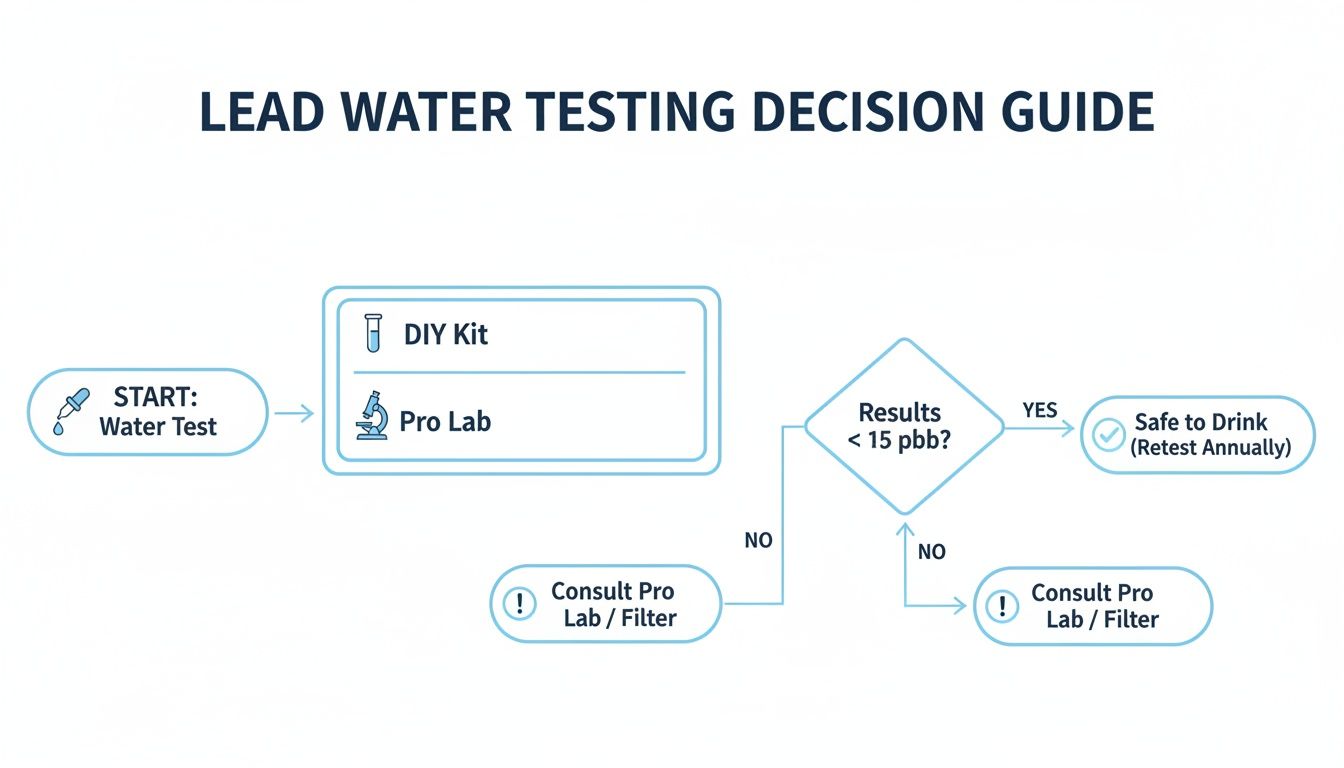
Whether you start with a quick DIY kit or go straight for a precise lab test, the goal is the same: get solid data so you can pick the right filter.
Activated carbon is probably the most familiar filter technology out there, but here's the crucial part: not just any carbon filter will handle lead. To be effective, it must be certified to NSF/ANSI 53.
That certification is your proof that the filter has been independently tested and proven to reduce lead. These filters use a process called adsorption, where lead particles essentially get stuck to the carbon's massive surface area, kind of like a magnet grabbing metal shavings.
The most important thing to remember is the certification. A basic carbon filter just for taste and odor won't do much for lead. Always look for that NSF/ANSI 53 mark on the box.
The great thing about activated carbon is its flexibility. You can find it in all sorts of formats:
Since we started in 2007, we've helped thousands of families find the right solution. Lead in water is a serious issue, but the fixes are incredibly effective. A quality RO system can reject 98-99% of lead, and a certified activated carbon filter can adsorb 95% or more. Installing a proven system is the best way to protect your family right now.
Ion exchange is a more specialized technology you’ll often find inside water softeners or as part of a multi-stage filter cartridge. It works like a trade. The filter media is loaded with harmless ions (like sodium) and when water flows through, it swaps them for undesirable ions, like lead.
While it's a great technology, you rarely see ion exchange used as a standalone lead filter for drinking water. It’s more of a team player, often working alongside activated carbon to provide a more complete filtration solution for various water quality issues.
To help you decide, it's useful to see how these top-tier technologies stack up. While a detailed guide to choosing the perfect water filter can provide more depth, this table gives you a quick, side-by-side look.
| Filtration Technology | Lead Removal Rate | Initial Cost | Annual Maintenance | Best For |
|---|---|---|---|---|
| Reverse Osmosis | 95-99+% | $150 – $500+ | $50 – $150 | Homeowners wanting the highest level of purification for drinking/cooking water. |
| Activated Carbon (NSF 53) | 95-99% | $30 – $400 | $40 – $120 | Renters and homeowners needing a flexible, effective solution for specific taps. |
| Ion Exchange | 95-98% | Varies | Varies | Homes with multiple water issues, often used in conjunction with other filters. |
At the end of the day, the best filter is one that's certified for lead, fits your budget, and is easy for you to maintain. Whether it’s a simple faucet filter or a full under-sink RO system, taking this step puts a vital barrier between your family and this invisible threat.
For more in-depth reviews and comparisons, check out our comprehensive advice on water filters at Water Filter Advisor.
Picking out the right filter feels like a huge win, but it’s really only half the job done. A top-of-the-line system is completely worthless if it’s installed incorrectly or you let its maintenance slide. This is where you come in—your ongoing attention is what keeps your filter doing its one critical job: to filter lead from water effectively, day after day.
Think of it like owning a high-performance car. It needs to be set up right from the start and requires regular tune-ups to keep running at its peak. If you skip these steps, you’re not just getting poor performance; you’re creating a false sense of security while contaminants slip right through.
Proper installation is the foundation for safe water. While a complex whole-house system is a job best left to a professional plumber, many of the point-of-use systems you'll encounter—like faucet mounts and under-sink units—are actually designed for a straightforward DIY setup.
Take a simple faucet-mounted filter, for example. Installing one of those often takes less than five minutes. Seriously. It's usually just a matter of unscrewing your faucet’s aerator and twisting the filter unit on. Most come with a handful of adapters to make sure you get a snug fit on any standard faucet. It’s an empowering first step toward cleaner water.
Under-sink systems, like a Reverse Osmosis (RO) unit, are a bit more involved but are still totally manageable for anyone with basic DIY confidence. The absolute key here is to follow the manufacturer's instructions to the letter. Don’t just skim them. Lay out all the parts, identify them with the manual, and take your time connecting the color-coded tubes. One wrong connection can lead to leaks or a system that doesn’t filter at all.
Once your system is up and running, the real work begins. Maintenance isn't just a suggestion; it's a non-negotiable part of keeping your water safe. An old, clogged filter can’t capture lead. Even worse, it can sometimes do the opposite and release a concentrated burst of trapped contaminants back into your water.
Here’s a practical breakdown of what needs your attention:
Pro Tip: Listen to Your Water
Your own senses can be a fantastic early warning system. If you ever notice a sudden drop in water pressure from your filtered tap, or if the water starts to taste or smell different, that’s a huge red flag. It’s a strong sign your filter is clogged and needs to be replaced right away, even if it’s before the scheduled date.
Besides a drop in water flow, other subtle clues can tell you a filter is on its last legs. Many modern systems come with a filter life indicator light, which is your most obvious signal. It usually changes from green to yellow (a warning) and finally to red (replace now).
But don't rely on the light alone. These indicators are often just simple timers and don't actually measure the filter's real-world performance. The most reliable method is sticking to a strict replacement schedule based on the manufacturer's gallon capacity rating. If you have a big family and go through a lot of water, you’ll probably need to replace filters more often than a single person would.
Following these guidelines is the only way to ensure your system continues to reliably filter lead from water, protecting your home and family with every glass you pour.
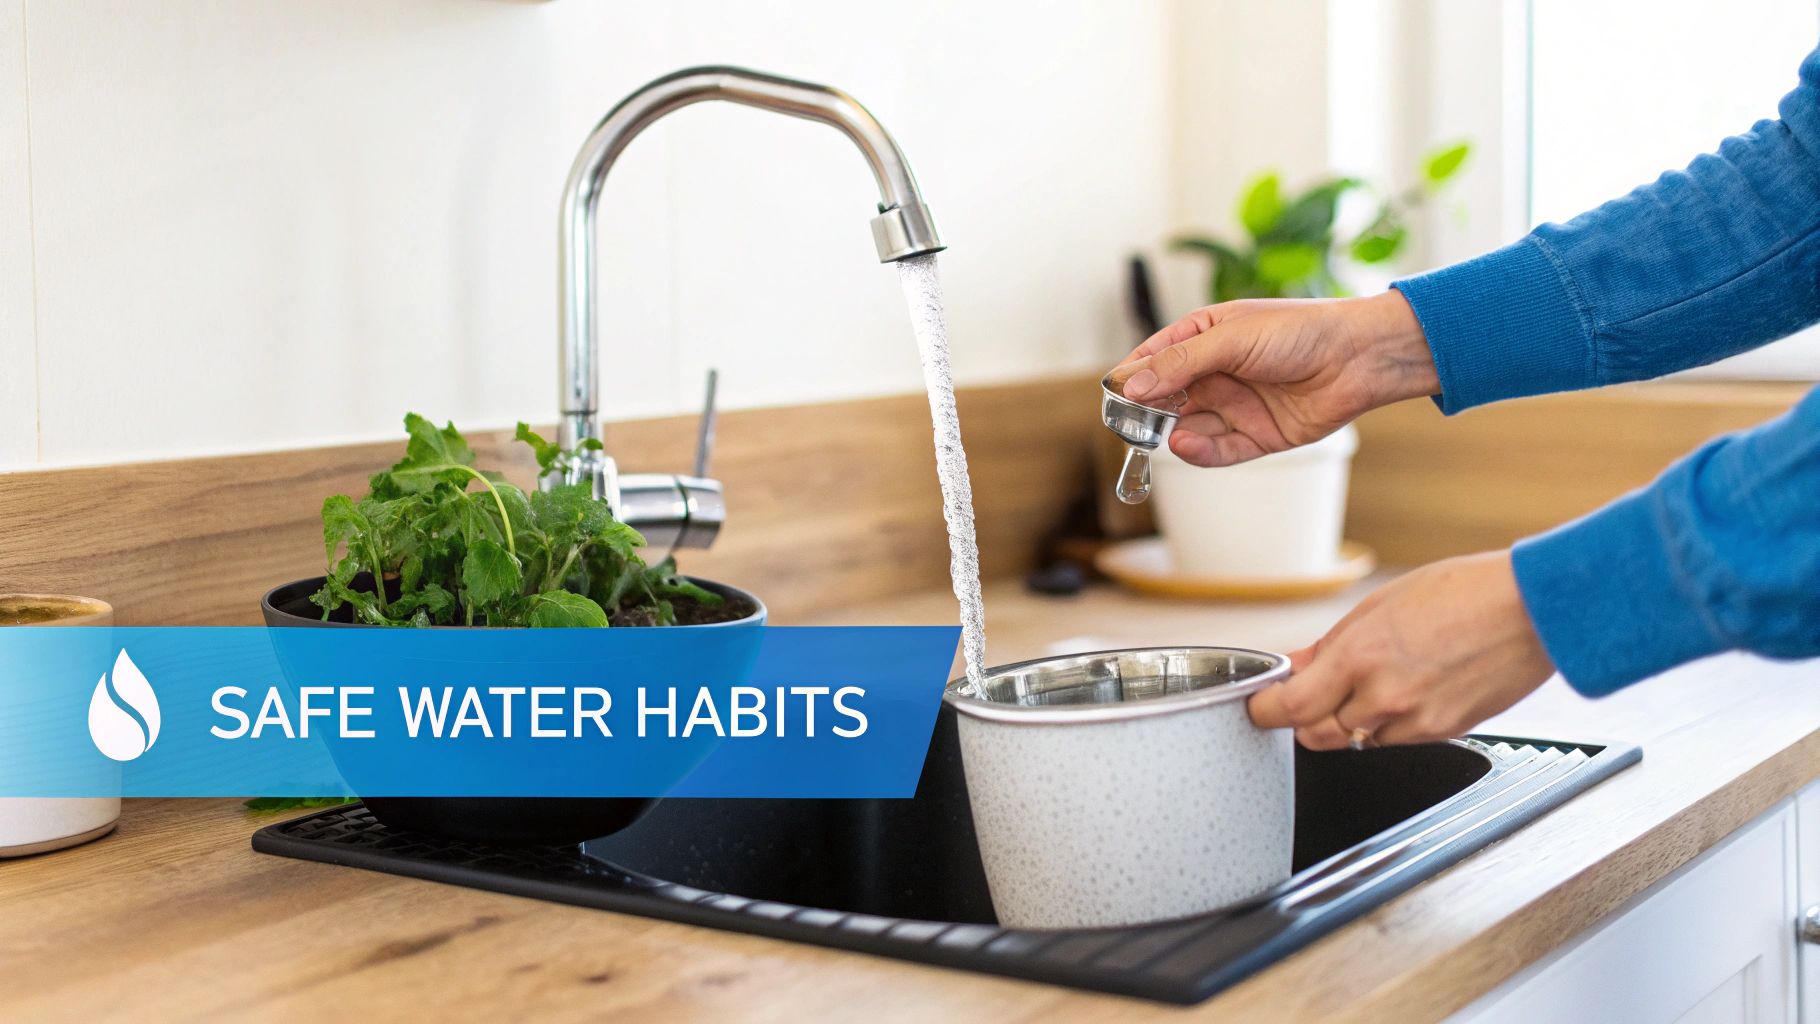
While a high-quality filter is your main line of defense, it’s not the only move you can make. A few smart habits can act as a powerful backup, creating an extra layer of protection that works with your filter to keep lead exposure to an absolute minimum.
These aren't complicated changes. They’re small, easy adjustments to your daily routine that make a surprisingly big difference in the quality of your water.
Here’s something to think about: when your home is quiet overnight, the water just sits in the pipes. It has hours and hours to pick up lead from older plumbing, solder, or even brass fittings. That means the very first glass of water from the tap in the morning can have the highest lead concentration of the day.
The fix is incredibly simple: flush your pipes. Before you make coffee or fill a glass, just run the cold water for a minute or two. This pushes out that stagnant, lead-heavy water and brings in fresh water from the main.
You don't have to waste it, either. Use that first bit of water for things you won't be drinking:
This one habit is probably the easiest and most effective way to support your efforts to filter lead from water.
"The first draw of water in the morning can be a real wild card. By simply running the tap for a minute, you’re not just flushing the line—you’re actively reducing the contaminant load your filter has to deal with, which can even help extend its life."
This is a golden rule in our house: the hot water tap is for cleaning, not for cooking or drinking. Period. Hot water is much more effective at dissolving metals like lead from your plumbing.
It’s tempting to use hot water to get a pot of pasta boiling faster, but it's a risky shortcut. The heat from your water heater actually speeds up the leaching process, potentially delivering a much higher dose of lead straight into your food. Always, always start with cold water and heat it on the stove or in a kettle.
You know that little screen on the tip of your faucet? That's an aerator. Its job is to mix air into the water so it doesn't splash everywhere, but it also acts like a tiny net, catching sediment and other gunk. If there's lead in your plumbing, lead particles can get trapped right there.
Every few months, just unscrew the aerators and give them a quick cleaning. A simple rinse and a gentle scrub with an old toothbrush is all it takes to clear out any buildup. It’s a two-minute job that keeps your water flowing clean.
The Flint water crisis back in 2014 was a tough lesson on what happens when corrosion control goes wrong, with some homes testing over 100 ppb for lead. While there's a global push for lead-free water by 2040, filtration is what protects families right now. You can read more about these global water safety initiatives on Frontiersin.org. Combining a good NSF/ANSI 53-certified filter with these simple habits gives you a rock-solid defense against lead.
Once you've picked a filtration system and started building better habits, a few questions almost always pop up. Getting these final details right is what gives you real confidence that your home's water is safe. Let's dig into some of the most common things people ask when they're tackling a lead problem.
Getting clear answers on these points helps you know you’ve covered all your bases. From what popular products can't do to knowing when you can finally stop worrying, these details bring your whole water safety plan together.
This is a huge point of confusion, and the answer is not necessarily. Your average water pitcher you grab off the shelf is really just designed to make your water taste and smell better, mostly by reducing chlorine. It’s simply not built to capture heavy metals like lead.
If you want a pitcher that works for lead, you absolutely have to find one that is certified under NSF/ANSI 53 for that specific job. Always check the box or, even better, look it up on the NSF's online database to be sure. Certified pitchers can be a great, convenient option, but remember they hold very little water and the filters need to be changed way more often than an under-sink system.
Having a new home is a fantastic head start, but it’s not a 100% guarantee against lead. Even though lead pipes and solder were banned decades ago, today's "lead-free" plumbing regulations still allow for up to 0.25% lead content in new fixtures like faucets, valves, and other fittings.
Over time, tiny amounts of lead can still leach out of these brand-new parts, especially if your city's water is on the corrosive side. There's also the service line—the pipe connecting your new house to the water main could still be an older, lead-based pipe owned by the utility. The only way to know for sure is to test the water coming directly out of your tap.
The term "lead-free" is a bit misleading. It just means very low lead, not zero. That's why testing is still so important, even in modern homes. It's the only way to confirm what's in your water and make the right call on filtration.
This all comes down to being diligent. The single most important thing you can do is stick to the manufacturer's filter replacement schedule. They don't just pull those timelines out of thin air; they're based on extensive testing to figure out the filter's maximum capacity in gallons or months.
For some extra peace of mind, you can also:
This is a dangerous myth that needs to be busted right now. Boiling water does NOT remove lead. In fact, it actually makes the concentration of lead higher.
Think about it: when water boils, some of it turns to steam and evaporates, but the lead gets left behind in the pot. This makes the lead in the remaining water more concentrated and even more hazardous to drink. The only methods proven to filter lead from water are technologies like reverse osmosis, specialized ion exchange, and properly certified activated carbon filters. Never, ever boil water to try and make it safe from lead.
At Water Filter Advisor, we're here to give you the clear, unbiased information you need to protect your family. From in-depth reviews to practical maintenance guides, we help you navigate every step of your journey to safer water. Explore our resources to find the perfect solution for your home at https://www.waterfilteradvisor.com.