Bypass Water Filter: A Complete How-To & When-To Guide
You know the moment. The filter light starts blinking, water pressure seems a little off, and you remember that changing the cartridge means shutting water off, opening a housing that never comes loose gracefully, and dealing with the splash that somehow always lands in the wrong place.
That’s where the bypass water filter setup earns its keep.
A bypass isn’t glamorous. It doesn’t improve taste by itself, and it doesn’t remove contaminants. But it does something every homeowner appreciates. It keeps water moving through the house while you service the system, isolate a problem, or protect a filter from a job that doesn’t need treatment. Used properly, it’s one of the smartest parts of a home filtration layout. Used casually, especially on refrigerator and point-of-use systems, it can undo the very protection you paid for.
The key is understanding the trade-off. A bypass is a tool, not a free pass. In some situations it saves wear, time, and hassle. In others, it puts untreated water right back into your drinking glass.
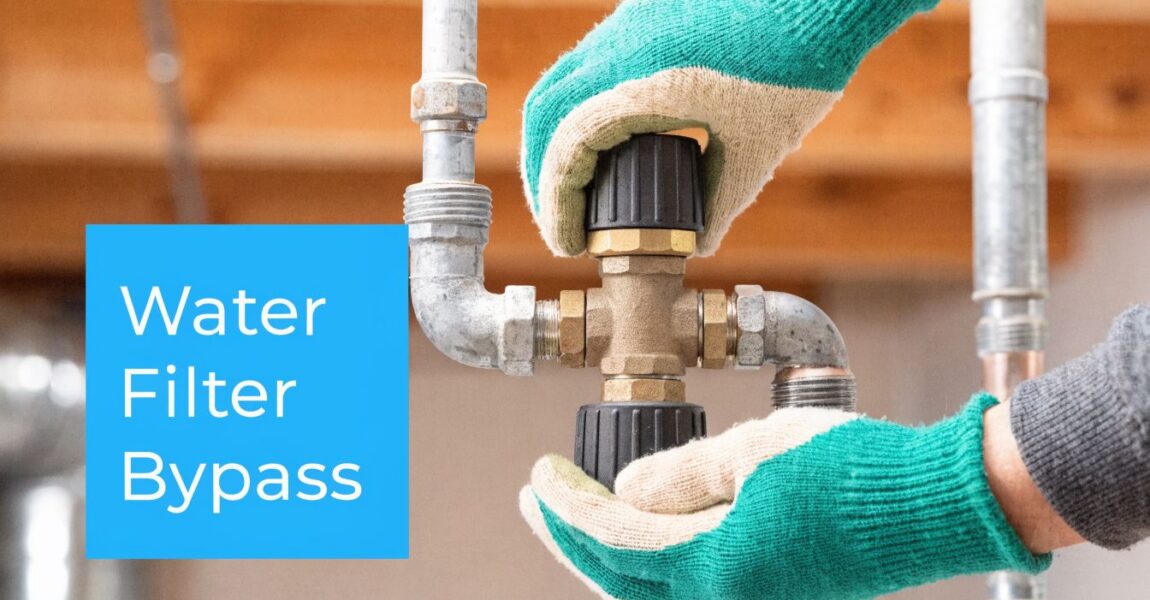
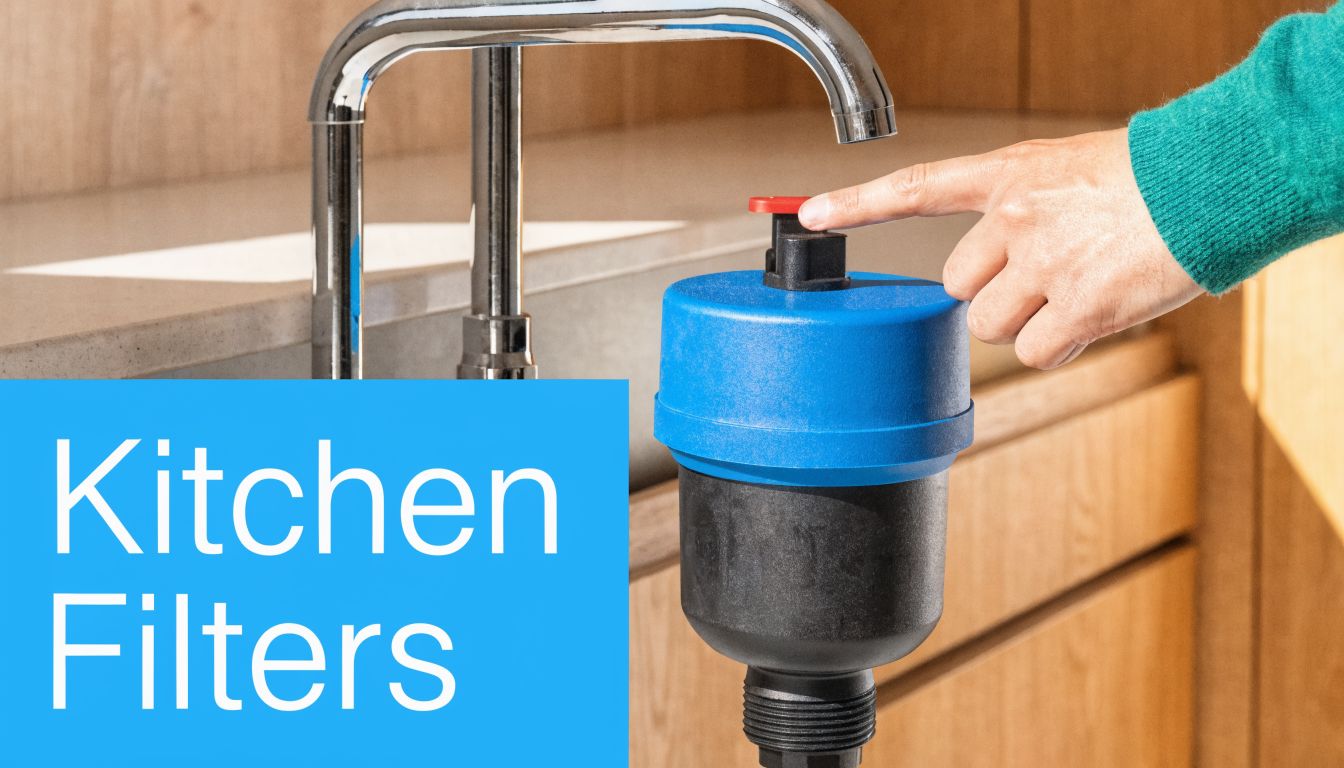
Your Filter's Secret Weapon The Bypass Valve
Most homeowners think about the cartridge, the media, or the big blue housing on the wall. The bypass valve gets ignored until the day it saves the job.
A bypass valve is a way to reroute water around the filter for a short period. It functions as a road detour around a construction zone. Water still reaches the house, but it skips the treatment equipment while you change a cartridge, inspect a leak, or troubleshoot low flow.
Why it matters in a real home
On a whole-house setup, that detour can be the difference between a clean maintenance job and a miserable one. If your system has no bypass, a basic cartridge change can mean shutting off the house, draining lines, opening the housing, and hoping nobody flushes a toilet halfway through. With a bypass, you isolate the filter and keep the rest of the plumbing usable.
That’s why plumbers like to see one built in from day one. It’s not an accessory. It’s part of a serviceable system.
Practical rule: If a filter can’t be isolated cleanly, maintenance gets delayed. Delayed maintenance turns a good filter into a bad one.
What a bypass does and what it does not do
A bypass valve does two jobs well:
- Keeps water available: You can still wash hands, flush toilets, or run a faucet while the filter is out of service.
- Protects the filter during service: You don’t force water through an open or partially disassembled housing.
What it does not do is provide treatment. Once water is on bypass, the filtration step is out of the loop. That’s fine when you’re changing a sediment cartridge in the basement. It’s a different story when the water you’re bypassing was supposed to improve taste, reduce odor, or address drinking water concerns at the kitchen tap.
That difference matters more than most DIY guides admit.
When to Use the Bypass and When to Think Twice
You notice the filter needs service on a Saturday morning. The house still needs water, the kids still need showers, and the temptation is to flip the bypass and leave it there until later. That is exactly where good maintenance can turn into a water quality problem.
A bypass is safest as a short-term tool with a specific purpose and a clear end point. The right use depends on what the filter was installed to do in the first place. Skipping a whole-house sediment stage for an hour is one decision. Skipping a drinking water filter for a week is a different one.

Good reasons to use a bypass
For a whole-house system, bypass mode is often part of normal service. It keeps water available while you change a cartridge, clean a housing, replace an O-ring, or confirm whether a clogged filter is causing pressure loss. On jobs like these, the bypass saves time and keeps the plumbing usable.
There are also cases where sending every gallon through a filter is hard to justify. Lawn watering, driveway washdown, and other heavy utility use can burn through cartridge life quickly, especially on sediment or carbon stages that were installed to improve indoor water use, not outdoor hose work.
Short-term matters here.
If the filter protects appliances from grit, stains, or scale-related debris, leaving it bypassed longer than necessary means the rest of the house starts seeing untreated water again.
Situations that deserve caution
The bigger risk shows up at fixtures where people drink the water. Under-sink systems and refrigerator filters are easy to dismiss because water still comes out of the faucet or dispenser. Flow is not treatment.
That trade-off gets ignored in a lot of DIY advice. If the filter was installed to reduce chlorine taste, odor, lead concerns, or hard-to-pronounce contaminants such as PFAS, bypassing it puts those concerns back at the tap immediately. The U.S. Geological Survey reported widespread PFAS detection in U.S. tap water, which is exactly why bypass decisions deserve more care than they usually get.
A bypass does not fail slowly. It removes the filtration step all at once.
Whole-house versus drinking water bypass
These choices are not equal, and I tell homeowners to judge them by exposure, not convenience.
| System type | Bypass usually makes sense when | Main trade-off |
|---|---|---|
| Whole-house sediment or prefilter | Filter changes, service work, troubleshooting, heavy non-potable utility use | Dirt, sediment, or other untreated water can reach fixtures and appliances during the bypass period |
| Under-sink drinking water filter | Brief cartridge replacement or filter-head service | Drinking and cooking water quality drops right away |
| Refrigerator filter | Diagnosing flow issues or keeping the ice maker running until the correct filter arrives | Water and ice still dispense, but the filter media is no longer reducing taste, odor, and contaminant load |
That last row causes the most confusion. Homeowners see normal flow and assume the system is “basically working.” It is not. It is only passing water.
The refrigerator filter trap
Official bypass plugs and bypass cartridges have a real use. They help confirm whether a blocked filter is causing low flow, and they can keep a refrigerator running while you wait for the right replacement. I use them for diagnosis, not as a long-term fix.
The trade-off is simple. You get water delivery back, but you give up the treatment the refrigerator filter was there to provide. In practical terms, that often means the chlorine taste returns first. If the filter was part of your plan for reducing lead or PFAS exposure at the dispenser, bypassing it undercuts that plan completely.
For homeowners weighing pressure loss, cartridge cost, and contaminant concerns, practical home water treatment guidance helps sort out whether bypassing is the right short-term move or a sign the system needs a different fix.
A simple way to decide
Use the bypass for maintenance, diagnosis, or limited utility use where untreated water is an acceptable short-term compromise.
Reconsider bypassing any filter that serves drinking water. If that filter was installed for taste, odor, lead, chlorine, or PFAS concerns, bypass should last hours or days, not become the new normal.
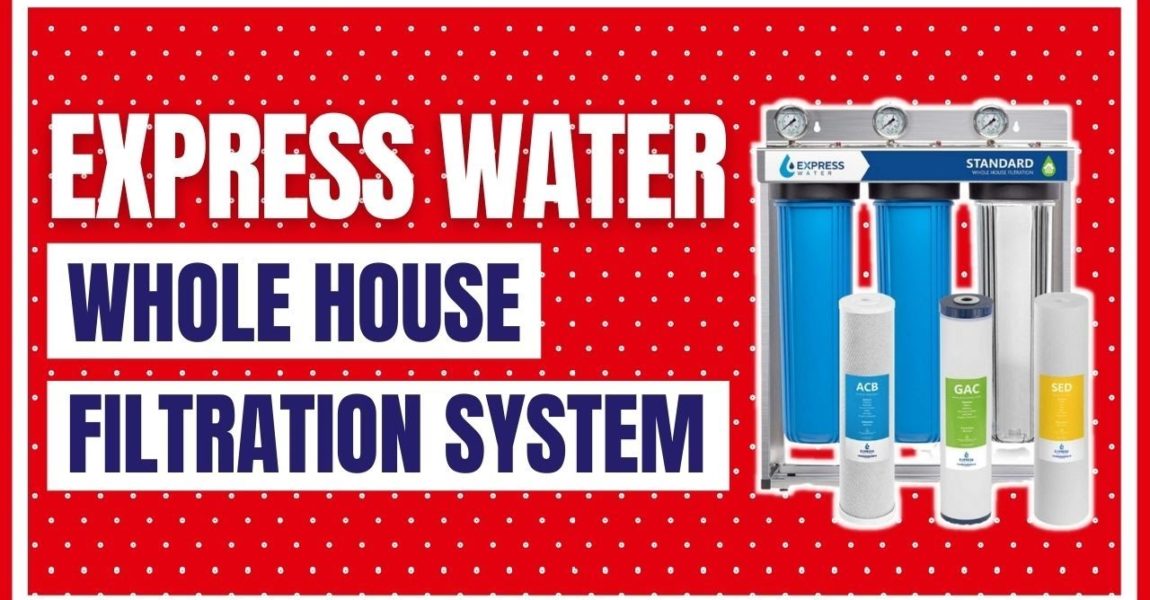
Installing a Whole-House Water Filter Bypass
A whole-house bypass solves a very practical problem. You need to change a cartridge, service a leaking housing, or diagnose a pressure issue, and the house still needs water. Done right, the bypass lets you keep showers, toilets, and laundry running while the filter is offline. Done poorly, it becomes the weak point in the system.
That trade-off matters more than many DIY guides admit. A bypass on a whole-house sediment or carbon filter is often reasonable for short maintenance windows. A bypass on a system installed to reduce a known contaminant problem changes the risk immediately. If your filter is part of your plan for PFAS, chlorine byproducts, or other source-water concerns, the bypass should be treated like a temporary service position, not normal operation.
The standard layout is a three-valve bypass. One valve sits on the inlet side, one on the outlet side, and one bridges the two through a short bypass loop.
In service mode, water goes through the filter. In bypass mode, you close the inlet and outlet valves to isolate the housing and open the center valve so water travels around it.
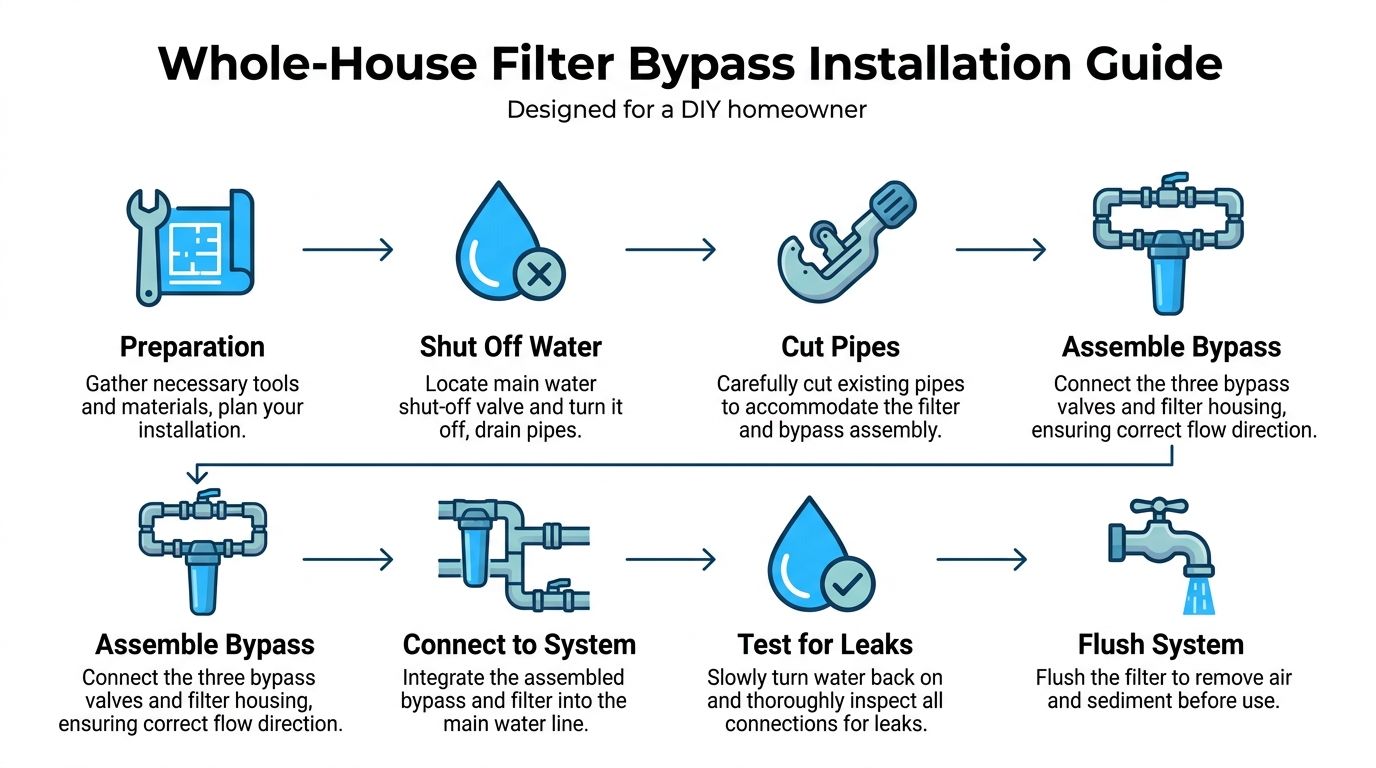
Tools and materials to gather first
Set everything out before you cut into the main line. For most installations, that includes:
- Ball valves: Full-port valves matched to your pipe size
- Pipe and fittings: Tees, elbows, unions, nipples, and the short section that forms the bypass loop
- Thread seal materials: PTFE tape or an approved thread sealant for threaded joints
- Cutting tools: A copper cutter, PEX cutter, or the correct tool for your plumbing material
- Wrenches: Two adjustable wrenches or two pipe wrenches so you can hold back while tightening
- Mounting hardware: A bracket and screws if the housing or manifold needs wall support
- Bucket and towels: Always needed, even on clean installs
Heat needs extra care around plastic housings, valve parts, and nearby trim pieces. Midmark's installation document for bypass-equipped water treatment assemblies shows support hardware, union use, and orientation requirements, and it reinforces a rule every plumber learns fast: keep open flame work away from plastic components whenever possible, especially once the assembly is mocked into place (Midmark installation document).
Plan the layout before you cut
A clean layout is easier to maintain and less likely to leak later.
Leave enough space below the housing to drop the sump and remove the cartridge without fighting the floor or wall. Give yourself hand room around each valve handle. Dry-fit the tees, valves, and housing before making the first cut.
I see the same mistake over and over. The piping is technically correct, but the sump cannot be unscrewed without hitting the wall, or the bypass handle ends up tucked behind the housing where no one can reach it.
Basic valve positions
Before you install anything, know the finished valve positions:
| Mode | Inlet valve | Outlet valve | Bypass valve |
|---|---|---|---|
| Service | Open | Open | Closed |
| Bypass | Closed | Closed | Open |
Label the valves after installation. A tag or marker saves confusion when somebody else has to shut it down during a leak or filter change.
Here’s a visual walkthrough that pairs well with the written steps below.
Step 1 shut off water and drain the line
Shut off the main supply. Open a downstream faucet to relieve pressure and drain the section you plan to cut.
Put towels down early if the filter is near finished walls, flooring, or electrical equipment. Water always finds the one spot you did not protect.
Step 2 mark the filter and bypass footprint
Hold the housing and bypass loop in position and mark your cut points. Confirm spacing for the housing ports, both tees, the center valve, and future service access.
Too tight, and the housing becomes miserable to maintain. Too spread out, and the pipe puts extra strain on the head and fittings.
Step 3 cut the pipe cleanly
Cut the main line with the right tool for the material and keep the cuts square.
Deburr as needed. Sharp edges can damage seals and cause push-fit connections to seat badly.
Step 4 pre-assemble the bypass loop
Build as much of the assembly as you can on a bench or floor. Usually that means the two tees, the short bypass section, and the center valve.
Then confirm the housing orientation and branch connections with a dry fit. This allows you to catch backward heads, awkward handle positions, and missing clearance before the system is glued, pressed, or threaded together.
Step 5 support the assembly
Mount the bracket firmly if your system uses one. Use unions where they make future service easier, especially on common residential sizes.
This step gets skipped in a lot of homeowner installs. The pipe ends up carrying the housing weight, the housing shifts every time someone changes the cartridge, and the threaded ports start weeping months later.
Step 6 check flow direction before final assembly
Some housings, valve bodies, and control components are directional. Follow the flow arrow on every part that has one.
This matters on simple filter heads and it matters even more on systems with accessories such as shutoff components or specialty controls. If the body is installed backward, you can get poor flow, bad sealing, or service problems that look like a defective filter.
Step 7 connect the assembly to the plumbing
Install the filter and bypass into the main line. On threaded joints, use two wrenches so you do not twist the housing head or rack the existing plumbing.
Use thread sealant only where the fitting type calls for it. Compression, push-fit, solvent-weld, PEX crimp, and threaded joints each have their own rules. Mixing methods out of convenience is how small leaks turn into callbacks.
Step 8 install the cartridge and check seals
Insert the cartridge, seat the O-ring correctly, and tighten the housing the way the manufacturer specifies. Clean the O-ring groove first and inspect the seal for nicks, flattening, or grit.
A dirty or pinched O-ring often gets blamed on the bypass because the leak shows up after the installation. The actual problem is usually at the sump.
Step 9 pressurize slowly and test for leaks
Bring the water back on slowly. With the bypass valve closed and the inlet and outlet valves in service position, crack the main supply just enough to fill the housing without a hard rush.
Check every joint, union, valve, and housing connection. A dry paper towel is better than your eyes for finding a small seep.
Step 10 flush the filter before normal use
Flush the cartridge according to the filter manufacturer's instructions. That clears trapped air, fines, and installation debris.
A little sputtering at first is normal while the air purges. Steady flow is the goal.
Common mistakes that create callbacks
These are the problems I run into most often:
- Valve handles blocked by the layout: The bypass works on paper but cannot be operated easily.
- No support under the housing: The assembly moves during cartridge changes and stresses the ports.
- Not enough sump clearance: The filter cannot be opened without removing other plumbing.
- Torch work too close to plastic parts: Housings, valve seats, and trim get damaged by heat.
- No unions where service requires them: Future repairs become harder than they need to be.
- Bypass left open by accident: Untreated water feeds the entire house and the filter appears to be "working" because flow is normal.
That last mistake deserves attention. On a whole-house sediment filter, the main consequence may be dirt getting through fixtures and appliances. On a whole-house carbon or specialty treatment system, bypassing can re-expose the home to the very contaminants the system was installed to reduce. If the household chose treatment because of taste alone, that is one problem. If the choice was driven by PFAS concerns or another drinking-water issue, bypass is a short-term maintenance position and should be treated that way.
A good bypass installation feels simple in use. The valves are easy to reach, the housing comes apart without a fight, and the system returns to service without leaks or guesswork.
Bypassing Under-Sink and Refrigerator Filters
You pull the refrigerator filter because flow has slowed to a trickle, snap in a bypass plug, and the water comes back strong. That feels like a fix. In practice, it only proves the filter was restricting flow. It also means the water is now passing through with little or no treatment.
That distinction gets missed all the time. With whole-house systems, a bypass usually sends water around the equipment through separate piping. Under-sink units and refrigerators often do it inside the filter head or by replacing the cartridge with a pass-through part. The hardware is simpler. The drinking-water trade-off is easier to overlook.
Under-sink systems usually use a built-in bypass
Most under-sink filter heads are built for quick service. A lever, push button, or auto-shutoff in the head lets you remove the cartridge without shutting down the entire home. On a good design, cartridge changes are clean and fast.
Use the feature the way the manufacturer intended:
- Shut off the feed if your model requires it.
- Open the faucet to relieve pressure.
- Engage the release or service position.
- Remove the old cartridge.
- Seat the new cartridge fully.
- Return the head to filter mode and flush the faucet.
Correct seating matters more than many homeowners expect. If the cartridge is cocked, half-locked, or forced past a keyway, you can get leaks, poor flow, or a partial internal bypass that lets untreated water slip past the media.
Refrigerator filters use plugs or bypass cartridges
Refrigerators handle bypass differently. Many models need a bypass plug or bypass cartridge installed when the filter is removed. Without that insert, the dispenser or ice maker may slow down, stop, or behave erratically because the filter head is designed to stay mechanically engaged.
Manufacturers sell those parts for troubleshooting and short-term use. GE and other major brands provide model-specific bypass inserts that keep water moving through the refrigerator while the filter housing remains properly actuated. That proves a useful point for diagnosis. If flow improves the moment the bypass goes in, the old filter was clogged, installed incorrectly, or failing internally.
What it does not prove is that the water is still being treated.
Side-by-side trade-offs
| Feature | Under-sink bypass | Refrigerator bypass plug |
|---|---|---|
| How it works | Built into filter head or manifold | Replaces the cartridge with a pass-through part |
| Main use | Quick cartridge changes or service | Troubleshooting or temporary operation |
| Best use case | Brief maintenance window | Waiting for the right replacement filter |
| Main downside | Easy to forget system isn’t filtering if left in bypass | Water flows, but treatment for taste and chemicals is lost |
What works and what doesn’t
These bypass options are useful during maintenance, diagnosis, or a short wait for the correct replacement filter. I use them for exactly that.
Problems start when a temporary bypass becomes normal operation. A refrigerator bypass plug is not a filter. An under-sink head left in service position is not filtering either. If the original cartridge was there for chlorine taste, odor, lead reduction, or PFAS reduction, bypassing can put those contaminants back into the drinking water stream at whatever level the incoming supply contains.
PFAS is the part many DIY guides skip. If a household installed an under-sink filter because they were trying to reduce long-lasting contaminants, bypassing that unit takes them back to untreated source water. The same logic applies to refrigerators. Many fridge filters are mainly used for taste and odor improvement, but some households rely on them as a last point-of-use barrier for chemicals they do not want in drinking water or ice.
You can often taste the difference fast. More chlorine bite. More pool smell. Sometimes no obvious taste change at all, which is why bypass can be misleading. A lot of contaminants do not announce themselves in the glass.
Treat under-sink and refrigerator bypasses as service tools, not operating modes. That keeps the convenience without forgetting the reason the filter was installed in the first place.
Smart Alternatives to a Standard Bypass
Not every home starts with a neat three-valve bypass. Older installs often have a filter housing plumbed straight into the main line with no isolation at all. That’s when homeowners start looking for workarounds.
Some of those workarounds are solid. Some create more pressure loss and more service headaches than the original problem.
Two practical retrofit options
The first option is an isolation-style retrofit. Instead of a full classic bypass from the start, you add shutoff valves on either side of the filter and build a controlled path around it. This can be a good fix when access is tight or when you want to improve serviceability without rebuilding the whole area.
The second option is a temporary jumper for maintenance. In some situations, especially on PEX systems, a plumber can isolate the filter, disconnect a section, and create a short temporary pass-through using compatible tubing and fittings while the filter assembly is repaired or replaced. That’s a practical service method, not something to leave in place forever.
Flow loss matters more than people expect
A bypass layout can solve one problem and create another if the components are undersized or poorly chosen. Homeowners who install a DIY 3-way ball valve bypass using 3/4-inch NPT fittings need to be aware that it can reduce water flow by 15% to 20%, while factory bypasses designed for the application may preserve up to 95% of the original flow rate, according to this discussion of whole-house bypass trade-offs.
That’s the kind of issue people feel in the shower or when two bathrooms run at once. The system still “works,” but the house feels starved.
Which alternative fits which situation
- Use a temporary maintenance jumper when the goal is to keep water on during a short repair.
- Use isolation valves when you want easier service access but don’t need a full redesign.
- Use a factory-made bypass assembly when preserving flow and compatibility matters more than shaving initial cost.
A bypass that kills pressure isn’t a clever hack. It’s just a different problem.
What about smart bypass valves
Some newer systems use app-controlled or automated bypass functions, especially on equipment that backwashes or cycles through service modes. Those can be useful in complex setups, but for most homes, simplicity still wins. A clearly labeled manual bypass with quality valves is easier to understand and easier to repair.
The smartest alternative is usually the one the next homeowner, the next plumber, or the next family member can operate without guessing.
Troubleshooting Common Bypass Problems
Bypass problems usually announce themselves in plain ways. A drip. A stuck handle. A sudden pressure drop. The trick is separating a valve problem from a filter problem, because they can look similar from across the basement.

Quick diagnosis table
| Symptom | Likely cause | What to do |
|---|---|---|
| Slow drip at valve handle | Packing nut or internal seal issue | Gently tighten the packing nut if the valve design allows. If it still drips, replace seals or the valve. |
| Valve won’t turn | Mineral buildup, age, or lack of use | Don’t force it. Shut down the line and service or replace the valve. |
| Pressure is low after returning to service | Filter is clogged, valve not fully open, or housing issue | Confirm valve positions first, then inspect the cartridge and housing seal. |
| Water still seems untreated | Filter bypassing internally or poor seal at the housing | Inspect the cartridge seating and O-ring before blaming the valve. |
The problem may be the filter seal
One of the most overlooked causes of poor performance is leakage around the filter rather than through it. Research on filter bypass flow shows that even a 1 mm gap can allow about 1% to 2% of flow to bypass the media, and bypass can rise to nearly 40% with larger gaps or as a filter gets clogged, according to this California Energy Commission research document.
That matters because the symptoms mimic a faulty bypass valve. Water quality drops. Pressure acts strangely. The homeowner assumes the valve is partly open, yet the underlying problem is a bad seal, warped frame, or misseated cartridge.
Simple checks before you call for service
- Verify handle positions: A half-turned valve can create confusing flow behavior.
- Inspect the housing O-ring: Clean it and make sure it sits flat.
- Look for frame or cartridge damage: A bent cartridge or worn seat can let water sneak around the media.
- Cycle the bypass slowly: Sometimes a valve that sat untouched for years needs careful movement to reseat fully.
Don’t diagnose from the handle alone. The bypass path might be closed while the filter is still leaking around its own seal.
If you see cracked housings, heavily corroded valves, or fittings that move when touched, stop there and bring in a plumber. Water under pressure punishes wishful thinking.
Frequently Asked Questions About Water Filter Bypasses
Will installing a bypass void my filter warranty
It can, depending on the equipment and the parts used. Manufacturer-approved bypass components are always the safer route when warranty protection matters. On refrigerators especially, an official bypass cartridge is very different from a homemade workaround. If you’re unsure, check the filter or appliance documentation before modifying anything.
Is it okay to leave a bypass water filter on all the time
Usually, no. A bypass is meant for service, troubleshooting, or another short-term reason. If you leave the system in bypass, you’ve removed the treatment stage from the water path. On a whole-house system that may mean taste, odor, or sediment issues returning. On a drinking-water system, it means the water at the faucet or dispenser is no longer being treated as intended.
How do I keep bypass valves from seizing up
Operate them occasionally and do it gently. A valve that never moves is the one most likely to freeze in place when you need it. Turn the handles through their positions during routine maintenance, then return them to normal service mode. If a valve feels rough or gritty, don’t muscle it harder. That’s when stems snap and leaks begin.
How do I know whether low pressure is from the bypass or the filter
Start with the simple checks. Confirm the valve positions, then compare flow in service mode versus bypass mode if your system allows it. If pressure improves when bypassed, the cartridge may be loaded or the housing may have a sealing problem. If pressure stays poor either way, the restriction may be elsewhere in the plumbing.
When should I call a professional
Call for help if the bypass leaks at the body, not just the handle, if the housing threads are damaged, if the valve won’t move without force, or if you’re dealing with a complicated setup that includes directional parts or electrical controls. It’s also worth calling a pro if you’re not fully certain which water lines feed drinking fixtures versus utility lines. That’s where bypass mistakes become household water-quality mistakes.
If you’re sorting out a bypass water filter decision and want clearer guidance on replacement filters, whole-house setups, under-sink systems, and what helps with chlorine, lead, iron, or odor, Water Filter Advisor is a strong next stop. It’s built for homeowners who want practical, research-driven help choosing and maintaining the right filtration system without getting lost in marketing claims.