
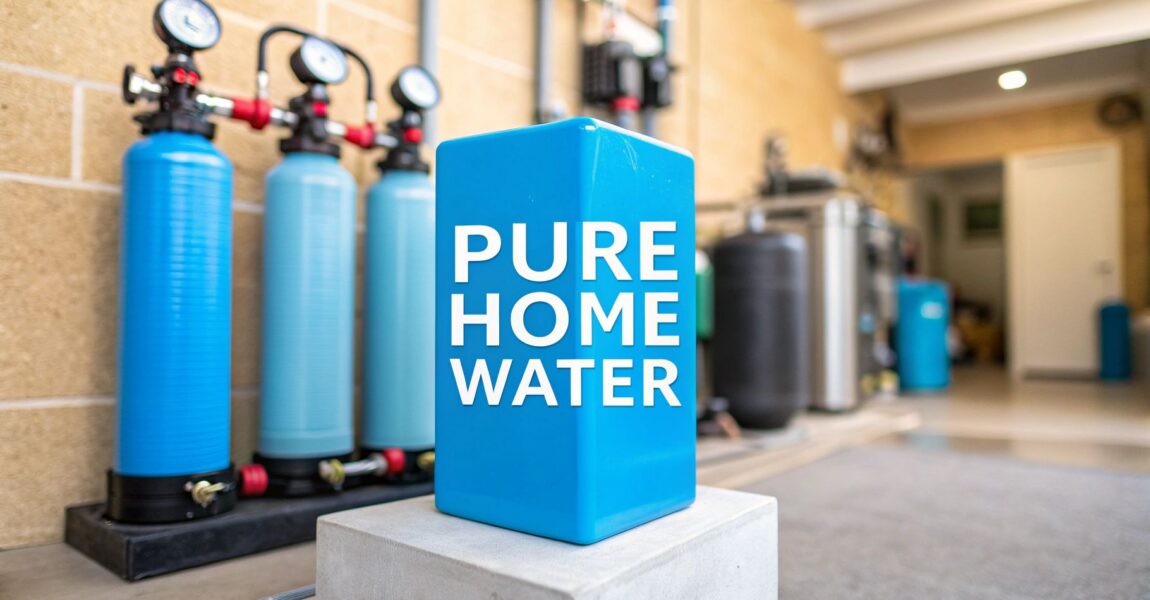
Choosing The Best Whole House Water Filter Systems
Ready to banish that chlorine smell from your showers and stop scrubbing rust stains from your sinks? Finding the best whole house water filter system ...
Ready to banish that chlorine smell from your showers and stop scrubbing rust stains from your sinks? Finding the best whole house water filter system ...
Finding the best whole house water filter system isn't about plucking a random brand off a shelf. The right choice is the one tailored specifically to your water, your home, and your family. It's about matching the filter to the unique contaminants swimming in your tap, making sure it’s sized correctly for your home’s flow rate, and verifying it has the NSF/ANSI certifications to back up its impressive claims.
The ideal system for you depends entirely on whether you're on city or well water, what specific impurities are floating around in there, and how much water your household actually uses day-to-day. Let's dive in and make your water awesome.
Are you tired of that faint chlorine smell every time you turn on the shower? Fed up with those chalky hard water stains that defy all cleaning products? A whole house water filter is the hero you've been waiting for. It treats water right where it enters your home, delivering purified, pristine water to every single tap, appliance, and showerhead. This "point-of-entry" approach is a total game-changer.
Unlike a simple faucet filter that only cleans up the water at one sink, a whole house system provides a complete, home-wide solution. This guide will walk you through everything you need to know to make a smart decision, from understanding your water’s unique chemistry to picking the right technology for the job.
First things first, you need a filtration strategy. The two main paths, point-of-entry and point-of-use, serve very different purposes. Getting this right is key to finding the best whole house water filter system for what you actually need. Digging into the different Water Filtration Systems available is a crucial step to ensuring pure water flows from every faucet.
| Feature | Whole House (Point-of-Entry) | Point-of-Use (e.g., Faucet Filter) |
|---|---|---|
| Coverage | Treats all water entering the home | Treats water at a single fixture |
| Main Goal | Protects plumbing, appliances, and provides clean water everywhere | Improves drinking water taste at one tap |
| Installation | Installed on the main water line, often requiring a plumber | Simple DIY installation, screws onto a faucet |
| Maintenance | Filters changed every 6 months to 10+ years | Cartridges changed every 2-4 months |
This side-by-side view makes it clear why whole-home solutions are exploding in popularity. More homeowners are prioritizing clean water everywhere, driving huge demand in the global home water filtration market. Experts project the industry will hit USD 7.13 billion by 2026, growing at a healthy clip of 8.49% each year.
A whole house system is an investment in your home's infrastructure and your family's well-being. It protects your washing machine, dishwasher, and water heater from damaging sediment and scale, extending their lifespan and improving efficiency.
My goal here is to help you look past the brand names and focus on what really counts: matching the right filter technology to your home's specific water problems. For more in-depth help, check out our other advice on choosing water filters.
Before you even think about buying a filter, you need to play detective. The single most important thing you can do is figure out what’s actually in your water. Choosing a system without this knowledge is like prescribing medicine before you know the illness—it’s a total shot in the dark.
This all comes down to water testing. Your game plan will look completely different depending on whether you’re on city water or a private well, as each has its own unique set of problems.
If your house is hooked up to a municipal supply, you've got a head start. Your local water utility is legally required to send you a Consumer Confidence Report (CCR) every year. Think of it as a report card for your water, showing what contaminants were found and how they stack up against legal limits.
The usual suspects in city water are:
Well water, on the other hand, is a total wild card until you test it. Since it isn't treated by anyone, keeping it safe is 100% on you.
A private well is basically a direct tap into the ground. Its quality is at the mercy of everything from farm runoff and leaky septic tanks to the natural minerals in your local geology. Never just assume your well water is safe to drink.
Okay, so you know you need to test. But how? The right method depends on your water source and what you think might be wrong.
For city water folks, that CCR is your starting point. If you’re just dealing with annoying things like the taste of chlorine or a bit of sediment, a simple DIY home test kit can confirm it. These kits are cheap, fast, and good enough to point you toward a basic carbon or sediment filter.
But for well owners or anyone worried about serious health risks (like lead from old plumbing), a professional lab analysis is the only way to go. It's not optional. A certified lab will give you a detailed report that can spot a much wider range of contaminants with pinpoint accuracy, including:
Once you know exactly what's in your water, you can stop guessing. This data is the foundation for finding a whole-house filter that actually solves your problems instead of just wasting your money.
With your water test results in hand, it’s time to play matchmaker. The goal is to perfectly pair the contaminants lurking in your water with the right filtration technology to knock them out. This is the absolute core of choosing the best whole house water filter system—it's not about a flashy brand name, but what's under the hood.
Forget generic lists. We're going to dive into how each type of filtration actually works in the real world. Getting a handle on these technologies is the only way to build a system that truly solves your specific water problems, whether you're dealing with city water or pulling from a well.
This flowchart lays out the different challenges you'll face with city versus well water, which really dictates your whole strategy.

As you can see, municipal water is all about tackling treatment byproducts, while well water forces you to focus on whatever nature has thrown in.
The table below breaks down which technology is best suited for common water issues. Use it to connect your water test results directly to the right solution.
| Contaminant Problem | Primary Technology Solution | Best For This Scenario | Key Considerations |
|---|---|---|---|
| Chlorine Taste & Smell | Activated Carbon | City water that tastes/smells like a swimming pool. Improves general water quality. | Standard GAC is good; carbon block is better for preventing channeling. |
| Chloramine (stubborn chemical) | Catalytic Carbon | City water treated with chloramine instead of just chlorine (check with your utility). | Standard carbon is not effective against chloramine; you need this specific upgrade. |
| Heavy Metals (lead, mercury, iron) | KDF Media | Well water with metallic tastes or city water with known lead pipe risks. | Often paired with carbon to protect it and inhibit bacterial growth. |
| Hard Water (limescale, soap scum) | Water Softener (Ion Exchange) | Homes with hard water that causes appliance failure, dry skin, and spotty dishes. | Requires salt refills and a drain for regeneration. Doesn't "filter" chemicals. |
| Sediment (sand, silt, rust) | Sediment Filter | The essential first stage for all systems, especially for well water. | Micron rating is key. A 5-micron filter is a solid starting point for most homes. |
| Bacteria, Viruses, Cysts | UV Purifier | Well water users who need protection against microbiological contaminants like E. coli. | Water must be pre-filtered and clear for the UV light to be effective. |
Ultimately, choosing the right media isn't about picking just one. It’s about building a multi-stage system where each component targets a specific problem, creating a comprehensive solution for clean, safe water throughout your home.
When you think "water filter," you're probably picturing carbon. And for good reason. Activated carbon filters are the industry go-to for fixing the taste and smell of water, especially municipal water that's been zapped with chlorine. They work through a process called adsorption—think of it like a magnet, where chemical contaminants get stuck to the carbon's massive internal surface area.
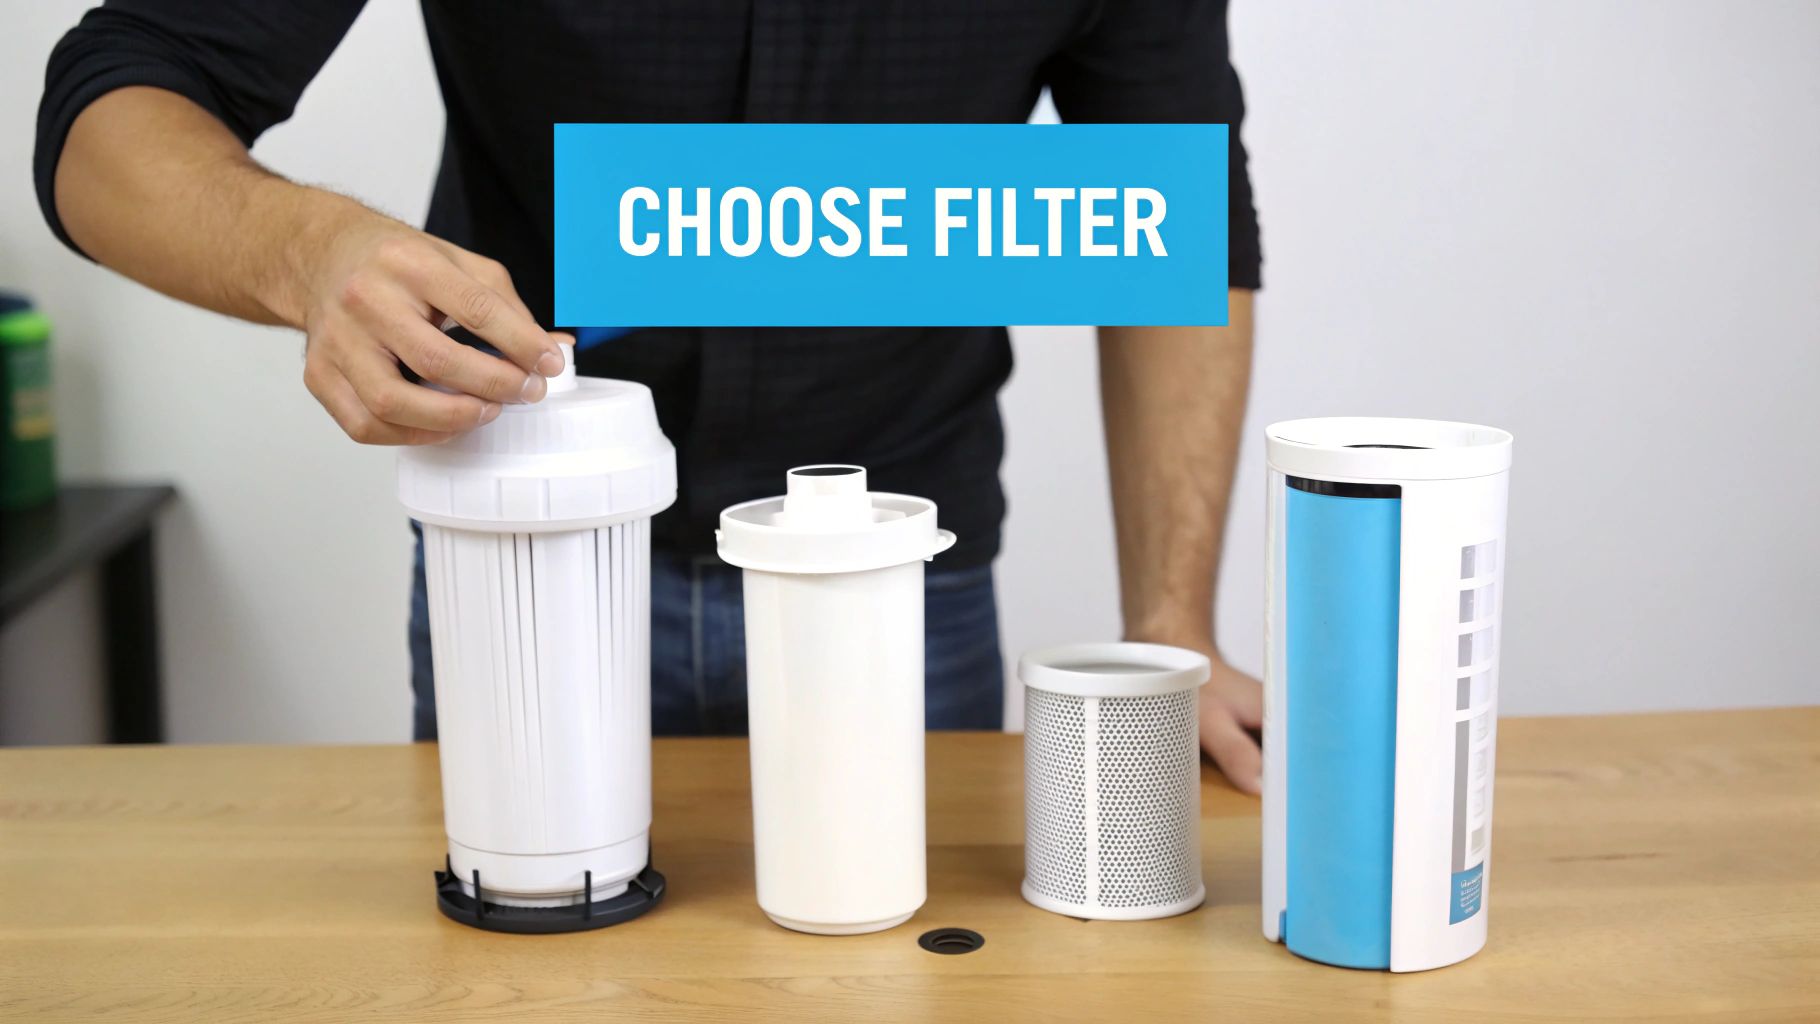
But not all carbon is the same. You'll mainly see two types: Granular Activated Carbon (GAC) and Carbon Block.
For most homes on city water, a good carbon block filter is all you need to get rid of that "pool smell." But what if your water report shows chloramine? About a third of U.S. municipalities use this more stubborn disinfectant. In that case, you need catalytic carbon, which is specifically engineered to break down chloramine's tough chemical bond where standard carbon falls short.
Once you move past basic taste and odor, you run into problems that require a more targeted approach. This is especially true for well water, which can be a cocktail of minerals and metals that carbon won't touch.
Enter Kinetic Degradation Fluxion (KDF) media. It's a high-purity copper-zinc alloy that works through an electrochemical reaction. KDF is a beast when it comes to:
Real-World Scenario: Your well water leaves orange stains in the shower (iron) and has a "rotten egg" smell (hydrogen sulfide). A multi-stage system is the answer. Combining a dedicated iron filter with KDF and carbon media will knock out the stains, the smell, and any other weird tastes.
Filtration isn't just about what you can't see. Sometimes the problem is physical—either hard mineral buildup that clogs your pipes or just plain old dirt and grit.
Water softeners are purpose-built to fight water hardness using ion exchange. They have resin beads that grab onto calcium and magnesium (the minerals behind limescale) and swap them for sodium ions. If you're tired of soap scum, spotty dishes, and appliances dying an early death, a softener is non-negotiable. Many of the best systems combine a softener with carbon filters.
Sediment filters, on the other hand, are the first line of defense for any system. They catch physical gunk like sand, silt, and rust before it can clog up the more sensitive carbon or KDF media downstream. They're rated in microns—the smaller the number, the finer the particle it can trap. A 5-micron sediment filter is a great starting point for most homes.
The demand for clean water is exploding. The home water filtration market hit USD 20.26 billion in 2024 and is rocketing toward USD 50.89 billion by 2033, growing at a blistering 11.2% CAGR. RO-based systems, which are often integrated into whole-house setups, claimed a 62.23% market share in 2024, proving how effective they are at removing heavy metals and microbes. You can discover more insights about this rapidly growing market.
For anyone on a private well, microbiological safety is paramount. Contaminants like E. coli or Giardia are serious health risks. While KDF can inhibit bacterial growth, it doesn't sterilize the water.
That's the job of an Ultraviolet (UV) purifier. A UV system zaps water with a powerful UV-C light that destroys the DNA of microorganisms, making it impossible for them to reproduce and make you sick. It's a completely chemical-free way to ensure your water is biologically safe. A UV light is almost always the very last stage in a well water system, placed after the sediment and carbon filters so the water is crystal clear, allowing the light to penetrate effectively.
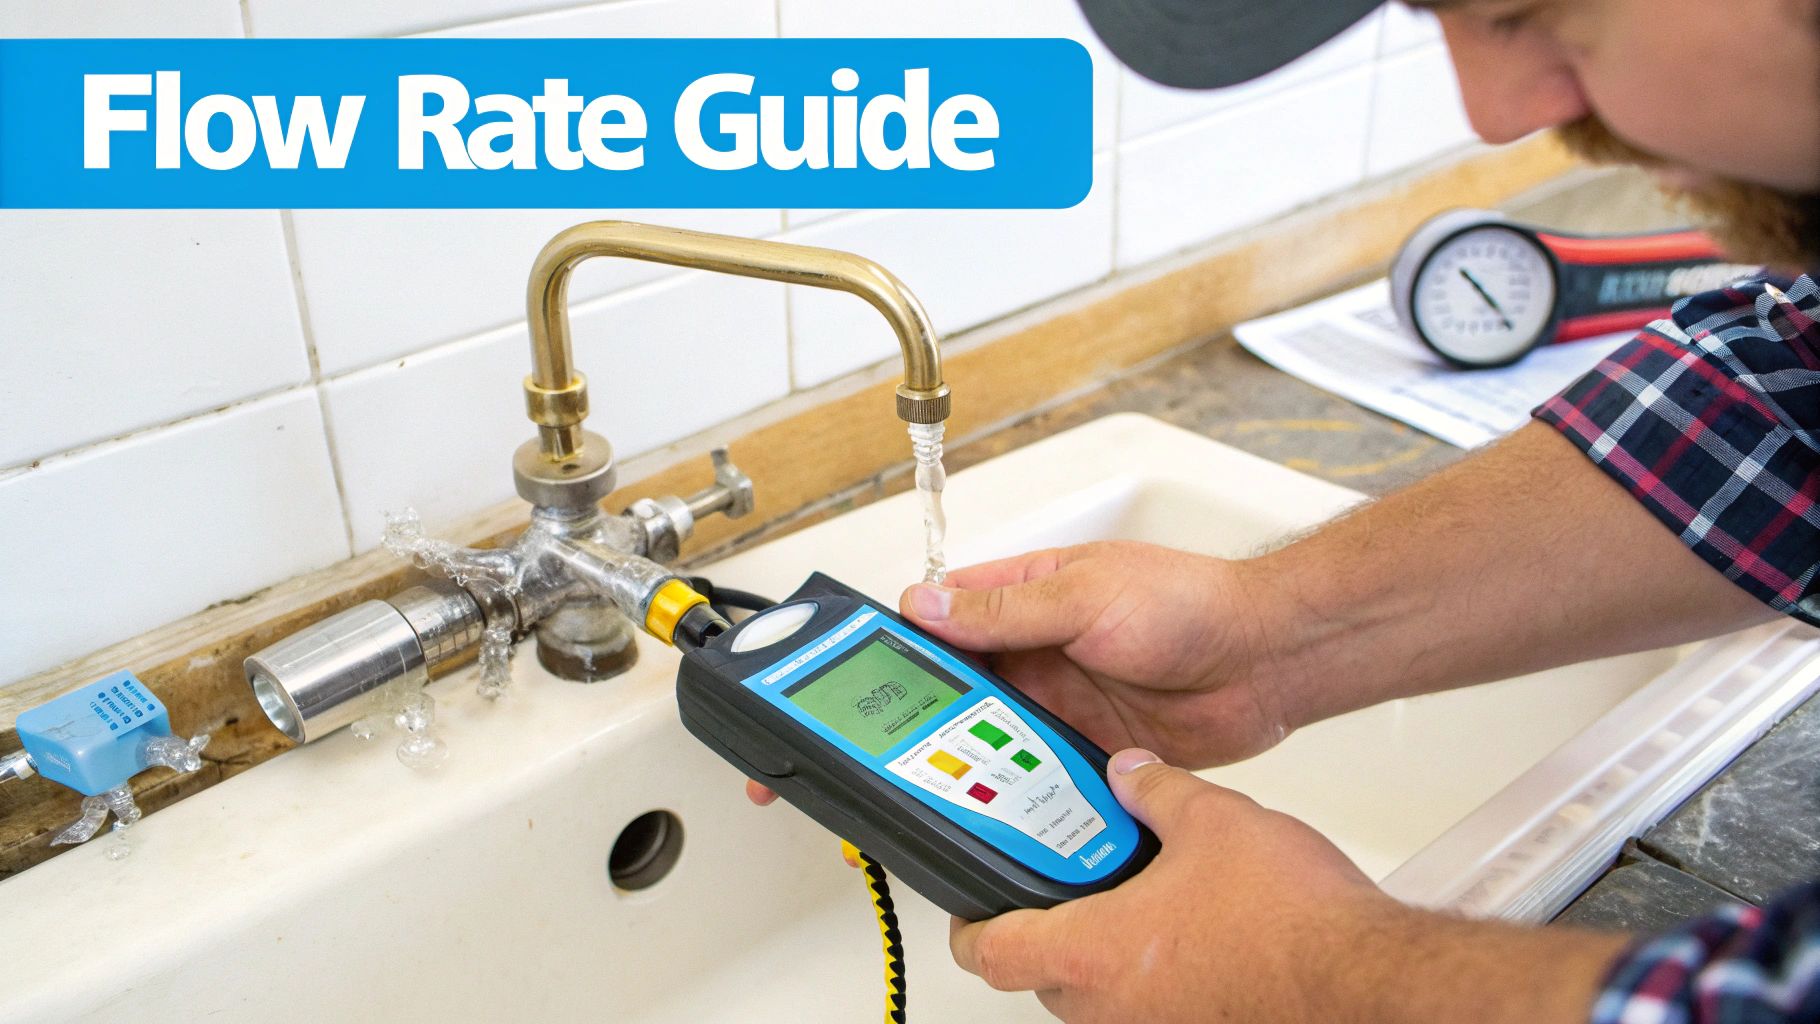
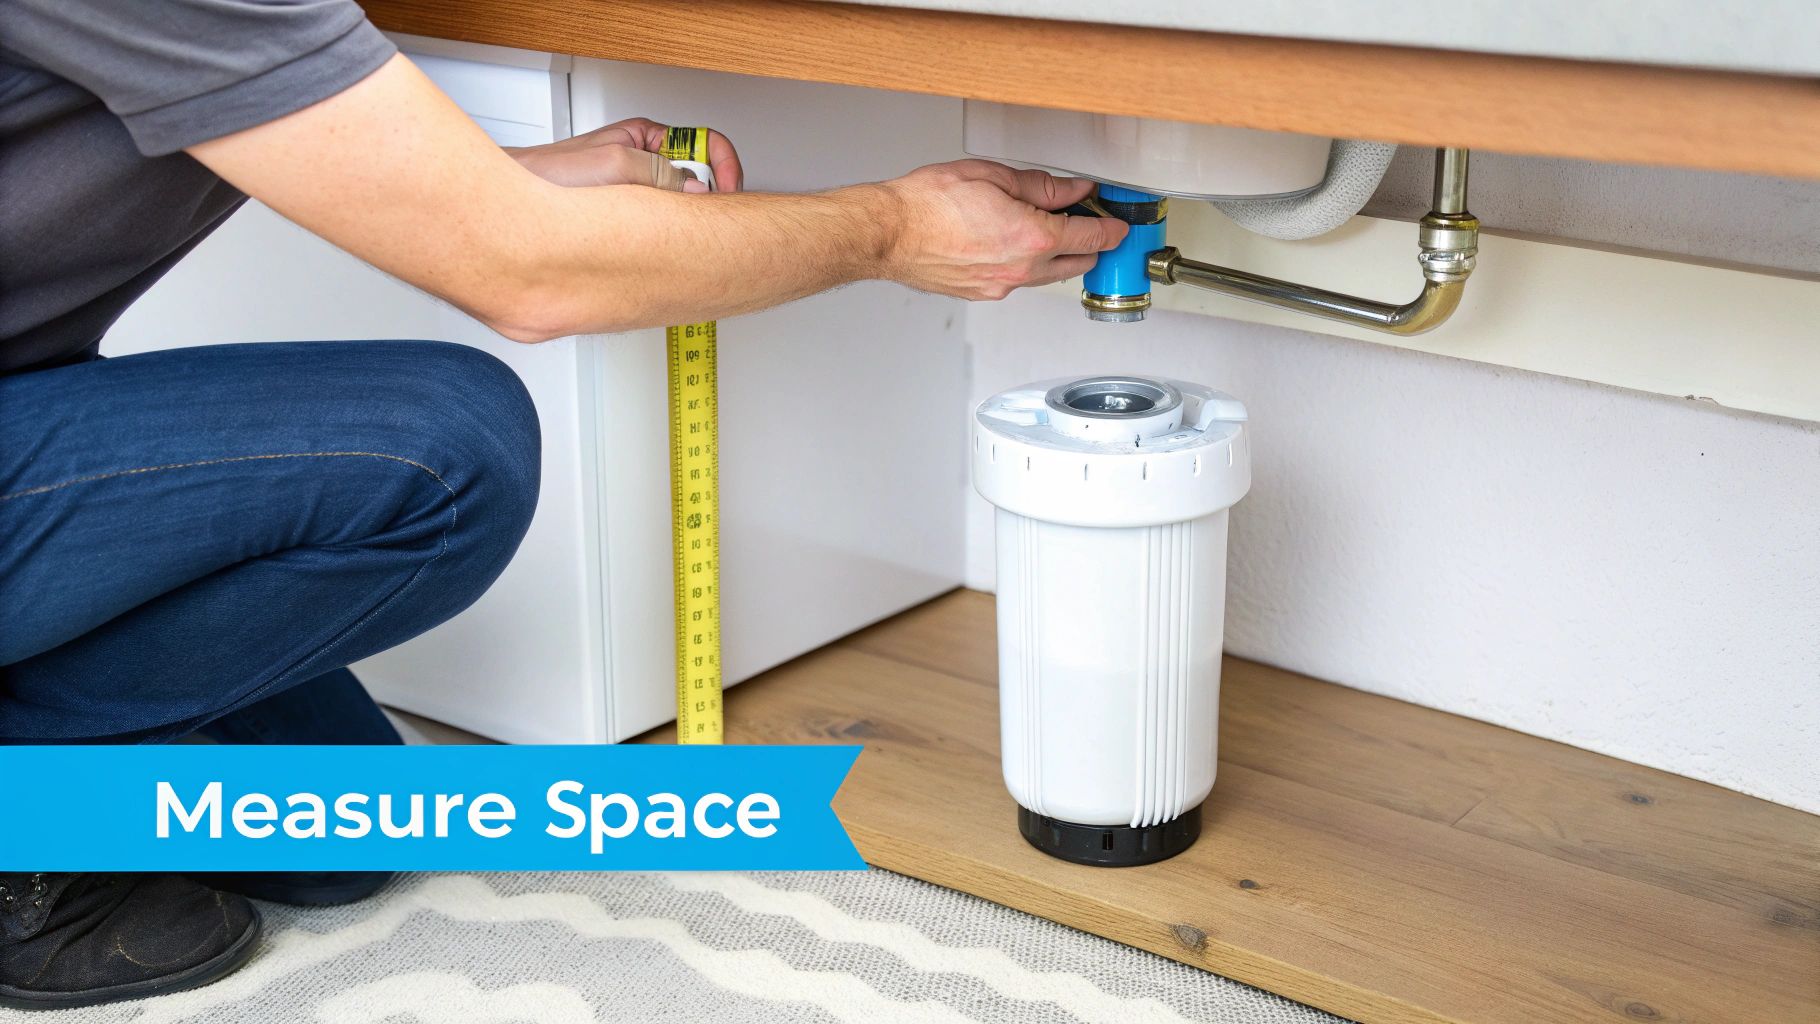
Picking a filter just based on what it removes is only half the job. If you get a system that’s too small, you'll kill your home's water pressure, and that relaxing shower will become a sad little trickle. Go too big, and you're just throwing money away. Getting the size and flow rate right is absolutely critical if you want the best whole house water filter system to actually work well.
The magic number here is the flow rate, measured in gallons per minute (GPM). This tells you how much water can pass through the filter at once without your pressure taking a nosedive. To keep everyone in the house happy, your filter's GPM has to be able to handle your household’s peak water demand.
We're not talking about total daily water use. Peak demand is all about those moments when everyone is using water at the same time. Picture a hectic morning: the shower is running, the dishwasher is on, and someone else is washing their hands. Your filter has to keep up with all of that simultaneously.
You can get a pretty good estimate by just adding up the flow rates of your main appliances and fixtures. They all vary a bit, but these are solid numbers to work with:
Let's put that into perspective. A home with two bathrooms might have a morning rush where two showers and a faucet are all going. That adds up to a required flow rate of 6.5 GPM (2.5 + 2.5 + 1.5). But for a larger house with four bathrooms, you could easily see peak usage spike above 15 GPM. A system designed for a small condo would be totally overwhelmed in a big house, causing a massive pressure drop for everyone.
Here’s a good rule of thumb: always choose a system with a GPM rating a little higher than what you calculate for your peak demand. It gives you a safety buffer so you never feel that pressure drop, even when things get busy.
Okay, so you've nailed down the right size. Now you need proof that the filter actually does what the company claims. This is where you look for independent certifications from groups like the National Sanitation Foundation (NSF) and the American National Standards Institute (ANSI). These aren't just fancy logos on a box; they're your guarantee that the system has been put through the wringer and passed legitimate tests.
Think of these certifications like a report card you can trust. When you're trying to find the best whole house water filter system, two standards really matter:
NSF/ANSI 42 (Aesthetic Effects): This one is all about the stuff that affects taste, smell, and appearance. It confirms a filter can reduce things like chlorine and visible particles. If your biggest problem is water that tastes and smells like a swimming pool, you definitely want a system with a Standard 42 certification.
NSF/ANSI 53 (Health Effects): This is the heavy hitter. It’s a much tougher standard that verifies a filter can reduce contaminants that are actual health risks. A system certified to Standard 53 is proven to remove specific things like lead, mercury, cysts (like Giardia), and a whole host of nasty volatile organic compounds (VOCs).
But here’s the key: you have to read the fine print. A filter might be certified under Standard 53 for lead, but not for cysts. Always double-check the performance data sheet to see the exact list of contaminants it's certified to remove, and make sure that list matches your water test results. This is what separates the truly great systems from the mediocre ones and gives you real peace of mind.
When you're shopping for a whole house water filter, the sticker price is just the tip of the iceberg. Finding the best whole house water filter system for your budget means looking past that initial number and figuring out the total cost of ownership over its entire life. Trust me, I've seen it happen: a system that looks like a bargain upfront can quickly turn into a money pit with expensive, frequent filter changes.
The smart way to approach this is to break down the total investment into three buckets: the unit itself, the installation, and the ongoing maintenance. Understanding how these pieces fit together is the key to making a good financial decision that gets you clean water without buyer's remorse later on.
The initial purchase price for a whole house system can swing wildly, from a couple of hundred dollars for a basic sediment and carbon setup to several thousand for a beefy, multi-tank system that includes a water softener. The price tag is almost always tied to the system’s complexity, its capacity, and what kind of contaminants it’s built to handle.
Then you’ve got to get it installed. A lot of the modern cartridge-based systems are designed for a handy homeowner to tackle, which could save you a few hundred bucks. But the bigger tank-based systems, especially those needing a drain line for backwashing, are a different story.
When you're adding it all up, don't forget to factor in professional installation—much like you would when calculating hot water system installation costs. Hiring a licensed plumber isn't just about getting a leak-free setup that meets local codes; it’s often required to keep your warranty valid.
This is where the real cost of owning a system shows up. Long-term maintenance almost always boils down to one thing: filter replacements. A low upfront price is tempting, but it often hides the reality of pricey proprietary filters you have to replace every few months.
The most affordable system isn't the one with the lowest initial price tag; it's the one with the most reasonable long-term maintenance costs relative to its performance.
Think about this common trade-off. System A costs $400, but needs $150 in filters every six months. Over five years, you’ve spent $1,900. Meanwhile, System B costs $900 upfront, but its high-capacity media tank lasts five years before you need a $500 replacement. Your five-year total for System B? Just $1,400. That’s a $500 savings in the long run.
To get a real handle on future costs, you need to know what you’re dealing with in terms of filter types and how long they last. This helps you build a realistic budget instead of getting hit with surprise bills.
Here’s a quick rundown of what to expect from the most common components:
It's clear homeowners are seeing these systems as a long-term investment. In the residential water purifier market, households make up a dominant 65% share in the US. These fixed systems are projected to hit USD 32.4 billion in revenue by 2025 and are expected to more than double to USD 64.3 billion by 2035. This trend just proves that people are willing to budget for quality water in their homes.
Picking the right system goes way beyond just comparing brand names or looking for the lowest price tag. You're close to making a decision, so let's tackle those final questions that always come up before you pull the trigger on the best whole house water filter system for your home.
This is a big one. Most whole-house filters are designed to remove contaminants, not the minerals that cause hardness. If your water test came back showing high levels of calcium and magnesium, or if you're constantly fighting limescale on your faucets and fixtures, then you have hard water. Simple as that.
In that case, a combination system that includes both a water softener and a filter is absolutely the way to go. A home battling soap scum stains and cloudy glassware will see a night-and-day difference almost immediately with a combo unit.
There’s no single answer here—it all depends on the type of filter, how bad your water is to begin with, and how much water your family uses.
As a general rule of thumb, the sediment pre-filters usually need swapping out every 3 to 6 months. The main carbon block filters typically last longer, somewhere in the 6 to 12-month range.
The big media tanks are the real workhorses; they can often go for 5 to 10 years before needing new media. Always, always check the manufacturer's specific guidelines.
For many of the simpler, cartridge-based systems, you bet. If you're comfortable with basic plumbing tasks, you can probably handle the installation yourself. Swapping out a cartridge and tightening the fittings isn't much harder than a small home repair.
But when you get into the larger tank-based systems, especially those with backwashing functions, things get more complicated. These require a dedicated drain line and careful management of pressure controls.
"Hiring a licensed plumber for the more complex systems is a smart move. It protects your warranty and gives you peace of mind that everything is leak-free and working correctly."
Yes, professional installation adds to the upfront cost, but it can save you a ton of headaches and money on future repairs.
If the system is sized correctly for your home, you shouldn't notice any meaningful drop in water pressure.
When people do experience a significant pressure drop, it's almost always one of two things: the unit is too small for the home's water demand, or the filters are clogged and long overdue for a change.
Making sure the system's gallons per minute (GPM) rating can handle your peak demand (think dishwasher, shower, and washing machine running at once) is the key to avoiding this.
| Cause of Pressure Drop | The Fix |
|---|---|
| Low GPM Rating | You'll need to upgrade to a higher capacity system. |
| Clogged Filters | Just replace the cartridges or backwash the media tank. |
Proper sizing and regular maintenance will keep that water flowing strong.
Before you click "buy," pull out your water test results and compare them directly to the performance data sheet for any system you're considering. Make sure it's certified to remove the specific contaminants you have.
Also, think about the design. A system that gives you easy, independent access to each filter will make maintenance much less of a chore. Check for clear warranty terms and an easy registration process, too.
Don't just read the marketing copy—dig into user reviews. They often reveal the real-world performance and customer service experiences that you'll never find on a spec sheet.
A great pro tip: check your home's water pressure before and after the installation. This is the best way to confirm how the system is impacting your flow.
Finally, think long-term. Budget for those replacement filters and be open to potential upgrades down the road if your water quality changes.
Water Filter Advisor guides you through comparing filters, certifications, and costs. Visit https://www.waterfilteradvisor.com to find your ideal system today.
A successful whole house water filter installation doesn't begin with a pipe cutter—it starts with a plan. Think of this as your mission briefing ...

Let's be honest: you can't pick the right water filter if you have no clue what evil lurks within your pipes. It's really that simple.
Before you spend a single dollar, you need to become a water detective and figure out exactly what's in your water. Think of it like a superhero's origin story—you have to identify the villain before you can choose the right power to defeat it. For most of us, this means either digging into a local water quality report or getting your water tested.
Choosing a filter without knowing what’s in your water is like a chef cooking a meal blindfolded. You might accidentally make something edible, but you'll probably just waste a lot of good ingredients.
The goal is to go from a vague complaint like "my water tastes funky" to a specific diagnosis like "my water has high levels of chlorine and tastes like a swimming pool." This clarity is everything. Thankfully, whether you're on city water or a private well, unmasking your water's true identity is easier than you think.

Sometimes, you can get a good idea of what’s wrong just by using your senses. Here’s a quick guide to help you connect common water complaints to their likely culprits.
| Symptom | Potential Contaminant(s) | Common Filter Solution |
|---|---|---|
| Rotten egg smell | Hydrogen Sulfide | Activated Carbon, KDF, Oxidation |
| Chlorine / chemical taste | Chlorine, Chloramines | Activated Carbon, Catalytic Carbon |
| Cloudy or murky water | Sediment, Silt, Turbidity | Sediment Filter |
| Metallic taste | Iron, Copper, Zinc, Lead | KDF, Ion Exchange, Reverse Osmosis |
| Stains on fixtures (blue/green) | Copper (from acidic water) | Acid Neutralizer, Reverse Osmosis |
| Stains on fixtures (red/brown) | Iron | Iron Filter, Water Softener |
| Hard water film on dishes | Calcium, Magnesium | Water Softener, Template Assisted Crystalization (TAC) |
This table is a great starting point, but for a definitive answer, you'll want to get a formal report or test done.
If a water bill magically appears in your mailbox every month, your water provider is legally required to give you an annual water quality report. It’s usually called a Consumer Confidence Report (CCR), and it's a treasure map to your water's secrets. It breaks down all the contaminant levels detected in your supply over the last year.
Finding your CCR is a piece of cake:
When you're looking at the report, don't let the science-y terms scare you. Just focus on the columns showing the "Level Detected" and compare it to the "Maximum Contaminant Level (MCL)." Keep an eye out for things like chlorine, chloramine, lead, and disinfection byproducts like TTHMs (Total Trihalomethanes).
If your water comes from a private well, congratulations—you're the sheriff in charge of your own water quality. Well water isn't monitored by a public utility, which means it can be vulnerable to contamination from things like farm runoff, septic systems, or even natural mineral deposits.
The most reliable way to know what's in your well water is to get a professional lab test. Those DIY kits from the hardware store are okay for a rough idea, but they just don't have the accuracy or detail of a certified lab analysis.
A good, comprehensive test will check for a whole rogues' gallery of problems, including:
Once you have those results, you've got a clear battle plan. High chlorine? You're looking at an activated carbon filter. Lead? You'll need something more heavy-duty that’s certified for heavy metal reduction. Knowing what you're up against isn't just half the battle—it's the entire foundation for a smart purchase.
Alright, you've got your water test results in hand. Now for the fun part: picking the right gadget to fix the problem. But hold on—this isn't a one-size-fits-all game. The perfect filter for someone renting a downtown apartment is a universe away from what a homeowner on well water actually needs.
Think of it like buying a vehicle. You wouldn't buy a Ferrari to haul lumber, would you? The goal here is to find that sweet spot where your specific water issues, your living situation, and your budget all high-five each other.
Let's meet the main players in the home water filtration game, from the big-gun whole-house systems to that humble pitcher sitting in your fridge.
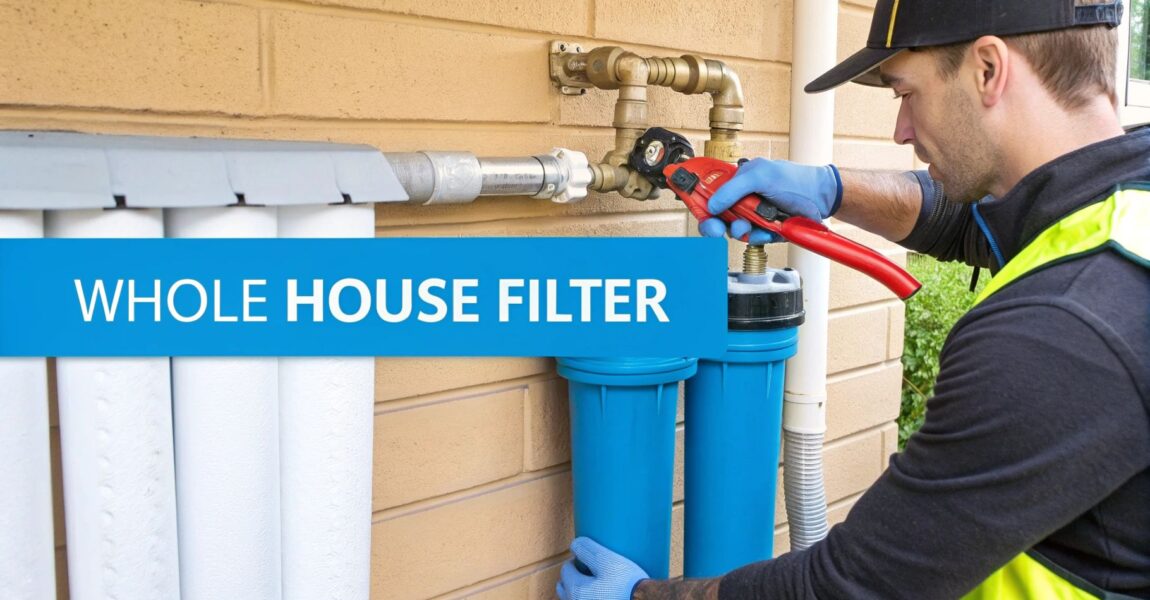
A whole-house water filter, sometimes called a Point-of-Entry (POE) system, is the superhero of home filtration. We're talking about a system that gets plumbed in right where your main water line enters your house. It treats every single drop of water you use, from the kitchen sink to the washing machine and every shower in between.
This is your go-to solution if your water report revealed widespread problems like tons of sediment, high chlorine levels, or serious hardness (looking at you, soap-scum-causing calcium). By tackling the water at the source, you’re not just getting better drinking water. You’re actually protecting your entire plumbing system and every appliance you own from scale buildup and chemical damage.
What if your biggest worry is just the water you drink and cook with? In that case, an under-sink filter—or Point-of-Use (POU) system—is a fantastic choice. These units are installed neatly out of sight in the cabinet under your kitchen sink, usually feeding into a small, dedicated faucet right next to your main one.
Don't let their size fool you; these systems offer a much higher level of filtration than a simple faucet or pitcher filter. Many under-sink models are multi-stage powerhouses, often using advanced tech like reverse osmosis (RO). An RO system can strip out an incredible range of contaminants, including nasty stuff like lead, arsenic, fluoride, and other dissolved solids.
An under-sink system really hits the sweet spot between performance and convenience. You get exceptionally pure water right where you need it most, without messing with your main faucet or cluttering up your countertop.
Look, not everyone can—or wants to—install a permanent system. If you're renting or just want something dead simple, there are some excellent, less-invasive choices out there.
When you're picking a filter, it's also worth knowing what's happening in the broader market. The global water filter market, valued at around USD 15.8 billion in 2025, is expected to jump to USD 25.2 billion by 2032. This boom means more innovation in residential systems like RO and activated carbon, more competition, and ultimately, better and more affordable options for you. A bigger market also means replacement parts are easier to find and more third-party testing is done, which keeps your long-term maintenance costs down. You can discover more insights about these market trends and how they affect your choices.
To make this crystal clear, let's line these options up and see how they compare in a real-world context.
| Filter Type | Ideal Use Case | Installation | Contaminant Removal |
|---|---|---|---|
| Whole-House | Homeowners wanting to protect plumbing and appliances from hard water, chlorine, and sediment. | Professional, permanent installation required. | Broad (sediment, chlorine, chemicals), often paired with a softener. |
| Under-Sink | Anyone wanting high-purity drinking and cooking water without treating the whole house. | DIY-friendly to professional, semi-permanent. | Very high (heavy metals, TDS, fluoride, chemicals). |
| Faucet Mount | Renters or those on a tight budget needing an easy, immediate fix for bad taste and odor. | Very easy, temporary DIY installation. | Good (chlorine, lead, taste, odor). |
| Pitcher | Individuals or small households looking for the simplest, most portable solution for drinking water. | None required. | Good (chlorine, some heavy metals). |
By matching your water test results and your lifestyle to this simple chart, you can start to narrow down the choices and get one step closer to picking the perfect water filter for your home.
Okay, you’ve picked the type of filter that seems right for your home. Now, we need to look under the hood. The real magic of any filter is its internal technology—the stuff that actually grabs the contaminants. This is where we cut through the marketing fluff and get down to what’s actually been tested, proven, and certified.
Think of it this way: different contaminants are like different kinds of messes. You wouldn’t use a sponge to pick up broken glass. The same logic applies here; you need the right tool for the job.
This flowchart can give you a quick visual to confirm you're on the right track, whether that's a whole-house system or a simple pitcher filter.

Use it as a starting point to narrow down your category. Once you have that, you can dig into the specific tech that will solve your water woes.
Most filters you’ll find for your home use one of a few core technologies. Each has its strengths, and knowing the difference is the secret to a smart purchase.
Activated Carbon: This is the undisputed champ for making water taste and smell amazing. It works through a process called adsorption (not absorption), essentially acting like a magnet for chlorine, many volatile organic compounds (VOCs), and other chemicals that give water that funky swimming pool odor. It's the go-to for pitchers, faucet filters, and fridge filters.
Catalytic Carbon: Think of this as activated carbon’s bigger, stronger sibling. While regular carbon is great for chlorine, it struggles with chloramine—a tougher disinfectant more and more cities are using. Catalytic carbon is specially engineered to break down chloramine, so if you see that on your water report, this is the hero you need.
Reverse Osmosis (RO): When you want to remove just about everything, you bring in the heavy artillery: reverse osmosis. An RO system forces water through an incredibly fine membrane, leaving almost everything else behind. We're talking lead, arsenic, fluoride, nitrates, and all sorts of dissolved solids (TDS). It produces exceptionally pure water but comes with a higher price tag and more complex installation, usually under the sink.
If you really want to geek out on the science, you can find great resources that explain how water purification processes work in both home and commercial settings.
With so many options, it's easy to get lost. This table breaks down which filtration media is best for tackling the most common contaminants found in household water.
| Filtration Media | Best For Removing | Less Effective Against |
|---|---|---|
| Activated Carbon | Chlorine, VOCs, pesticides, bad taste/odor. | Minerals, fluoride, heavy metals, nitrates. |
| Catalytic Carbon | Chloramine, chlorine, VOCs, hydrogen sulfide. | Dissolved solids, arsenic, fluoride. |
| Reverse Osmosis | Lead, arsenic, fluoride, nitrates, TDS, cysts. | Some VOCs and chlorine (often paired with carbon). |
| Ion Exchange | Hardness minerals (calcium, magnesium), heavy metals. | Chlorine, VOCs, bacteria, cysts. |
| UV Purifier | Bacteria, viruses, protozoa, and other microbes. | Dissolved chemicals, heavy metals, sediment. |
This isn't an exhaustive list, but it covers the main players. Often, the best systems use a combination of these technologies in different stages to provide comprehensive filtration.
So, how do you know a filter actually does what the box says it does? Simple: third-party certifications. They're your proof of performance. Without them, you’re just taking a company’s word for it.
The gold standard here is NSF International. When you see a filter is NSF/ANSI certified, it means it has survived a gauntlet of rigorous tests to prove it meets specific contaminant reduction claims.
Forget the marketing hype and focus on the hard numbers. A filter's performance is measured by what it removes, and certifications are the proof. For example, a certified filter won't just say it reduces lead; it will state that it achieves >99% reduction under specific lab conditions. That’s the kind of assurance you should be looking for.
There are a ton of NSF/ANSI standards, but for choosing a home water filter, these two are the most important.
NSF/ANSI 42 (Aesthetic Effects): This standard is all about the stuff you can taste, smell, and see. A filter with Standard 42 certification is proven to reduce things like chlorine, funky odors, and visible specks of dirt. It guarantees your water will be more pleasant.
NSF/ANSI 53 (Health Effects): This is the one that really counts for safety. Standard 53 certification means a filter is verified to reduce specific health-related contaminants like lead, mercury, asbestos, or cysts like Giardia. To get this seal, a filter has to prove it can remove at least one of those nasty contaminants to a specific level.
When you're shopping, look for that official NSF seal on the box or product specs. Be wary of vague phrases like "tested to NSF standards." That's not the same as being officially certified. A true certification means the product passed every test for material safety, structural integrity, and—most importantly—contaminant reduction.
It’s so easy to fixate on that price tag on the shelf. That initial number feels like the biggest hurdle, but when you're picking out a water filter, it's really just the tip of the iceberg. The real cost—the one that adds up over years—is tucked away in the ongoing maintenance.
A cheap filter with expensive, short-lived cartridges can quickly turn into a money pit. You have to think like an accountant here and calculate the filter's total cost of ownership. This isn’t just about snagging a bargain today; it's about choosing a system that genuinely fits your budget for its entire life.
That upfront cost is a one-time thing. Filter replacements? They’re a recurring bill, and this is where you see a system's true colors. A $40 pitcher filter seems like a steal next to a $300 under-sink system, but that's a seriously incomplete picture.
Before you pull the trigger on any filter, you need two critical pieces of information:
With just those two numbers, you can figure out your annual maintenance cost. Suddenly, that cheap pitcher doesn't look so hot when you’re shelling out $20 for a new filter every two months. That's $120 a year, every single year.
To make a truly fair comparison between different filters, you need a common denominator. The best one is the cost per gallon. This simple calculation cuts through all the marketing noise and shows you the system’s real long-term value.
Here's the quick and easy formula:
Cost Per Gallon = (Cost of Replacement Filter) / (Gallons Filtered per Cartridge)
Let’s walk through a quick scenario. Imagine you're comparing two under-sink filters:
At first glance, System A looks like the cheaper option. But let's do the math. System A's cost per gallon is $0.10 ($60 / 600). System B’s is just $0.08 ($80 / 1,000). Over time, the system with the higher initial price is actually the more economical choice.
This is a huge deal because lifetime expenses often blow past the initial purchase price. In fact, recurring cartridge replacements are the single largest ongoing cost for most household systems. A simple faucet filter might have a low upfront cost (under $50), but with cartridges needing a swap every 2–6 months, the annual spend can easily top $100. Compare that to a more expensive reverse osmosis system, where a membrane might cost $100–$400 to replace, but you may only do it every few years.
Once you have a handle on the long-term costs, you can plan your budget. A water filter is a home improvement project, and like any other renovation, it needs a little financial planning.
To get a clear picture of how this fits into your overall household expenses, a good home remodeling budget calculator can be a huge help. It lets you see how both the upfront and ongoing costs stack up.
By looking at the complete financial picture—initial cost, replacement frequency, and cost per gallon—you can confidently pick a water filter that delivers clean, safe water without delivering a surprise bill down the road.
A world-class water filter is completely useless if it’s still sitting in the box. Before you get swept away by performance stats and certifications, let’s ground this decision in a bit of practical reality. The best system is the one that actually fits into your home and your life—meaning you have the space to install it and the willingness to keep up with it.
This is where you need to be brutally honest with yourself. Are you a renter who can't make permanent changes, or are you a homeowner ready to call a plumber? Let's walk through the real-world logistics that will ultimately decide which filter is the right long-term partner for you.
That powerful under-sink reverse osmosis system looks fantastic online, but have you actually peeked under your kitchen sink lately? That cabinet can be a warzone of pipes, cleaning supplies, and the garbage disposal. Before you even think about adding one to your cart, grab a tape measure.
Under-Sink Systems: These are the notorious space hogs. A typical multi-stage or RO system doesn't just have multiple filter canisters—it also comes with a pressurized storage tank. Measure the height, width, and depth of your cabinet, keeping a close eye on existing plumbing. You need enough room to not only squeeze the unit in but also to get your hands in there for filter changes.
Whole-House Systems: These point-of-entry systems get plumbed into your main water line, usually in a basement, garage, or utility closet. You’ll need a clear, accessible spot on the wall with several feet of clearance around it for the initial installation and any future maintenance.
Renter-Friendly Options: If you’re renting, your choices are a bit more limited, but you still have excellent options. Faucet filters, countertop units, and pitchers require zero permanent modifications. They pack a serious filtration punch without putting your security deposit at risk.
The real question isn't just "Will it fit?" but "Will it fit comfortably?" A system crammed into a tight space is an absolute nightmare to service later. Always leave a few extra inches of clearance for your hands and tools.
Every single water filter requires maintenance. Period. Ignoring it doesn't just make it less effective; it can actually make your water quality worse as trapped contaminants start to build up and potentially leach back into your water. The trick is to pick a system with a maintenance routine you can actually stick with.
Different systems have vastly different demands. Some are as easy as a quick twist, while others require tools, a bucket, and shutting off your home’s main water supply.
Let's compare the day-to-day reality of maintaining a few different filter types. One person's minor chore is another's major headache, so finding your match here is key.
Simple Twist-and-Lock Maintenance
Many modern under-sink, faucet, and refrigerator filters are designed for pure user-friendliness.
Housing and Wrench Maintenance
This is the standard for most whole-house systems and some older under-sink models.
Considering these practical factors—the physical space you have and the level of maintenance you’re prepared to handle—is a vital step in how to choose a water filter. It ensures you select a system that not only cleans your water effectively but also fits your life without adding a bunch of unnecessary hassle.
Alright, you've done the homework. You know the difference between sediment and VOCs, and you've seen the various types of filters out there. Now it's time to connect the dots and make a decision. Let's walk through a simple, no-nonsense plan to get the right water filter for your home.
The first move, and it's a non-negotiable one, is to ground your choice in real data. If you haven't already, find out exactly what's in your water. You can do this by looking up your local utility's Consumer Confidence Report or, for well owners, getting a dedicated water test. This single step will guide every other decision you make.
Once you have those water quality results, it's time to narrow down the options. Think of this as a quick checklist to make sure you're covering all the bases.
One last piece of advice before you pull the trigger: spend a few minutes reading recent user reviews. They are an absolute goldmine for honest feedback on how a filter holds up in the real world and what you can expect from the company's customer service if something goes wrong.
When you follow these steps, you take the guesswork out of the equation. You're not just picking a product off a shelf; you're creating a solution for your home based on solid evidence and practical needs. For more expert guidance, check out our collection of water filter advice.
You've done the research, but a few questions might still be lingering. We get it. Let's tackle the most common ones we hear from homeowners, giving you the clear, straightforward answers you need to make your final choice.
Think of this as your last-minute checklist to ensure you're totally confident in your decision.
This is the big one. Always, and we mean always, follow the manufacturer's guidelines. They'll give you a schedule based on either time (like every six months) or gallons used (say, every 500 gallons).
Putting it off is a huge mistake. An old filter doesn't just stop working; it can clog up, grow bacteria, and even dump all the junk it's collected right back into your water.
Pro tip: The day you install a new filter, set a reminder on your phone's calendar for when it's due. You'll thank yourself later.
It can, but it shouldn't be a dealbreaker if you've got the right system for your home. Whole-house filters, especially the ones that catch sediment, will naturally cause a small drop in pressure as they do their job.
If you suddenly notice your shower feels weak or the kitchen sink is trickling, that's your filter screaming for help. A major pressure drop is the number one sign it's clogged and long overdue for a change. A fresh filter will get things flowing like normal again.
A water softener is a treatment system, but it doesn't "filter" in the traditional sense. It uses a process called ion exchange to swap out hard minerals like calcium and magnesium for sodium ions. The water is perfectly safe to drink, but you'll notice it has a slightly higher sodium content.
For the best setup, many people pair a whole-house softener with an under-sink reverse osmosis system in the kitchen. This is the ultimate combo: you get soft water for your pipes and appliances, plus ultra-purified, low-sodium water for drinking and cooking.
At Water Filter Advisor, we're here to help you get the perfect water filtration setup for your home. Check out our detailed guides and product reviews to make your choice with confidence. Learn more at https://www.waterfilteradvisor.com.

Ever wonder how to check for chlorine in your water? Good news: you don't need a chemistry degree. The easiest ways involve using test strips, liquid reagent kits, or digital meters. You can grab these just about anywhere, and they’re designed for regular folks, not mad scientists. In just a few minutes, you'll know exactly what's flowing from your faucet and be one step closer to delicious, clean water.
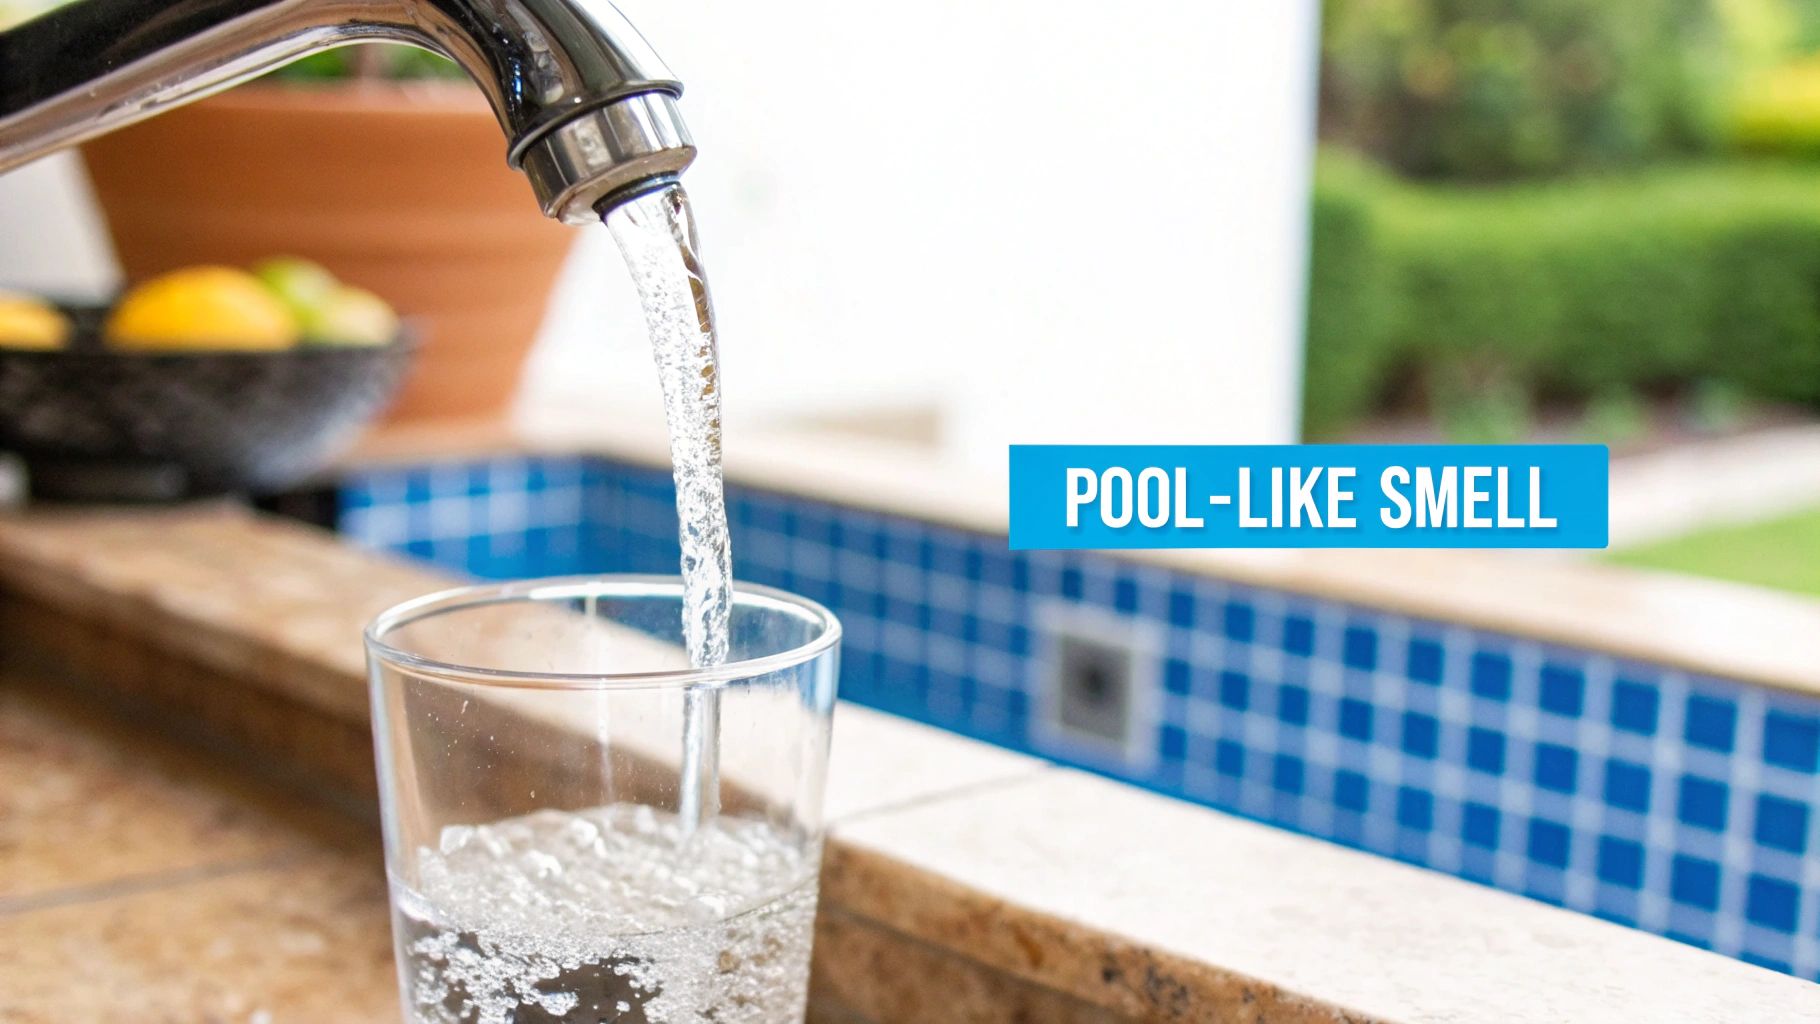
That bleach-like, "clean" smell wafting from your kitchen sink isn't just your imagination—it's chlorine, the unsung hero and occasional villain of your tap water. City water treatment plants add it to the public water supply for one glorious reason: to obliterate harmful bacteria, viruses, and other microscopic baddies. It's a fantastic disinfectant that keeps our water safe on its long, winding journey to your house.
Think of it as a bodyguard for your H₂O. It does a knockout job preventing waterborne illnesses, but its ghost tends to stick around long after the mission is complete. This leftover disinfectant is called residual chlorine, and it’s the culprit behind that familiar swimming pool perfume in your drinking glass.
While chlorine is a public health champion, this residual amount isn't always the most pleasant houseguest. The impact goes beyond just a funky taste in your morning coffee or that pot of pasta. Its presence can be a real buzzkill in other ways around the house.
When you learn how to check chlorine levels in your water, you take back control. Testing is the first, non-negotiable step. It tells you what you're dealing with so you can choose a home water filtration system that brings back your water's clean, natural taste.
So, what's a "normal" amount of chlorine? The levels in your municipal water can actually fluctuate wildly depending on the season, recent weather (like a massive rainstorm), and even how far your house is from the treatment plant.
Global health organizations have set guidelines for what's considered safe. The World Health Organization (WHO), for example, suggests that residual chlorine should ideally stay between 0.2 and 0.5 milligrams per liter (mg/L). This is the sweet spot for effective disinfection without going overboard. You can learn more about the WHO's drinking-water guidelines to see how your tap water stacks up.
Knowing the specific chlorine level in your water is the only way to connect the dots. A quick test will tell you if your levels are low, moderate, or hitting the high notes, giving you the intel you need to choose the perfect water filter for your family.
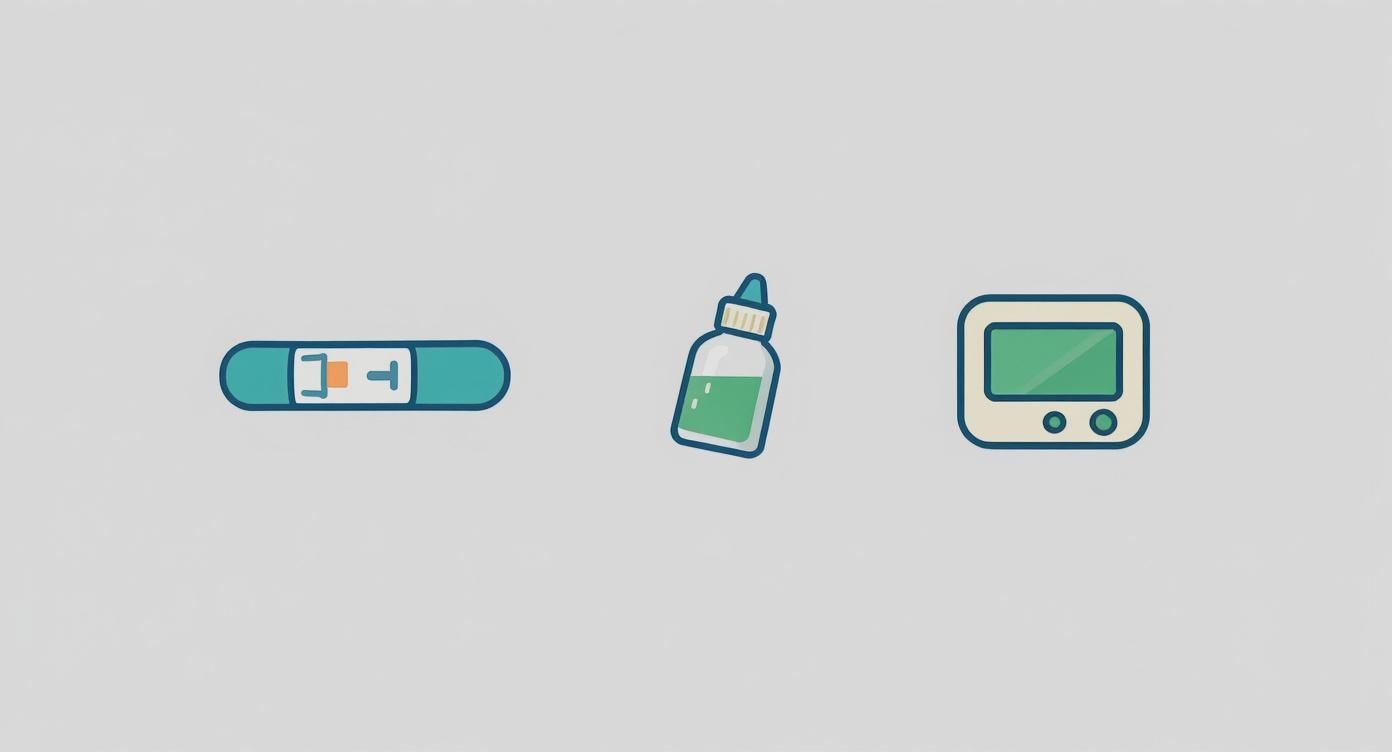
Before you can even dream about picking a water filter, you have to know what you're up against. Finding out how to check the chlorine in your water is a simple but super important first step. You've got three main ways to do this, and each one offers a different blend of convenience, accuracy, and cost.
Think of these as your personal water-testing toolkit. You don’t need to be a scientist to use them—just a few minutes and a glass of water from your tap. Let's break them down so you can find your perfect match.
Want an answer in less time than it takes to microwave popcorn? Chlorine test strips are your go-to. They couldn't be easier: just dip a strip into your water sample, give it a little swish, and match the color on the strip to the chart on the bottle. It’s a lightning-fast and cheap way to get a general vibe of your chlorine levels.
Test strips are perfect for a quick spot-check. Maybe you just moved into a new place, or you’ve suddenly noticed your water smells a bit "off." A test strip gives you a ballpark reading right away, satisfying your curiosity in seconds. The trade-off for all that speed, though, is precision. They’re great for sniffing out a problem, but not so great for measuring exactly how big that problem is.
For a more accurate reading that won't make your wallet cry, liquid test kits (sometimes called "dropper kits") are an excellent choice. This is where you'll usually find the DPD method, which is a trusted standard in the water testing world.
With these kits, you add a few drops of a liquid reagent into a small vial of your tap water. The water changes color based on the chlorine content, and you match that color to a printed comparator. This method gives you a much clearer and more detailed result than a test strip, letting you feel a bit like a home scientist.
One of the most common methods is the colorimetric DPD (N,N-diethyl-p-phenylenediamine) approach, which uses a color change to quantify chlorine. Research shows that while test strips are fast, DPD-based photometric equipment is generally preferred for precise chlorine control. You can learn more from these detailed reports on water quality testing methods.
When you need the most precise measurement you can get—no ifs, ands, or buts—a digital meter or colorimeter is the tool for the job. These slick handheld electronic devices eliminate all the guesswork of matching colors by eye.
You just pop a water sample into the meter, and it gives you a direct digital reading of the chlorine concentration, often down to two decimal places.
Digital meters are perfect for homeowners who want to geek out on their water quality, especially before and after installing a whole-house filter. They cost more upfront, but for people serious about their water, their accuracy and ease of use are unbeatable.
To make it simple, here’s a quick showdown of how the three main methods compare.
| Method | Best For | Accuracy | Speed | Typical Cost |
|---|---|---|---|---|
| Test Strips | Quick, initial checks and identifying a potential issue. | Low to Moderate | Very Fast (1 minute) | $10 – $20 |
| Liquid Test Kits | Balancing accuracy and affordability for regular use. | Moderate to High | Fast (2-5 minutes) | $15 – $30 |
| Digital Meters | Getting precise, data-driven results for tracking. | Very High | Fast (1-3 minutes) | $50 – $150+ |
So, what's the right call? It really depends on your mission. Are you just casually curious, or are you on a quest to solve a specific issue like dry skin or coffee that tastes like it was brewed in a swimming pool? Any of these methods will arm you with the crucial info you need to take the next step: picking a filtration solution that’s a perfect fit for your home.
Alright, let's get to the main event—actually testing your water. Don't worry, you won't need a lab coat for this. The goal is simple: get a true snapshot of the water quality coming out of your tap. Getting a reliable number you can act on is easier than you think; a few pro tips are all it takes.
We'll walk through the best practices for each testing method, but first, a couple of golden rules apply no matter which kit you have. These simple tricks ensure you're testing what’s flowing through your pipes, not what's been sitting around getting stale.
This visual guide breaks down your three main options for checking chlorine, from simple strips to precise digital readers.
As the infographic shows, there's a clear trade-off between speed and accuracy. Test strips are the fastest, but digital meters give you the most exact reading. It's all about matching the right tool to your needs.
Before you even crack open your test kit, a couple of quick steps will set you up for success. They seem small, but they make a huge difference in accuracy.
First, let your tap run for about 30-60 seconds before you collect any water. Water that sits in your pipes overnight can have a different chlorine level than the fresh supply from the main line. Running the tap for a minute clears out that old, stagnant water.
Second, always grab a clean container. Any leftover soap, food, or even old water residue can mess with your results. If you’re using a vial that came with your kit, just give it a good rinse with the same tap water you’re about to test.
Test strips are all about speed, but there's a right way and a wrong way to use them. Rushing the process is the number one mistake people make, and it can give you a completely bogus reading.
Here's how to nail it:
When it's time to read, match the color pads to the chart in good, natural light. It's surprisingly hard to tell the difference between subtle shades of pink in a dimly lit room.
Liquid dropper kits, often using DPD reagent, are a big step up in accuracy. Success here is all about the details. The reagent turns the water a pinkish-purple color when chlorine is present—the deeper the color, the higher the chlorine.
The single best tip for this method is to read the results against a white background. Just hold a plain piece of paper behind the vial when you compare its color to the chart. It makes the color pop and helps you find a much more exact match.
Also, be precise:
You might wonder why this matters. Well, city water with chlorine is great for preventing bacteria, but it's a problem for some hobbies. People who ferment foods or keep fish aquariums have to dechlorinate their water first, often by letting it sit out for 24 hours or boiling it for 15 minutes to let the chlorine gas dissipate. For the rest of us, a good filter is a much faster solution.
If you've opted for a digital meter, you're on your way to the most precise results possible at home. But even these high-tech tools need a little TLC to stay accurate. The most important step is calibration.
Think of it like tuning a guitar. You have to give the meter a reference point so it knows what "zero" looks like. Most meters are calibrated with chlorine-free water, like distilled water. You just put the "blank" sample in the meter and hit the "zero" or "calibrate" button.
Do this regularly, especially if you haven't used the meter in a while or if the readings seem off. Once it's calibrated, the rest is a breeze. You add your tap water, drop in the DPD reagent (it often comes in a little powder packet), and the meter gives you a specific number in parts-per-million (ppm) or milligrams-per-liter (mg/L). No more guesswork.
By following these simple steps, you can trust the number you see. That reliable data is the foundation for figuring out what it all means and choosing the right water filter to reclaim your tap.
You’ve done the test, matched the colors, and now you have a number. So what does a reading of 0.8 ppm or 1.5 mg/L actually mean for the water you drink and shower in every day? This is where we turn that number into a story about your daily life.
Understanding your results is less about complex chemistry and more about context. That number on your test strip or digital meter is the concentration of chlorine in your water, measured in parts per million (ppm), which is the same as milligrams per liter (mg/L). It tells you how your water is treated and what you're likely experiencing at home.
The chlorine in your tap water isn't just one thing. It’s a mix of different compounds, and your test kit can help you figure out what’s what. Grasping these two key terms is the first step to truly decoding your results.
When you test your water, you’ll often see options to measure both free chlorine and total chlorine. They sound similar, but the difference between them is crucial for understanding your water quality and choosing the right filter.
Free Chlorine: Think of this as the "active-duty" chlorine. It’s the potent disinfectant that’s ready and available to zap bacteria and other pathogens. This is the portion of chlorine that hasn't reacted with anything yet, and it’s what you typically taste and smell.
Total Chlorine: This is the sum of free chlorine plus combined chlorine (better known as chloramines). Combined chlorine forms when free chlorine gets tangled up with organic stuff in the water. It’s a less effective disinfectant but hangs around in the system much longer.
If your total chlorine level is way higher than your free chlorine, it means a lot of the disinfectant has already been "used up," creating chloramines. This often creates that potent, unpleasant chemical smell that's even worse than chlorine alone. For home filtration, knowing both numbers helps you choose a filter that can tackle the entire problem.
Key Takeaway: Think of free chlorine as the 'available' soldier ready for battle, and total chlorine as the entire army, including those who have already engaged with contaminants. Both contribute to the overall taste, smell, and feel of your water.
So, what should your chlorine reading actually be? According to the EPA, the maximum safe level is 4.0 ppm (mg/L). Most city water systems aim to keep it between 0.5 and 2.0 ppm by the time it reaches your faucet.
But "safe" and "pleasant" are two very different things.
Some people have super-senses and can taste or smell chlorine at levels as low as 0.5 ppm. Others might not notice it until it gets closer to 1.5 ppm or higher. This is often the point where you start to feel its effects, like dry, itchy skin after a shower or that distinct bleach-like taste in your drinking water.
It's also important to know that these levels aren't static. Chlorine concentration can swing up or down based on how far your home is from the treatment plant, seasonal changes, or even a recent heavy rainstorm that forces the city to use more disinfectant. This is exactly why you can't just rely on the city's annual water quality report; you need the real-time data from your own tap.
By understanding what a typical reading is and connecting it to your own experience—that dry skin, the flat-tasting coffee—you can decide what to do next. A consistently low reading might mean a simple faucet filter is all you need, while higher readings point toward a more robust whole-house system to protect every tap in your home.
Alright, you've done the testing and you're holding the results. This is the moment where that data transforms into an action plan for getting amazing water in your home. The right filter all comes down to what your tests revealed. Are we talking about a minor taste issue, or are you dealing with a chlorine level that makes your shower feel like a dip in the public pool?
Think of your chlorine reading as a signpost. It points you straight to the most effective and budget-friendly solution for your water. There's no single "best" filter for everyone—the best one is the one that solves the specific problem you just uncovered. Let's turn that PPM number into a home upgrade.
If your test came back in this range, you're in good company. This is the most common scenario, where the complaints are usually about taste and smell. Maybe your coffee tastes a little funky, your drinking water isn't as crisp as you'd like, or you catch a faint swimming pool scent now and then.
Good news: you don't need a massive, complicated system. The fix here is simple and targeted.
Both of these use activated carbon, a ridiculously porous material that acts like a chlorine magnet. As water flows through, chlorine gets trapped on the carbon's massive surface area. It's an incredibly effective and affordable way to get that pure water taste back.
Once your readings consistently climb over 1.0 ppm, you’re in territory where the effects are more than just a nuisance. This is when you start feeling that tight, dry-skin feeling after a shower or begin to worry about the long-term impact of chlorine and its byproducts.
A simple pitcher just isn't going to cut it for the whole house. It's time to level up with a more comprehensive solution.
Your test results are your guide. A reading of 1.5 ppm or higher, combined with noticeable skin irritation or a strong chemical smell, is a clear signal that a point-of-use or whole-house system is a smart investment in your family's comfort and health.
If your chlorine levels are consistently high, or you just want every single tap, shower, and appliance in your house protected, a whole-house water filter is the ultimate solution. These are installed right where the main water line enters your home, meaning every drop of water that flows through your pipes gets treated.
A whole-house system is your best defense against not only chlorine but also its disinfection byproducts, like trihalomethanes (THMs). When you're dealing with really stubborn chlorine issues, you might even look at what the pros use. High-purity facilities often rely on specialized equipment like lab water purifiers for distilled water to get absolute purity.
For your home, a robust whole-house carbon filter delivers that same kind of peace of mind. You're not just improving your drinking water—you're protecting your appliances from wear and your skin and hair from dryness. It's a total home transformation, one filtered drop at a time.
By matching your specific chlorine reading to one of these strategies, you can stop guessing and make a smart choice. You've already done the detective work; now you can pick the right tool for the job with total confidence.
Even with the right gear, a few questions always pop up when you're learning how to check chlorine levels in your water. We’ve rounded up quick answers to the most common queries to clear up any confusion and help you move forward with your filtration plan.
As a general rule, testing your home’s water every 3 to 6 months is a smart move. Chlorine levels from your city can change with the seasons or after heavy rain, so regular checks keep you informed.
A pro tip: always test right before and after you install a new water filter. This gives you concrete, undeniable proof of how well your new system is working and lets you see (and taste) the difference right away.
It’s tempting, but please don't. Stick to kits made specifically for drinking water. Pool test strips are designed for much higher chlorine concentrations and a completely different water chemistry.
Using pool strips on your tap water will almost certainly give you a wildly inaccurate reading, making it completely useless for choosing a filter. For results you can actually trust, always grab a dedicated drinking water test kit.
If you're looking for more guidance on selecting the right tools and understanding different water contaminants, you can find a wealth of information in our comprehensive water filtration advice section.
Not necessarily. If you're on city water, a zero reading might just mean you live far from the treatment plant. The chlorine has simply done its job and faded away by the time the water reaches you.
While that’s great for the taste, it also means the water no longer has that final layer of disinfectant protection. If you're concerned about microbial safety, adding a UV purification system after your main filter is a fantastic, chemical-free way to ensure total peace of mind.
This is a super common mix-up. A standard water softener will not touch chlorine. Softeners are designed for one job: removing hardness minerals like calcium and magnesium through a process called ion exchange. They're all about preventing scale buildup, not improving taste.
To actually get rid of chlorine, you need a filter that uses activated carbon. Many homeowners create the ultimate water dream team by pairing a water softener with a whole-house carbon filter to tackle both hard water and chlorine at the same time.