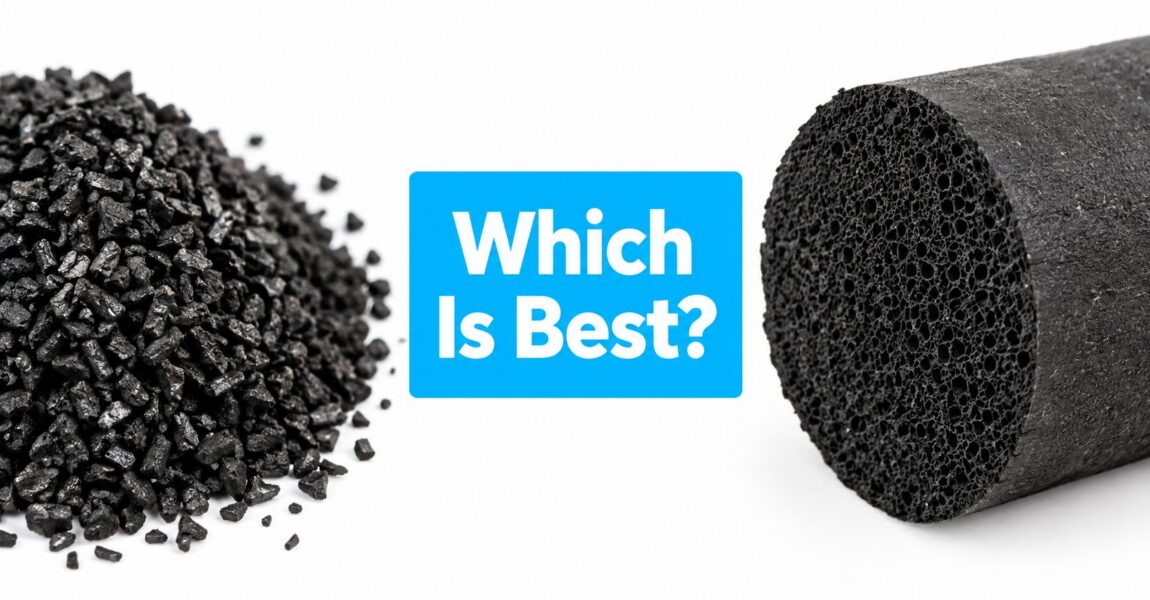
Granular Activated Carbon vs Carbon Block: Which Is Best
There is no single winner between granular activated carbon and carbon block. Carbon particles in block filters can be 10 to 20 times smaller than GAC ...
There is no single winner between granular activated carbon and carbon block. Carbon particles in block filters can be 10 to 20 times smaller than GAC ...
You fill the coffee maker, start a pot of pasta, or prepare a baby's formula bottle from the kitchen faucet. The water looks clean, smells normal, and tastes fine. That tells you almost nothing about lead.
If you're wondering how to test water for lead at home, start with the uncomfortable truth: the biggest risk may not be a visibly positive result. It may be a cheap strip that says “safe” because it can't detect lead anywhere near the level that matters. A proper sample sent to a certified laboratory gives you a number you can act on, while a casual spot check can give you confidence you haven't earned.
Lead doesn't announce itself when it enters your drinking water. The U.S. Environmental Protection Agency explains that testing is the only way to confirm lead, because dissolved lead can't be seen, tasted, or smelled. A clear glass from an older faucet can look identical to a glass from brand-new plumbing.
The water treatment plant may produce compliant source water, but lead can still enter later as water travels through a service line or sits inside household plumbing. Older service lines, lead-based solder, brass fixtures, and other plumbing materials can release lead at the tap.
That distinction matters. Municipal testing usually tells you about the public water system, while a sample from your kitchen faucet tells you what your household plumbing is contributing. Disinfectants, water chemistry, stagnation, and plumbing disturbance can all affect what reaches your glass.
Kitchen-counter rule: If the water looks clean, treat that as an observation, not a safety result.
Families with infants deserve extra discipline because formula preparation and drinking often rely on the same cold kitchen faucet throughout the day. Parents who are already reviewing safer household choices may also find useful context in this guide to toxin-free baby products from Hiccapop, but no household product can replace testing the water itself.
An old home, a recent plumbing repair, or an aging faucet can justify testing, but none of those clues tells you the concentration at your tap. Conversely, new-looking water service doesn't prove that every internal component is lead-free.
The practical answer is simple. Collect the right sample, send it to a certified lab, and read the result in parts per billion. That converts a vague concern into a filtration and plumbing decision. A strip that can't resolve low concentrations doesn't provide the same answer.
A lab report is only useful if you know how to read its units and comparison points. In the United States, the EPA's drinking-water action level for lead is 0.015 mg/L, or 15 parts per billion, known as 15 ppb. Public water systems compare selected tap samples with that threshold, and if more than 10% of those samples exceed 15 ppb, the system must notify customers and take follow-up action, according to CDC documentation describing the EPA standard and response level.
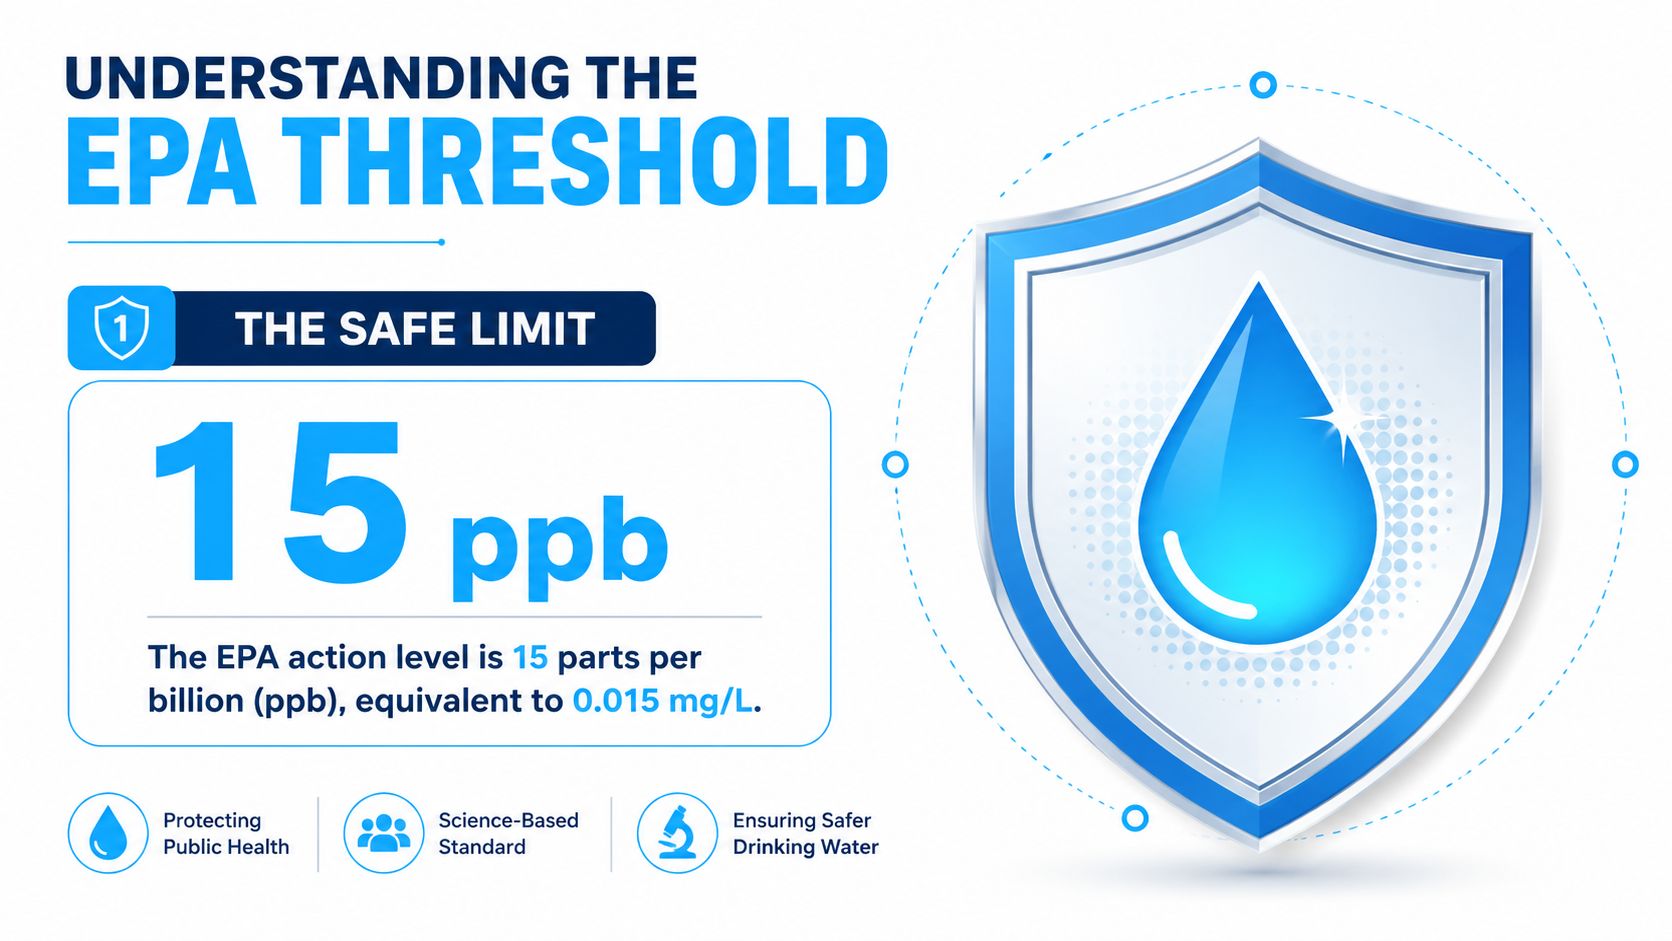
Your lab may report lead as µg/L, mg/L, or ppb. For water, 1 µg/L equals 1 ppb, so the EPA action level appears as 15 µg/L, 15 ppb, or 0.015 mg/L. A first-draw result at or above 15 ppb deserves prompt attention, not a shrug because the water still looks normal.
The World Health Organization lists a provisional guideline of 10 µg/L, or 0.01 mg/L, in its lead fact sheet for drinking water. WHO calls this value provisional because it reflects treatment performance and analytical achievability rather than a strictly health-based threshold. WHO also notes that exceedances aren't necessarily emergencies unless levels remain continuously very high, such as above 100 µg/L.
That doesn't make a lower result a guarantee of zero risk. It gives you practical yardsticks for deciding whether to investigate plumbing, install certified filtration, and repeat sampling.
Use cold water for drinking, cooking, formula, and sampling. Lead can be higher in hot water, and boiling doesn't remove it, as the CDC guidance linked above explains. Heating water for coffee or pasta doesn't turn suspect tap water into lead-free water.
A sensible interpretation looks like this:
A cheap color-changing strip looks convenient because it produces an answer at the kitchen counter. The problem is that many water strips aren't designed to answer the question homeowners have: is lead present near the EPA action level?
A peer-reviewed evaluation of 16 consumer lead test kits found that 12 weren't suitable for drinking-water analysis, as reported in the published evaluation indexed by PubMed. Those kits had detection limits of 5 to 20 mg/L, far above 15 ppb. Converted to the same units, that means the kits' stated detection range sat at 5,000 to 20,000 ppb, while the EPA action level is 15 ppb.
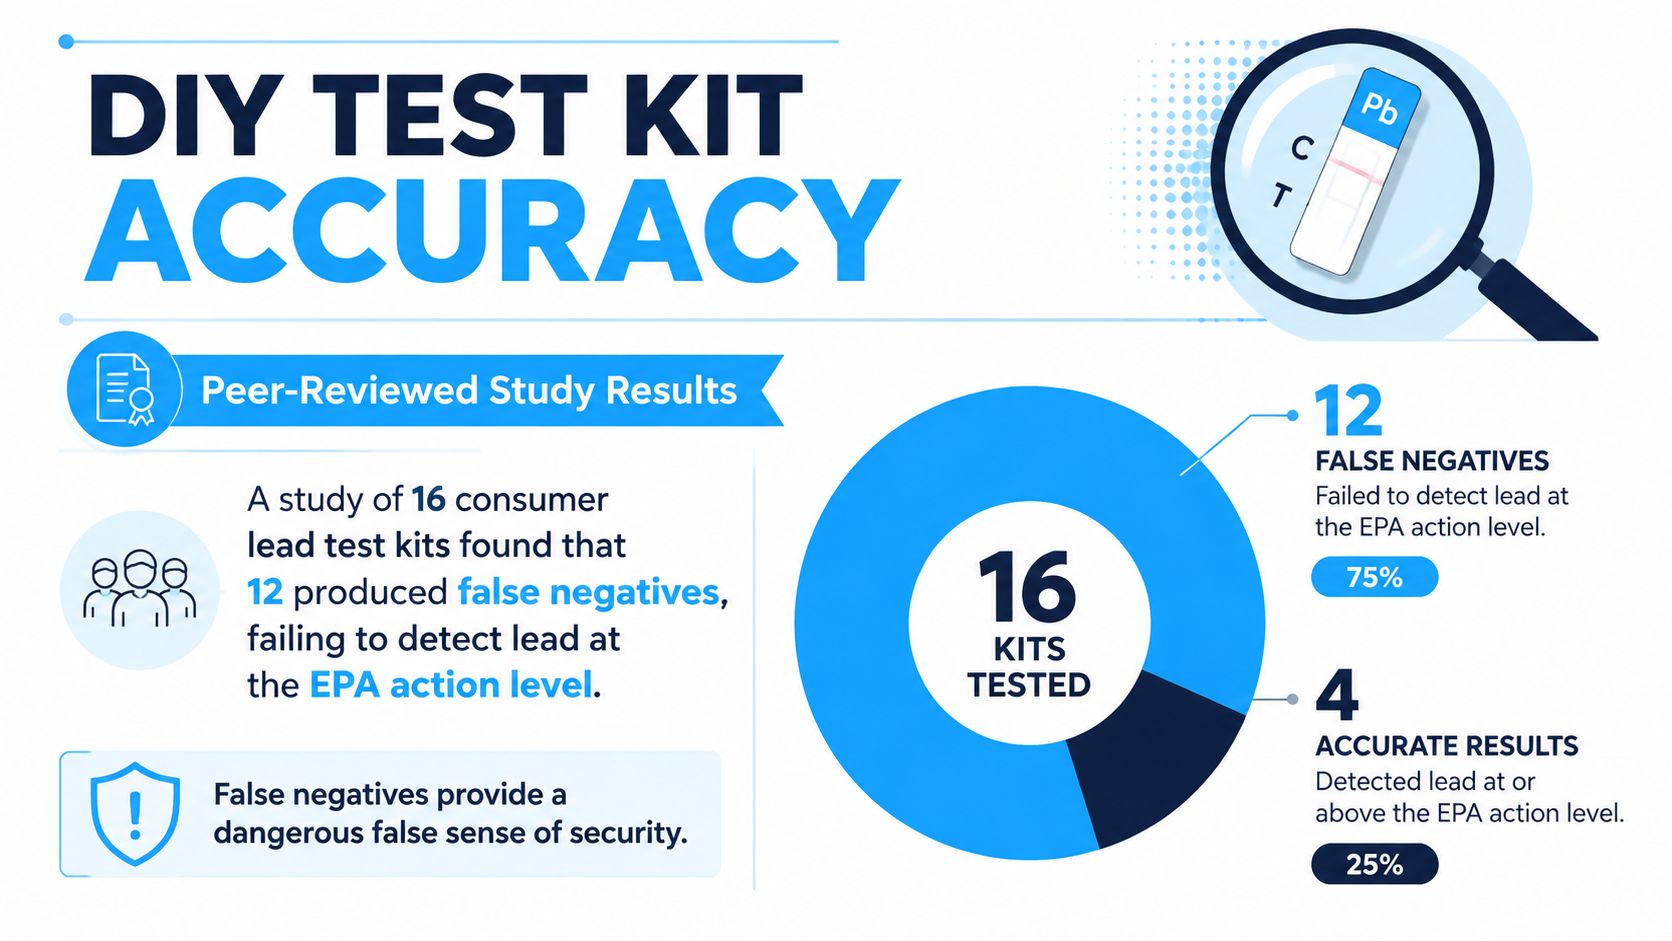
Some strips and binary tests also miss particulate lead. That matters because lead can travel as particles or flakes shed from plumbing, not only as metal dissolved evenly through the water. A test that reacts only to a narrow form of lead can produce a reassuring color while missing a meaningful part of the exposure.
That's why I wouldn't use a generic hardware-store strip as a stand-alone safety decision. It might identify a severe contamination event. It won't reliably clear a drinking tap when the relevant question is whether the water is near 15 ppb.
A negative strip result means “this test didn't detect lead under its conditions.” It doesn't automatically mean “this tap is safe.”
A properly specified home water kit can have a limited screening role, especially when its documentation clearly states a low reporting or detection limit and explains whether it measures dissolved lead, particulate lead, or both. Even then, treat the result as preliminary when children, formula preparation, older plumbing, or remediation decisions are involved.
DIY testing can also help you compare a tap before and after a plumbing change, but only if you use the same collection method and understand the kit's limitations. For a defensible answer, use a certified laboratory. The strip is optional. The lab sample is the foundation.
The laboratory can only analyze what you send. A poorly collected bottle can't tell you what your household tap normally delivers, so sample technique matters as much as the test itself.
Choose the cold-water kitchen faucet used for drinking. Leave that faucet unused for at least 6 hours, with overnight stagnation being the easiest routine. During that period, don't run showers, flush toilets, start the dishwasher, or use a washing machine. Any water movement can alter the conditions you're trying to measure.
The EPA's guidance on getting household water tested for lead recommends laboratory testing and a first sample from the cold-water kitchen tap after at least six hours without use. EPA also says testing commonly costs about $20 to $100, depending on the program and region.
| Step | What to Do | Why It Matters |
|---|---|---|
| Tap selection | Use the cold drinking-water faucet | It represents the water your household actually consumes |
| Stagnation | Leave it unused for at least 6 hours | Standing water can accumulate lead from plumbing |
| Collection | Capture the first water without flushing | First-draw sampling reveals stagnation-related lead |
| Bottle handling | Keep the inside of the cap and bottle clean | Contact or contamination can compromise the sample |
| Submission | Follow the lab's shipping instructions | Holding and transport conditions affect laboratory handling |
Avoid using hot water, flushing before the sample, or removing parts of the faucet unless the laboratory specifically tells you to. Aerators can hold sediment, so removing one may change the sample. Touching the inside of the cap can also introduce contamination.
There's an important exception for homes with a lead service line. EPA guidance changes the collection method in some situations and can require flushing before sampling when lead service-line material is present. Ask the lab or water utility which protocol applies before collecting the bottle. Mixing a first-draw method with a service-line flush method makes results difficult to compare across retests.
A cheap strip that misses lead near the action level creates false reassurance. Choose the test according to the decision you need to make: a rough screening signal, or a defensible result for filtration or plumbing work.
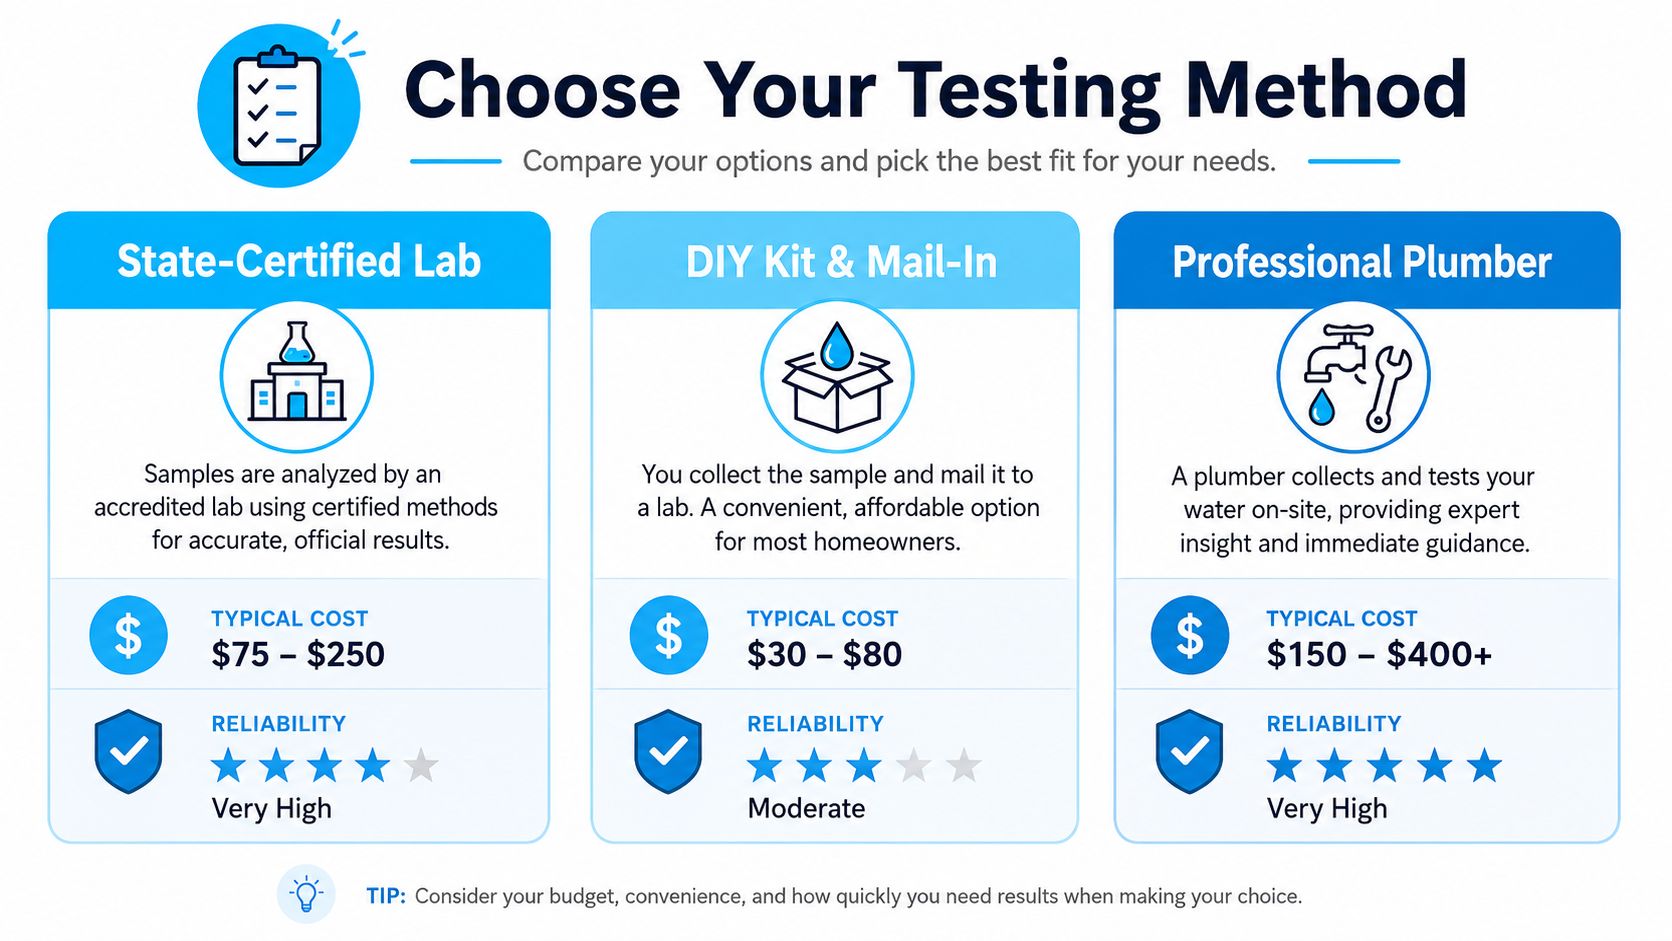
| Testing path | Strength | Weakness | My recommendation |
|---|---|---|---|
| State-certified laboratory | Reliable analysis and usable documentation | Requires careful collection and shipping | Default choice when available |
| Commercial mail-in laboratory | Convenient ordering and a report delivered remotely | Quality varies by certification and reporting limit | Use only when the lab publishes its qualifications |
| DIY strip or colorimetric kit | Fast and inexpensive | Many kits cannot detect lead near the EPA action level | Screening only, never your sole clearance |
Start with your state or local drinking-water office. It may provide a certified kit at no charge or low cost. The EPA describes household testing costs as varying by program and region in its consumer guidance on lead testing. Ask about the laboratory, collection protocol, and reporting limit before you order anything.
For a commercial mail-in service, look for state certification, a stated analytical method such as EPA Method 200.8 or an equivalent ICP-MS method, and a reporting limit below 1 µg/L. WHO guidance explains that laboratory and field methods can measure lead below 1 µg/L, which helps distinguish a low result from one close to the action level, as described in its guidance on chemical sampling and analysis.
The service description should identify its certificate of analysis, sample identification, units, detection limit, and collection instructions. If it only promises a color change without explaining sensitivity, skip it. A strip can indicate a problem, but a negative strip cannot clear your tap when its detection range is too high.
For filtration comparisons and testing-related buying guidance, review Water Filter Advisor's water filtration advice. The right test is the one that can support your next decision, not the one that is easiest to use.
A negative strip or laboratory result does not clear your faucet for good. Lead levels can change as water sits, moves, and contacts plumbing. A recently flushed tap may produce a low reading, while the same tap can produce a much higher first-draw result after prolonged stagnation. The lead testing fact sheet from the Center for Health, Environment and Justice warns that lead can fluctuate by tens to hundreds of times across the day, so one or two tests can miss a spike.
Treat every result as a snapshot. Even a reliable laboratory result can answer the wrong question if you collected it after flushing, used a different tap, or changed the timing. A cheap negative strip is especially weak evidence when its detection range cannot reach the EPA action level.
For a home with lead service-line material or older plumbing, use a consistent schedule:
Sampling uncertainty is real. WHO guidance recommends double or triplicate samples when that uncertainty matters. You do not need to turn your kitchen into a laboratory, but one bottle should not end the investigation when the home has known risk factors.
A flushed sample answers a different question from a first-draw sample. First-draw water shows what sat against household plumbing. Flushed water shows conditions after standing water has moved out of the immediate plumbing path.
If first-draw lead is high and flushed lead is low, the pattern points toward internal plumbing or a service connection rather than source water alone. Ask the laboratory or utility for its paired-sampling procedure, especially if a lead service line may be present. Keep the tap, timing, and collection method consistent so the comparison remains useful. Consistent retesting gives you a clearer basis for deciding whether the risk is intermittent, localized, or persistent.
A concerning result calls for prompt action, not panic. Start by protecting drinking and cooking water while you identify the source.
Use the cold tap only, and flush it for 1 to 2 minutes before drinking or cooking until you have a better solution. Use bottled or properly filtered water for infant formula, and never cook with hot tap water. Flushing is temporary control, not a repair. It may also differ from the service-line sampling protocol required by your laboratory or utility.
For short-term protection, choose a point-of-use filter with a clear NSF/ANSI 53 certification for lead reduction. Suitable formats include:
Ignore packaging that says “premium,” “multi-stage,” or “removes heavy metals” without identifying lead performance. Check the certification, lead claim, rated capacity, and replacement schedule. Record cartridge changes, then test treated water to confirm the filter is working.
Long-term remediation may require replacing a lead service line, suspect brass fixtures, or accessible lead-based solder. Coordinate service-line work with the utility, and hire a qualified plumber who can identify materials without stirring up additional debris.
Keep laboratory reports, sample IDs, dates, and whether each result was first-draw or flushed. If you are investigating possible heavy-metal exposure beyond the water system, ask a clinician about appropriate medical evaluation. A general resource such as this Sunridge Medical chelation guide can explain why treatment decisions belong with qualified medical professionals, not a home strip or internet diagnosis.
Water Filter Advisor helps homeowners compare drinking-water and whole-house filtration options, understand certifications, and plan replacement schedules for contaminants such as lead. Visit Water Filter Advisor to match a tested water problem with a practical filtration system, then document the result and maintain the filter.
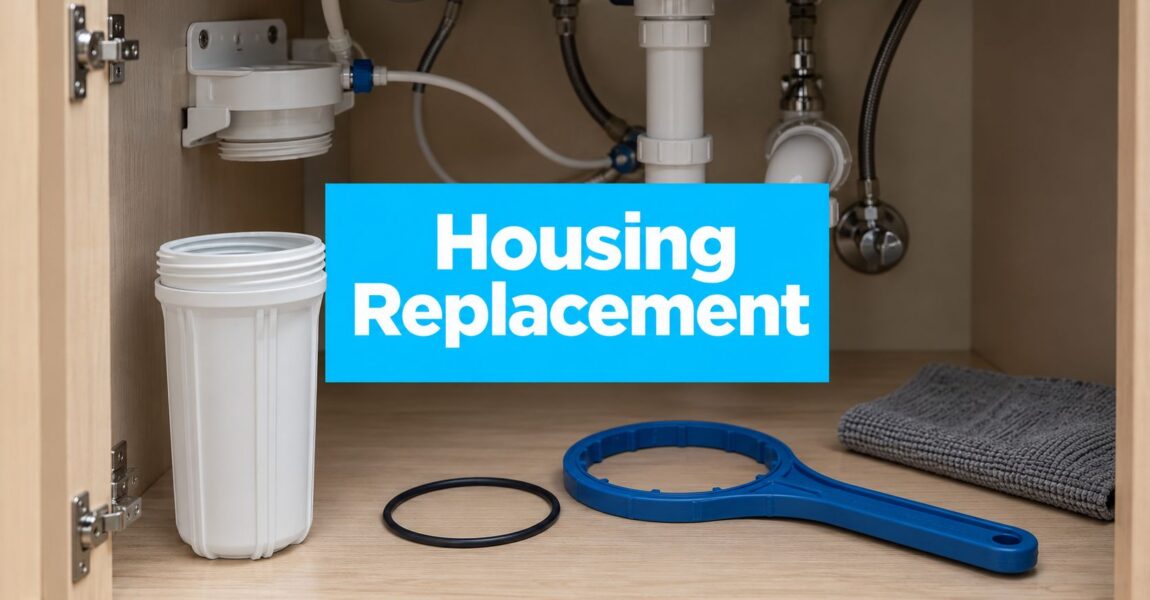
You usually notice the problem at the worst moment. Maybe the floor under the sink is damp, the sump looks cloudy, or a housing that's worked fine for years suddenly starts weeping after a cartridge change. That's the moment you realize the housing itself isn't immortal, and swapping the cartridge alone won't fix a body that's cracked, warped, or cross-threaded.
A lot of homeowners treat filter maintenance like it's just a routine cartridge swap, then get surprised when the bowl sticks, the O-ring won't seal, or the plastic shows age around the threads. A water filter housing replacement is different from a normal filter change because you're dealing with the pressure vessel, not just the media inside it. The right replacement is less about force and more about alignment, clean sealing surfaces, and knowing when the housing has reached the end of its usable life.
The warning signs usually start small. A hairline crack near the neck, a drip that only appears after the system repressurizes, or a bowl that feels gritty as you unscrew it all point to a housing that deserves attention. The DIY filter housing replacement conversation matters because the housing is a wear part too, even if the cartridge gets all the attention.
The housing takes the pressure, gets opened and closed over and over, and lives with whatever torque people use during routine cartridge changes. That is where a lot of leaks begin. Over-tightening rarely fixes a sealing problem, and it often makes one worse by distorting the O-ring, stressing the threads, or making the next service call harder than it should be.
The cartridge does the filtering, but the housing carries the load. It holds pressure, gets handled every time the cartridge is changed, and relies on clean threads and sound sealing surfaces to keep working as it should. Market reporting from Global Growth Insights shows this is a steady replacement category, not a one-time purchase, because housings and the parts around them are expected to be serviced over time.
That matches what shows up in real homes. A cartridge may be due on schedule, but the housing itself is what gets inspected at every change, and that is when cloudy plastic, thread wear, stress marks, and seal damage finally become obvious. I have seen homeowners keep using a housing long after the cartridge schedule made sense, then run straight into a leak because the body was no longer dependable.
Practical rule: if the housing shows damage, stop treating it like a disposable filter part. Treat it like a pressure component with a finite service life.
The mistake is assuming tighter always means better. In practice, a housing usually seals because the O-ring sits cleanly, the bowl threads engage properly, and the cap and sump line up without strain. Once those surfaces start to degrade, no extra muscle at the wrench will make up for it, and forcing the fit usually creates the next problem.
If you want a straight walkthrough from someone who has done this repeatedly in real homes, the most useful reference is DIY filter housing replacement. It is useful because it treats housing service as its own job, separate from swapping the cartridge.
A water filter housing is not the filtering medium. It's the pressure vessel that holds a replaceable cartridge or filter bag while water passes through it under controlled pressure (Basidewt). That distinction matters because replacement decisions should be based on the body, threads, and sealing surfaces, not just on the cartridge schedule. A housing can be reused for a long time, but only until the body, threads, or sealing surfaces are no longer dependable.
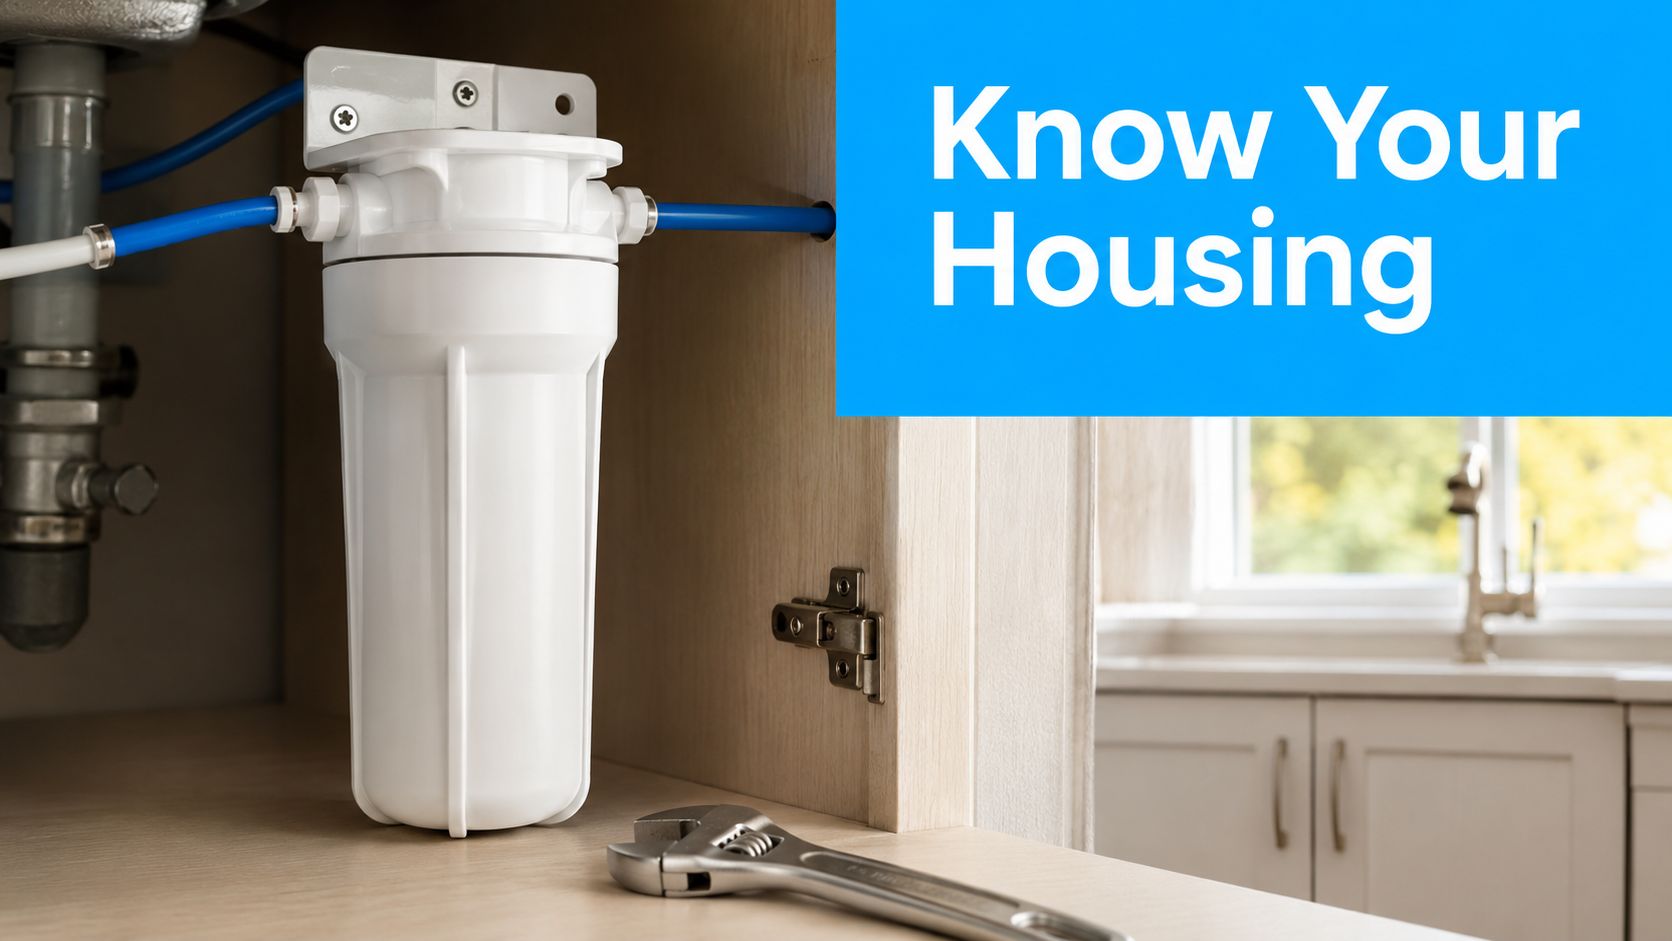
Under-sink housings are usually compact and built for point-of-use filtration. Whole-house housings are larger, because they handle the water entering the home, and they're the ones most homeowners wrestle with when a leak shows up at the main line. Refrigerator filtration uses a different style of enclosure entirely, and the replacement parts aren't interchangeable with the big canisters used for plumbing mains.
| Housing Type | Common Use | Typical Size | Material |
|---|---|---|---|
| Under-sink housing | Drinking and cooking water | Compact, cartridge-sized | Plastic |
| Whole-house housing | Main entry filtration | Larger canister style | Plastic or metal |
| Refrigerator housing | Appliance filtration | Small integrated unit | Plastic |
Compatibility is where a lot of DIY jobs go sideways. You need the right housing body, the right cartridge format, and the right sealing geometry. If the new part doesn't match the old system's size and connection style, you can force it together and still end up with a leak, which is exactly the kind of repair that turns into a second repair.
The practical way to think about it is simple. The cartridge must fit the housing, the housing must fit the plumbing, and the sealing surfaces must line up cleanly. If any of those three don't match, don't improvise.
Look at the neck, the threads, the sump, and the O-ring groove. If any of those areas are damaged, stained beyond cleaning, or visibly distorted, replacement becomes a safer choice than another round of tightening and hoping. The housing is reusable only while its pressure-bearing structure and sealing points are still sound.
A clean replacement starts before you shut off the water. If you're missing the housing wrench, the new O-ring, or the silicone grease, you'll end up with wet hands, a half-open system, and a mess that takes longer to clean than the actual install. A good prep pile saves more time than any amount of muscle.
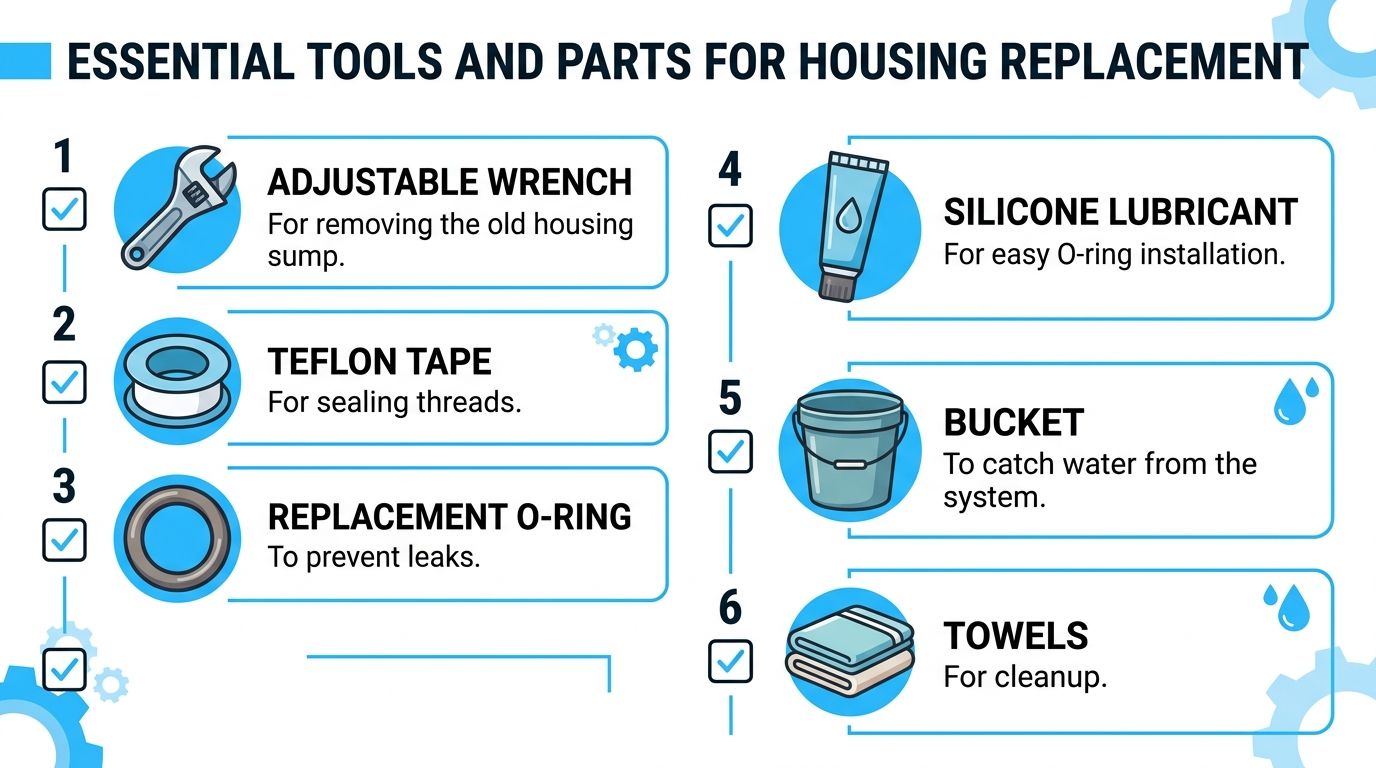
Start with the obvious items. You need an adjustable wrench or the correct housing wrench, a replacement O-ring, silicone lubricant, a bucket, and towels. Teflon tape can help on threaded connections where the manufacturer allows it, but it doesn't fix a damaged seal or a bad fit. If the housing is tucked into a tight cabinet, a shop vacuum is handy for cleanup, especially when the sump dumps unexpectedly.
A lot of homeowners also underestimate how much easier the job gets when the replacement housing is already unpacked and checked against the old one. Match the size, the port style, and the cartridge format before you drain anything. The wrong part in the right box still leaves you standing there with the water off.
The best replacement parts are the ones that fit cleanly the first time. If you need to persuade them, something's off.
That's where a good resource can help you compare options without guesswork. Water Filter Advisor has practical maintenance guidance at https://www.waterfilteradvisor.com/advice/, which is useful if you're sorting out replacement timing or trying to understand what kind of housing you have.
The O-ring is small, but it does a lot of work. If it's flattened, nicked, left dry, or seated crooked, the housing can leak even when everything else looks perfect. Silicone grease gives the ring a better chance of seating evenly, and a clean groove matters more than people expect because debris left behind can mimic a bad part.
The replacement housing itself should be treated as the main purchase, not an accessory. If the old body is cracked, the bowl is cloudy from age, or the threads have been stressed by past overtightening, no amount of fresh tape will make it trustworthy again.
A housing swap goes better when you treat it like a pressure job, because the housing itself wears out over time even if the cartridge still looks fine. A tired body, warped threads, or a stressed seal surface can leak on a fresh cartridge, so the replacement has to start with the unit, not just the filter inside it.
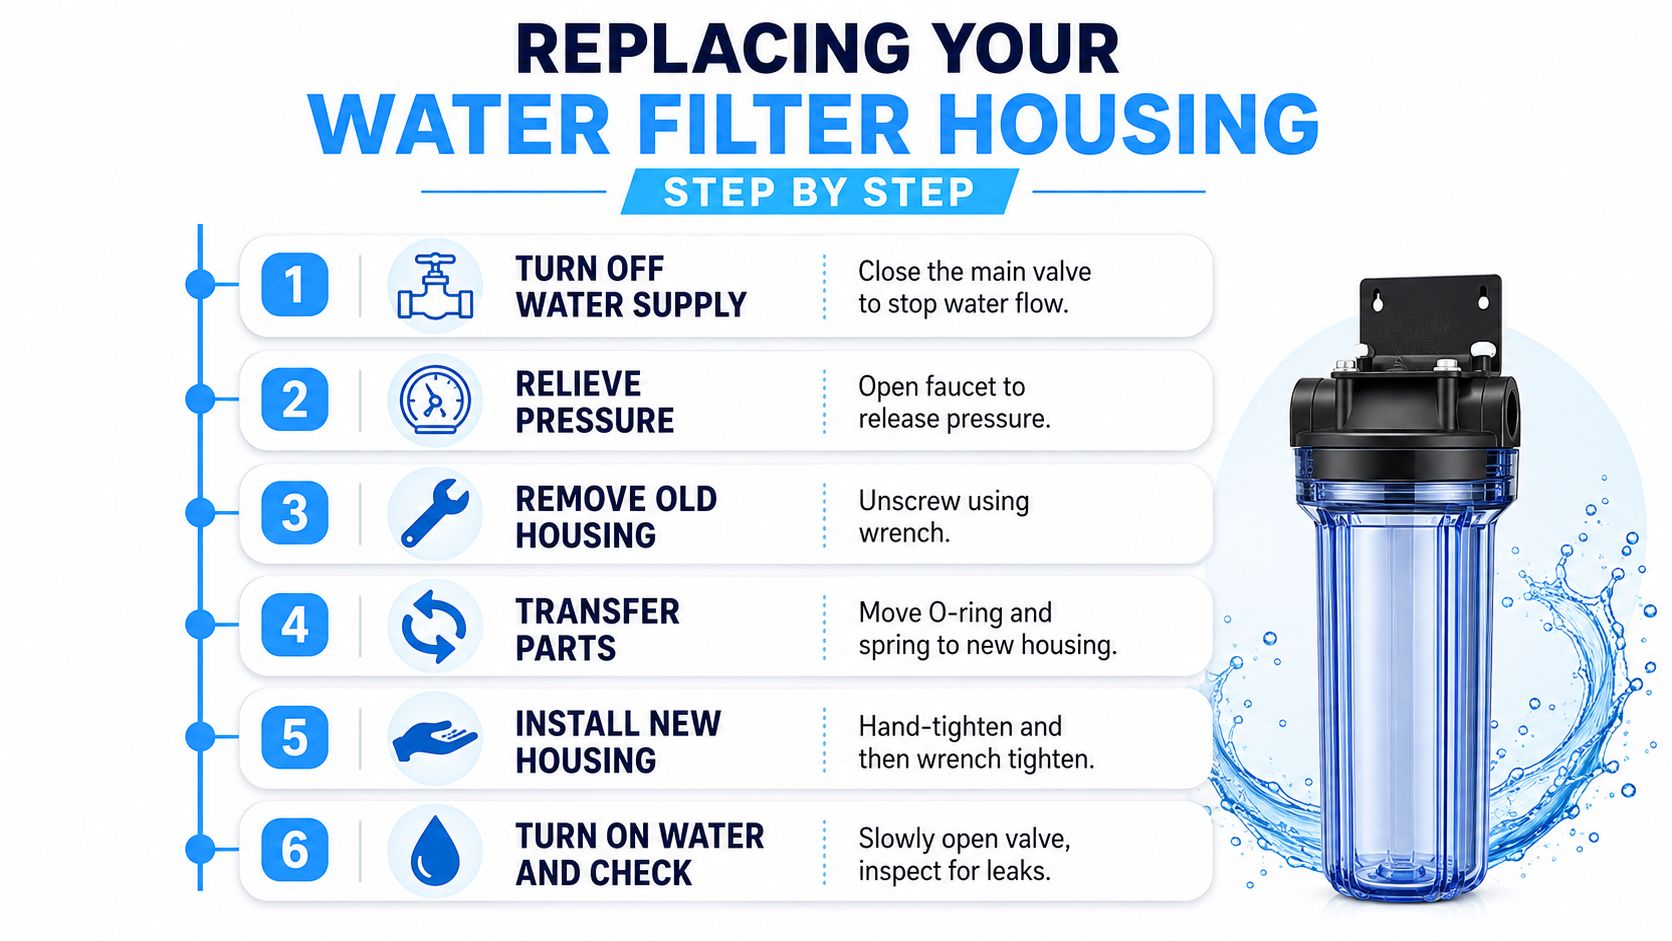
Shut off the feed first, then open the nearest faucet to bleed off pressure before you touch the bowl. That order matters because trapped pressure is what turns a normal removal into a spray problem. Hand-tight assembly is the goal here, and the common leak mistake is overtightening, which can stress-crack the neck or distort the seal instead of fixing it.
Once the bowl is off, remove the cartridge and inspect the old parts before they go in the trash. Check the O-ring groove for grit, scale, or an old ring left behind. I've seen a stray O-ring fool people into blaming the new housing when the actual problem was the leftover seal sitting in the groove.
Rule of thumb: if the threads only close properly when you force them, stop. Hand-starting the thread is part of the repair.
A practical cleanup pass means rinsing the housing, then scrubbing the cap and bowl with 1 gallon of warm water plus 1 tablespoon of household bleach (Home Depot instruction sheet). The point is not cosmetic. It clears film, grit, and residue that can keep the new seal from sitting flat and can make a good housing look faulty.
The O-ring should get a light coat of clean silicone grease and sit evenly in its groove. A dry, twisted, or cocked ring will not usually settle into place once pressure comes back. That is why the seat has to be right before the bowl goes on. Line up the cartridge squarely, thread the bowl on by hand first, and only give it the small wrench turn the manufacturer allows.
Bring the water back on slowly, leave a faucet open to purge air, and flush the system before putting it back into service. One instruction sheet calls for a 5-minute flush, a 1-hour wait, then another 5-minute flush (Home Depot instruction sheet). That gives the housing time to settle, clears loose fines, and helps prevent the first batch of water from carrying taste or cloudiness.
Check for leaks while the system is under pressure and the area is still open. A small drip at this stage is usually a simple fix. Leaving it alone only turns a minor seal issue into water damage later.
A housing swap usually goes sideways for the same few reasons. The bowl is stuck because pressure was never fully bled off, a leak shows up because the O-ring groove still has grit, or the threads feel off because the part was started crooked and then forced. Those are the failure points, and they show up in ordinary homes all the time.
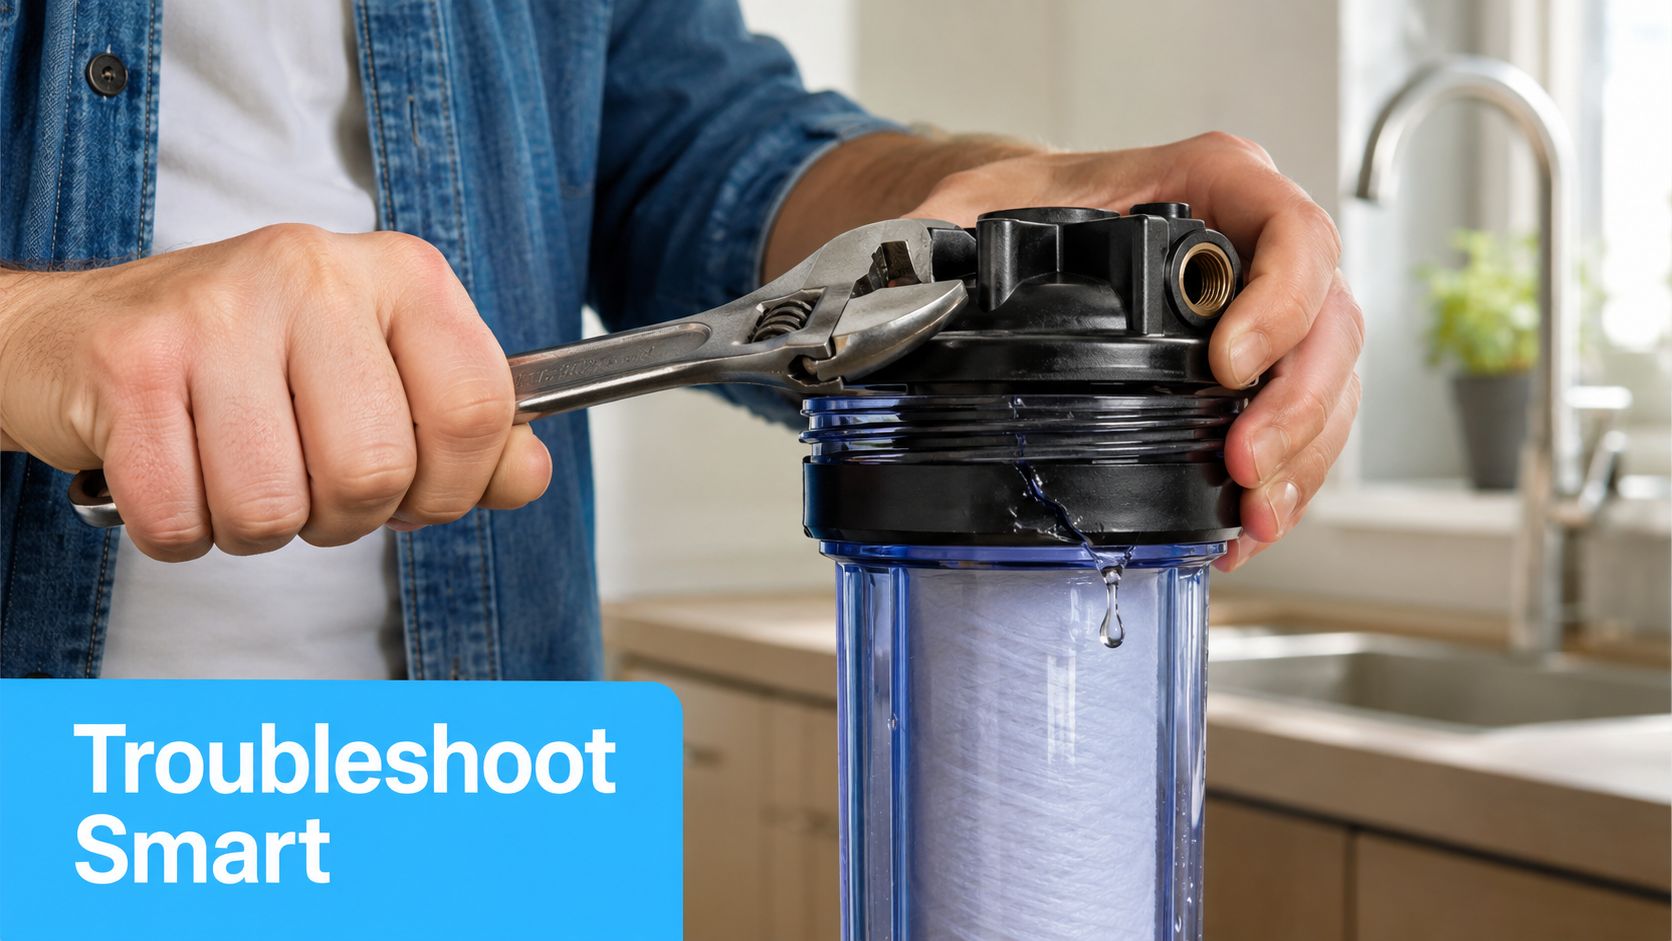
The fastest fix is to find the source before you touch anything, then fully relieve pressure before loosening the bowl, as outlined in the Basidewt troubleshooting guide. That sounds basic until you run into a housing that will not budge. If pressure is still trapped, the bowl can feel welded in place, and forcing it only makes the next repair messier.
Leaks after reassembly usually come from one of four places. The O-ring is worn, the groove still has debris, the threads were tightened too hard, or the replacement housing does not match the original shape closely enough. The torque myth causes a lot of these calls. More force does not improve the seal. Several installation guides warn that overtightening can distort the seal and damage the threads instead of fixing the leak (Basidewt troubleshooting guide).
Practical rule: if you have already tightened it by hand and it still leaks, clean and reseat before you tighten again.
If the bowl still drips after reseating the O-ring, take it apart again and look for a trapped old ring, a nick in the groove, or a thread that has already been stressed. Do not keep adding tape and hoping for the best. Tape has its place on the right connection, but it will not save a housing with a damaged sealing surface.
If the housing body is cracked or the neck shows stress whitening, stop chasing the seal. That part has moved past normal service. A lot of repeat leaks are the system telling you the body is done, not the cartridge. Housing plastic degrades with age, heat, and repeated tightening, so replacing the cartridge alone will not fix a shell that has already worn out.
For whole-house setups or awkward plumbing, the trade-off is the same as if you decide to replace your AC system. Some jobs are routine maintenance, and some are better handled by a tech once the access is poor or the system is already showing wider wear.
A confident DIYer can replace a lot of housings without help. The line gets crossed when the plumbing layout is awkward, the leak source stays unclear, or the system is big enough that a mistake means real water damage instead of a damp towel. When the housing is part of a complicated whole-house setup, the cost of a bad guess can outrun the savings from doing it yourself.
If you're comparing the job to another major home system, the logic is similar to replace your AC system. Some tasks are basic maintenance, and some are better handled by a tech when the equipment is old, hard to access, or already showing signs of broader failure.
Persistent leaks are the biggest clue. If you've cleaned the groove, reseated the O-ring, checked the threads, and the leak keeps coming back, something deeper is wrong. At that point, a plumber can check the plumbing connection, the housing alignment, and whether the system needs a different part instead of another round of tightening.
The winning formula is boring, and that's a good thing. Shut off pressure, clean the sealing surfaces, seat the O-ring properly, hand-start the threads, and only use the smallest final wrench turn the manufacturer allows. That sequence prevents most of the problems people blame on “bad parts.”
Treat the housing as a service item with its own life cycle. During every cartridge change, inspect the body, threads, and O-ring groove for cloudy plastic, cracks, or distortion. Because cartridge replacement happens on a recurring schedule, the housing gets a built-in inspection window every time, and that's the moment to catch failure before it turns into water on the floor.
A few habits make the whole system easier to live with. Mark installation dates on the housing, keep a spare O-ring on hand, and store the wrench where you can find it. After a swap, follow the flush routine and don't rush to declare victory before the system has run under real pressure.
The broader point is simple. A housing isn't just a shell around the cartridge, it's a pressure part that ages, loosens, and eventually deserves replacement on its own merits. If you want a practical reference for maintenance habits and filter care, the advice hub at Water Filter Advisor is a useful place to keep on hand for future system checks.
If you want more hands-on help with choosing a housing, spotting seal failures, or figuring out whether a swap is worth doing yourself, visit Water Filter Advisor. It's built for homeowners who want clear maintenance guidance without the jargon, and it pairs well with a real-world water filter housing replacement job.

You're probably in one of two camps right now. Your tap water is technically “fine,” but it tastes like a swimming pool, smells off, or leaves you wondering what's really in the glass. Or you're on a private well and you know water quality can change with weather, plumbing, and seasonal runoff.
That's where a gravity filtration system earns its place. It doesn't need electricity, doesn't need a drain line, and doesn't ask you to remodel your kitchen. You fill the upper chamber, let gravity do the work, and draw clean water from the lower chamber. Simple systems tend to last because there's less to fail.
For home use, that simplicity matters. A good gravity filter gives you direct control over drinking water quality without turning your kitchen into a plumbing project. It also forces a useful question that many buyers skip: not just “Will it filter water?” but “How well will it hold up in my actual water?”
You can learn a lot from the way people hesitate at the sink. They will drink the water, but only after a pause. They sniff it first. They fill a bottle and put it in the fridge to hide the taste. They buy bottled water for guests. That hesitation is usually the primary issue. People do not want to guess about what they are drinking.

A gravity filtration system solves that problem in a very grounded way. It sits where you can see it, it works without power, and it gives you a separate supply of treated drinking water. For many homes, that alone lowers stress. You're not relying on a pitcher that empties too fast or a fridge filter you forget to replace.
This isn't a trendy countertop gadget. The modern gravity water filtration system originated in 1835 when Queen Victoria commissioned John Doulton to create a ceramic gravity-fed stoneware filter for her royal household in London, England, and the design was successful enough that she granted Doulton the right to apply the Royal Crest to each unit, as described in this history of gravity filtration.
That story matters because it tells you why gravity filters still make sense now. They were built to deal with a basic public health problem: unsafe water. The hardware has improved, but the core idea hasn't changed. Let water move slowly through a carefully designed barrier and remove what you don't want to drink.
Practical rule: The best home water system is often the one your family will use every day without fiddling, plugging in, or forgetting.
Gravity filters fit real homes well because they solve several problems at once:
If you're comparing options and want a broader look at countertop-style systems, this guide on what changes with a gravity water filter is a helpful next read.
Pour cloudy water into the upper chamber, wait, and what comes out below usually looks and tastes like it came from a different source. That result feels simple from the outside, but the filter is doing two separate jobs inside the element. One job is straining out suspended material and larger microbes. The other is reducing the dissolved compounds that make water smell off or taste flat.

Gravity-fed filters usually rely on ceramic, carbon block, or other fine media with very small passages. As noted in Frizzlife's gravity-fed water filter guide, many gravity elements use microfiltration-level pores to catch sediment, cloudiness, and some biological contaminants as water moves through.
In plain terms, the filter forces water through spaces that dirt, rust, and larger unwanted particles cannot easily pass. If your tap water looks hazy after pipe work, heavy rain, or well disturbance, this stage does most of the visible cleanup.
That visible cleanup is only part of the story.
Many gravity systems pair that fine filtration layer with activated carbon. Carbon does not work like a screen. It works by adsorption, which means chlorine, some volatile organic compounds, and other taste and odor offenders stick to the carbon surface instead of staying in the water.
This is the part homeowners notice at the dinner table. Water can be clear and still taste like a swimming pool, stale plastic, or damp earth. A carbon stage is often what turns "safe enough to drink" into water people want to drink every day.
Water enters the top chamber, passes through the filter elements, and collects in the lower chamber for dispensing. No pump is pushing it through. The system depends on steady downward pressure from the water above.
That slower flow rate is part of the design, not a weakness. In practice, slower filtration usually means better contact time with the media. Better contact time often improves taste reduction and gives fine filter media more opportunity to catch particles before they reach the clean chamber. The trade-off is output. A gravity unit that polishes water well will never fill a glass as fast as a faucet-mounted system.
Here is the basic sequence inside the unit:
Many buying guides simplify these details too much. Filter life on the box usually assumes relatively manageable source water. In a home with high sediment, tannins, or frequent particulate spikes, elements clog faster and flow slows sooner. That raises the actual cost per gallon, even if the unit itself looked affordable upfront.
For homeowners comparing setups, it helps to review the differences between common water filtration system types before buying, especially if speed, contaminant profile, and replacement cost all matter to you.
A final practical note. Water quality and presentation are separate decisions, but some households care about both for guests or events. If you already serve filtered water at gatherings, a guide on choosing custom water labels and sizes may be useful for the table side of the equation.
Not every gravity filtration system fits every home. The right choice depends less on brand loyalty and more on how you live, how much water you use, and whether your main concern is daily convenience, portability, or simple backup protection.
These are the models typically envisioned first. They use stacked stainless chambers, sit on the counter, and hold enough water for routine household drinking and cooking.
Their strongest advantage is balance. They're durable, easy to wipe down, and large enough to serve families without constant refilling. They also tend to look more permanent, which matters because the systems people keep visible are the systems people use.
They're a good fit for:
These often have a more traditional look and can blend into kitchens that don't want an industrial stainless appearance. They're simple, quiet, and appealing to buyers who care about aesthetics as much as function.
The trade-off is usually practicality. They can be more fragile, and depending on the model, they may not be as easy to move or clean. For a small household with modest drinking-water demand, though, they can be a pleasant everyday option.
Choose the system that matches your habits, not your aspirations. A large unit is wasted if nobody refills it. A tiny one becomes annoying if the family empties it by lunch.
These include hanging bag systems, rugged canisters, and jerry-can inspired formats used for camping, cabins, travel, or emergency storage. They're built around mobility and off-grid use.
At home, they're rarely the nicest countertop choice, but they shine as backup gear. If your priority is resilience during power loss, boil-water notices, or evacuation kits, portability beats polish.
Some homeowners want a hands-on path and are comfortable with simple, low-tech treatment setups. A DIY-style gravity approach can be useful for learning, backup planning, or non-primary applications.
But for regular kitchen use, most households are better served by a purpose-built consumer unit. DIY systems can work, but they demand more user judgment and more tolerance for inconsistency. For drinking water in a busy home, consistency matters.
| System Type | Typical Capacity | Best For | Average Filter Lifespan | Key Feature |
|---|---|---|---|---|
| Stainless steel countertop | Medium to large household storage | Everyday family drinking water | Varies by water quality and filter type | Durable body and strong daily usability |
| Ceramic dispenser style | Small to moderate household storage | Style-conscious kitchens and lighter daily use | Varies by water quality and cleaning habits | Traditional appearance |
| Portable field-style system | Small batch or mobile use | Camping, emergencies, cabins | Varies widely by source water condition | Packable and off-grid friendly |
| DIY or bio-sand inspired setup | Flexible and user-defined | Backup use, educational projects, low-tech applications | Depends heavily on design and maintenance | Low-tech simplicity |
If you want a broader overview of categories before narrowing your shortlist, this guide to water filtration system types you should know before buying is worth a look.
Start with your real friction point.
If your issue is daily drinking water for several people, stainless countertop units usually make the most sense. If your issue is backup readiness, portable systems deserve more attention. If your kitchen setup is small and your use is light, a simpler ceramic dispenser can be enough.
The mistake I see most often is buying by headline claim instead of use case. A gravity filtration system works best when its storage volume, refill burden, and maintenance style match the household using it.
A gravity filtration system only makes financial sense if it solves the problem you have. That sounds obvious, but homeowners often overspend. They buy a unit expecting broad protection, then discover later that a countertop filter is excellent at some jobs and limited at others.

The practical question is simple. Are you trying to improve taste and clarity, reduce common biological risks, or target a specific dissolved contaminant such as fluoride, arsenic, or very high mineral content? Those are different jobs, and gravity filters do not handle them all equally.
Gravity systems tend to perform best on the problems people can notice day to day. Cloudy water, sediment, earthy taste, chlorine odor, and many larger microorganisms are where these filters often earn their keep.
For bacteria, gravity filters have a long history of use, especially with ceramic or ceramic-plus-carbon elements. As noted in Waterdrop's explanation of gravity-fed filtration, ceramic media is widely used because its pore structure can physically reduce many bacteria and suspended particles.
In real kitchens, that usually translates into three visible benefits:
That mix matters for total cost of ownership. If your main frustration is bad taste and occasional cloudiness, a gravity filter can be a very cost-effective fix. If your real concern is a contaminant the filter is not designed to catch, even a premium unit becomes expensive for what it delivers.
Dissolved contaminants are the category that causes the most confusion.
A standard gravity setup usually does not excel at reducing dissolved salts, lowering total dissolved solids, or dealing with hard-water minerals that cause scale. If your water leaves white buildup in the kettle or tastes strongly mineralized, a gravity filter may improve flavor a bit, but it often will not change the underlying mineral load enough to solve the issue.
The same caution applies to fluoride, arsenic, lead, and other heavy metals. Some gravity systems can address certain metals or chemicals, but only if they use the right media and have testing to support that claim. A stainless housing or a high price tag does not tell you anything useful on its own. The filter element does the work.
Viruses also require a careful read of the product sheet. A filter can be strong on sediment, bacteria, and protozoa while offering limited virus reduction. That gap matters more for untreated surface water, travel, and emergency use than for chlorinated city water, but it still matters.
Match the filter to the contaminant, then judge the price. That is how you avoid paying for reassuring marketing instead of actual treatment.
Use this quick framework before you buy replacement elements for years:
| Contaminant group | Typical gravity filter performance | What to verify before buying |
|---|---|---|
| Sediment and cloudiness | Usually strong | Micron rating and media type |
| Taste and odor | Usually strong with carbon media | Carbon element included, and replacement interval |
| Bacteria and protozoa | Often a strong category | Tested reduction claims, ceramic or equivalent barrier media |
| Heavy metals | Mixed, depends on media | NSF or manufacturer test data for the specific metal |
| Dissolved salts and minerals | Often limited | Whether the system is even designed for TDS reduction |
| Viruses | Often limited unless specifically tested | Clear certification or lab testing for virus reduction |
Certification matters here because it helps separate broad language from verified performance. A claim like “improves water quality” is marketing. A claim tied to a standard or a named contaminant is far more useful for family safety and for comparing long-term value between models.
If your water smells of chlorine, tastes flat, or carries visible sediment, a gravity filtration system can be a smart buy and a low-hassle one. If your concern is narrow and chemical-specific, slow down and check exactly what the element is certified or tested to reduce.
That small step saves money. It also prevents the common mistake of blaming the filter for underperforming when the underlying issue is that it was asked to do a job it was never built to do.
Some products are easiest to judge in the abstract. Gravity filters aren't. They make the most sense when you place them inside a real household routine.
For a home on municipal water, a gravity filtration system is often the simplest way to improve drinking water without touching plumbing. You set it on the counter, fill it once or twice a day, and use it for glasses, kettles, pet bowls, and cooking.
The advantages are obvious in practice:
The trade-off is that you have to participate. You refill it manually. If the household drinks a lot of water, someone has to stay ahead of demand.
Well water owners often live with more variability. Rainfall, sediment, mineral load, and seasonal changes can all affect what comes out of the tap. In that setting, a gravity filter can serve as a daily drinking-water station or a useful backup layer alongside other treatment equipment.
It's especially practical for people who want a non-electric option available even if another part of the house system goes down. For drinking and cooking water, that redundancy is valuable.
Gravity systems excel in these situations. They do not require pressure, they do not need power, and they do not depend on a cartridge hidden behind a refrigerator panel. If there's a boil advisory, service interruption, storm outage, or short-term utility issue, a gravity filter gives you a familiar tool that keeps working.
That doesn't mean every emergency situation is identical. Source water quality still matters. But for home preparedness, gravity systems are one of the easiest filter formats to own and understand before an emergency happens.
The best emergency filter is the one you've already assembled, cleaned, and used before the lights go out.
Renters often get left out of water treatment conversations because many solutions assume permanent installation. Gravity filters don't care whether you own the house. They work in apartments, condos, guest suites, and temporary housing.
For renters, the main downside is counter space. If your kitchen is tight, the unit needs a dedicated spot that doesn't interfere with daily cooking.
A gravity filtration system is a strong fit if you want:
It's a weaker fit if you want totally hands-off operation or if your water problem calls for a treatment method designed specifically for dissolved contaminants. In those cases, convenience or contaminant type may point you somewhere else.
Most gravity filtration systems are easier to set up than a coffee maker. The parts are larger, the process is slower, and there's very little mystery once you've seen it done once.

Start by washing the chambers, lid, and spigot parts according to the manufacturer's directions. Then install the filter elements into the upper chamber, making sure seals are seated properly and everything is snug, not over-tightened.
The step many new owners underestimate is priming. A dry element often won't flow well right away. Priming saturates the media so water can move through it properly. If a new system seems disappointingly slow on day one, poor priming is often the first thing to revisit.
A gravity filter doesn't need constant attention, but it does reward light routine care.
A simple maintenance rhythm looks like this:
Keep the inside of the system as clean as the water you expect from it. A neglected lower chamber can undo the benefit of a good filter element.
If a gravity filtration system starts underperforming, the cause is often ordinary:
| Problem | Likely cause | Practical response |
|---|---|---|
| Slow flow | Incomplete priming or clogged exterior surface | Re-prime if needed and clean per manufacturer instructions |
| Odd taste | Dirty chamber, stale standing water, or exhausted media | Wash components and check whether the element needs replacement |
| Leaking near spigot or filter mount | Misaligned washer or loose fitting | Re-seat seals and tighten carefully |
| Air lock behavior | Improper assembly or trapped air | Recheck assembly and refill method |
Here's a helpful visual walkthrough if you want to see the process in action before buying or assembling your own unit:
The owners who get the best service life usually do three things well. They keep the chambers clean, they don't ignore slowing flow, and they pay attention to source water quality. Very dirty feed water puts more strain on any gravity filter.
If your water carries visible sediment, use a simple pre-strain step before pouring it into the upper chamber. That small habit can reduce frustration and help the system stay easier to maintain. Long-term performance is rarely about heroic maintenance. It's about small consistent habits.
You buy a gravity filter once. You pay for the elements for years. That is why the better question is not “What does the unit cost today?” but “What will clean, good-tasting water cost in my house over time?”
Gravity filter marketing gets slippery fast, so certifications help cut through broad claims. NSF/ANSI 42 usually relates to aesthetic improvements such as taste and odor. NSF/ANSI 53 is tied to reduction claims for certain health-related contaminants, but the details matter. A brand may mention a standard while only part of the system, or a specific element, was tested.
For a first purchase, check four things:
That last point matters more than many buyers expect. A filter can be certified for a claim and still disappoint if the element is overdue for replacement or if your water loads it up with sediment and hardness.
If you live in Southern California and want a local comparison mindset before you buy, Praz Pure Water's guide for LA homeowners is a useful example of comparing systems by household priorities instead of sales language.
Manufacturers like to highlight maximum lifespan. Homeowners live with actual lifespan.
According to USA Berkey Filters' overview of gravity-fed water filtration economics, Black Berkey elements last up to 6,000 gallons per pair. The same source also notes that hard water can shorten real-world lifespan because mineral buildup restricts flow. That trade-off matters in the budget. A system that looks inexpensive at checkout can become more expensive to own if your water pushes you into earlier replacements.
I see this mistake often. Buyers compare stainless steel housings, sight glasses, and capacity numbers, then learn later that replacement elements and source water conditions drive the actual cost.
Use your water, not the brochure, as the starting point.
Buy for filter performance and replacement cost first. The container matters far less than the element inside it.
For a first system, keep the decision boring and practical. Choose a brand that states what the filter reduces, explains maintenance clearly, and gives replacement guidance that sounds realistic, not idealized.
If your water is hard, iron-heavy, or visibly dirty, assume you will get less than the maximum lifespan claim. That is not a defect. It is normal ownership in tougher water conditions.
A gravity filtration system is a strong fit for many homes because it is simple, quiet, and useful during outages. The smart buy is the one you can maintain easily, afford to keep running, and trust because the claims are specific. That is what holds up over the long haul.
If you want help comparing systems, decoding filter claims, and avoiding expensive mistakes, Water Filter Advisor is a solid place to continue your research. It's built for households that want clear, practical guidance on choosing and maintaining better water filtration at home.
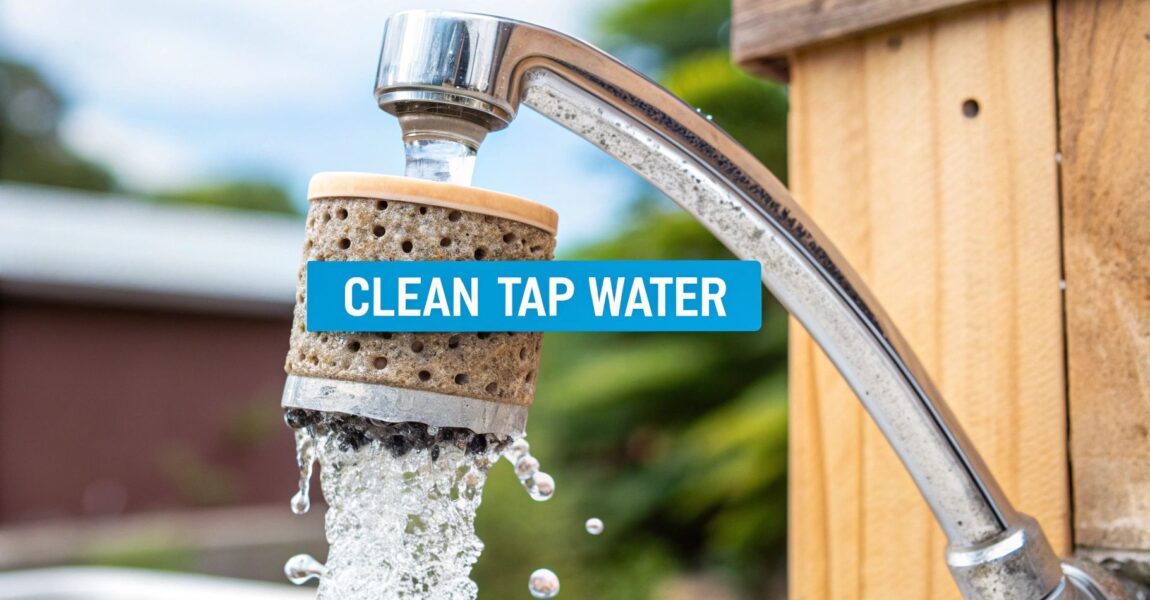
That faint swimming pool smell from your kitchen tap? Or maybe the water looks just a little… murky in the glass? Those are the battle scars from your water's long, epic journey from the treatment plant to your home. But fear not! Carbon block filtration is a surprisingly simple yet incredibly powerful technology that acts as a final, heroic gatekeeper, trapping those unwanted impurities to give you safer, tastier water right where you use it most.
When you turn on the faucet, you want clean, refreshing water. But what you often get is H2O that's been treated with chlorine to kill off bacteria—leaving behind that all-too-familiar chemical tang and odor. It's easily one of the biggest complaints people have about their tap water, and the first thing you'll notice is gone with a good filter.
Beyond just the taste, your water can pick up other unwanted hitchhikers on its way through ancient pipes and treatment plants. We're talking about things like sediment, industrial chemicals, and even pesticides. While your local utility works hard to meet safety standards, having a final line of defense in your own home offers real peace of mind. This is exactly where carbon block filtration shines.
Think of a carbon block filter as a microscopic maze packed with a contaminant-grabbing sponge. It physically blocks larger particles and uses a process called adsorption—where impurities literally stick to the carbon's surface—to snag chemical contaminants, letting only the pure, clean water molecules pass through.
This guide will walk you through everything you need to know, covering:
By the time you're done here, you’ll have the know-how to pick and maintain the perfect filter for your family's needs. If your goal is pristine water from every tap, understanding carbon block filtration is the first step.
This technology is a straightforward and effective way to improve your water's quality, taste, and safety without a bunch of complicated plumbing. For more general guidance, you can explore additional advice on water filters to get a broader view of your options. Our goal is to give you clear, no-nonsense information so you can make the best choice for your home.
To really get how a carbon block filter cleans your water, picture a super-dense, magnetic sponge shot through with billions of tiny tunnels. This isn't just any old sponge, though. It's an engineered maze designed to trap all the gunk you don't want, while letting clean water molecules sail right through.
This whole process boils down to two distinct methods working together in perfect harmony: a chemical attraction and a physical roadblock.
The magic ingredient is activated carbon, usually sourced from coconut shells. The "activation" part is key—it blasts the carbon with heat, creating a massive internal surface area. Believe it or not, a single gram of this stuff can have more surface area than a football field, giving contaminants plenty of room to get stuck.
This brings us to the first, and most powerful, purification method.
The main way a carbon block filtration system works is through a process called adsorption. It’s easy to mix up with absorption, but they’re totally different. A kitchen sponge absorbs water by soaking it in. Adsorption is when contaminants chemically stick to the outside surface of the carbon, kind of like how magnets snap to a fridge.
Here’s how it works: common troublemakers in tap water like chlorine, pesticides, and many VOCs (volatile organic compounds) have a negative charge. Activated carbon, on the other hand, has a slight positive charge. This creates a natural pull that yanks these impurities out of the water and holds on tight. As water flows through, these chemicals are drawn to the carbon's surface and trapped for good.
This is why you notice such a dramatic improvement in your water's taste and smell almost instantly after installing a carbon block filter. It’s tackling the biggest offenders head-on.
Key Takeaway: Adsorption is basically a chemical magnet. The massive, porous surface of activated carbon attracts and locks away chemicals like chlorine, stopping them from ever reaching your glass.
While adsorption is busy grabbing chemicals, the solid structure of the carbon block is dealing with physical debris. This is the second critical purification method: mechanical filtration.
Think of it as a bouncer at a club with a very strict door policy. The carbon block is packed so tightly that the gaps between the particles are microscopic—often measured in microns. A micron, for reference, is one-millionth of a meter.
This dense structure creates a physical barrier that stops any particle larger than its pores from getting through. This includes stuff like:
By physically blocking these particles, the filter doesn't just make your water clearer; it also helps protect your plumbing and appliances from getting clogged up over time.
So what’s the big deal about the block itself? Manufacturers take fine activated carbon powder, mix it with a binder, and then compress it under intense heat and pressure to form a solid, dense cylinder. This solid structure is precisely what gives it an edge over other filter types.
The biggest advantage is that it completely prevents channeling. In filters that use loose carbon granules, water can sometimes cheat the system by carving a single path of least resistance right through the media, bypassing most of the filtration.
A carbon block is a solid, uniform mass. This forces water to follow a long, winding route—what we call a "tortuous path"—through its microscopic maze. This design guarantees that every drop of water makes maximum contact with the activated carbon, boosting both adsorption and mechanical filtration. It’s this extended contact time that makes carbon block filters so reliable for delivering clean, great-tasting water.
Choosing a water filter can feel like you're trying to crack a secret code. You're hit with a bunch of acronyms and tech specs, and it's tough to know what's what. While a carbon block filter is a seriously powerful tool for cleaning up your home's water, it’s not the only option out there.
Knowing how it stacks up against the other players is the real key to building a system that actually solves your water problems.
The most common comparison you'll see is with its closest cousin, the Granular Activated Carbon (GAC) filter. They both use the same magic ingredient—activated carbon—but how they're built makes a world of difference in how they perform.
Think of a GAC filter as a big jar of loose coffee grounds. The carbon granules are all packed in there, but water can still find some pretty easy paths to wiggle through. This means you get a great flow rate, which is a big deal for whole-house systems where you don't want to kill your water pressure. But there’s a catch. This design can lead to channeling, where water carves a mini-river right through the filter, completely bypassing most of the carbon. A lot of contaminants can just sneak right by.
Now, picture a carbon block filter. It’s more like a solid puck of espresso, where those same grounds are compressed into a dense, solid block. This design forces every last drop of water to take a long, winding journey through a maze of microscopic pores. It guarantees the water spends a ton of time in contact with the carbon, which means much more thorough and reliable filtration.
The real difference comes down to that structure. A GAC filter's loose carbon can be a bit of a gamble, while a carbon block’s solid form means every single drop of water gets the full treatment. It’s a much more consistent and dependable process.
Let's break down the key differences between these two common carbon filter types. While both have their place, understanding their strengths and weaknesses is crucial for choosing the right one for your home.
| Feature | Carbon Block Filter | Granular Activated Carbon (GAC) Filter |
|---|---|---|
| Structure | Solid, compressed block of carbon powder | Loose bed of individual carbon granules |
| Flow Rate | Generally lower; can slightly reduce pressure | Typically higher; minimal impact on pressure |
| Channeling Risk | Virtually zero; forces uniform water flow | High risk; water can bypass the carbon media |
| Filtration | More thorough; longer contact time with carbon | Less consistent; shorter contact time |
| Sediment Removal | Good; acts as a sediment filter (e.g., 5 microns) | Poor; loose media doesn't block fine particles |
| Common Use | Under-sink systems, pre-filter for RO | Whole-house systems, refrigerator filters |
Ultimately, while both use the power of adsorption, the solid structure of a carbon block offers a superior defense. It eliminates the risk of water finding an easy way out, ensuring more contaminants are captured along the way.
A carbon block filter is often the star of the show, but it also plays incredibly well with others. Most homes have more going on with their water than just chlorine, which is where systems like Reverse Osmosis (RO) and UV purifiers enter the picture.
A carbon block is your specialist for taking out chemicals, funky tastes, and weird smells. It's a champion at grabbing chlorine, VOCs, and pesticides. But it can’t do everything.
Reverse Osmosis (RO) Systems
RO systems are the heavy hitters. They use a super-fine membrane to force out a massive range of dissolved solids—we’re talking salts, nitrates, and heavy metals. The process is incredibly effective, but it has one major weakness: chlorine will absolutely shred that delicate RO membrane.
That’s why you'll find a carbon block filter acting as a pre-filter in nearly every RO system on the market. The carbon block takes out the chlorine first, acting as a bodyguard for the RO membrane so it can do its job for years to come. It's the perfect partnership.
Ultraviolet (UV) Purifiers
If you're on well water or just worried about what might be swimming in your pipes, a UV purifier is a must-have. It zaps bacteria, viruses, and other nasty microbes with ultraviolet light, scrambling their DNA so they can't make you sick. But there’s a condition: that UV light needs a clear shot.
If your water is cloudy with sediment, those tiny particles can act like microscopic umbrellas, casting shadows that shield germs from the UV rays. By installing a carbon block filter right before the UV lamp, you clarify the water. It removes the sediment and other gunk, ensuring the light can reach and neutralize every last threat.
Alright, let's get down to what this impressive piece of filtration tech is pulling out of your water. This is where a carbon block really shows its value, acting like a bouncer at the door of your home's water supply. It uses a one-two punch of physical filtration and chemical adsorption to grab a huge range of things you definitely don't want to be drinking.
The effectiveness of a carbon block filtration system really shines across three main areas. Each one tackles a different part of your water quality, all working together to give you water that’s cleaner, safer, and just plain better.
The first thing you’ll notice—probably within minutes of installing a carbon block filter—is how much better your water tastes and smells. That’s because these filters are absolute rockstars at nabbing the aesthetic impurities that make tap water unpleasant.
The biggest offender here is chlorine. Your local water treatment plant adds it to kill off nasty bacteria, which is a good thing. But the leftover chlorine can make your water taste and smell like a swimming pool. Not so good.
A carbon block filter uses adsorption to grab onto those chlorine molecules and hold them tight, pretty much eliminating them. In fact, many high-quality filters are certified to remove over 97% of chlorine, giving you instantly better-tasting water. It also goes after chloramine, a tougher disinfectant made from chlorine and ammonia that many other filters miss.
Beyond just making your water more enjoyable, a carbon block filter is a critical defense against a bunch of invisible chemicals that can pose real health risks. This is where the filter's tiny pores and massive internal surface area do the heavy lifting.
These filters are incredibly good at reducing a wide variety of synthetic chemicals, including:
By trapping these compounds, a carbon block filter gives you real peace of mind, knowing your family isn't drinking or cooking with this stuff.
Think of a carbon block filter as a chemical sponge, perfectly designed to attract and trap organic, carbon-based contaminants. It's a must-have for anyone on city or well water who's worried about chemical pollution.
While it’s not their main job, top-tier carbon block filters can also reduce certain heavy metals. This usually depends on the specific blend of carbon used and whether any special media has been added to the mix.
The big ones a carbon block can help with are lead and mercury. Lead is a major health risk, especially for kids, and can get into water from old pipes. Specially designed carbon blocks can bind to lead and pull it out of the water. They can do the same for mercury, another toxic metal that can find its way into our water.
It’s just as important to know what a filter can't do. Being realistic about a carbon block's limitations helps you figure out if you need another piece of equipment to get the job done right.
Here’s what you can expect to stay in your water:
While carbon blocks are fantastic for chemicals and bad tastes, if you're worried about microbiological safety, you might want to look into how to remove bacteria from drinking water. It just goes to show how important it is to match the right filtration technology to your specific water problems.
Alright, you’ve got a handle on the science behind carbon block filters. Now, let's get practical and figure out how to pick the right one for your home.
Walking into the world of water filtration can feel a little overwhelming. Suddenly you're dealing with terms like "microns" and "GPM." Don't worry. This guide will help you cut through the jargon and give you a clear roadmap to find the perfect filter for what you actually need.
A good starting point is to pinpoint your main concern. Are you just trying to get rid of that funky chlorine taste, or are you worried about something more serious?
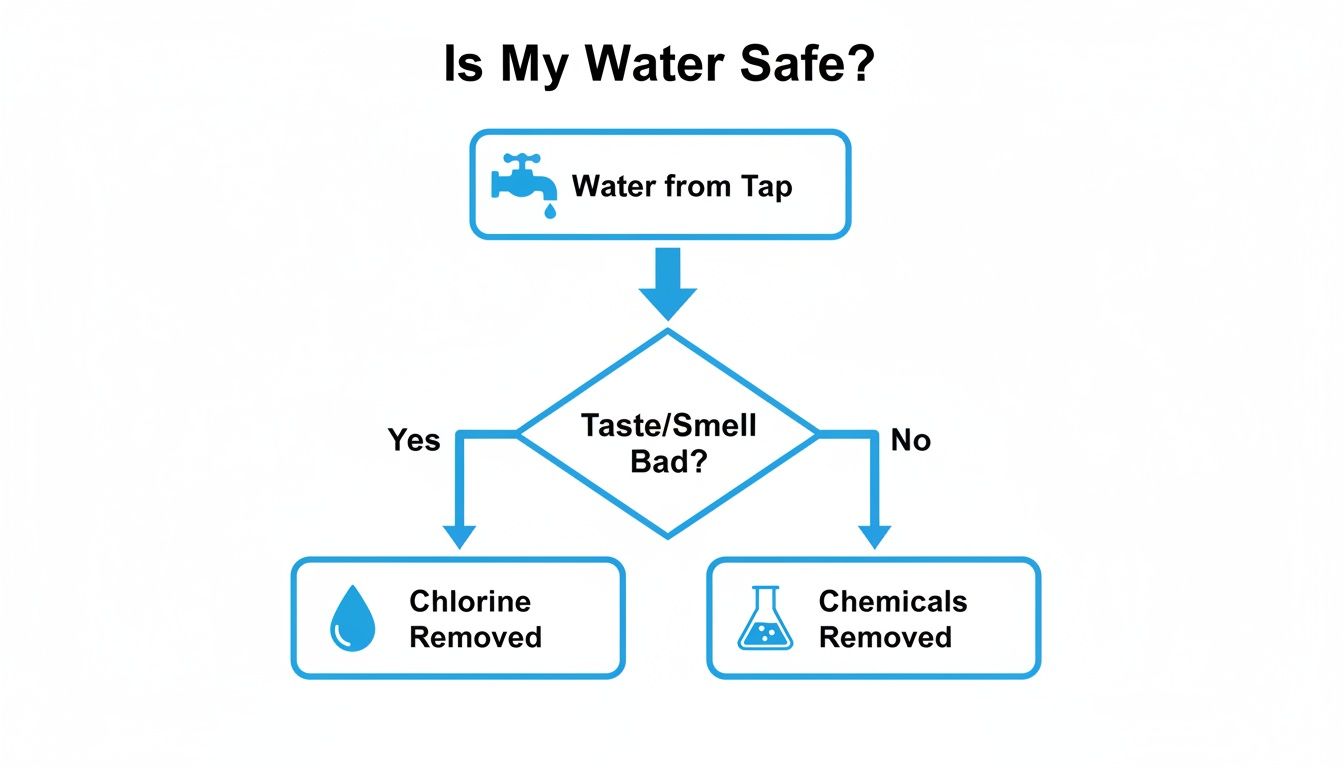
This simple chart lays out the most common decision for homeowners: are you dealing with a taste and smell problem, or do you have deeper concerns about invisible chemical contaminants?
When you start shopping for filters, you'll notice a few key numbers pop up on every product label. Understanding these is the secret to matching a filter's performance with your family's daily water use. Think of them as the filter's vital stats.
Micron Rating: This number tells you how small the pores are inside the carbon block. It’s simple: a smaller number means finer filtration. A 5-micron filter is a solid choice for general sediment and chlorine, but a 0.5-micron filter—often called a "sub-micron" filter—can snag much smaller things, including nasty cysts like Giardia.
Flow Rate (GPM): This is all about speed, measured in Gallons Per Minute (GPM). It tells you how fast water can get through the filter without losing pressure. A weak flow rate in a shower filter is incredibly frustrating. For a kitchen faucet, 1-2 GPM is usually plenty, but a whole-house system needs to be in the 10-20 GPM range to keep up with multiple showers and appliances running at once.
Total Capacity: This is basically the filter's lifespan, measured in gallons. A filter rated for 600 gallons will need to be replaced far more often than one rated for 10,000 gallons. You have to follow the manufacturer's replacement schedule to make sure you’re actually getting clean water.
Want proof that a filter actually does what it says on the box? The most reliable way to know for sure is to look for third-party certifications from an independent organization like NSF International (formerly the National Sanitation Foundation). These aren't just fancy marketing stickers; they represent rigorous, standardized testing.
When you see an NSF/ANSI certification, it means the product has been scientifically tested and verified to meet specific standards for removing certain contaminants. It’s the gold standard for trust in the water filtration industry.
For carbon block filters, there are three main certifications you should keep an eye out for:
NSF/ANSI 42 (Aesthetic Effects): This is your guarantee against bad tastes and odors. If a filter has this stamp, it’s been proven to significantly reduce chlorine and other things that make your water taste or smell off.
NSF/ANSI 53 (Health Effects): This one is a much bigger deal. This standard certifies that a filter can reduce contaminants with known health risks—we’re talking about things like lead, mercury, asbestos, and certain volatile organic compounds (VOCs). If you’re concerned about your family's health, this certification is non-negotiable.
NSF/ANSI 401 (Emerging Contaminants): This newer standard tackles the stuff we're just starting to worry about, like trace amounts of pharmaceuticals, herbicides, and pesticides that are showing up in water supplies. It’s an extra layer of defense against compounds that aren't even regulated yet.
A filter might be certified for one, two, or all three of these standards. Always dig a little deeper and check the filter's performance data sheet. It will tell you exactly which contaminants it's certified to remove and at what percentage.
The last piece of the puzzle is deciding where you need filtered water. The right setup depends on your budget, whether you rent or own, and your ultimate clean water goals.
Under-Sink Systems: Installed neatly under a kitchen or bathroom sink, these systems connect to their own dedicated faucet. They strike a great balance between performance and convenience, giving you a steady stream of highly filtered water right where you need it for drinking and cooking.
Refrigerator and Pitcher Filters: These are the easiest and cheapest way to get started. They’re super convenient for getting cold, filtered drinking water, but their capacity is small and the flow rate is slow. They’re a good first step, but they’re really only effective for basic chlorine removal.
Whole-House Systems: For total peace of mind, a whole-house system is the ultimate solution. It treats every single drop of water that enters your home. That means cleaner water for drinking, cooking, showering, and doing laundry. As a bonus, it also protects your plumbing and appliances from sediment buildup and reduces your family's exposure to chlorine vapors in the shower.
By keeping these key factors in mind—micron ratings, flow rates, and those all-important certifications—you can confidently pick a carbon block filter that will deliver the clean, safe, and great-tasting water your family deserves.
A high-performance carbon block filter is a fantastic investment, but it's not a "set it and forget it" appliance. Think of it like changing the oil in your car—regular, simple maintenance is the secret to getting pure, great-tasting water year after year. If you let it go, you don't just lose performance; you can actually make your water quality worse.
The single most important job you have is replacing the filter cartridge on time.
Day in and day out, that carbon block is trapping a massive amount of junk. Eventually, every square inch of its surface area gets saturated, and it simply can't grab any more chemicals like chlorine. At the same time, all the sediment it has caught clogs up the pores, which is why you'll start to see your water pressure take a nosedive.
But it gets worse than just being ineffective. An old, saturated filter can become a breeding ground for bacteria. All that trapped organic gunk is a perfect food source, allowing nasty stuff to multiply inside the filter housing. Before you know it, your filter could be dumping contaminants back into your water, completely defeating the purpose of having it.
While most under-sink or refrigerator filters are easy enough to install yourself, whole-house systems are a different beast entirely.
If the job requires cutting into your home's main water line, soldering pipes, or you just don't feel confident with that level of plumbing, call a licensed professional. It's always the smart move. A pro will make sure the system is installed correctly, preventing costly leaks and guaranteeing you get the flow and performance you paid for right from the start.
Noticed a sudden change in your water? Don't panic. A few quick checks usually point right to the problem. Run through this list before you pick up the phone:
Staying on top of your filter changes—typically every 6 to 12 months for most under-sink systems—ensures your carbon block filter remains a reliable guardian for your home's water.
Even after getting the science down, a few practical questions always seem to come up when you're thinking about putting one of these filters in your home. Let's tackle some of the most common ones.
This really boils down to how much water you use and the specific filter you have. For a quick rule of thumb, plan on swapping out your under-sink or refrigerator filter every 6 to 12 months.
Bigger whole-house filters have a much longer lifespan, often lasting anywhere from one to three years. Your best bet is to always follow the manufacturer's directions, because once a filter hits its limit, its performance drops off a cliff.
When you install a new, correctly sized carbon block filter, you should barely notice any change in your water pressure. If you start seeing a major drop in pressure down the road, that’s a dead giveaway the filter is clogged with gunk and needs to be replaced.
Think of a sudden pressure drop as your filter's way of saying, "I'm full!" Ignoring it means you're not getting the clean water you paid for.
You bet. Carbon block filters do a fantastic job of pulling out the organic chemicals, pesticides, and funky tastes and smells you often find in well water.
But here’s the critical part: they do not remove bacteria or viruses, which is a major concern for any well owner. If you're on a well, your carbon block filter should be just one piece of a bigger system. You'll absolutely want a sediment pre-filter before it and a UV purifier after it to ensure your water is microbiologically safe.
Beyond just filtering, many homeowners are also thinking about protecting their homes from water damage. Looking into things like smart water leak detectors can provide that extra layer of security and peace of mind.
Ready to experience the difference for yourself? Water Filter Advisor provides in-depth guides and unbiased reviews to help you find the perfect water filtration solution. Visit us at https://www.waterfilteradvisor.com to compare systems and start your journey to safer, better-tasting water today.

The Frigidaire Gallery filter replacement ( both the water filter and air filter) is actually quite easy.
Frigidaire Gallery Dishwasher Filter Cleaning | step-by-step instructions
This video provides step by step installation instructions how to change refrigerator water filter and air filter. This specifically applies to the Frigidaire Gallery model LGHX2636TFB. This video also includes instructions on resetting the refrigerator filter replacement indicator once the filters are replaced.
Chapters;
0:00 Introduction
0:22 Identify model number
0:36 Remove the water filter
0:54 Compare old filter end with replacement filter end
0:57 Insert new filter
1:10 Remove the air filter
1:36 Insert air filter in tray
1:38 Insert tray back in rack in refrigerator
1:50 Reset reminder on display panel
Frigidaire Water Filter
Frigidaire Air Filter
#FieldGuidetoDIY
Original Video Source

This is how i fixed the leak on my on my whirlpool ed5vhexvboo refrigerator. When the water filter was removed and replaced and started leaking. This should work for most water filters that have quick releases ad develop a leak. Don’t be duped into buying parts you don’t need.
Original Video Source

How To Replace: Samsung Refrigerator Water Filter DA29-00020B
Symptoms: replace every 6 months.
Tools: none.
This Samsung made Refrigerator Water Filter replaces the following older part numbers on Samsung Refrigerators: 2008145, DA29-00019A.
Buy the new Refrigerator Water Filter DA29-00020B here:
Most orders delivered in 2 business days or less.
If you enjoyed this video, please click the like button. Subscribe to this channel for more appliance repair tutorials.
If you need any more technical advice, call us at 1-877-477-7278 or chat with us on our website We’re available 7 days a week.
For more appliance advice, information, and tips, follow us on social media.
Facebook:
DIY Repair Group:
Twitter:
Original Video Source

How to replace a push-button water filter in your Whirlpool refrigerator. This filter works on Side by Side, French Door Bottom Mount, and 2-Door Bottom Mount refrigerator models. Remember to replace your water filter every 6 months depending on your usage.
Check www.whirlpool.com/waterfilters to confirm the correct water filter part number for your refrigerator.
For additional troubleshooting or product information please visit us at
Original Video Source

