Your Guide to the Cost of a Whole House Water Filter
So, you're dreaming of crisp, clean water from every tap in your house. Fantastic idea! But before you dive in, that big question looms: "Wh ...
Putting in a whole house water filter isn't rocket science, but it does demand a bit of care. The basic idea is you'll find your main water line, shut everything down, cut out a piece of pipe, and then plumb the new filter system into that gap. For anyone who's comfortable with basic plumbing, you're looking at a 2 to 4 hour job from start to finish. A little planning goes a long way to making sure it's a leak-free success and every tap in your house delivers crisp, clean water.
Before you even think about grabbing a pipe cutter, you need a solid game plan. This isn't just about saving time; it's about transforming your home's water from questionable to pristine. I can't tell you how many times I've seen DIY jobs go wrong because someone rushed this part. It's the difference between a smooth installation and multiple frustrating trips to the hardware store—or worse, a slow drip that turns into a water damage nightmare.

Seriously, spend an hour here. Map it all out in your head and on the floor. This prep work is where you spot potential problems and ensure you have every fitting and tool you need before the water is off and the real fun begins.
Where you put this thing is easily the most important decision you'll make. You want to install it on your main water line, right after the main shut-off valve but before the line splits off to your water heater. Get this right, and you guarantee every single drop of water in your house, both hot and cold, gets filtered and purified.
Basements, garages, and utility closets are the usual suspects because the main line is typically exposed and easy to get to. As you're scouting for the perfect spot, keep these three things in mind:
A classic rookie mistake is tucking the filter into a tight spot to hide it, only to find out there's no room to get a wrench in there or drop the sump for a filter change. Always, always think about future you.
Alright, time to play plumber's detective. You need to know exactly what your pipes are made of and how big they are. Most modern homes use either Copper, PEX (the flexible plastic stuff), or PVC. Figuring this out is non-negotiable because it determines the tools and fittings you need. You'll need a tubing cutter for copper, whereas a simple shear-style cutter works for PEX and PVC.
Just as important is the pipe's diameter. The vast majority of homes have either 3/4-inch or 1-inch main lines. The easiest way to check is to wrap a piece of string around the pipe, measure the string's length (the circumference), and then divide that by 3.14 (pi). Or, just grab an adjustable wrench, tighten it onto the pipe, and then measure the gap. Showing up with fittings for a 1-inch pipe when you have a 3/4-inch line will stop your project dead in its tracks. If you're getting into home improvement, looking into other helpful DIY plumbing projects is a great way to build up your skills.
This is my secret weapon for a stress-free installation: do a 'dry-fit' before you cut a single thing. Lay the filter unit, shut-off valves, bypass valve, and all your fittings out on the floor right next to where you're going to install it. It's like a dress rehearsal for your plumbing.
This simple step lets you see exactly how it will all go together. You'll know precisely how much pipe to cut and whether you need an extra elbow to get around an obstacle. It's so much easier to solve these little spatial puzzles on the floor than when you're crouched in a closet with water dripping. For more expert tips on choosing the right system, we have a ton of professional advice for your water filter needs to get you pointed in the right direction.
Walking into a hardware store without a solid plan is the difference between a successful weekend project and a week-long headache filled with return trips. Let's get this right the first time. Think of this not just as a checklist, but as your battle plan for a smooth, leak-free whole house water filter installation.
Having every single piece on hand before you make that first cut is the secret. It allows you to work with confidence, moving from one step to the next without any frustrating interruptions.
There are a few tools that are absolutely non-negotiable for this kind of plumbing work. Without them, you're just making the job harder and risking a sloppy finish.
These are the fundamentals. They’re what separate a clean, professional-looking job from a messy, amateur one.
Now for the main event—the filter itself and all the bits and pieces to tie it into your water line. What you need will depend on your specific system and whether you have Copper, PEX, or PVC pipes, so always double-check the manufacturer's guide.
Here's a pro tip: Before you go to the store, snap a quick photo of your main water pipe and the filter’s connection ports on your phone. It’s a simple step that can save you from the massive headache of buying the wrong size fittings.
Before you head to the hardware store, make sure you have everything on this list. Having it all laid out and ready to go will make the entire process feel a whole lot less intimidating.
| Category | Item | Pro Tip |
|---|---|---|
| Filtration | Whole House Filter Housing & Cartridges | Look for a system with a built-in pressure relief button. Trust me, it makes changing filters down the road much, much easier. |
| Connections | Fittings (Push-to-Connect, Threaded) | Push-to-connect fittings are a DIYer's dream. They're incredibly fast, reliable, and don't require any soldering. |
| Valves | Shut-off Valves (Ball Valves) | Always install a shut-off valve before and after the filter. This creates a bypass loop that makes maintenance a breeze. |
| Sealing | Plumber's Tape (Teflon Tape) | When wrapping threaded fittings, go clockwise 3-4 times. This ensures the tape tightens as you screw the fitting on, instead of unraveling. |
| Mounting | Mounting Bracket & Screws | Use the right screws for your wall type. You'll want lag bolts for wood studs or masonry anchors if you're mounting to concrete. |
| Miscellaneous | Buckets & Towels | Have these within arm's reach before you start. You're going to spill some water—it’s inevitable. Be prepared for it. |
This checklist covers your bases and helps prevent those last-minute, panicked runs back to the store.
While plenty of handy folks tackle this project themselves, it’s also important to know your own limits. This job involves cutting into your home's main water line. A professional plumber can usually get this done in about 2 to 4 hours. In fact, because it requires precise cuts and watertight connections, around 65% of homeowners choose to have a pro handle the installation. You can learn more about home filtration market trends to see how this fits into the bigger picture of consumer choices.
Alright, let's get this done. This is where the magic happens—where all that prep work pays off and you finally get your hands on the pipes. It can feel like the point of no return, but trust me, it’s the most satisfying part of the job. You're about to transform that box of parts into a clean-water powerhouse for your entire home.
Before you make that first cut, just picture the flow: you'll use a pipe cutter for a nice, clean slice, wrenches to get everything snug, and a little plumber's tape to guarantee a leak-proof seal.

It really boils down to that simple sequence: cut clean, seal well, and tighten right. Get those three things down, and you're golden.
Before a single tool touches a pipe, you absolutely must shut off the main water supply to your house. Find that main shut-off valve—it's usually right where the water line enters your home—and crank it all the way off.
With the main shut, you've got to get the water out of the pipes. Head to the lowest faucet in your house (a basement sink or an outdoor spigot is perfect) and open it up. Then, pop open a faucet on the top floor. You’ll hear some gurgling as the lines drain and air gets in, which is exactly what we want. This little step saves you from a surprise shower when you make the cut.
Safety First: Keep a couple of buckets and some old towels handy. No matter how well you drain the system, there's always a bit of water left in the line. Being ready for it will keep your work area dry and safe.
Time to mark your pipe. Hold the fully assembled filter unit, with all its valves and fittings, right up against the section of pipe you're installing it on. Use a marker to pinpoint exactly where you need to cut.
Don't forget to account for the length of the fittings! You're not just making room for the filter body; you need space for the whole shebang. Double-check your measurements. Then, seriously, check them a third time. A bad cut is a major pain to fix.
When you're confident, get your tubing cutter on the mark. Slowly tighten it as you rotate it around the pipe. The key is a clean, square cut. A crooked cut is one of the biggest reasons for leaks down the road because it stops the fittings from seating properly.
With the piece of pipe removed, it's time to put in your new shut-off and bypass valves. This setup is a gift to your future self, I promise. It lets you isolate the filter entirely, meaning you can change cartridges later without shutting off water to the whole house.
First, take a moment to deburr the freshly cut ends of the pipe to smooth out any sharp edges. It seems small, but this step is critical—it prevents you from nicking the O-rings inside your fittings, which is a surefire way to cause a slow drip.
Now, install the first shut-off valve on the incoming water line. Follow that with the filter assembly itself, and then pop the second shut-off valve on the outgoing line. If you planned for a bypass, this is when you'll connect that little loop of pipe that bridges the gap between the two valves.
Connecting the filter properly is all about creating a watertight seal. If you're working with threaded fittings, plumber's tape is your best friend. Wrap the male threads 3 to 4 times in a clockwise direction. Wrapping it this way ensures the tape tightens down as you screw the fitting on, instead of bunching up.
When you're tightening, always use two wrenches. Use one to hold the filter head or valve steady, and the other to turn the fitting itself. This is called "backing up," and it stops you from putting a ton of stress on the filter housing or your home's plumbing.
Tighten until the connection feels snug, but do not overtighten. Going full-on Hercules here can crack the plastic housing or strip the threads, and that's a mistake you can't fix. You're aiming for "firmly tight," not "cranked-down-with-all-your-might tight."
A properly installed system can remove over 95% of common contaminants like chlorine, sediment, and heavy metals before they even get to your taps. By doing this, you're taking a real step to reduce your exposure to things linked to long-term health issues. You can find more data on the effectiveness of water filtration on persistencemarketresearch.com.
Last but not least, check the flow direction. Every filter head has arrows marking the "IN" and "OUT" ports. Getting this backward will make the filter useless and could even damage it. Make absolutely sure your incoming water line goes to "IN" and the line heading to your house connects to "OUT." All that prep work is about to pay off—you're just one step away from clean water everywhere.
https://www.youtube.com/embed/HPlMvL3QF2w
Alright, the pipes are connected and the filter is mounted solid. It’s that moment where you just want to crank the main valve open and call it a day. But hold on—this next part is what separates a successful DIY job from a frantic call to a plumber.
Properly testing your connections is the final, most important step. Think of it as a quality control check on your own work to guarantee a leak-free system. Rushing this is just asking for trouble.
First things first, make sure the shut-off valves you installed before and after the filter are closed. If you put in a bypass valve (and I hope you did), open it up. This is a brilliant little trick that lets you test your main plumbing connections without even letting water touch the new filter yet. You're isolating the joints you cut into the main line, which are the most likely spots for a leak.
Now, walk over to your main water shut-off. Don't just throw it open. Turn it on just a quarter of the way—slow and easy. You’ll probably hear some hissing and gurgling as the pipes fill back up. This gentle pressurization is much kinder to your joints and gives you a chance to catch a major issue before it turns into a geyser.
Grab a good flashlight and start inspecting every single fitting you touched. You’re using three senses here: sight, sound, and touch.
While you're at it, it pays to know what to look for beyond an obvious drip. Being familiar with the critical signs of water damage can help you spot bigger problems before they get out of hand.
Once you're 100% certain your connections are bone-dry and solid, it's time to bring the filter online. You can't just open the valves; you need to prime the system to push all the air out.
Close the bypass valve. Now, very slowly, crack open the inlet valve (the one before the filter). You’ll hear the filter housing gurgling as it fills with water.
While it's filling, press the red pressure-relief button on top of the filter head. You'll hear a big whoosh of air escaping. Keep holding that button down until a solid little stream of water shoots out. That's how you know the air is gone.
Pro Tip: Have a small bucket or a bunch of rags right under the filter before you hit that pressure-relief button. It always shoots out more water than you expect once the air is purged.
With the air out, you can open the inlet valve all the way. Now, find a nearby faucet—a utility sink or a bathtub is perfect for this—and turn on the cold water full blast.
Don't be alarmed when the water comes out cloudy or even blackish for a few minutes. This is totally normal. What you're seeing are carbon fines, which are basically harmless dust-like particles from the new carbon filter. It’s just leftover residue from the manufacturing process.
You need to let that faucet run for a good 10-15 minutes, or until the water is completely clear. This step is non-negotiable. If you skip it, you'll get that murky water coming out of your kitchen sink or into your washing machine.
Once the water is crystal clear, you can go back and fully open the outlet valve after the filter.
And that's it. Your whole house water filter is officially installed and running. Congratulations—you just upgraded the water quality for your entire home.

You did it. The whole house water filter is installed and humming along. But getting it running is only half the battle. Think of this system like a new car—it needs routine tune-ups to keep performing its best. A little bit of consistent care turns this project into a long-term win for your home's water quality.
This is where you shift from installer to owner. A simple maintenance schedule is all it takes to guarantee the system you worked so hard on keeps delivering clean, crisp water for years. It really just comes down to knowing what to do and when to do it.
The single biggest mistake I see homeowners make is forgetting to change the filter. A clogged-up cartridge can't do its job, and worse, it can choke your home's water flow. The easiest way to sidestep this problem is to get organized right from the start.
Most filter cartridges come with a recommended lifespan, usually measured in months or the number of gallons they've filtered.
The moment you finish the installation, grab a permanent marker and write the date directly on the new filter cartridge. While you're at it, set a recurring reminder on your phone for a week before it’s due for a change. This simple trick takes all the guesswork out of maintenance.
It’s no surprise these systems are getting more popular. People are more aware of their water quality than ever before, which is why the global whole house water filter market is projected to hit about $16.91 billion by 2025. This shows a huge shift in how much we value clean water at home. You can dig into more data about whole house water purifier market growth on archivemarketresearch.com.
When that calendar alert goes off, it's time for a quick filter swap. This is where you'll be glad you installed that bypass valve—it lets you change the filter without shutting off water to the rest of the house.
Here’s the drill:
A dry or cracked O-ring is the number one cause of a slow leak after a filter change. Taking a few seconds to inspect and lubricate it is one of the smartest things you can do.
Sometimes, your filter will give you a heads-up that it needs changing before your calendar does, especially if your water is heavy with sediment.
The most obvious clue is a noticeable drop in water pressure across the house. If your shower suddenly feels weak or the kitchen faucet seems sluggish, your filter is likely clogged. That's actually a good thing—it means the system is doing its job and trapping all that stuff before it gets to your taps. It's just time for a fresh cartridge.
Even after you've tightened the last fitting and turned the water back on, a few questions might still be nagging you. That's totally normal. Putting in a whole house filter is a serious upgrade, and it's smart to think through all the angles. Let's run through some of the most common questions we hear.
Think of this as your final debrief, making sure you're not just set for today, but for the long haul.
You absolutely can, provided you're already pretty handy with basic plumbing. At its core, the job involves shutting off the water, cutting a piece of pipe, and fitting the new filter system in. Pulling it off yourself can easily save you hundreds of dollars on a plumber's bill.
But, you need to be honest with yourself. If the idea of cutting into your main water line makes you break out in a cold sweat, or if you're dealing with older, tricky plumbing like galvanized steel, calling a pro is the way to go. A small mistake can quickly turn into a big, expensive leak, wiping out any savings you were hoping for.
The sweet spot is on your main water line, right after the main shut-off valve for your house but before the pipe splits off to feed your water heater. Placing it here means every single drop of water, both hot and cold, gets filtered before it goes anywhere else.
Most people find their main line is exposed in a garage, basement, or utility closet, which are all great spots. When you're picking the final location, keep two things in mind:
This happens more often than you'd think, and it's a critical mistake. Whole house filters are specifically designed for water to flow in one direction, which is why they have "IN" and "OUT" ports clearly marked.
If you hook it up backwards, you're essentially pushing water against the grain. This immediately tanks the filter's performance, can physically damage the filter cartridge itself, and will almost certainly cause a major drop in water pressure throughout your entire house. Always, always double-check the little flow-direction arrows on the filter head before making your final connections.
One of the most important steps in learning how to install a whole house water filter is verifying the water flow direction. Getting this simple detail right ensures the system works as intended from day one.
How long your filters last is a mix of your local water quality and how much water your family uses. But here are some solid rules of thumb:
Don't just rely on the calendar, though. Your house will tell you when it's time. The biggest clue is a slow but steady drop in water pressure at your faucets and in the shower. When that happens, it means the filter is clogged with gunk and has done its job—it just needs a fresh one to get your water flowing freely again.
Ready to take control of your home's water quality? At Water Filter Advisor, we provide the in-depth guides, unbiased reviews, and practical advice you need to find the perfect filtration solution. Explore our resources and make your next water filter decision with total confidence.
Find your perfect filter at https://www.waterfilteradvisor.com.
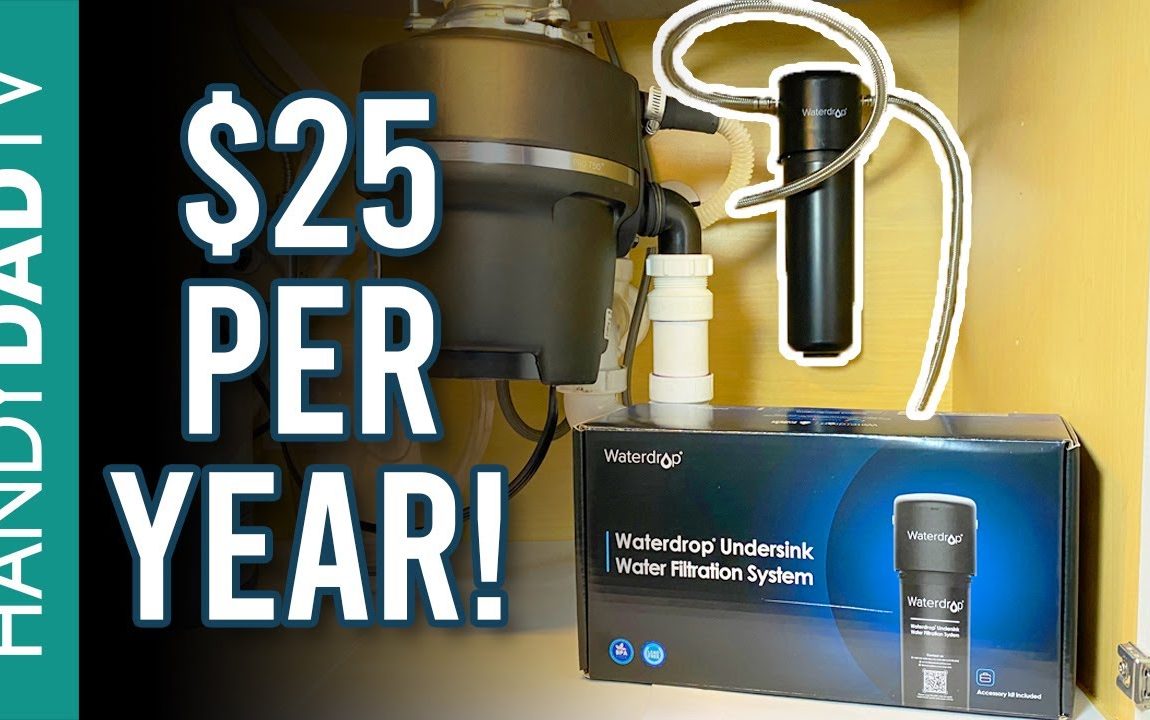
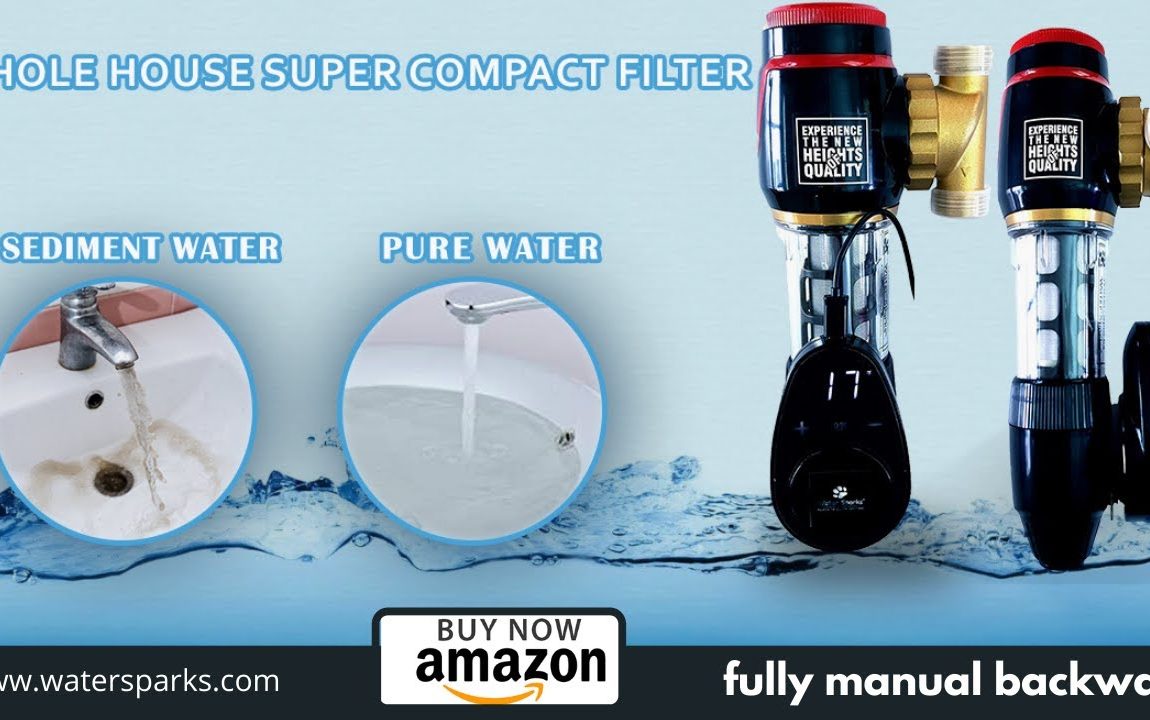
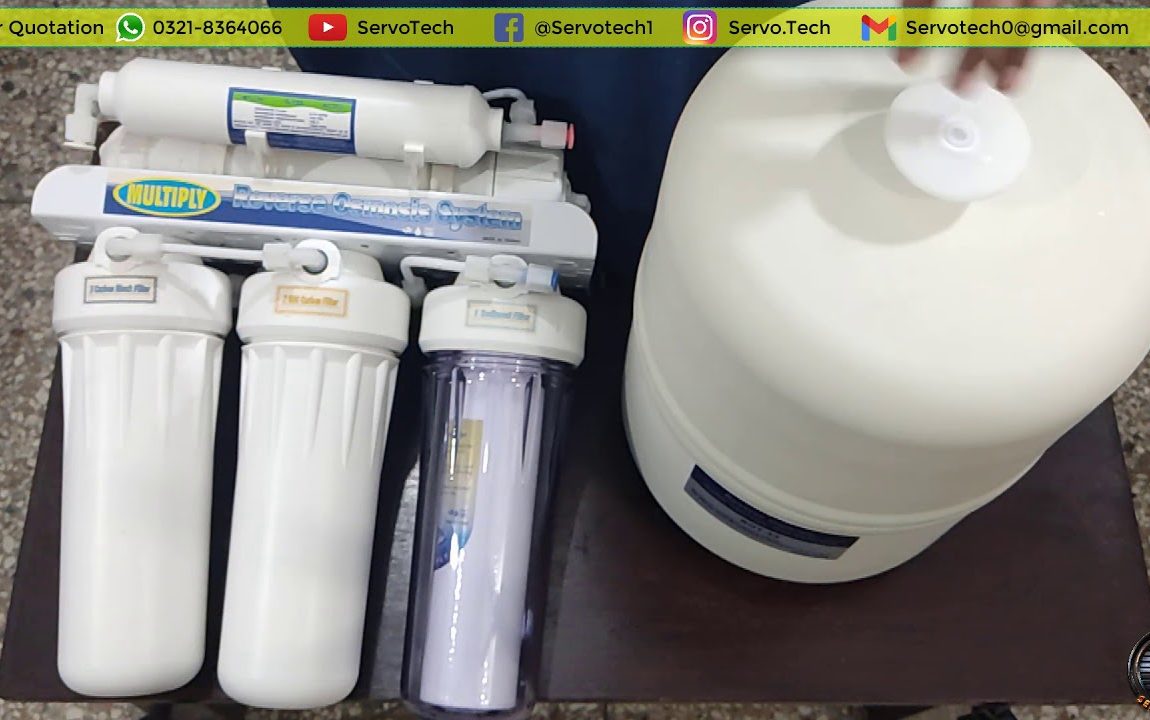
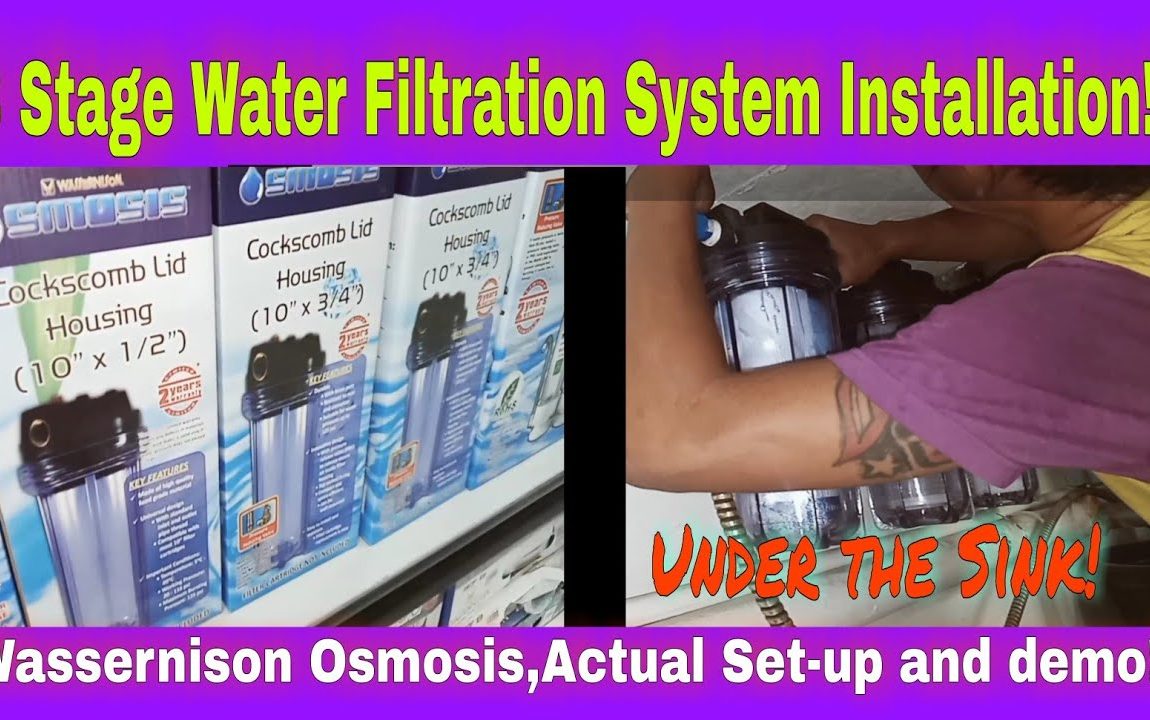
Water Filtration System this video is about what happened to my house’s water filtration and what the worker did to fix our problem.The problem was us having chemicals in our water such as Bromine and chlorine and having hard water watch full video to see what the worker did to get us healthy clean water. I’m so happy that we can have fresh clean water for ourselves our health and our
pets health.It’s just as simple as calling a company to see if you have clean safe drinking water then go from there.
00:00-Intro
0:24-Fullvideo
19:00-Outro
My Name Is Gina Young and Cooking is a True Passion Of mines and i want to share my Gift that God has Given me with the world I love to do cooking tutorials how to cook Gina Young Style
So If you want to learn How to cook this is the channel you want to watch or if you just love a good recipe i have over 1,400 cooking videos on this channel and counting i upload new content daily.
Feel free to Check out my playlist you will find just about any recipe you’re looking for.
until the next video God Bless You All Goodnight. In The Kitchen With Gina Young Gina Young Recipes How To Cook Gina Young Cooking Channel Best Cooking Channel On Youtube For Beginners Water Filtration System Water Filtration. Good water
#WaterFiltrationSystem 
#WaterFilter
Water
#WaterSoftener
#WholeHouseWaterFilterReplacement
#WaterFiltrationSyste m
#waterPurification
#CleanWater
#waterfilters
#WaterFilterInstallation
#InTheKitchenWithGinaYoung
#HowToCook
#HowTo
#BestCookingChannelOnYoutubeForBeginners
#GinaYoungCookingShow
#GinaYoungCookingChannel
#GinaYoungRecipes
Original Video Source
In this video, I install and review the WaterDrop WD-10UA under sink water filter, which provides great tasting water from my kitchen faucet. This is the best water filter because the cartridges are big enough to last a whole year and they only cost $25 to replace.
➤➤Shop for WaterDrop water filters at
🎥 Watch the follow-up video 👉🏻
☕️☕️☕️ If you liked this video, say thanks with a cup of coffee 👉🏻 ☕️☕️☕️
✔︎Follow me on Facebook, Instagram and Twitter @HandyDadTV
Original Video Source
iSpring CKC / CT10 series countertop drinking water filtration systems are easy to install with no drilling required. Portable and easy to install. Sleek and efficient design offers a natural look on any counter. Perfect for small spaces.
Please give this video a thumb up if you think it’s helpful. If you have any questions about the product, feel free to contact us at 678-261-7611 (M-F, 8:30 – 5:30 EST). We are always happy to help!
0:00 Intro
0:24 Before we begin
0:44 Installation
2:27 Filter replacement
Get iSpring Countertop Water Filters here:
—————————————————————-
Connect with us:
• Facebook –
• Instagram –
• Website –
• Amazon Store –
• Phone – 678-261-7611 (M-F, 9-5 EST)
• Email – support@123filter.com
If you like this video, please SUBSCRIBE and don’t forget to press the bell, 🔔 like, comment and share. You are my power to work so please appreciate me by giving your valuable opinion. Stay safe and Love all. 😍
——————————————————————–
#waterfilterforhome #ispringwaterfilter #waterfilterchange #ispring #waterfilter #installation #filterreplacement #bestwaterfilter #2022 #waterfilterforsink #waterfiltrationsystem #waterfiltrationsystemforhome #ispringwater #iSpringcountertopwaterfilter #countertopwaterfilter #ispringct10 #ispringct10installation #ispringcountertopwaterfilterinstallation #waterfilterinstallation #ispringfilterreplacement #ispringckc1countertopwaterfilter
Original Video Source
FilterSmart/Pentair Whole House Water Filter & Salt-less Water Softener
Rated for 1-3 Bathrooms
1,000,000 gallons or 5 Years
Prefilter cartridge change every 8-10 months
DISCLAIMER: The information on my videos and channel is for general information and viewing purposes ONLY. All information is provided in good faith. I make no representation or warranty of any kind, express or implied, regarding the accuracy, adequacy, validity, reliability, availability or completeness of any information on the video. Any errors shown or mentioned are not intentional in any way.
Under no circumstance shall I have any liability to the viewer for any loss or damage of any kind incurred as a result of the use of the video/channel or reliance on any information provided. Use and your reliance on any information is solely at your own risk.
Original Video Source
Building an Idea Farm:
Please share and subscribe!
Find out more:
Robot:
Spotify:
Studio:
Instagram:
Patreon:
Original Video Source
Water Sparks – Whole House Filtration System with Fully Automatic Backwash Technology – Removes dissolved iron particles in water up to 50%. Removes Suspended impurities in water up to 40 microns the filter mesh is made of special SUS316L stainless steel, which is easy to clean and durable and lasts for a very long period, and does not require a change at all, unlike traditional cartridge filters.
Please visit our amazon store to see all product including Super compact whole house water filtration system:-
We are one of the leading manufacturers and suppliers of RO water treatment plants in Chennai, Iron removal plants, industrial RO water treatments which are fabricated using high-quality material. Water Sparks, includes a fervent team of Engineers, Technicians who are trained in their individual fields to supply Superior Quality products & unmatched client Service. our specially designed RO water treatment plant in Chennai is so compact that a 500lph (liters per hour) is just 2 feet X 2 feet X 5 feet which can fit in any place in a high priced city where occupying space cost is more.
Our official websites:
Contact or Whatsapp me: 9884366644.
#watersparks #wholehousefiltrationsystem #manualbackwash #backwashfilter #wholehousewaterfilter
Original Video Source
Best RO Plant is Pakistan for Home and your Offices, Water filters are available in best prices, Reverse Osmosis Mineral system is Highly used in Home and Universities
Contact us through our
Facebook Page:
Instagram: @Servo.tech
Whatsapp, SMS or Call us at any time, We will guide you.
0321-8364066
0333-8364066
#ROPlant #WaterFilters #Rawalpindi_islamabad
Original Video Source
UNDER THE SINK,3 STAGE WATER FILTER SYSTEM INSTALLATION/WASSERNISON OSMOSIS,ACTUAL SET-UP AND DEMO.#YOUTUBE TIPS TAGALOG#YOUTUBE TIPS AND IDEAS#KUYA ROJIE TV
Original Video Source