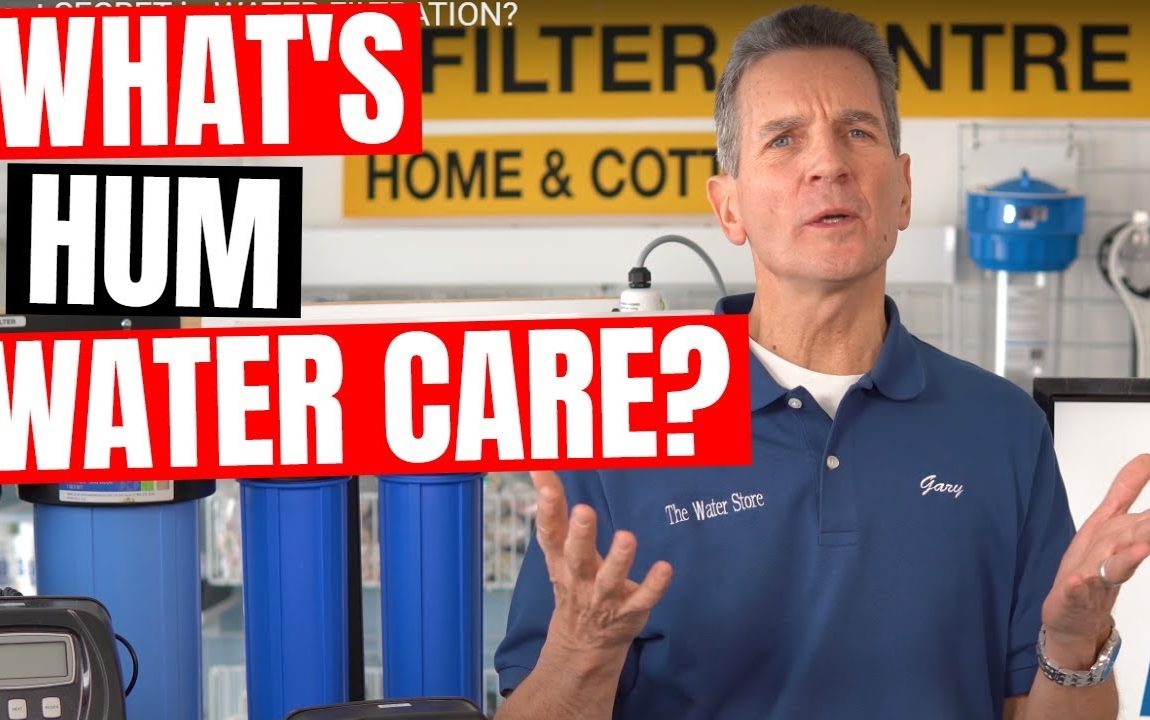
When you’re investing in water treatment for your family there are so many products out there, where do you start? Who do you believe? How can you be sure you get what you need? Surely there must be a short cut to get to what you need! There is and it’s HUM Water Care!
Think of HUM Water Care like the story of Goldilocks and the three bears. HUM Water Care products offer that “just right” mix of great quality, ease of installation & use, product support and service. Make no mistake about it, these are definitely not the most expensive water filtration products, they offer no bells, no whistles just great performance day after day, year after year. HuM water care products will give your family the biggest and best “bang for the buck”.
HUM Water Care is our own private label brand. Although we’ve access to over 20,000 water filtration products there are only a select group that are good enough to be chosen by me, Gary the Water Guy to join our HUM Water Care brand because these products give great performance, last a long time and are available at a very reasonable cost to purchase and operate.
Whenever our customers identify the need for water filtration, we look for the best solution and product to fill that need. Because we’ve had a retail water filtration store since 2003 we’re in consumers’ homes every day testing water, installing and servicing their water filtration needs so we soon know what works and what doesn’t, which brands provide the quality products and customer support our customers love and which ones don’t. We vet our suppliers and personally test all HUM Water Care products, installing them in our homes and monitoring their performance daily. The manufacturer must have a proven track record of not only building a high performance product but also providing amazing after sales support and service. HUM Water Care products are easy to install & service, in most cases use widely available non proprietary consumables and when possible, are Made in North America. We offer YouTube videos that support HUM Water Care products explaining how they work, how to install and service.
We do offer other high end and perceived higher quality water filtration brands that come with a high price tag, but are not good enough to become HUM Water Care products because often they are difficult to use, extremely expensive to purchase & operate. We find those flashy “bells and whistles” that come with the premium brands always break down first. And the cheap stuff, well some families look for the lowest price point but then find those products are very difficult to use, often break down and after a year or two those proprietary replacement filters or UV lamps are nowhere to be found.
HUM Water Care products are “just right” and are what I’ve installed in my home. We offer a 100% money back guarantee if you’re not satisfied with your investment in HUM Water Care water filtration products for your family.
Check out more HuM Water Care products here and I’ll see you in the next video
Check out my YouTube Channel here
Share this video
LOVE GARY THE WATER GUY AND WANT TO LEARN MORE ABOUT WATER FILTRATION FOR YOUR FAMILY? HERE ARE SOME NEXT STEPS!
1) SUBSCRIBE
2) LET’S CONNECT!
3) CONTACT!
info@WaterEstore.com or info@WaterStoreMidland.com
4) SHOP!
Midland www.WaterStoreMidland.com
Canada www.WaterEstore.ca
USA www.WaterEstore.com
Please share this video
Please comment or ask questions below. #garythewaterguy #waterfiltration
The StoneStream Hard Water Filtration Kit includes the EcoPower showerhead and the StoneStream universal shower hard water filter. Both designed to purify your shower water and remove any impurities from your shower water such as Chlorine, Limescale, heavy metals, and more.
The Hard Water Filtration Kit is especially beneficial for those of you who live in a hard water area, and for anyone who feels itchy or dried hair or skin.
To get your StoneStream Hard Water Filtration Kit go to
For any questions about fitting, operation and maintenance of our products – please reach out to us via
Join Tim as he demonstrates how to setup a water softening and filtration system on the LUCCA Direct Plumb A53 espresso machine or any other direct plumb model espresso machine.
Learn more by reviewing Clive Coffee’s extensive knowledge base and articles at:
Order the Water Softening and Filtration System here:
Order the LUCCA Direct Plumb A53 espresso machine here:
To learn more about Clive Coffee, visit us at:
Our Site:
Facebook:
Instagram:
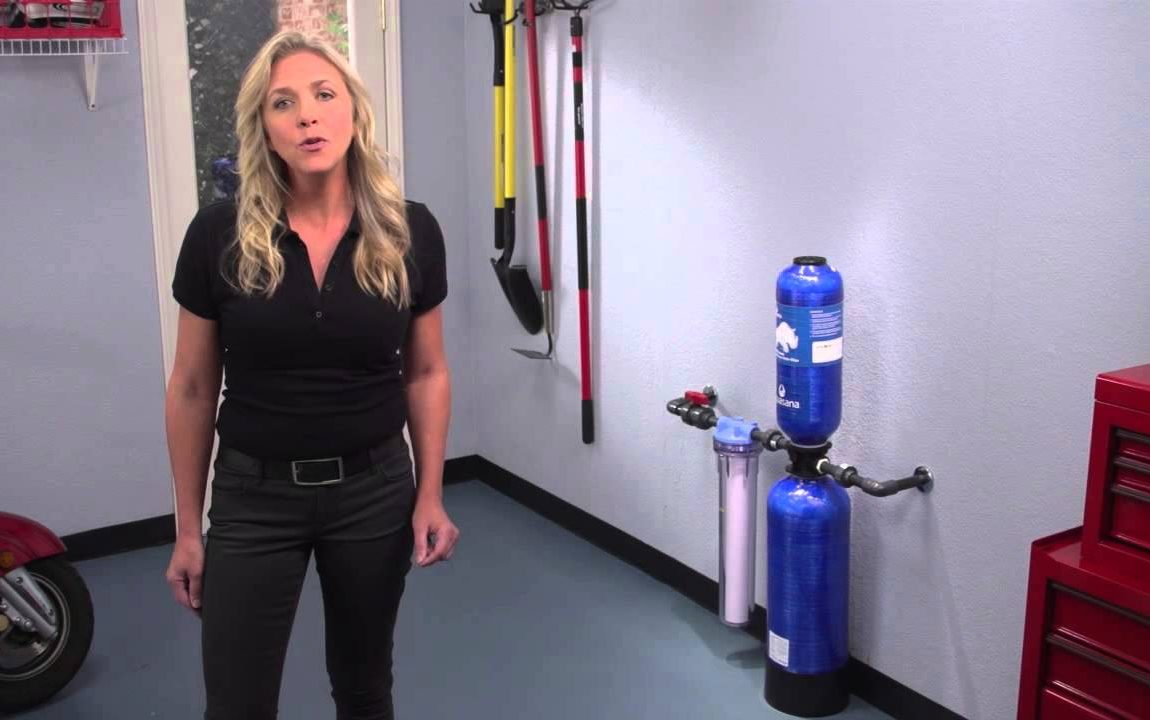
The Pelican Water Whole House Filter and Salt-Free Softener is an easy-to-use system that is part of Pelican Water’s Combo Series. This system works to filter water while also taking care of hard scale build-up and preventing future build-up. Pelican Water is the market leader in salt-free water softening systems and this is the only salt-free water softener certified 99.6% effective.
We’re now incorporating cutting-edge NFC functionality into our best-selling Pelican Smart Combo™ to streamline care and maintenance of the system.
NFC, or Near Field Communication, allows a user’s smartphone to wirelessly connect to the Pelican Water system in their home. The connection costs nothing to use, and is reestablished any time the customer is within the field of their Pelican Smart Combo™ system.
With the ability to access guides, FAQs, and maintenance information by simply placing their smartphones near their Pelican Smart Combo™ system, users will have total control over every aspect of their Pelican Water filter and softener. Simply scan the NFC sticker on the top of the Sediment Filter bracket with your smartphone to instantly access the filtration and softening system using NFC technology.
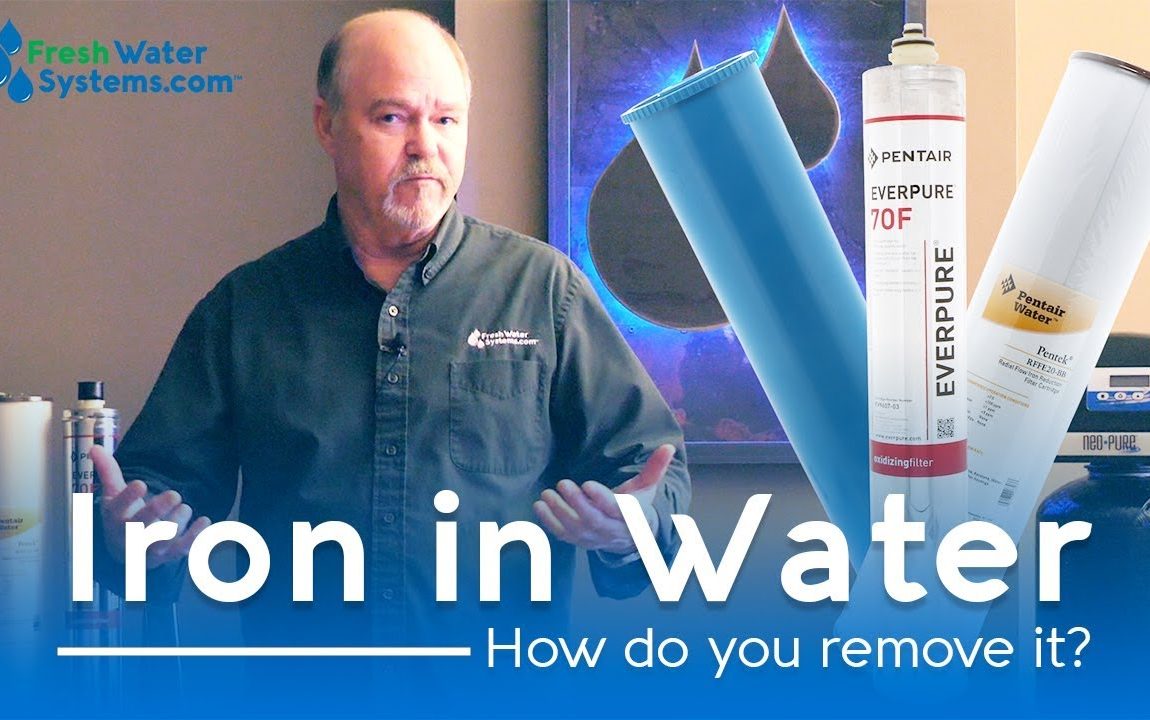
Iron is one of the most common contaminants faced by well owners. From muddy-colored glasses of drinking water to bright orange streaks in toilets and bathtubs, iron leaves a trail of stains, discoloration, and foul tastes in its wake. Though it is one of the most prevalent water quality issues faced by well-owners, there are many solutions to rid your water of this unwelcome mineral. Join John Woodard, our Master Water Specialist, as we explore how iron gets in your water and how to remove it.
To learn more, read our blog on removing iron from well water:
Shop our water filtration systems at:
You need whole house water filter for your home or cottage because the water is full of dirt and chemicals but where do you start?
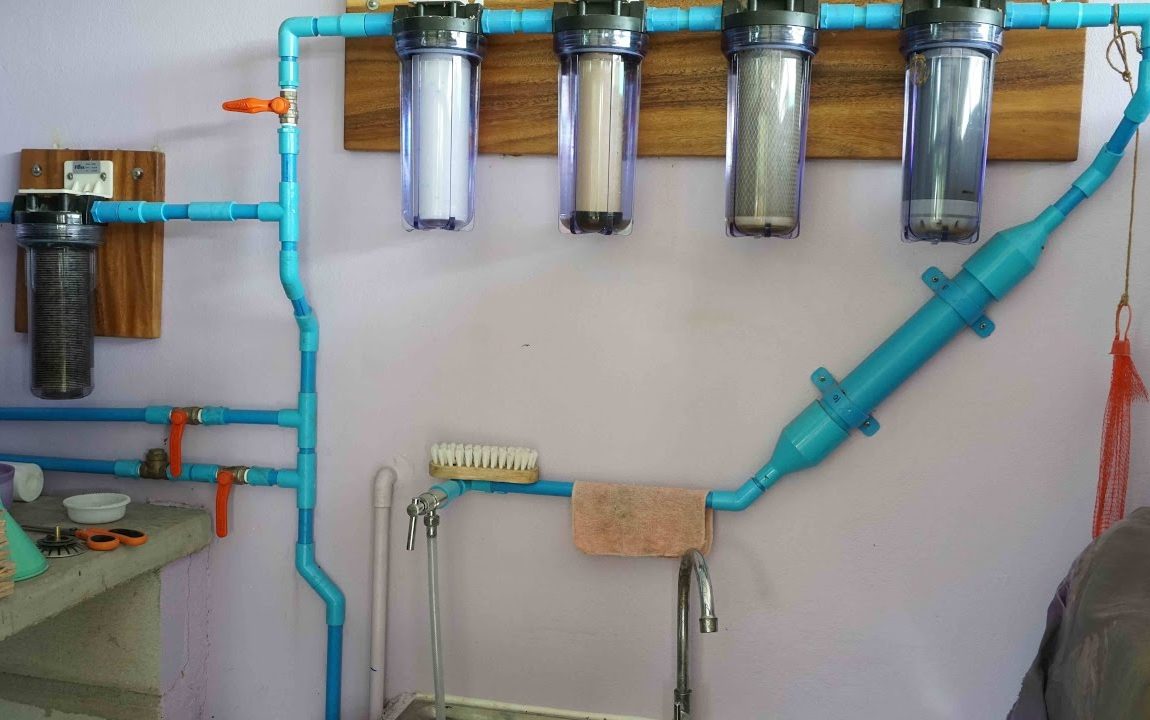
This HUM Water Care 20” Dual Big Blue Filter housing is definitely the way to go. It comes fully assembled as you see here, no need to plumb the two housings together, attach to the brackets, line them up! Also, their large 20” size gives your family lots of capacity so you likely won’t need to replace the filters for a whole year. Obviously how long they actually last is based on how much water you use and how many contaminants you need to remove.
Find the perfect location. You will need to install the filtration system before the plumbing splits into hot and cold and likely after your water softener and iron/sulphur equipment but if you’re looking to prefilter the water before your other equipment then it will need to be installed before.
The housing needs to be mounted where you have access to replace the filter in the future and where any water being spilled during filter replacement will not splash into or onto electrical components.
1. Shut off the main water supply valve.
2. Cut the pipe and mount the unit on the wall using the mounting bracket provided.
3. When installing the Filter Housing, make sure the water flows into the inlet. WARNING: if soldering, do not allow heat near plastic threads or fittings.
4. I always recommend installing ball valve shut offs before and after the filter housing to make future filter replacement easier.
5. Open the valves on either side of the Filter Housing. Check for leaks. Open supply valve slowly and bleed air from system.
6. Be sure to flush all new filters thoroughly before using water.
You’ll want to click here next for my video on filter selection, just click up here and I’ll see you there. Question of the Day? What questions do you have about water filtration cartridges? Add your question below I read every one and would love to respond to yours!
Please share this video:
LOVE GARY THE WATER GUY AND WANT TO LEARN MORE ABOUT WATER FILTRATION FOR YOUR FAMILY? HERE ARE SOME NEXT STEPS!
1) SUBSCRIBE
2) LET’S CONNECT!
3) CONTACT!
info@WaterEstore.com or info@WaterStoreMidland.com
4) SHOP!
Midland www.WaterStoreMidland.com
Canada www.WaterEstore.ca
USA www.WaterEstore.com
Please share this video
Please comment or ask questions below.
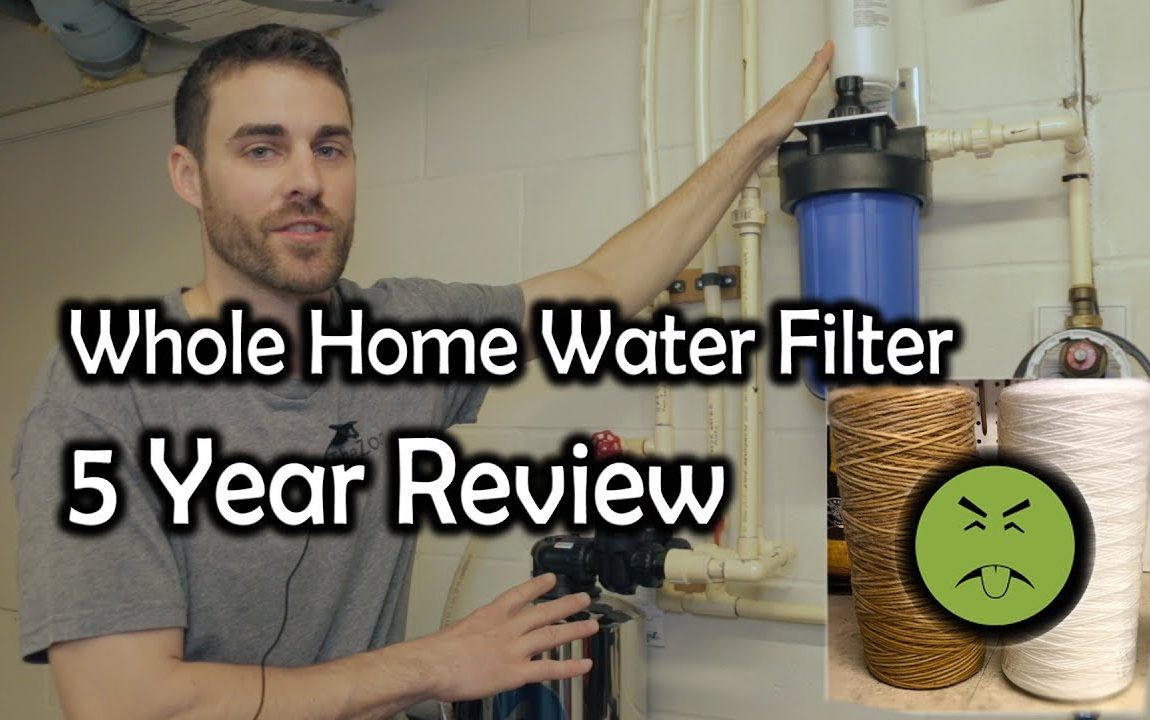
This filter has been working without problem except for a minor issue talked about in the video. Even if you filter your water for inside AND outside use with a 2 person household, it would be hard to approach the 600,000 gallon limit. You don’t need much more than this to have clean water. If you have 4 people in a home, I recommend bypassing your plumbing so that water is only filtered for inside use.
Do not buy into soft water filtration unless you have very very hard water and avoid using RO water for drinking. Those units waste 10 time more water than they produce and demineralized water is the opposite of healthy anyway.
In most cases, chlorinated water poses no human health risks that so many people try to elicit. But for a piece of mind and to possibly make your life a little easier, simple whole home carbon filtration is the way to go.
The Premium Rhino® Whole House Water Filter gives you long-lasting, high performance water filtration for great-tasting, healthy water throughout your entire home for up to 1 million gallons or 10 years. Available options include SimplySoft salt-free water softener, ultraviolet UV filtration, and professional-grade installation hardware.
A tasteless and odorless liquid at room temperature, it has the important ability to dissolve many other substances, the versatility of water as a solvent is essential to live organisms.
Life is believed to have originated in the aqueous solutions of the world’s oceans, and living organisms depend on aqueous solutions, such as blood and digestive juices, for biological processes.
It is one of the most plentiful and essential of compounds, it is vital for all known forms of life, even though it provides no calories or organic nutrients, we are 80% made of water.
Unfortunately, in our modern society, not every water that comes to us is clean, even though it appears clean, tap water for instance has various contaminants that can harm your health, such as chlorine, microorganisms, flour, lead, etc. If you want to know more you can have a look at your contaminants page right here.
So, answering your question: The best way to filter tap or any other water is to buy the most useful tool against these chemicals and contaminants, which is a Water Filter.
We know that sometimes we cannot afford to buy such equipment, because we are having economical problems, or even we are in places that don’t have it for sale, or maybe you are going on vacation or camping and need fresh and clean water, these are common situations.
You must be asking yourself what are the problems of ingesting unpure water in those cases we mentioned before, I mean, It’s just a few times, right?
And this is the crucial point where you do not want to think like that!! Drinking impure water is the first cause of death for people that are lost in the woods or camping, etc.
You can get very sick and spoil your trip or even worse! Thinking about people that can’t afford the water filter we are going to share How To Make Your WaterFilter- DIY
What is the simplest way to purify water?
Boiling
The simplest and most reliable method to purify water is to boil it for a good amount of time.
High temperatures cause the bacteria and virus to dissipate, removing all impurities from the water.
In doing so, chemical additions cease to exist in the water as well.
However, boiling uses fuel and could take a while. Furthermore, you will need to filter the water to remove all solid particles especially if the water was taken from a doubtful water source.
Use of Iodine solution, tablets or crystals
This is an effective and more convenient method, It can kill viruses and bacteria.
Once you drop the tablet into the water container
Shake the container and hold the bottle upside down
Have the lid slightly unscrewed to let the iodine to flow into the threads of the bottle cap.But It takes about thirty minutes before you can drink the treated water, it has an unusual aftertaste. Be careful: It is also not suitable for pregnant women.
A quick trick to make it look better is to pour the water through a coffee filter or clean cloth.
This won’t make it safe to drink, but it can improve the clarity of the water, which will help the following disinfection methods work better.
And remember, if you are very sensitive to chemicals, you can always just boil your water for 10 minutes instead of chemically treating it.
Bleach
Our next trick is to carefully use ordinary household bleach to disinfect water.
As a rule, colder water needs a little more bleach than warm water, and muddier water needs more bleach than clear water. Let the water stand for several minutes if it is muddy, and just pour the clearer water off the top. This will make disinfection much more effective.
Add 2 to 4 drops of ordinary chlorine bleach per quart of water.
Use 2 drops if the water is warm and clear.
Go to 4 drops if it is very cold or murky – or both.
Put the bottle lid back on, and shake the container for a minute.
Then turn the bottle upside down, and unscrew the cap a turn, or two.
Let a small amount of water flow out to clean the bottle threads and cap.
Screw the lid back on tight, and wipe the exterior of the bottle to get the chlorine on all surfaces.
Use a clear PET bottle (the one typically used for sodas and soft drinks) as some glasses block out too much of the UV-A rays – If the water is too cloudy then filter it first using a clean cloth before pouring it into the bottle.
Lay the bottle face down under the sun, If it’s a clear sky or not too cloudy – then just 6 hours of sunlight is enough. If not, 2 days of exposure might be required.
Fire
Boiling water can kill almost all bacteria and viruses, to speed up the process you can cover the pot and let it boil.
Chlorine Drops
Chlorine kills the bacteria in the water but can be harmful if added in excess. The package will usually tell you how many drops for how many liters and for how long you need to wait. It typically takes about 30 minutes to treat the water.
HTH 42033 Super 3-inch Chlorinating Tablets for Swimming Pools, 5 lbs –BENEFITS: Sanitizes and protects your pool water so you can enjoy swimming in clean and clear water all season long USE: Place a tab in pool skimmer, floater, or feeder for simple, DIY pool care; 1 tablet treats 10,000 gallons of water for up to a week
How can I make a cheap water filter?
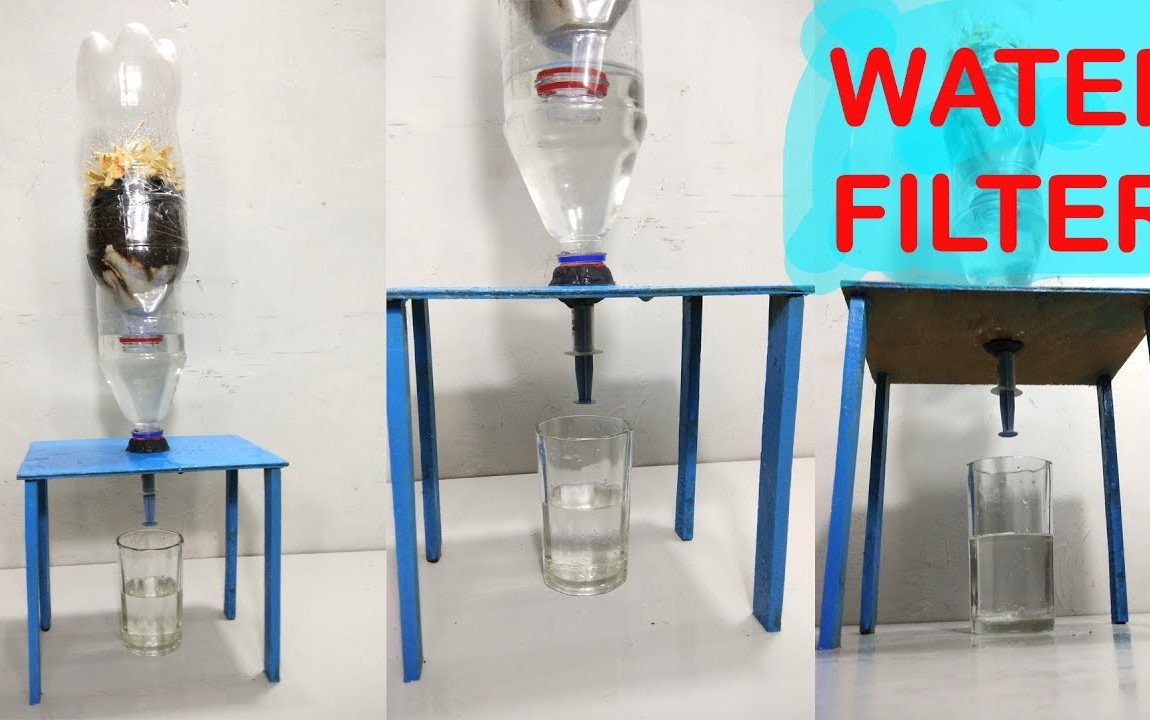
Here is how to make a cheap Water Filter in 12 Steps:
Supplies Needed:
Plastic bottle or comparable food-safe container
Another container for clean water
Clean cotton or cheesecloth
Coffee filter or porous cloth
Charcoal
Sand (fine and coarse)
Gravel or pebbles
Step 1 – Cut Bottom Off
Use scissors or a knife to cut off the bottom part of the bottle you will be putting the filter material in.
Step 2 – Cut Drain Hole
Use scissors or a knife to poke a small hole in the cap. If there is no cap, cut off the top of the bottle instead of the bottom for the previous step then poke several small holes in the bottom of the bottle.
Step 3 – 1st Layer: Straining Fabric
Stuff the bottom of the bottle with a fine cloth or paper fabric, such as a coffee filter, cheesecloth or cotton stuffing.
Sand and grass can also be used in this first stage. Fill the bottom with about 3 inches of grass clippings to filter out larger particulates and help give water a clean taste from chlorophyll contained in the grass. Then fill with 3-4 inches of very fine sand.
Be careful not to use poisonous or unidentified weeds when collecting grass clippings. Do not use Highway Department sand, as it can be full of road salt and chemicals.
Step 4 – Break Up Charcoal
Take charcoal from campfire or BBQ charcoal (do not use match/instant light type because it’s soaked in chemicals) and use hammer or rock to break it down into the smallest particles you can.
Step 5 – Layer 2: Pulverized Charcoal
Pour about 3 inches of pulverized charcoal into a bottle. If available, cover with another coffee filter to prevent the charcoal from being displaced too much during filtering.
Step 6 – 3rd Layer: Fine Sand
Add a 2-3 inch layer of the finest sand you can find. This and the subsequent layers you will add are to filter out particulates in the water.
Do not use Highway Department sand, as it can be full of road salt and chemicals.
Step 7 – 4th Layer: Coarse Sand
Add a 2-3 inch layer of coarse sand or very small pebbles.
Step 8 – 5th Layer: Fine Sand
Add 2-3 inch layer of the fine sand. Multiple varying filter stages (like a reverse osmosis system) ensures that most of the particles present in the water are caught.
Step 9 – 6th Layer: Gravel
Add a 2-3 inch layer of gravel or small rocks to prevent the water from being poured in from displacing the sand.
Step 10 – Top Strainer
Cover top of the filter with a piece of porous cloth, such as a bandana or cheesecloth. This step is optional but helpful in straining any large debris from the water and stop the pouring from displacing the sand inside the filter.
Step 11 – Pouring & Collecting
Pour water slowly into the filter while holding it over the second container.
Make sure to wipe off or clean the collection container. Pour water slowly so as not to disturb filter layers too much or to cause filter container to overflow and possibly spilling unfiltered water into the collection container.
Step 12 – Sterilize Water
Even though you have filtered the water through many different layers, microbes can still exist in the water and it still needs to be sterilized. Boiling the water in a pot or kettle is the easiest way.
You can also use sunlight to sterilize water. Pour filtered water into a clean, clear plastic or glass bottle up to 3/4 full and screw-on cap. Shake for thirty seconds to add more oxygen to the water. Place on a light or reflective surface in direct sunlight. The amount of exposure it needs it dependant on weather conditions. A clear day requires 6 hours of exposure whereas 50% or more cloud coverage will require 2 days of sunlight.
If you want a faster step-by-step get a look at our DIY video: